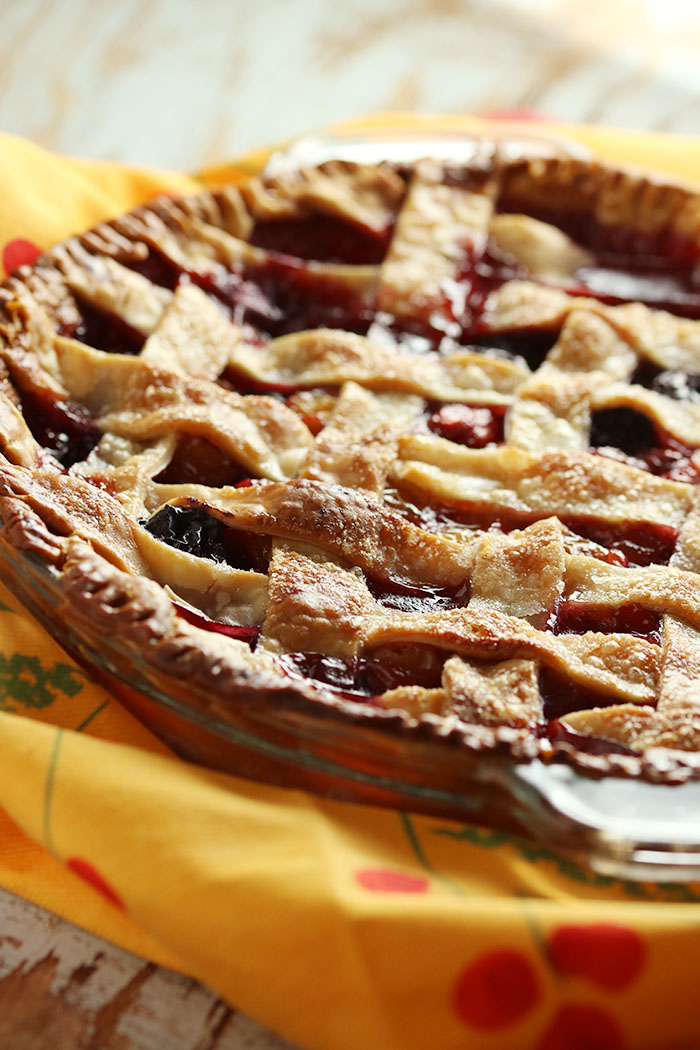
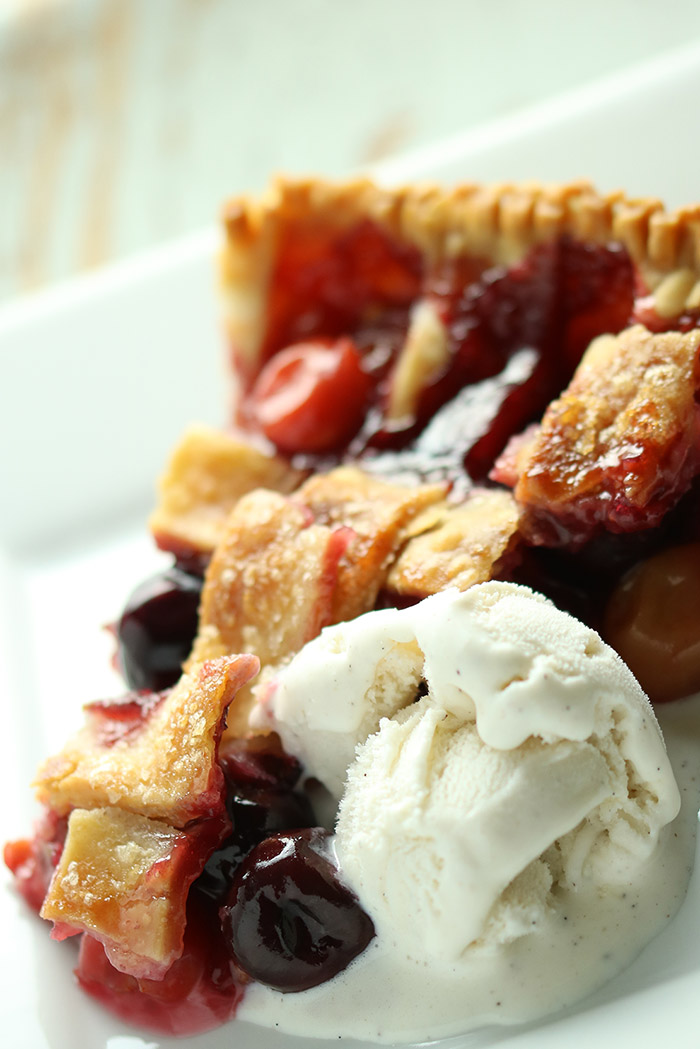
Nothing says summer like a fruit pie, especially cherry pie, warm with a generous scoop of vanilla ice cream. But for me there is one not so tiny problem. The 425oF oven. It’s impossible to get around that aspect of summer pies, biscuits and shortcakes. But what you can do is get in and out as quickly as possible and I have a couple secret weapons that let you trick out store bought dough, pass it off as your own, and get back to the beach. Who doesn’t love that? Face it – while home-made crust is a fabulous nod to bygone days and an awesome salute to Gramma, with our 2016 lifestyle and in the dog days of summer, it’s a crime against the calendar. I hereby give you my permission to do this fast fix.
While the crust hacks are my own, this pie recipe is inspired by one of the late Richard Sax’s Classic Home Desserts. This book is one of my very few must haves and has to be one of the best baking reference books ever written… at least for home-style desserts which are not only my personal favorites, but also the style at New World Grill where I did most of the baking. I am super excited to find out that it is no longer out of print! For years it was only available used, but it has been reprinted and is here for the taking! Not just pies, but cobblers, puddings, dumplings, cakes, tarts, custards, frozen treats and more. Run! Run! Run!
One of the tricky things about fruit pies is how much thickening – usually cornstarch or tapioca – is enough but not too much. There are no easy answers here. It depends on the water content of the fruit, the ripeness, pectin etc. This generally is not a problem with fall fruits like apples, quince, figs, or pears. Food52 had a recent post on “the fickle mistress” of the pie world – fresh fruit. Their suggestions are a lot more time consuming than what I suggest here, but they are also more predictable. I would NOT follow my recipe if you were trying to use super high water-content fruit like raspberries or blackberries. They are …..like 87% water, 12% seeds and 1% fruit. (Source: my vivid imagination). Not good contenders. But this would work super well with peaches and a sprinkling of blueberries. Or cherries as I suggest here. Keep it to fruit with sturdy flesh and you will be fine.
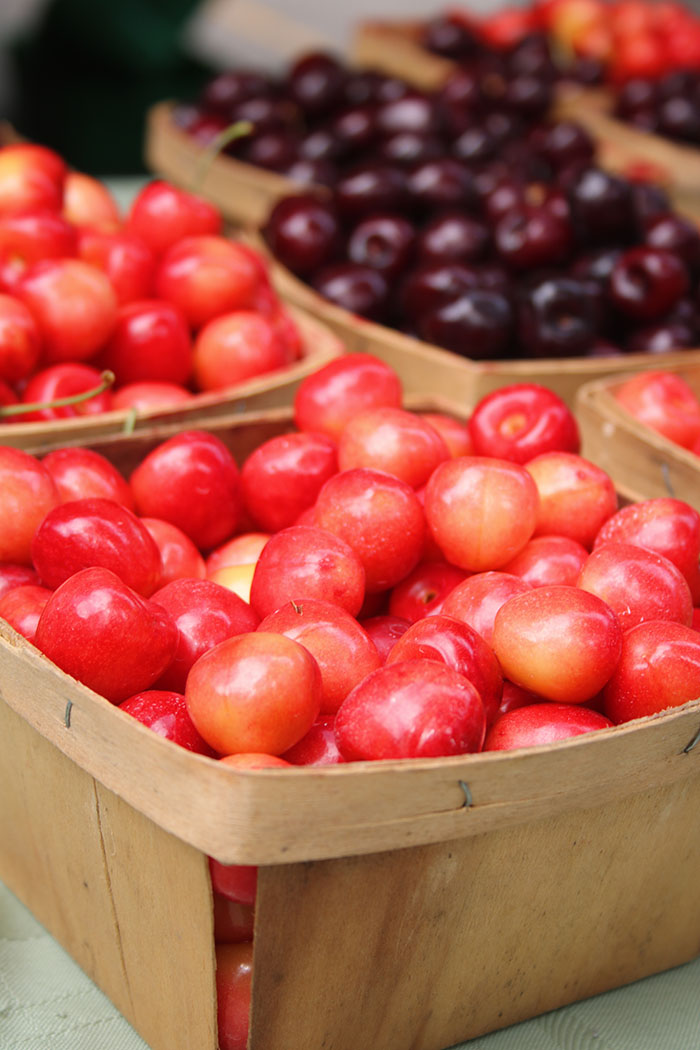
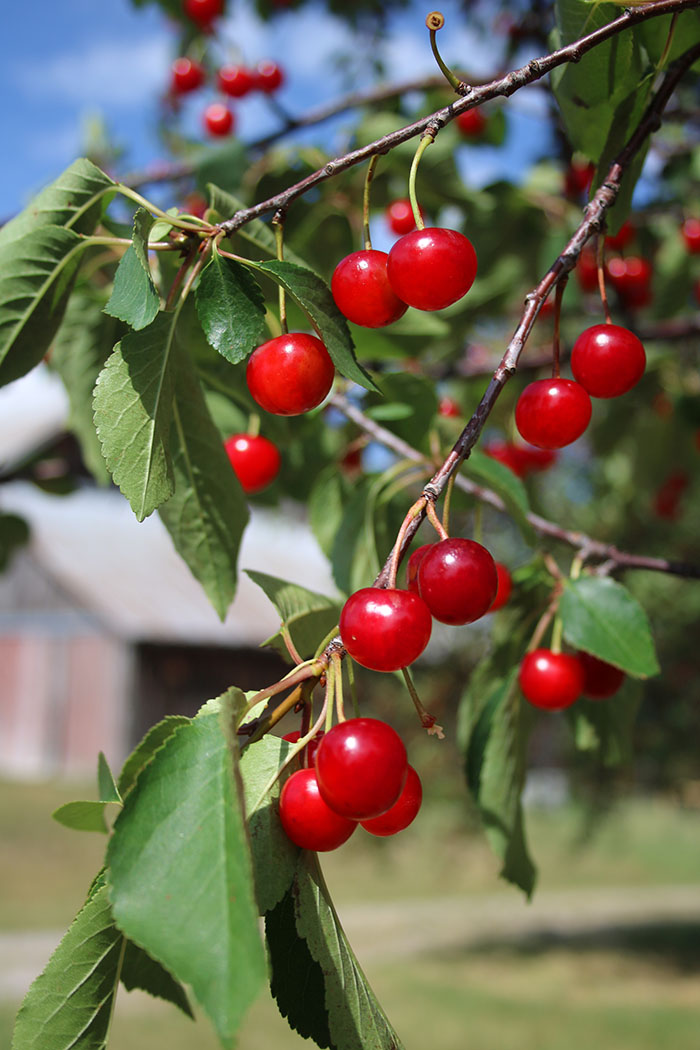
I can’t think of cherry pie without thinking of my Grandmother who was often perched on the piano bench belting out a round of Can She Make a Cherry Pie, Billy Boy Billy Boy. No?? Nobody?? We didn’t actually grow up on cherry pies as a summer staple, but my Dad loved him some bings and spending time in Michigan during the summers, they were and are plentiful. Traverse City has an annual festival dedicated to cherries with races through the orchards, pie eating and pit spitting. The airport is Cherry Capital Airport. Fly right over the Leelanau Peninsula mid-summer and you will be amazed by the vision in bright red. For this pie, I used a combo of those pretty bright red tarts, along with sweet dark cherries and whites. Whenever I get them, I pit them immediately and freeze by color in ziplocks.
Now on to the inside secrets on how to trick out a ready-made crust and pass it as your own. These tricks work best for the pre-made dough that comes rolled up and is found in the dairy case, possibly sporting a chubby white guy with a chef toque. Some of these tips will help you jazz it up and some will help rid you of a soggy bottom. Nobody likes that!
Secrets for success:
Oven should be hot; pastry should be cold. Always 425oF for crusts.
Heat a pizza stone while you preheat.
Use a glass pie plate and butter it well.
Brush egg white on the inside of the raw bottom crust once you’ve laid it in the pie plate. Back to the fridge til its time to use this.
Brush the top crust with cream or half & half. Sprinkle with sugar
Lay a sheet of foil loosely on the top for the first 15 minutes of baking to help the fruit temperature rise more quickly.
Use a foil-lined (for the mess) sheet pan (to protect the glass on the pizza stone) under the pie.
Get the best vanilla ice cream – no point in cutting corners here!
Double Crust Three Cherry Pie
Dough for a double crust pie
6-7 cups of cherries, pitted (I like a combo of sweet and tart. If frozen, do not thaw)
1/2 cup sugar
3 Tablespoons cornstarch
1 Tablespoon lemon juice
1 teaspoon almond extract (wonderful flavor for both cherries and peaches)
Preheat the oven to 425oF with a pizza stone placed on a rack in the bottom third of the oven. Butter a 9 1/2” deep dish glass pie plate.
Rollout (or unfold) dough for the bottom crust. Fit into the pie plate, leaving any overhang. Brush the inside of the crust with enough egg white to coat. Roll out the top crust. Refrigerate both crusts until you are ready to use them.
Combine the cherries with the sugar, cornstarch, lemon juice and almond extract.
Remove the top crust from the refrigerator and cut into 3/4” wide strips.
Remove the bottom crust from the refrigerator and fill with the cherries. If any sugar mixture has settled in the bowl, sprinkle evenly on top of the cherries. Brush the outside edge of the crust with the remaining egg white and lay half the strips evenly across the top in one direction. Weave the remaining strips cross-wise ”pot-holder style”. Press the ends into the bottom crust around the outer edge and trim excess. Flute or crimp the edges.
Dot the top of the pie with butter, brush the lattice with cream and sprinkle with 1 Tablespoon sugar.
Lay a piece of foil on top of the pie (not tightly wrapped and not tented). This will help the fruit heat up faster and keep the crust from starting to brown too quickly. Place the pie on a foil-lined sheet pan and set on the pizza stone. After 15 minutes, remove the top foil. Continue baking until the crust is golden and the fruit is thickened and bubbly. Keep an eye on the crust color and cover outside edge with foil cut into a ring or entirely, as needed to slow down the crust color while the fruit thickens. This will take about an additional 45 -50 minutes.
Remove the pie from the oven and let it cool thoroughly on a wire rack to thicken up completely. Cut it too early and you have a juice bomb. If you want to serve it warm, reheat it at serving time.
Serves 8 – 10
This post contains affiliate links. For more of my must-have faves, check out my shop.
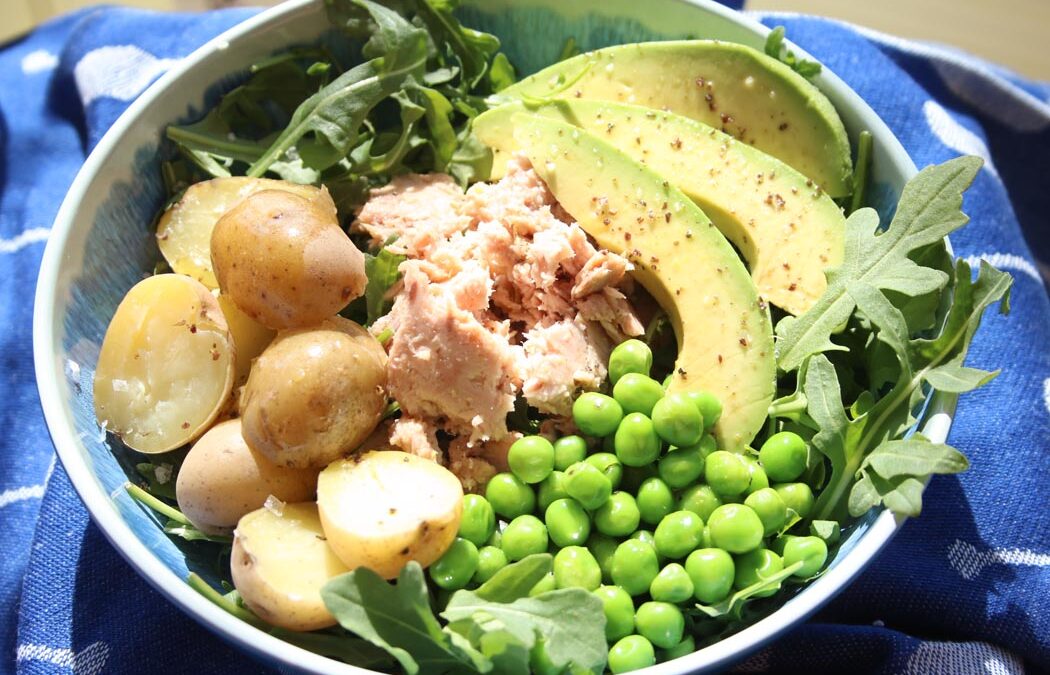
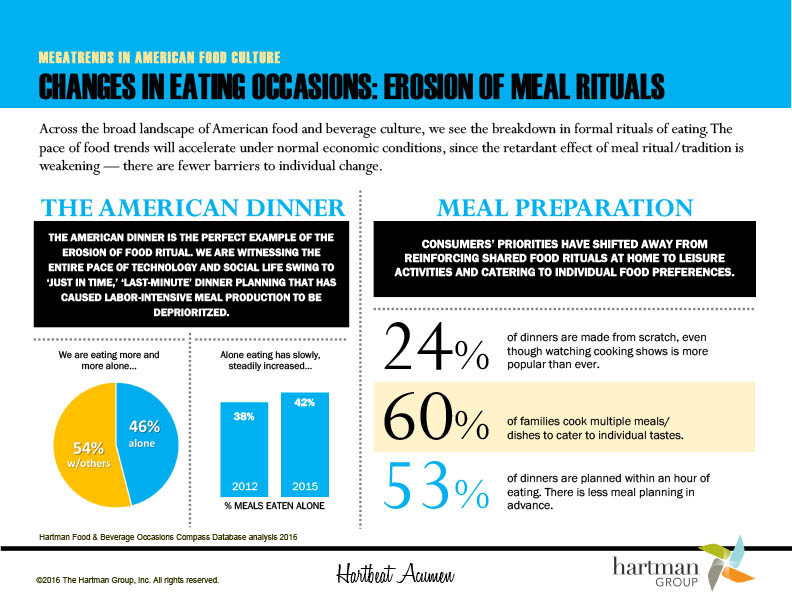
Say it ain’t so!! This sad infographic appeared this week from a consulting company that focuses on food and beverage trends. For me, the really sad part is the title – Erosion of Meal Rituals. According to the Hartman Group, more people are eating meals alone and most meals are planned in less than an hour. The last part sounds really good to me. With a well-stocked pantry, and the fact that spring has sprung and sweet peas are starting to appear, this soul-satisfying dish can be whipped up in no time. But it’s just as easy to make this for two – or three – or four or more – so please don’t eat alone. Breaking bread with friends and family is one of life’s great treats and truth be told is the real soul-satisfying part of any meal.
This spicy horseradish lemon dressing is a fantastic vinaigrette to make in a big batch and have on hand. I always have four or more vinaigrettes available at any time and the flavor profile of each can take a dish in a whole new direction. Lemon/EVOO is a staple, doctored here with a dose of spicy mustard and horseradish. I love a creamy miso dressing, an Asian ginger/soy/sesame oil one and of course something balsamic-based – maple, raspberry, white balsamic, etc. The possibilities are endless.
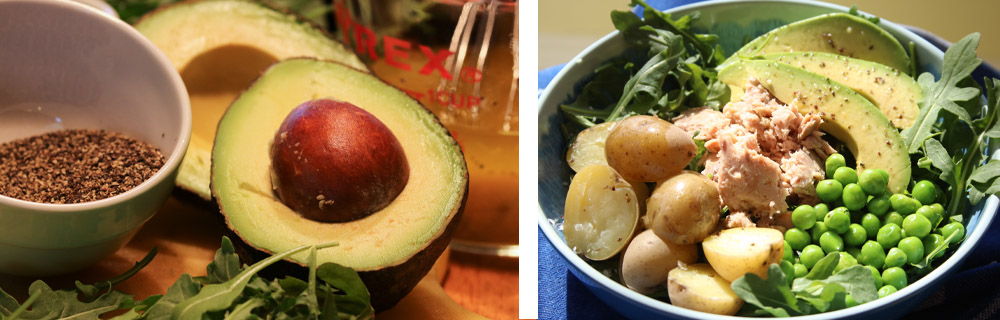
Using classic French technique, salt and pepper are added first with the acid so that they can dissolve before drizzling in the oil in a thin stream for a perfect emulsion. Seemingly every kitchen in France had a different benchmark as to what was the right amount of seasonings. And no matter how I did it, I was American and it was wrong. Oh wait, I was an American Woman, and it was really wrong. I will dedicate a whole post to the classic technique, but for today we will just dump and whisk. As an American, I reserve the right to change the technique and I find that using a grainy salt and pepper in just a measured dose at the end – here I use it strategically on the avocado where its texture and flavor make it a standout – allows for more control over sodium intake which isn’t a bad thing. Certainly not as bad as eating alone. These are my favorite salts today – Maldon Sea Salt Flakes and Maine Coast Sea Seasonings.
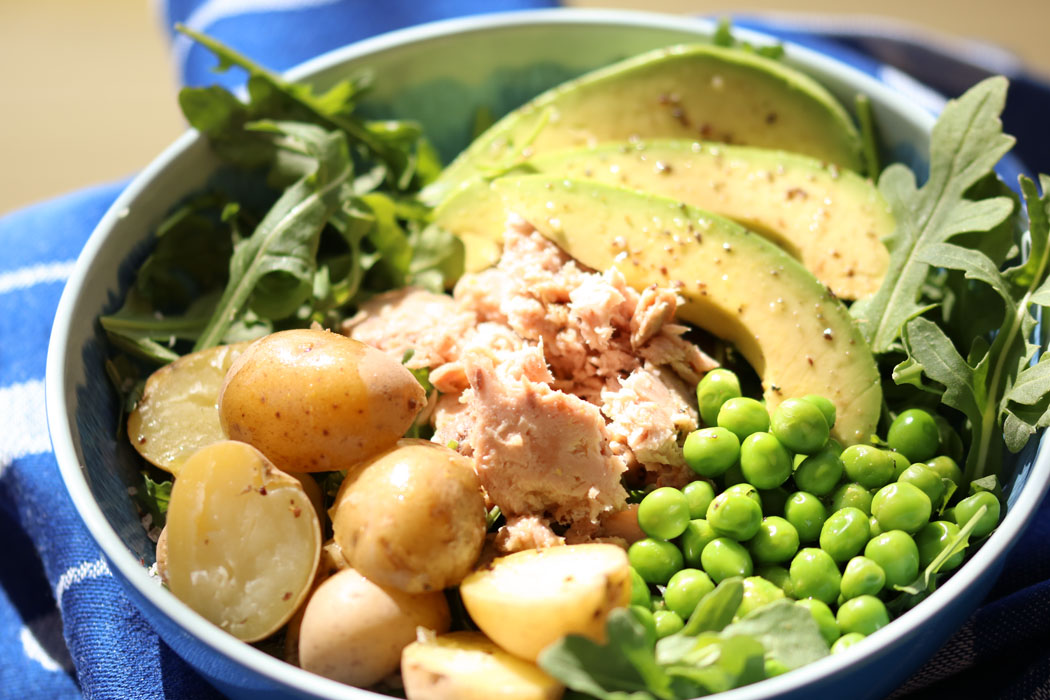
Sweet Peas, Tuna and New Potato Salad
1 pound small new potatoes
½ pound fresh (or frozen) shelled sweet peas
10 ounces tuna (I prefer chunk light tuna in water – especially love the pouches that need no draining)
5 ounces arugula
1 avocado, sliced or chopped
Salt and Pepper to taste
Spicy Horseradish Lemon Vinaigrette
1/3 cup lemon juice
1/3 cup extra virgin olive oil
1 Tablespoon prepared horseradish
1 Tablespoon spicy Dijon mustard
Bring a pot of salted water to a boil. Add potatoes and cook until tender, about 8 minutes. Drain liquid and let potatoes cool to room temperature.
While the potatoes are cooling, place an inch of water in the pot and bring to a boil. Transfer the peas to a steamer basket and add the basket to the pot and cover. (Frozen peas can just be thawed – no need to cook). When tender (about 2 minutes), remove the basket and run under cool water to stop the cooking.
Prepare the Spicy Horseradish Lemon Vinaigrette: Combine all ingredients in a shaker with a tight-fitting lid and shake to combine well, or place in a small bowl and whisk to combine.
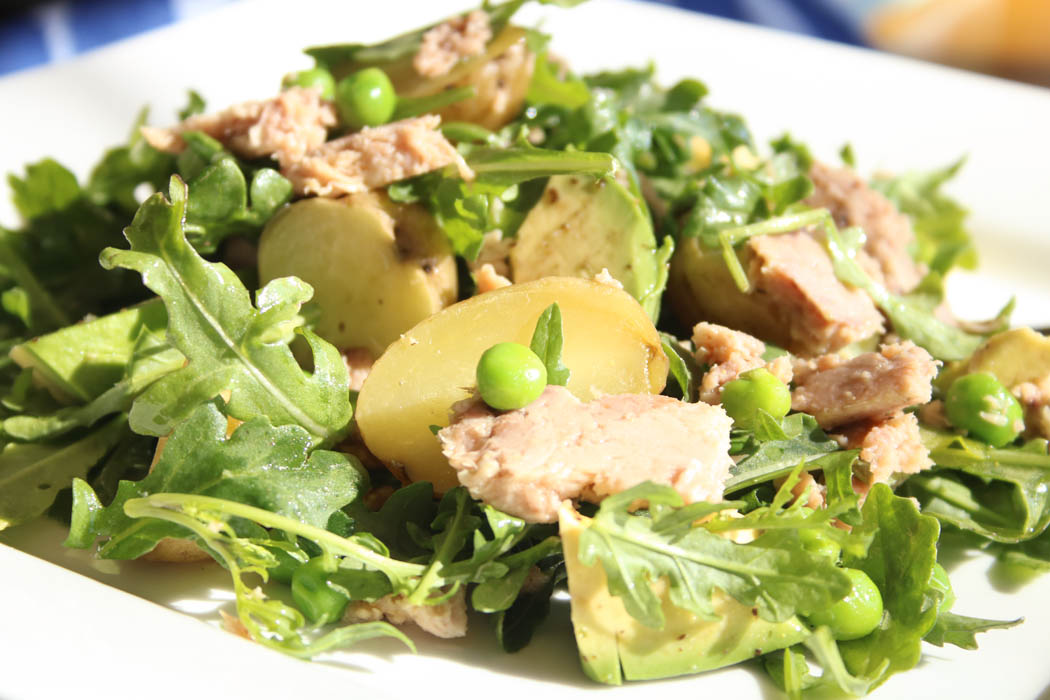
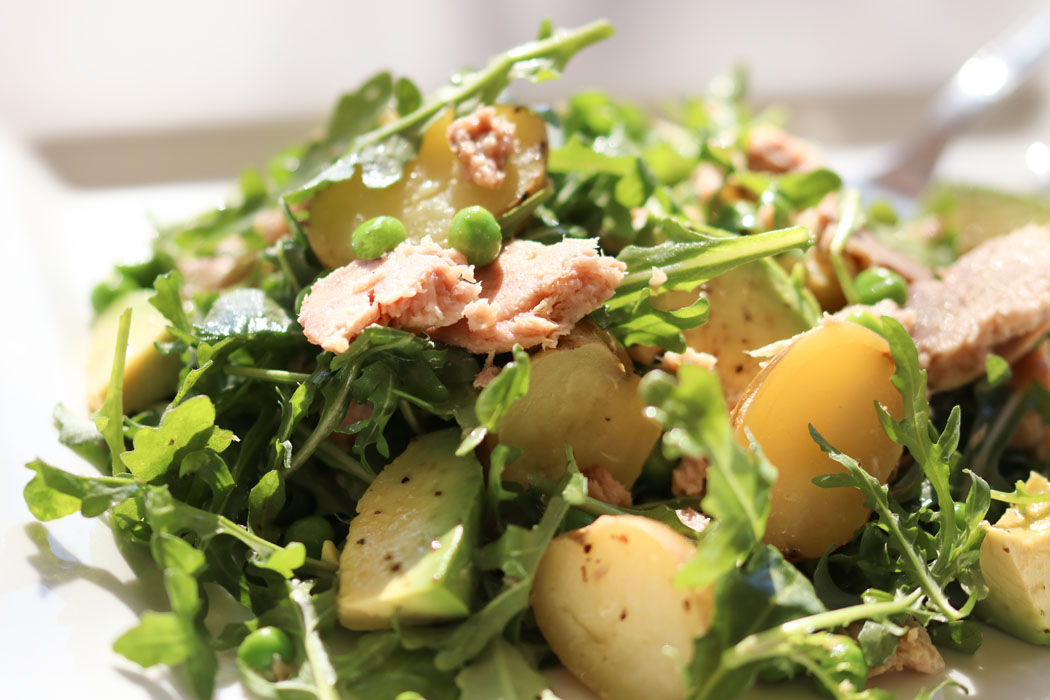
Arrange greens in four bowls and divide and arrange potatoes, peas, tuna and avocado. Drizzle with spicy horseradish lemon vinaigrette. Or combine all ingredients in a large serving bowl and drizzle with the dressing and toss to combine. Season with salt and pepper to taste.
Either way – composed (aka deconstructed) or tossed – it’s as fresh as the spring air.
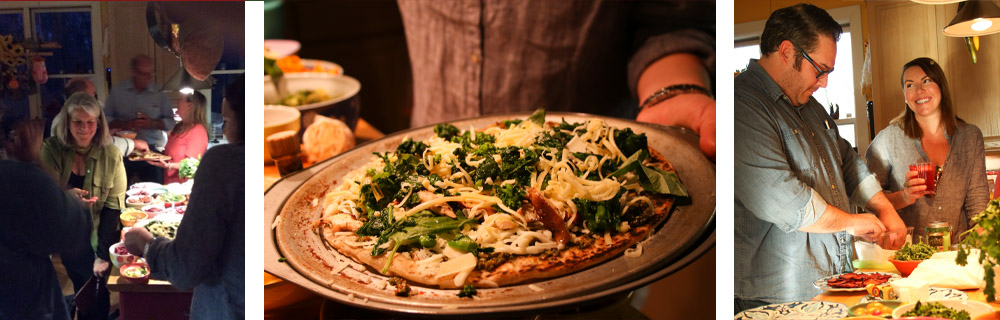
Bring your own pizza toppings. Pizza Party extraordinaire.
In case you haven’t guessed, these newfangled pot lucks (emphasis on the LUCKY, not the pot) are a big hit. Perhaps the reason typical pot lucks scare me just a wee bit is their origin. Historically, pot lucks date back to the European middle ages when nothing, but nothing, was thrown away. (Maybe we could take a tiny page from that lifestyle – I’m looking at you 40% food waste). Rather, leftovers were thrown into a pot and kept warm kind of indefinitely, available to any unplanned arrivals on short notice. This practice was especially prevalent in taverns and inns in medieval times, so no matter when you arrived, you could be treated to the “luck of the pot.” It’s entirely possible, to me at least, that modern day pot lucks could be of equally suspect food safety, never mind random items. But the Pot Lucky aims to change all that!
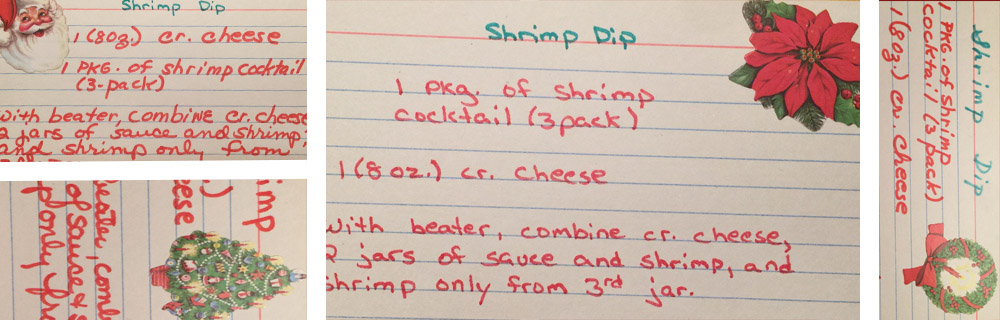
While on the subject of random items, who can forget the famous shrimp dip? My hosts, the charming Bob and Sally Oyler, were no doubt surprised when not only did a guest plop down a somewhat lame-ass (editorial comment mine, certainly not that of the gracious hosts) hors d’oeuvre smack dab in the middle of their fabulous holiday buffet, but said hors d’ was accompanied by kitschy recipe cards to take away. By the end of the party, pretty much every card remained – apparently not a dish that you really need (nor want, for that matter) a recipe for. And now, for more than 35 years, they have appeared in my mail, tucked inside Christmas cards from Sally, their daughter Barb, and most recently hand-delivered by a grandson, something of a recipe card mule, given he had no idea what was in the envelope he bore. I have gotten the last card from Sally, but trust, hope they will keep coming. Anybody want that recipe? I might have a few to share.
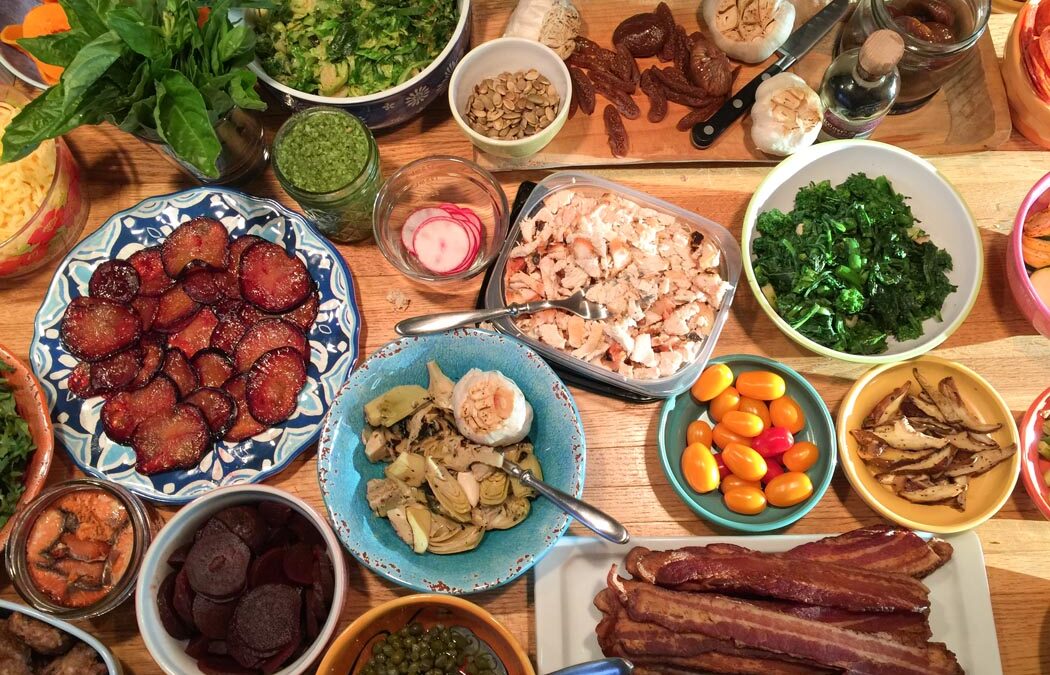
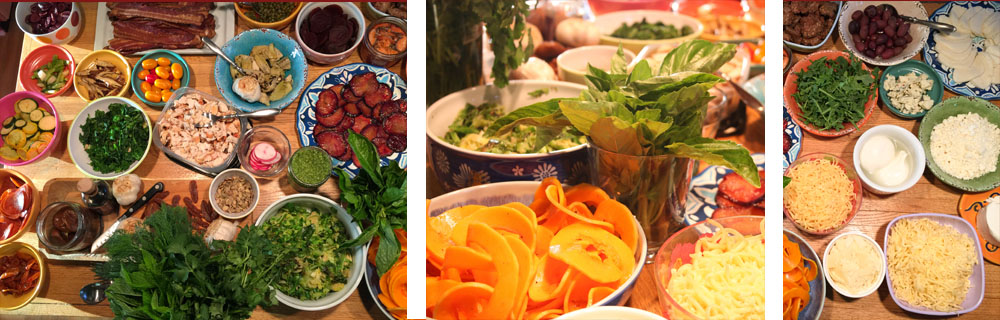
Like everything, pot lucks have a silver lining. The beauty of the pot luck is that it spreads both the effort and the expense and makes entertaining a you-don’t-have-to-be-Martha-Stewart snap. After the sausage making party and the soup swap, both definite fan faves, I landed on BYOPT – bring your own pizza toppings. A Pizza Party. “Best Party Ever”, according to one guest. I think part of the fun was that everyone got a quick turn at playing chef – drawing from the 40 some toppings, sauces, and cheeses that found their way to the kitchen island. And by playing chef, I mean this in the truest sense of the word – all the items were prepped (mise en place) and assembly is both the easy and the creative part. I committed to providing the dough (Trader’s Joe has fresh flour, whole wheat and herbed dough, as well as a frozen organic dough). Then I threw out some ideas for both pizza combos and individual toppings, organized by sauce/base, oils, toppings (veg and meat), and cheeses. You can plan it two ways – have people chose from a list of toppings and mix and match at the party, or have them bring enough for their own concoction and they are responsible for everything but the dough on that pie. We got a bit of both. Just a little coordination will keep you from having a lot of dupes.
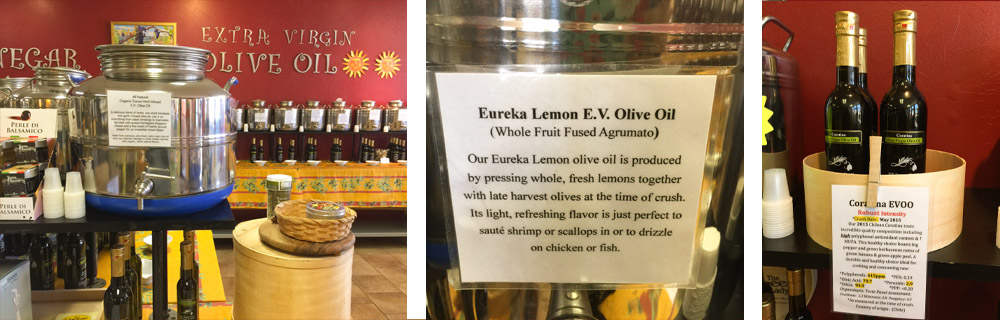
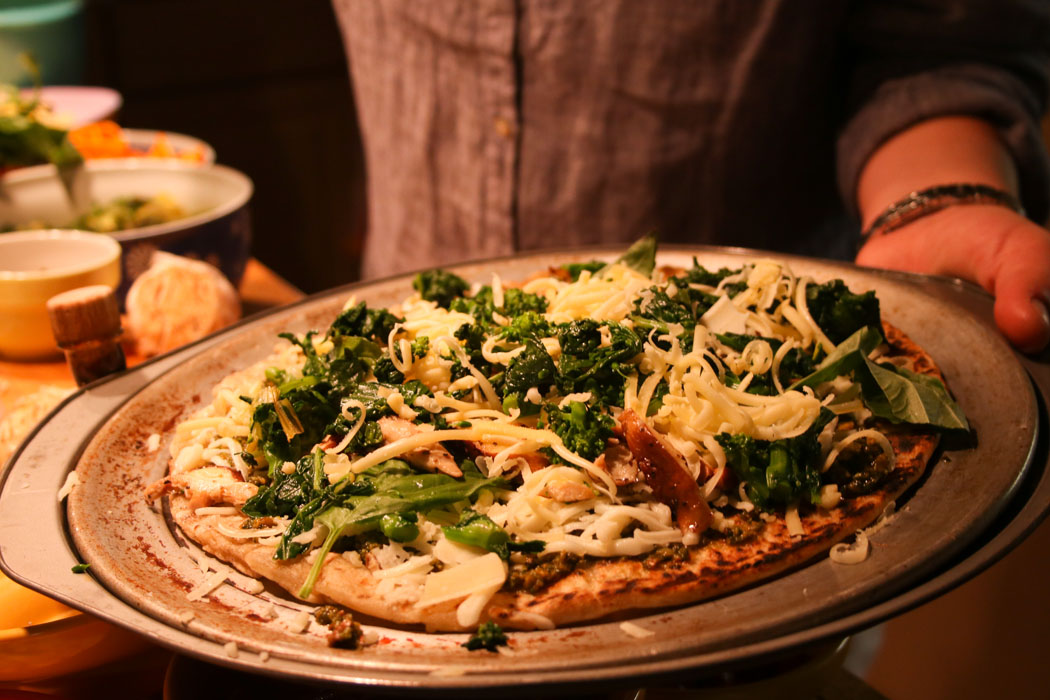
I of course had to make a run to the Cheese Lady, not just for the fabulous ooey-gooey meltable cheeses, but also for her fine collection of oils and vinegars. I settled on a lemon oil (fabulous to drizzle with my lemon pistachio pesto) and a white truffle oil. Super aromatic oils like truffle need to be drizzled after the bake. They are too good to go on before the oven. Good news guys – a phone call to the Cheese Lady and these puppies can be on their way to you. They don’t ship cheeses, but do take phone orders on the wonderful assortment of oils and vinegars. There is a divine maple balsamic that makes a killer vinaigrette with the lemon oil, and the raspberry balsamic is wonderful drizzled into a seltzer. Super refreshing!
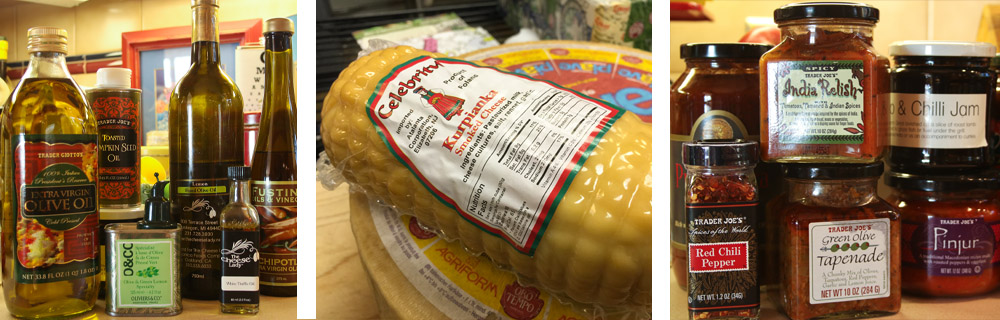
I had to get a couple cheeses that weren’t on my radar – one was meadowkaas which I did know about but didn’t expect to see til June. This is a special (aren’t they all?) style cheese that is made from the first milk from the cows that wander into North Holland’s (the Netherlands, not Michigan!!!) first grasses each spring. An importer found some 65 wheels from 2015 and upon Cheese Lady deeming it delish, they found their way to her. Yahoo! However, the other cheese I bought I had never heard – Kurpianka smoked cheese from Poland. Its touch of garlic and springy texture make it a perfect melting pizza cheese. Yum. Oh and it looks like a cheese grenade. I love that!
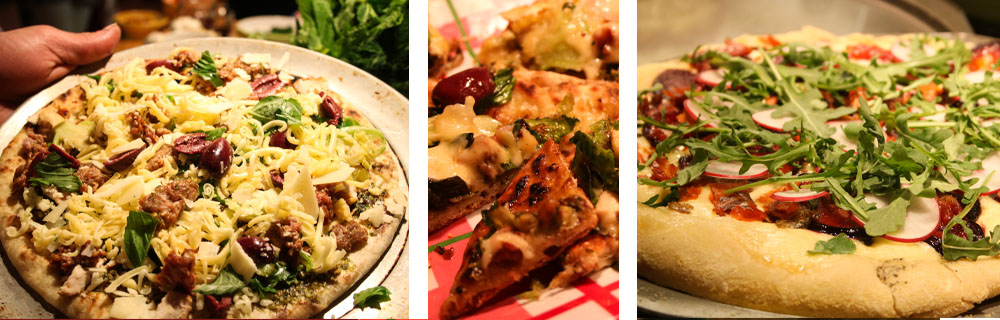
The most important detail you can tell your guests is to make sure the ingredients are “pizza-ready.” That means olives are pitted, zucchini and shiitake-types are quickly sautéed, and bacon is at least par-cooked. Otherwise you will get both a free for all with your limited space and a real mess. I considered a change of address halfway through the party. But a little organization goes a long way. I had a building station with sauces and oils, a topping station, a cutting station, a bar area, and a plates & salad serving area. My kitchen isn’t nearly as big as it sounds. But it worked – just barely. We had about 18 people and made about 13 pies. I find that so hard to believe because I swear I made 15 myself and ate at least 20. #CarbFreeMay
It helps to have some basic equipment – a Pizza Peel to transfer the prepped pizzas, a Pizza Stone or two (or three) always hot in the oven, pizza pans, and plenty of cutting boards and pizza wheels. Everyone brought what they had. I think there may have been six pies in the oven and two on the grill at one point. For the grilled pizza, we used the frozen dough. If you make your own or use fresh dough, it is best to roll it as thinly as you can and then freeze it to make a smooth transfer to the grill. Oil the grill and cook the dough on both sides to color and get grill marks. Then transfer to the building area where you can add toppings. Slide back on the grill and close the lid to melt the toppings. This will only take a few minutes. The oven (400-425oF) pizzas work well if you dust the peel with corn meal or make sure the dough is well floured and not sticky. Build the pie and slide onto the hot stones. All in all, it’s pretty neck-down in the execution, once you do a couple test pies to get down the technique.
We had some pretty fantastic Pizza Party toppings – here is a select list (email if you want my master list):
Sauces: red sauce, lemon ricotta, lemon pistachio pesto, fruit chutney, kale pesto, green olive tapenade, horseradish dill drizzle
Oils: EVOO, lemon oil, white truffle oil, Toasted Pumpkin Seed Oil (divine on the butternut squash ribbon pie), chipotle oil, fig balsamic
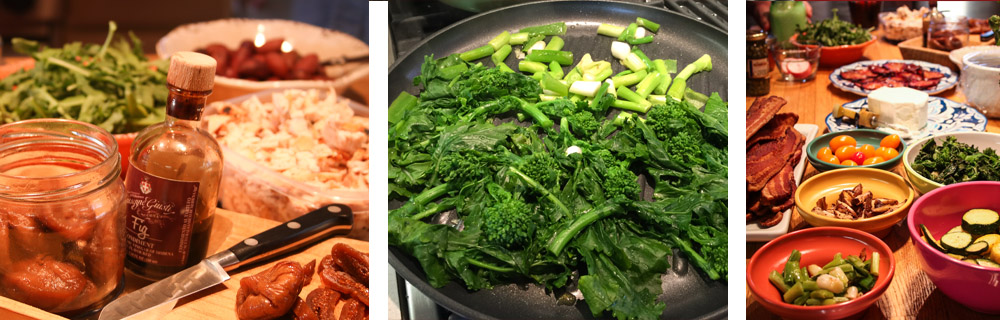
Arugula, charred scallions, roasted garlic, sautéed shiitakes, grilled zucchini and yellow squash, you’ll thank me in the winter oven dried tomatoes, sautéed broccoli rabe, fresh basil, Kalamata olives, artichoke hearts, spinach, roasted beets, dried figs, butternut squash ribbons (the Paderno Spiral Vegetable Slicer worked perfectly), Brussels sprouts, smoked salmon, capers, roasted plums, radishes – wait…..seriously??? A partial list????
Pepperoni, prosciutto, shredded chicken, ham, bacon, sausage
You know a movement has had its awareness sufficiently raised when a blithe reference slips into a throw-away line on a sitcom. After two posts on food waste last week, imagine my squeals when I heard this from a waiter at a hip millennial launch party on a newish sitcom: “The bruschetta has been made with rescued tomatoes and date of expiration burrata”. I’m squealing. Really. Yipeeeeeeee!
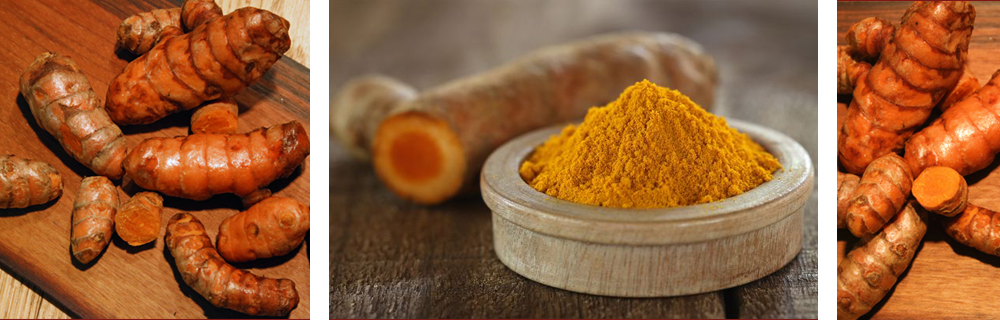
Unfortunately summer bruschetta is the last thing on my cooking mind today. A girl can dream. But as I moped through the grocery looking for anything to lift the gloom of winter’s darkest days, I was thrilled to see fresh turmeric. I didn’t even know you could get this in a mainstream grocery – in the Midwest. It used to be relegated to special trips to Asian markets in big cities. Or more likely it could only be sourced dried and ground. Honestly, I was never a fan of turmeric when I only knew its dried self. I thought it tasted – well, yellow. It didn’t really register much on my palate. But while doing guest chef stints on culinary cruises in the Caribbean, I would gather up ever fresh market item that was a bit unique and had a story and introduce our passengers to these new world treats. I even spent one week being followed by the Food Network, and we hit the Grenada spice market hard.
Turmeric was just one of the many spices I found bears little resemblance to its dry spice counterpart. Mace was another. It makes sense that I love turmeric because it’s related to ginger – and I’m well documented as a “fiend for ginger”. Both are rhizomes, along with galangal, lotus, bamboo, and many more. They spread laterally (called creeping rootstalk) and send shoots up. Many have culinary uses.
Like ginger, turmeric when fresh has a pungent and aromatic taste that can be quite peppery (HOT!), especially when used in excess. It is a key player in many South Asian (Thai, Indian, Vietnamese, and Cambodian) dishes – both for flavor and color; you’ll find it in American food as a colorant that can range from subtle to supreme. Vanilla products like yogurt and pudding turn creamy, not stark white, and mustard turns bright yellow.
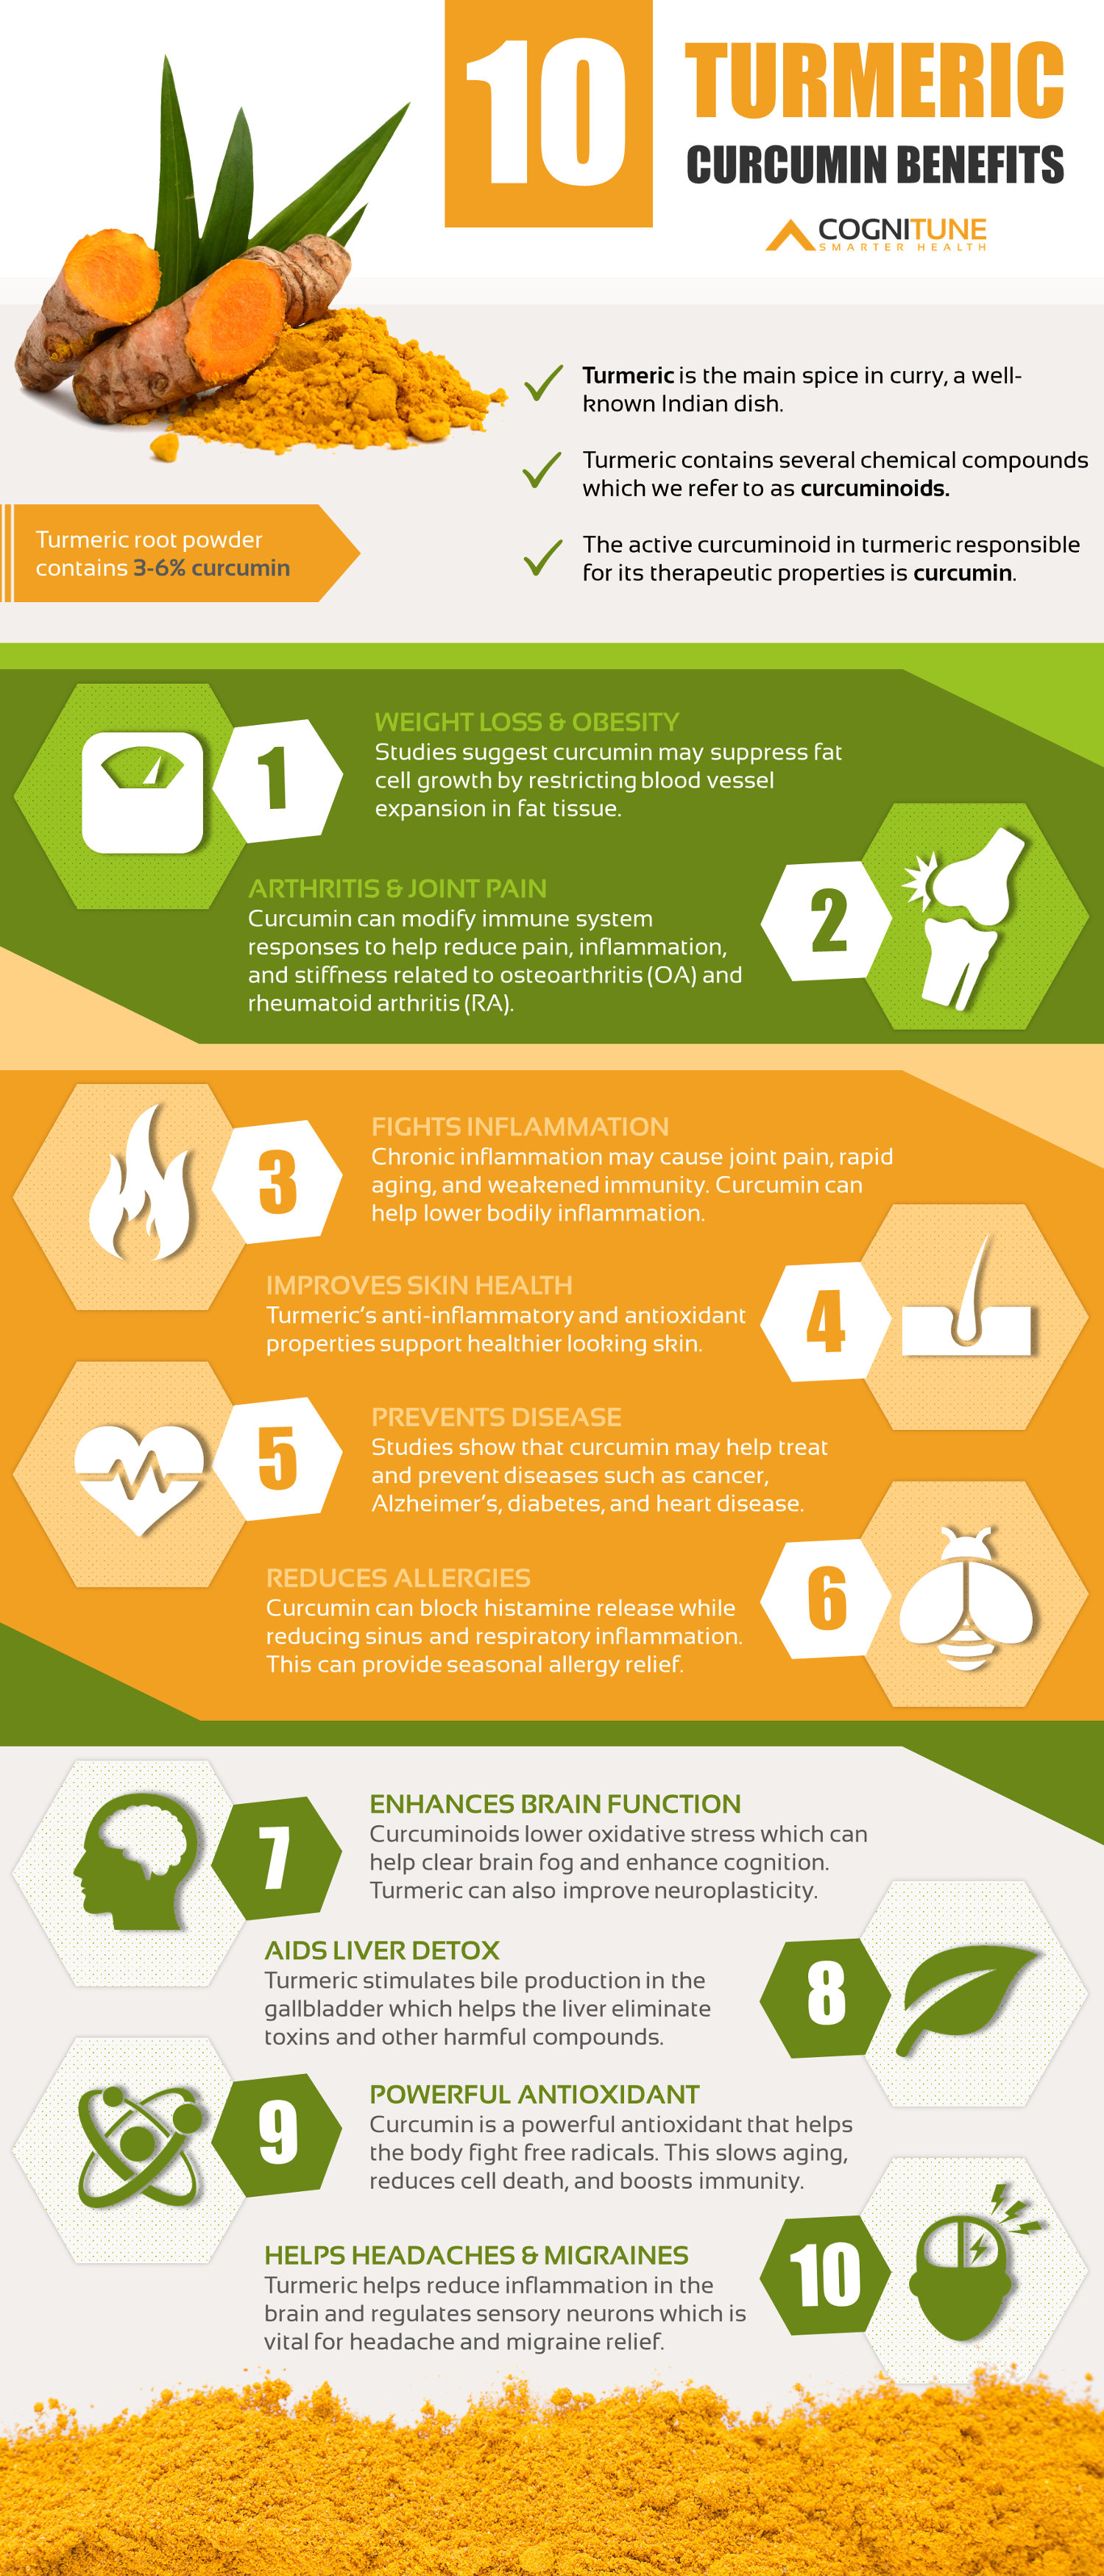
But turmeric’s real claim to fame is its medicinal properties. Like ginger, turmeric has powerful anti-nausea (turmeric tea, just boil it up), anti-inflammatory, anti-microbial, and anti-fungal properties. If only this miracle worker could clean the bath!! (Nobody wants a yellow tub, I know, I know). It’s even being studied for treatment of IBS, Alzheimer’s, depression and cancer. Rock stah!
So I grabbed a handful and headed home, determined to make a spicy vegan curry. It doesn’t have to be vegan or even vegetarian, but that is what I had on my mind. Tucking in for the night with a Buddha Bowl of Spicy Goodness.
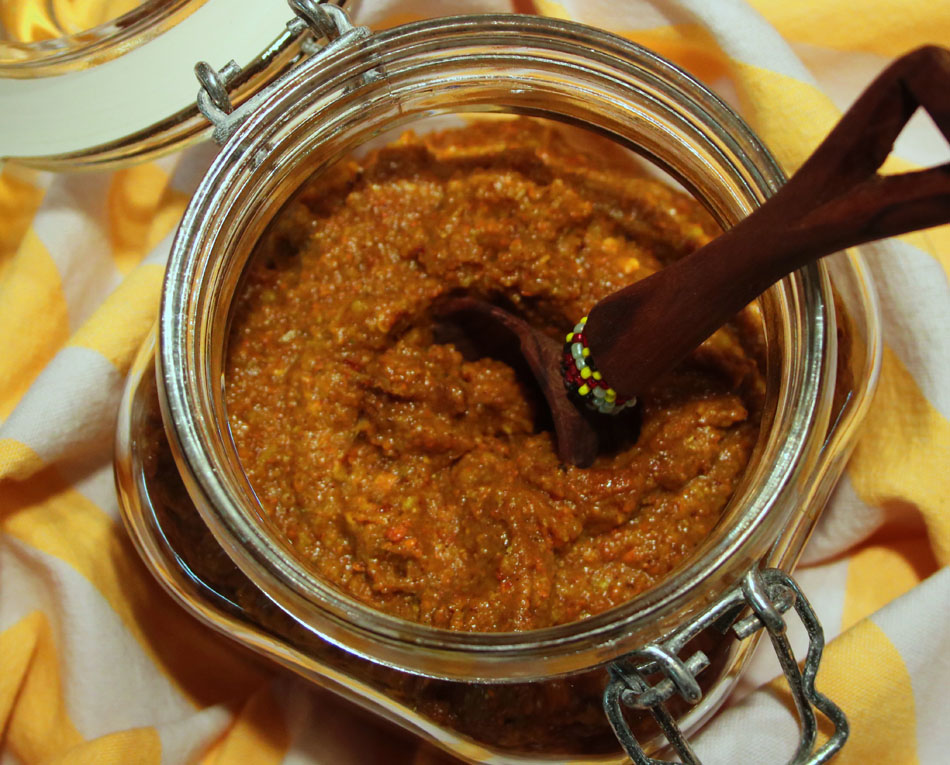
Start by making a Yellow Curry Paste – this will make four times what you need and freezes well. You can add a lot of different ingredients or leave out some of these, but this is what I had on hand and so what I used. Roasting the aromatics and toasting the spices, while a bit more time-consuming, will elevate the taste and develop a real depth of flavor that you simply can’t get by just pureeing all the ingredients. It’s worth the commitment.
Many curry recipes are simple purees, but this one roasts the aromatics and toasts the spices. While a bit more time-consuming, this extra step develops depth of flavor that you simply can’t get with dump and whirl. It’s worth the commitment. And bonus – it freezes well!
Ingredients
Scale
3 shallots
5 pieces of turmeric
3heads of garlic
1 Tablespoon of olive oil (plus more to drizzle on aromatics)
Spice Blend:
2 Tablespoons ground coriander
2 Tablespoons ground cumin
1 Tablespoon red pepper flakes
1 teaspoon ground cardamom
1 teaspoon cayenne
1/2 teaspoon cinnamon
1/2 teaspoon paprika
1/4 teaspoon clove
1/4 teaspoon allspice
3 Tablespoons lemongrass paste (a tube usually found with herbs in produce section)
1 1/2 teaspoons sea salt
Instructions
Preheat oven to 400oF.
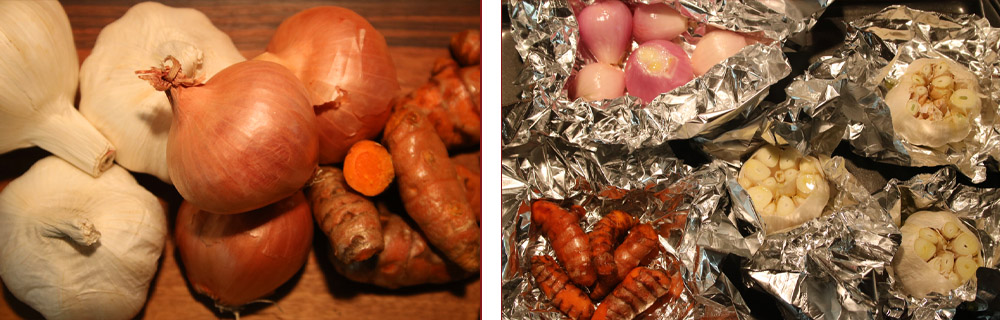
Wrap the aromatics, each in their own foil pouch, and place on a sheet pan to roast. (20 minutes for the turmeric; 1 hour for the shallots and garlic)
Shallots – peeled, placed in a foil pouch and drizzled with olive oil
Turmeric – well scrubbed, placed in a foil pouch and drizzled with olive oil
Garlic – loose outer “paper” removed, tops of each head trimmed, placed in a foil pouch and drizzled with olive oil
In a small sauté pan, heat one Tablespoon olive oil and add all the spices. Sauté, stirring, for about two minutes until the spices start to release their aroma. Transfer to the work bowl of a food processor.
Once the aromatics are cool enough to handle, transfer the shallots and turmeric to the bowl of a food processor. Squeeze the roasted garlic cloves into the processor, picking by hand any that linger behind. Discard the garlic “paper”.
Add the lemongrass paste and sea salt. Puree until desired consistency.
Transfer to airtight container and refrigerate or freeze.
Notes
This will last longer than if it were made with raw herbs or aromatics, and it also freezes well.
Prep Time:10 minutes
Cook Time:1 hour
Category:Sauce
Method:Blender/Processor
Cuisine:Indian
Keywords: turmeric, curry
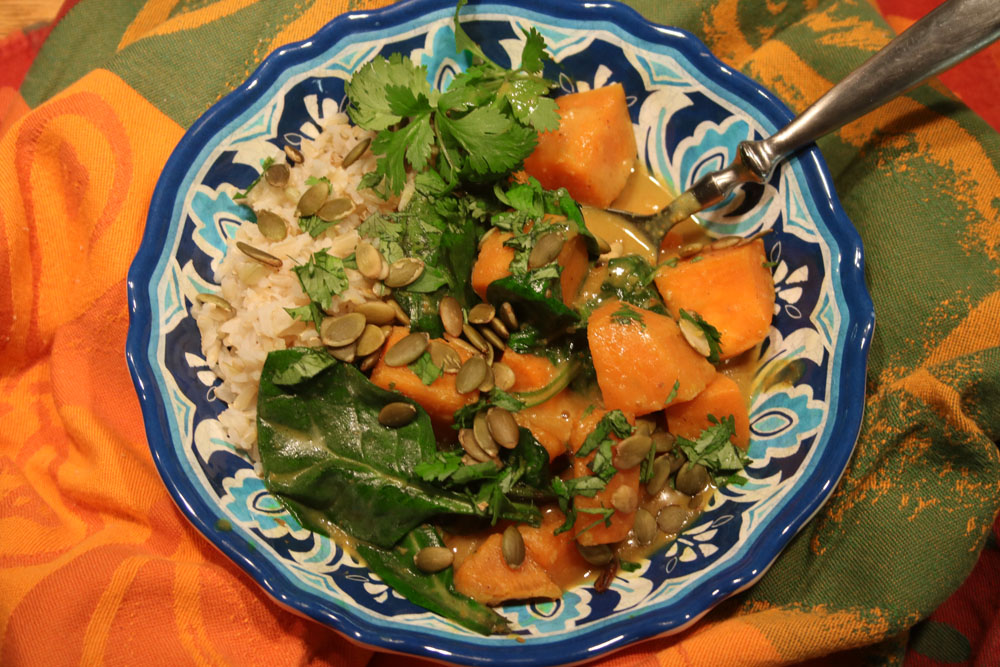
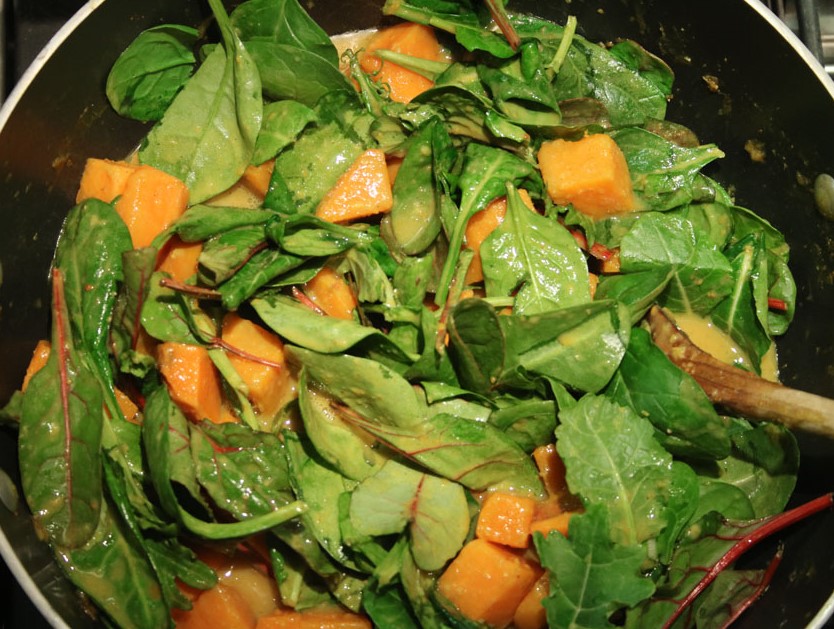
Now that you have that tasty curry, how about whipping up a Coconut Curry Buddha Bowl, filled with hearty and soul-warming sweet potatoes and earthy greens and topped with pumpkin seeds. It’s vegan and you can feel great about that for so many reasons.
Coconut Turmeric Curry with Winter Vegetable Buddha Bowl
Serving suggestion – rice or brown rice* (See note below)
Start the rice.
In a wok or deep skillet, heat the olive oil and sauté the ginger for 2-3 minutes until soft.
Add the sweet potatoes, curry paste, coconut cream and stock. Bring to a simmer and cook uncovered, stirring periodically, for about 30 minutes or until potatoes are tender and sauce is thickened.
Add the greens and stir until wilted.
Divide rice among bowls and top with sweet potato curry. Garnish with scallions, pumpkin seeds, and cilantro. Serve with lime wedges.
Serves 4.
*Brown rice note: I really prefer brown rice but you’ve likely heard the bad news about arsenic. Because it is a whole grain, it has more potential for danger than white rice which has been stripped of its outer hull (and for that matter its nutritional value). Truth be told, I really don’t eat it very often – once a month or less – so I’m not that worried but I do take a couple precautions. Brown basmati from California, India and Pakistan are the best choices – about 1/3 less risk than other brown rices according to Consumer Reports. The other thing I do is rinse it several times, and then cook it like pasta in a 6:1 water ratio (instead of the normal 2:1) and drain the excess water. That will help wash away the evil-doers lurking in your lovely whole grain. My Grandmother always said “you’ve gotta eat a peck of dirt before you die”. I’m guessing she wasn’t talking about arsenic, but she did make it pass 90. Just sayin.
Sawsuch sawsedge. That’s the way my Dad used to say it. Was he channeling his inner Brooklyn? Fuhgeddaboudit! He cracked himself up when he said it. But this tale isn’t really about sausage or sausage making, it’s about fun with friends. I must however make one quick sausage stop, a reverent moment to pay homage to the mother of all sausage experiences – the sausage bomb. I once had to work for the daughter of a famed crime boss. I would tell you who she was, but I’d have to kill you (read: they may kill me). You think I’m kidding, but when her brother died in a car/mini-bike accident, the car driver was “disappeared.” Have I said too much already? Anyway Princessa Mafiosa wrote a cookbook and Extra was filming a piece at her Lon G-Island mansion. I prepped what I could and took a car service to arrive a bit ahead of the appointed hour. They really hadn’t scheduled sufficient time for me to ready all the beauty food laid out in a magnificent “of course she did this herself” spread. When I knocked on the door of the palace, the circle drive strewn with obligatory black Escalades parked haphazardly Tony Soprano-style, my knock was greeted with a door slam and strict instructions to come back later. I had been doing this long enough to know how much work lay ahead and forceful enough to finesse my way inside, but I always wondered – at what cost?
The first recipe was a pasta dish that called for browning the sausage in 2 cups of olive oil, then adding 2 cups of cold water and a bouillon cube to the boiling oil. It was genius – take out the target without spilling any blood – sausage bomb ??? style. BOOM! I did have the good sense to retrieve my business card from the kitchen counter before leaving lest I find a horse head in my bed. Hopefully with a lovely Béarnaise sauce napping it just so.
But I digress – and still swear this really isn’t about sausage. It’s about hospitality. We’ve just survived the super bowl, the Oscars, and the New York marathon of all home entertaining events- Thanksgiving. It was no doubt stressful. Was the turkey too salty, too dry, too frozen? Did you really have to do it all by yourself? Time now to sit back and enlist the full team to make things happen, and have fun while doing it. I’m not just talking about a potluck people, I mean a real cooking party.
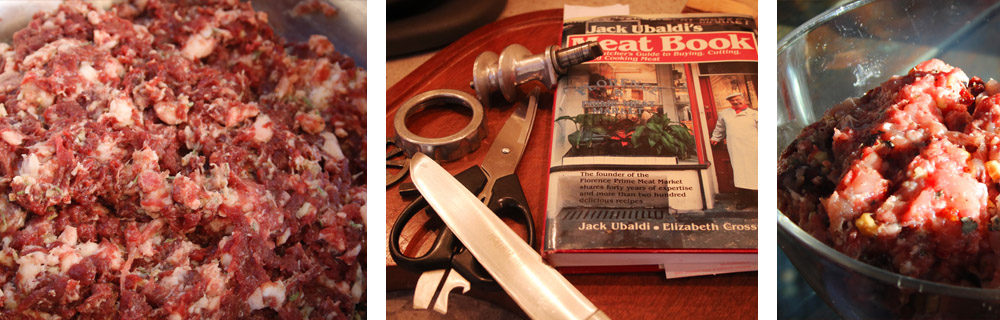
I recently had the good fortune of spending the afternoon at a sausage party. This crowd takes their game meat seriously so we had a variety of flavors, including a beef heart sausage. (Stop it – your face is gonna freeze like that). But the one here is rabbit with dried cherries and toasted hazelnuts. The great thing about making your own sausage is that you have ultimate control over the seasonings and fat/meat ratio, eliminating all preservatives, while having great fun. Win. Win. Win.
One of my all-time favorite meat books is a seriously old cookbook by Jack Ubaldi. Jack owned the legendary Florence Prime Meat Market in New York’s Greenwich Village. He was a butcher’s butcher. A master of meat. When I came on the food scene, he had just sold it and was teaching. I took both butchering and knife skills from him. He changed my life when I learned that a bread knife is not to be used in a back and forth sawing motion, but rather cut on the forward movement, only dragging the knife back – without action – merely to re-position, so you can cut again on the next forward motion. Who knew? Jack.
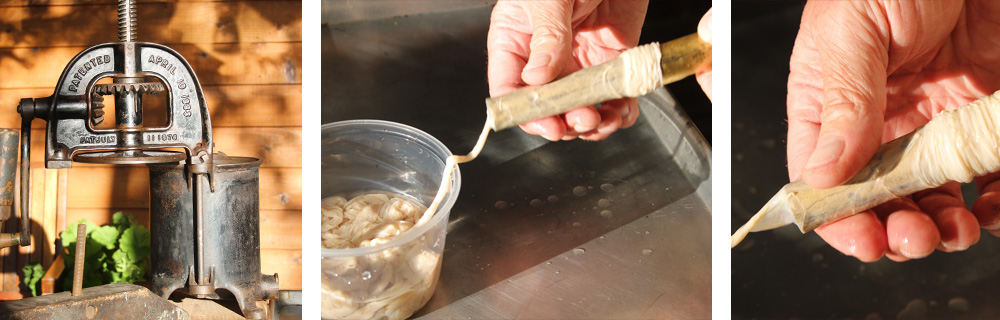
Jack’s sausage technique became the base for our afternoon of sausage revelry. I arrived just as the sausage mix was being processed in a meat grinder. My Mom and Grandmothers had manual grinders that C-clamped to their counters. Today you can buy attachments for a variety of machines; I have the grinder attachment for my KitchenAid stand mixer. Here’s what we missed –
Fresh Rabbit Sausage with Dried Cherries and Toasted Hazelnuts:
2 pounds lamb, cut in chunks
2 pounds rabbit, cut in chunks
2 tablespoons kosher salt (if not kosher, at least coarse grain)
2 Tablespoons chopped garlic
1 teaspoon black pepper
1 teaspoon chopped marjoram
1 teaspoon chopped sage
¼ cup chopped dried cherries
¼ cup chopped toasted hazelnuts
Casings, soaked – available from your butcher
Makes about 4 pounds of sausage, or approximately 12 links.
The general rule of thumb is 30% fat to 70% lean meat. If it’s too lean, it will be very dry; too fatty, the fat will render leaving a shriveled up sausage that is way too rich. This sausage was pretty lean, but lots of flavor. The meat went through the grinder with 3/8” plate, and the rest is stirred in by hand, first the seasonings, then the cherries and nuts. Knead by hand until the meat sticks together, about 5 minutes or so. The recipe and technique here are for a fresh sausage, meant to be cooked and enjoyed within a couple days. Drying sausage is a separate technique, which is no longer required for home cooks, now that we have fridges.
The casings you will find are generally hog. They are often sold packed in salt. If your butcher doesn’t carry them there are several onlinesources. About an hour before you start, you should soak the casings in warm water for about 30 minutes. After, run water through the casings, but do not squeeze. Then return them to a container, covered in tepid water. One pound of casings is about 50-60 feet long, and will pack 25 pounds of sausage, though it may be closer to 50 pounds. There is a fairly wide range in capacity because the diameter will vary. If you don’t use them all, wring out the excess water and pack again in salt and refrigerate in airtight container.
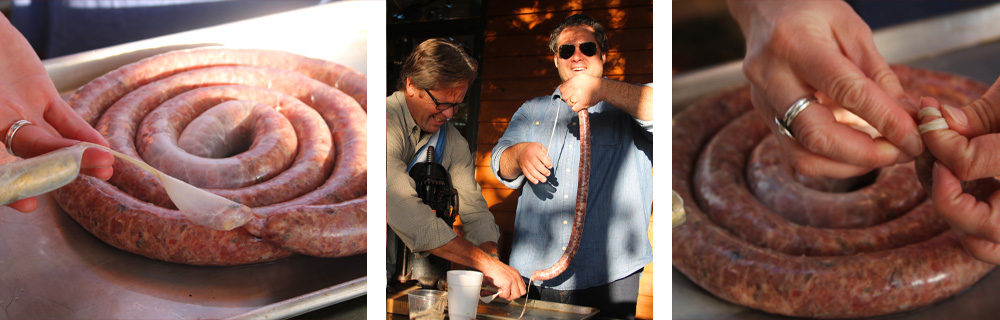
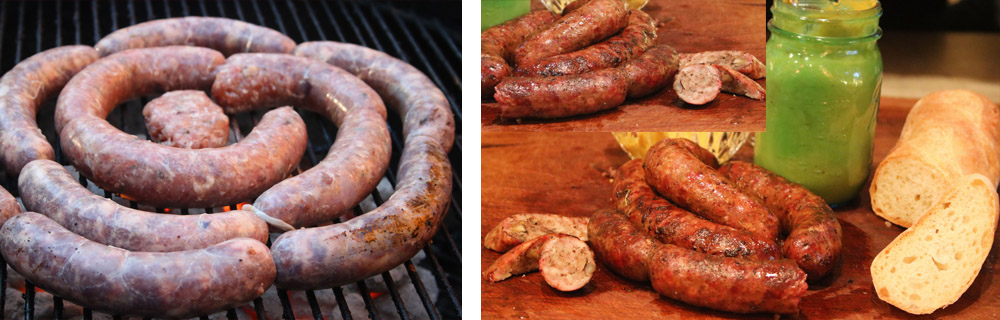
The real fun begins when the stuffing happens. My friends happen to own an antique stuffer, but in addition to the meat grinder attachment, my KitchenAid stand mixer has a Stuffing Attachment. You can always use a funnel for stuffing by hand. Thread the casings onto a wet funnel or stuffing tube until an inch of casing remains. Tie off the end. Add the meat to the hopper and push through. It helps here if you have octopus arms or a friend – one to man the sausage intake and one to manage the casing/stuffing output. Once you have filled a desired length, press gently to ease out any air, even the meat distribution, and make sure there is a little give – i.e. not too stuffed. Tie off this end. Continue filling additional lengths, until you have used all your meat mixture. The next step is to make links: Pinch off a 4-5 inch section at each end and twirl like a jump rope to create an individual link. Generally all the links are kept attached to minimize the waste. At this point you can freeze, simmer, broil, or grill, but if you are like us, you will want them right away with a frosty beer. We threw them on the grill and cooked about 8-10 minutes per side.
There are infinite ways you can customize this concept – fresh sausage, dry sausage, fruit, nuts, organs, animals, fish, veggie, etc. But this story is about camaraderie and spending the day with friends. We cracked a new jar of last season’s habanero mustard – sorry but this recipe is also a mob secret – and served it up with Amy and Todd’s butternut squash soup, topped with crispy bacon, shallots, and apples, then chased it with my gentleman jack pumpkin ginger cheesecake. Fat and happy!!!!
The next cooking party on the docket is a soup party. Stay tuned!