Sep 6, 2016 | Dressings & Sauces, Recipes, Salads, Sides, Sustainability
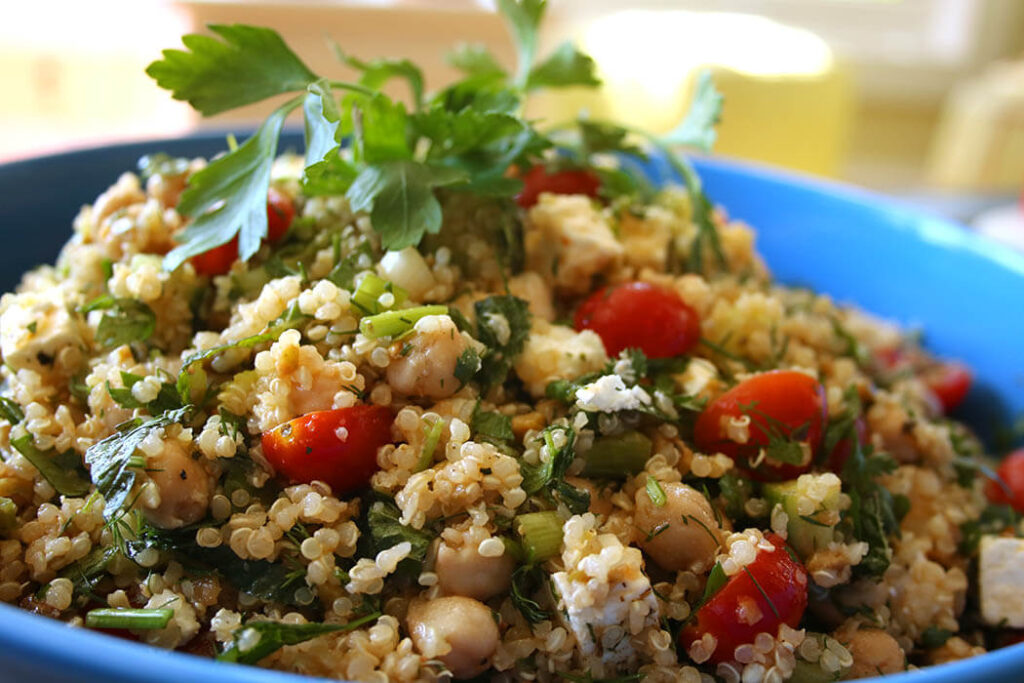
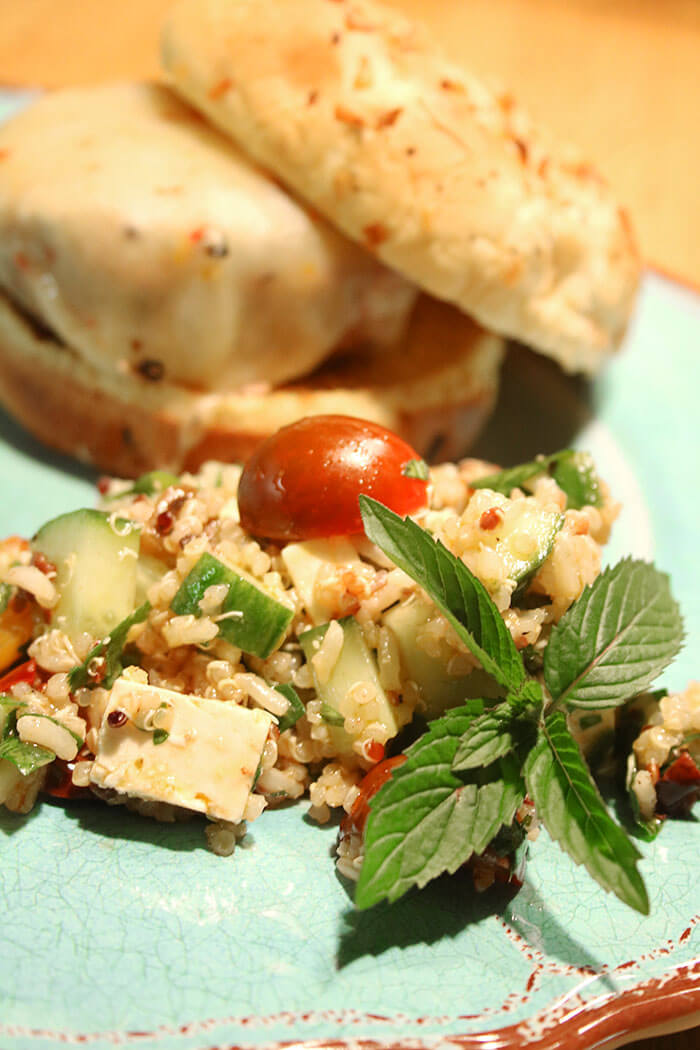
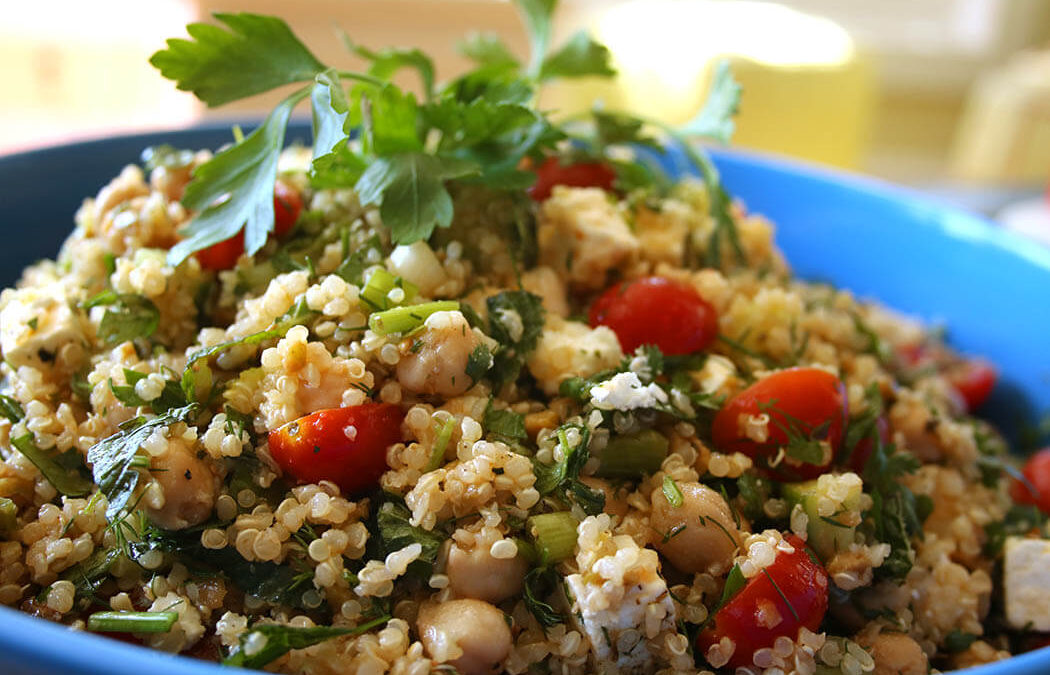
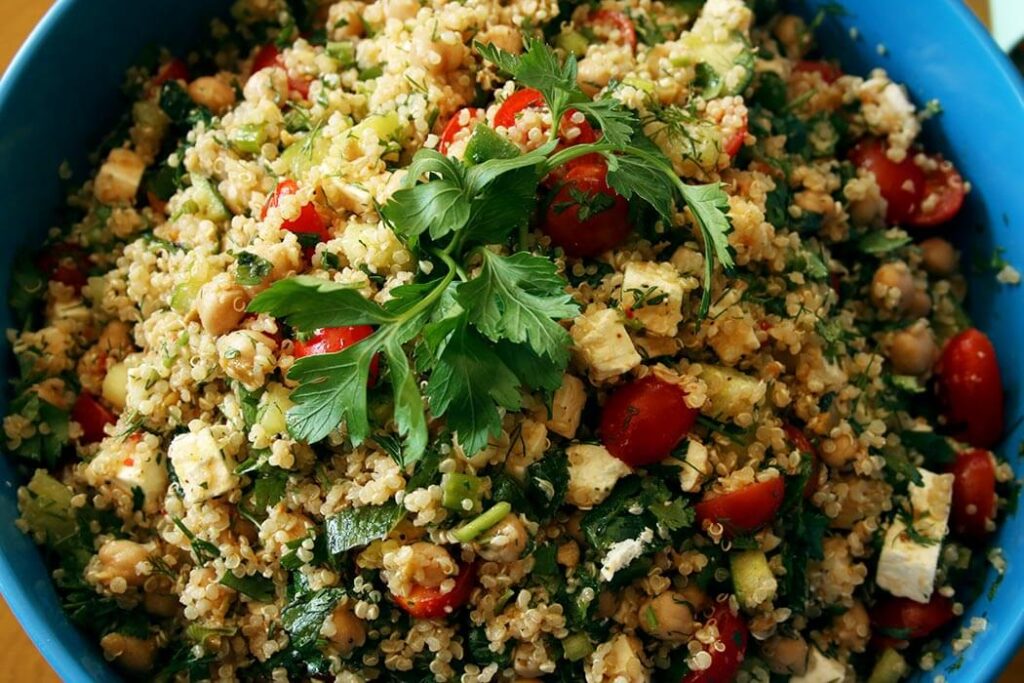
I created this salad earlier this summer – in part because it is so tasty (of course), and in part because it is a starch that is hearty and filling without being potato salad. Yawn. Plus that whole mayo aversion thing I got going. It made its first appearance at the Burger Pot Lucky. And ever since, I have been getting requests for the recipe. One of the great things about adding grains to any salad is their ability to stretch. The ingredients normally found in a Greek salad are all primo, which is to say pricey. The addition of quinoa gives you bang for the buck.
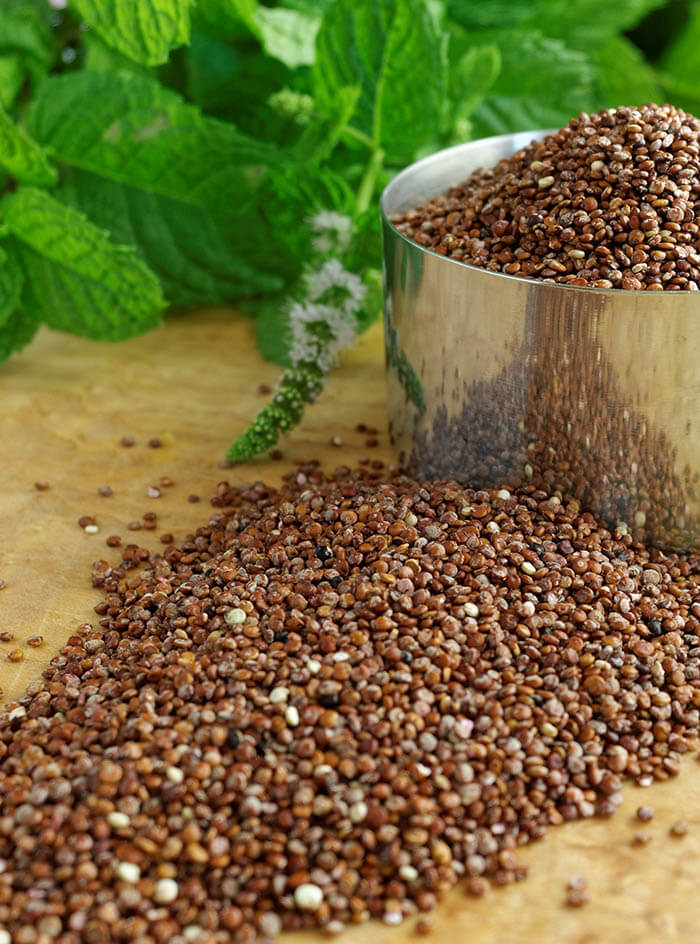
If you aren’t familiar with quinoa, get to know it. It’s kind of a miracle food: it comes in several colors including black, white and red, cooks in 10-15 minutes, is high in protein, fiber, and folate, is gluten-free, and is a decent source of iron, zinc and magnesium. First cultivated in the Andes (Peru, Bolivia, Ecuador) some 4000 years ago (with non-domesticated sightings dating back more than 7000 years), Incans considered quinoa the “mother of all grains” and held it sacred, which caused the Spanish colonists to consider it pagan and led them to forbid it. But, quinoa is finally having its day – the United Nations General Assembly gave quinoa its own year – 2013 the International Year of Quinoa – to celebrate the Incan ability to preserve this ancient tradition and live in harmony with nature. Hallelujah! It was the hope of the UN that quinoa would be a major player in attaining MDGs (Millennium Development Goals) and be instrumental in maintaining SDGs (Sustainable Development Goals) by providing food security, nutrition and aiding in poverty eradication. And while you are getting to know quinoa, get to know the UN and its work on food security.
Meanwhile back in the kitchen: I know I can only ask you to pit olives so many times in one summer (looking at you panzanella), so here I am telling you to pick up a jar of an olive relish or tapenade or bruschetta topping – grab a product that has done the heavy lifting for you – and make that the base of your dressing. I’m all about short cuts in cooking when possible. Trader Joe’s has a green olive tapenade that I really like and it makes a super tasty green olive vinaigrette, but check your condiment section at the grocery and see what you have available. If you can’t find something olive based, then try a pepper relish or whatever kind of bruschetta or crostini topping your joint offers.
My Big Fat Greek Salad
Green Olive Vinaigrette:
- 1 cup green olive tapenade (I like Trader Joe’s and use the whole 10-ounce jar. But you can also use any kind of tapenade or bruschetta spread, or just use 1 cup chopped oil-cured green or black olives. Please! No California black olives in water!!!!)
- 1/2 cup lemon juice
- 1/2 cup EVOO
- 1 teaspoon salt
- 1 teaspoon ground black pepper or favorite pepper blend (lemon pepper would be amazing)
- Zest of two lemons
Whisk together all ingredients in a small bowl.
Store, refrigerated, in an airtight container.
Makes 2 cups. (This salad will use about 1/3 of this Vinaigrette recipe.)
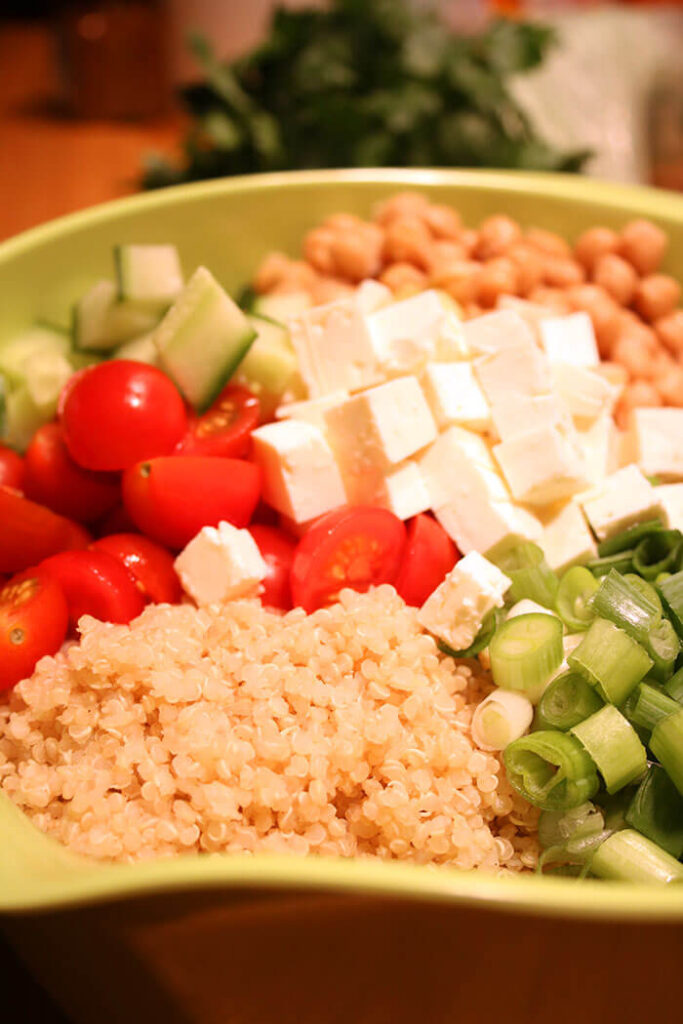
Greek Salad:
- 1 cup raw quinoa (red or white)
- 1 16-ounce can garbanzo beans, rinsed and drained
- ½ seedless English cucumber, cut in ½” dice
- 4 scallions, sliced
- 1 ½ cups halved cherry tomatoes
- 8 ounces feta, cubed
- ¼ cup each: chopped parsley, mint, dill and cilantro
Rinse and drain the quinoa, then add to a pot with tight-fitting lid along with 2 cups water or stock. Bring to a boil, cover, and reduce heat to a simmer. Cook for 10-15 minutes until all liquid is absorbed. Transfer to a mixing bowl and cool.
When cool, add garbanzos, cucumbers, scallions, tomatoes and feta.
Dress the salad with the green olive vinaigrette, using about 1/3 of it or more, as needed. Refrigerate until ready to serve, then add chopped herbs and check seasonings. I like to finish it off with my beloved Maldon Sea Salt Flakes . This dish can easily be made a day or so ahead, but add herbs and check seasonings and acidity at serving time.
Makes about 1 ½ quarts.

This post contains affiliate links. For more of my must-have faves, check out my shop.
© Copyright: KatyKeck.com 2016. All rights reserved.
Hey, we want to hear from you!
Don’t forget to Comment, Share & Subscribe to our blog.

Sep 3, 2016 | Appetizers & Bar Bites, Pot Lucky, Recipes

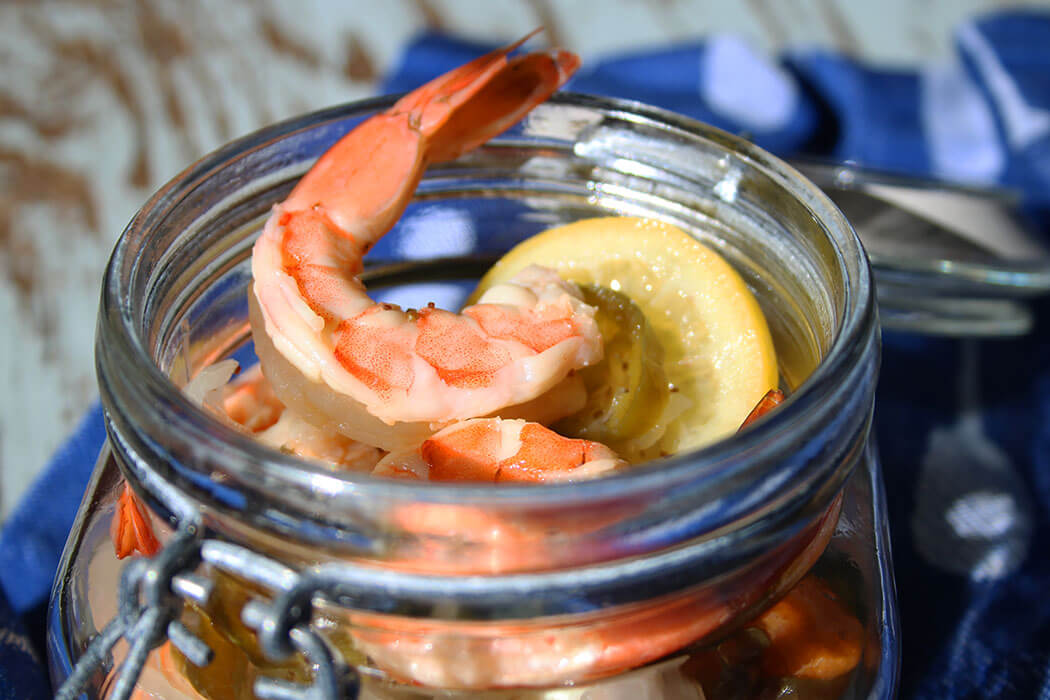
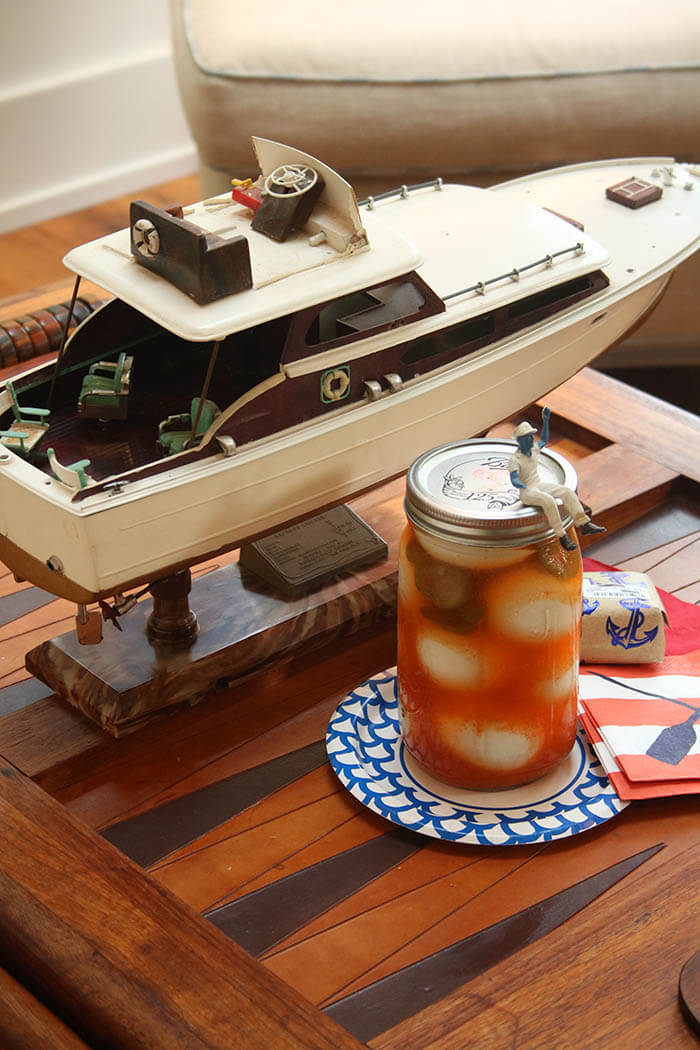
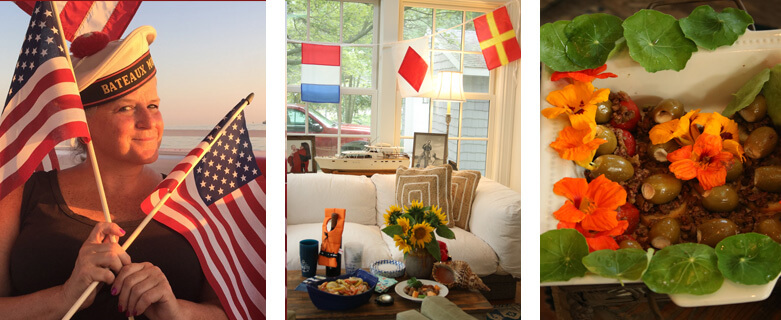
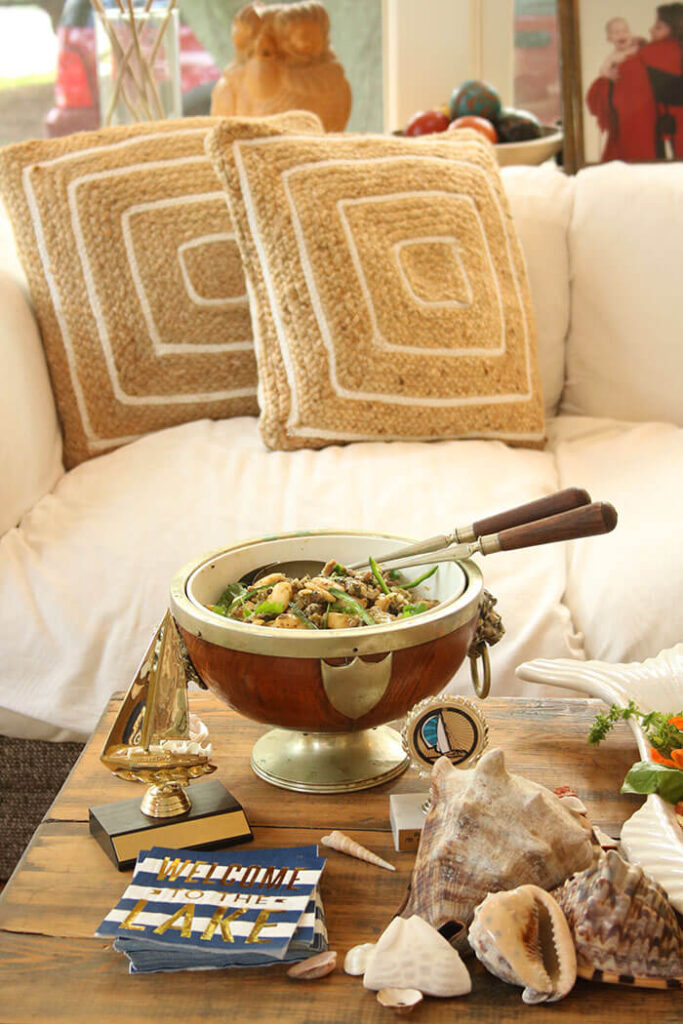
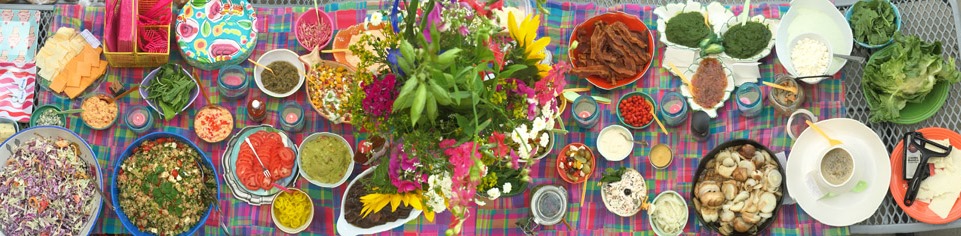
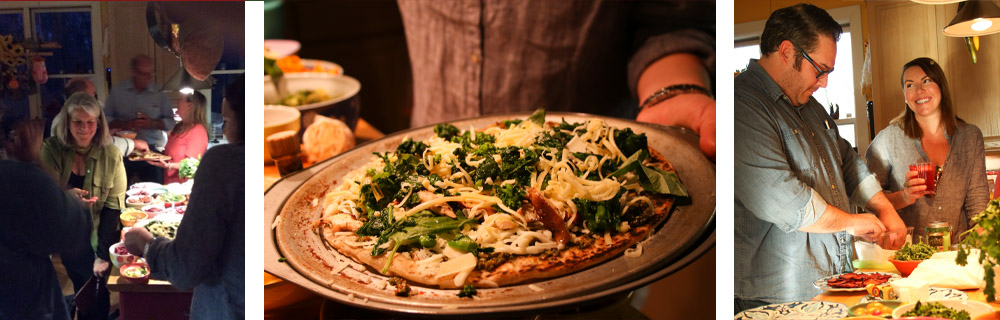
All ashore that’s going ashore. Or so it should have been. But Mother Nature was a fickle mistress (or was she?) and the pot-lucky aboard our intrepid pontoon Scout was not to be. It’s quite possible that Mother Nature did us a solid – the feast that arrived needed to be a moveable feast, else we would have had to have a side car on the boat just to carry the food. The call went out to bring an appetizer that fit a verrrrry loose nautical theme – #puremichigan, #redwhiteandblue, #beach, #getfishy. I really didn’t have much in mind, unlike previous pot-luckys (my curated and themed spin on a typical pot luck), other than my own plan to roll out the pickled shrimp, so asked friends to get creative and creative they got! The food just kept arriving and it took multiple rooms to spread the feast.

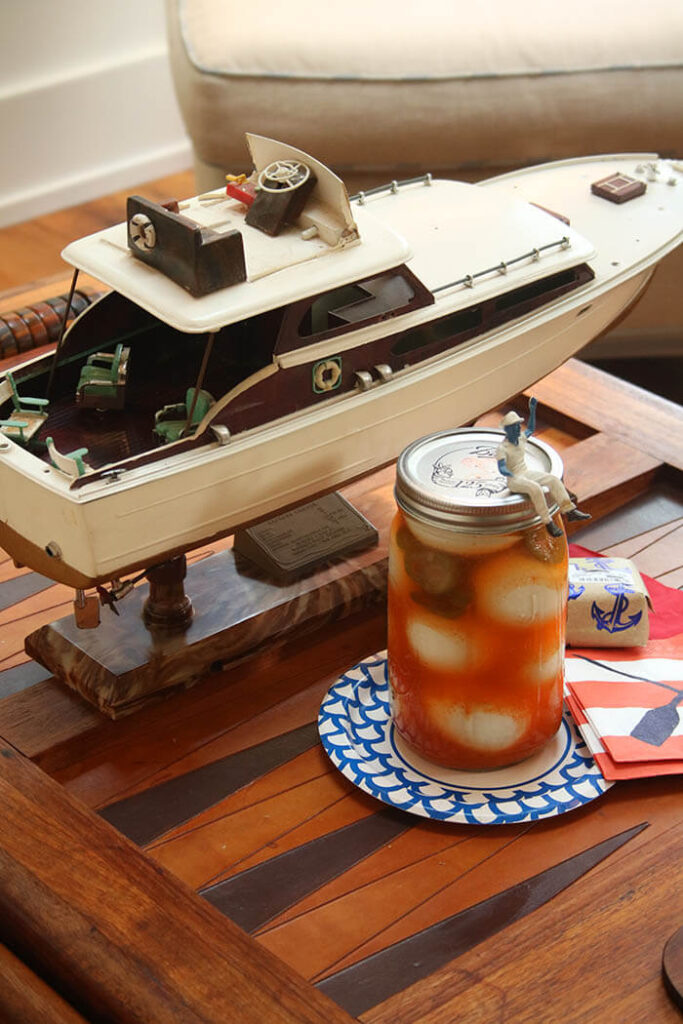
Scout goes out on Wednesdays all summer to watch races from the Grand River Sailing Club on the “big lake” (as any respectable west Michigander refers to Lake Michigan). The best racing weather is not the best Scout weather. Glassy nights don’t make for a great race. But fun, food, beverages, music and very deep conversations abound no matter the weather.


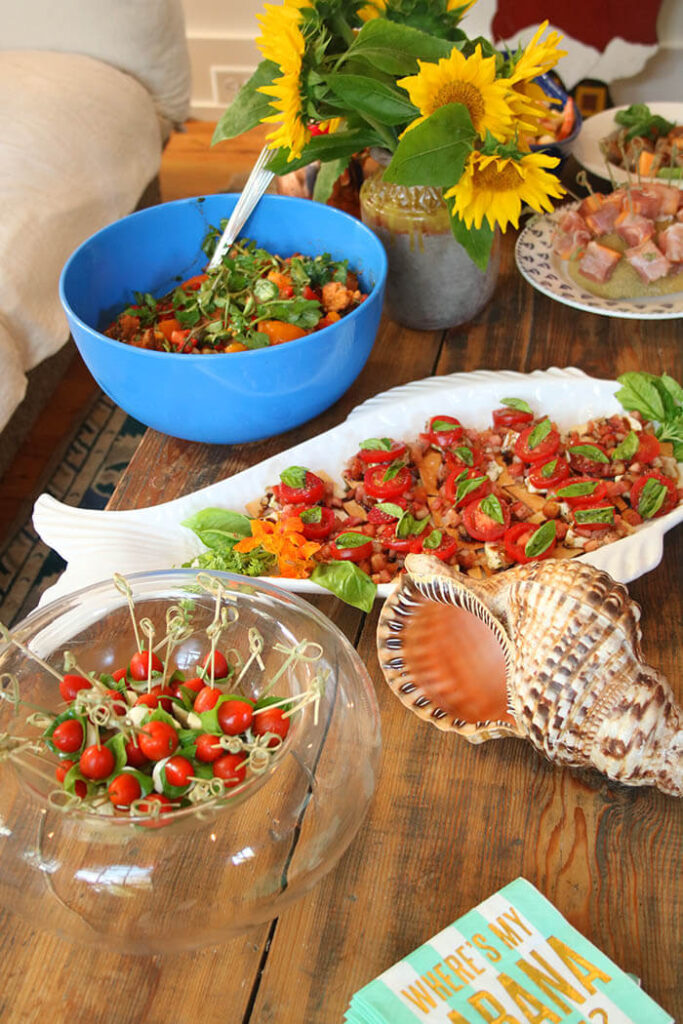
Sadly,3 foot waves and high winds precluded our “Scout”ing on the designated pot-lucky, so we headed inside and pulled out all the stops, tricking out the Captain’s Quarters to make it even more boat-like. Guests arrived with the most amusing and creative sacrifices to the pot-lucky gods. I loved that the theme came through in presentation, as well as ingredient selection. A self-proclaimed non-crafty guest fired up the printer and created picks for the best ever meatballs, adorning them with home-made burgees (flags) representing another local yacht club. And the most wonderful sausage/butter bean/poblano chili was served as if already the winning trophy. Or how about the goldfish, tossed in herbs and put in a fish bowl and served with a net? #Hilarious
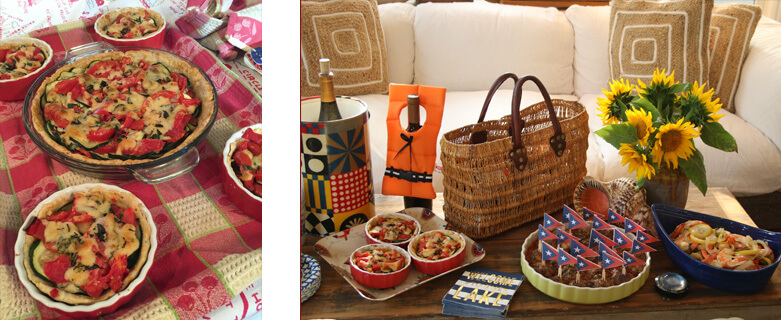

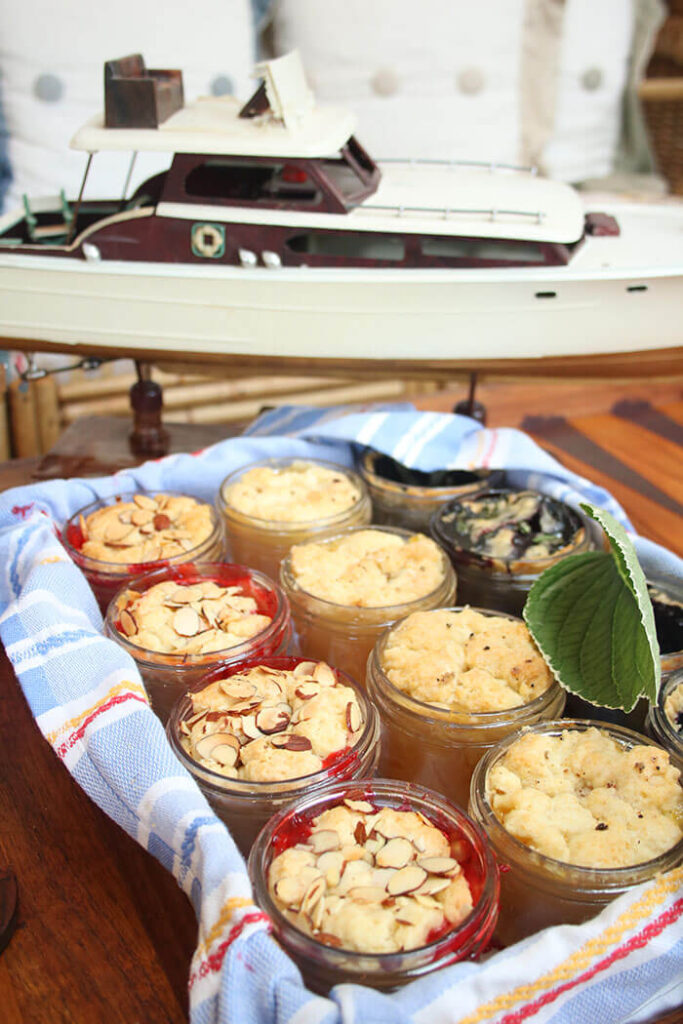
Not just looking good, the ingredients were carefully selected around the theme, as well. Tomatoes are at their peak and they appeared on Caprese skewers, panzanella bread salad, baked with Parm and herbs in a savory crust, and atop lavosh for a yummy mozzarella bruschetta topping. Spicy pickled eggs, already red and white, picked up their blue from a wandering model boat captain. And dessert goes all red, white, and blueberry – with cherries & almonds, white peaches, blueberries & basil. Yum.
In the end, it turned out to be an app exchange of epic proportions, as there were far more treats than even the most intrepid sailor could consume. Everyone went home with sacks to nosh on throughout the week. Note to self: pot-luckys require to-go containers!
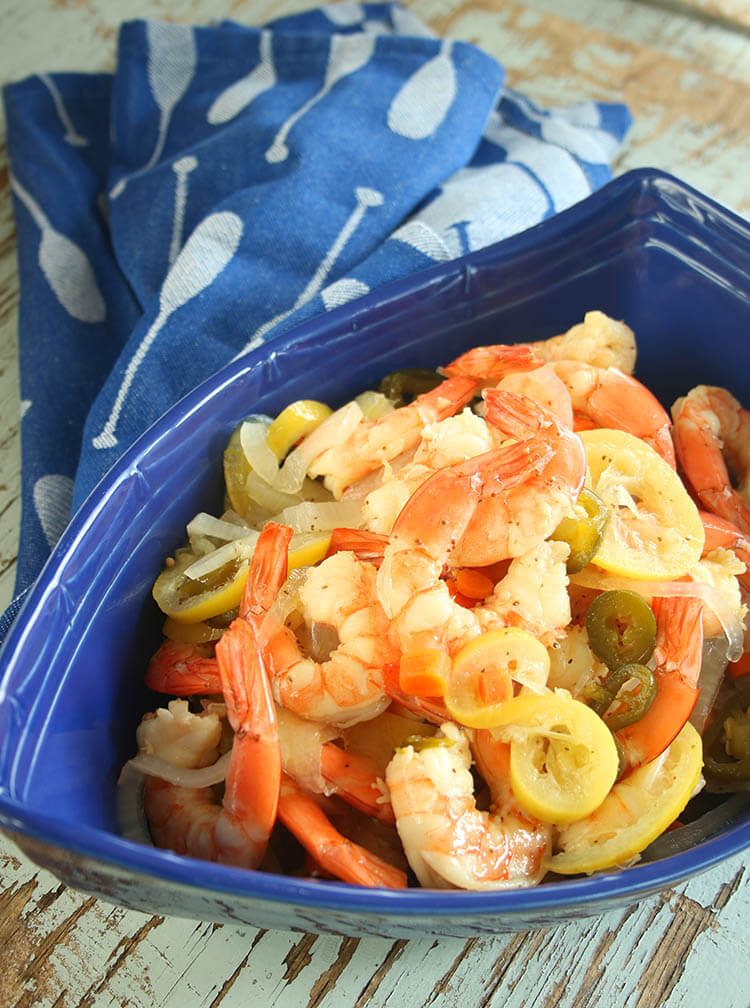
I represented with a pickled shrimp recipe that I first found from a neighbor who was a regular reader of Tasting Table. The recipe was adapted from Butcher & Bee in Charleston and Nashville. Here, it is adapted again. It’s a wonderful dish and a consummate hit and keeps for a week, if in fact you can manage to have leftovers. The original recipe didn’t work for scaling up to bigger quantities, but if you follow my seemingly fussy technique, you will get perfect results and can make as many pounds of shrimp as you want. The recipe below is for two pounds of shrimp. If you only make one pound, scale the remaining ingredients down by one third; for every pound you add over the two called for, scale the remaining ingredients up by 25% over those listed. ish. There is a lot of liquid and you definitely do not need to be linear in your math. Can you do that for me? If your poaching liquid does get too low, just add a little more water so that the shrimp are covered during their one-minute dip in the simmering brine.
Pickled Shrimp a la Butcher & Bee by way of me
- 4 cups water
- 2 ½ cups white vinegar
- 1 ½ cups cider vinegar
- 1 large onion, thinly sliced (I like Vidalia or other sweet onion)
- 2 garlic cloves, peeled
- 4 jalapenos, stemmed and cut into ½” thick rings
- 20 baby carrots, sliced in ¼” thick slices
- 4 lemons, thinly sliced
- 3 cups granulated sugar
- 1 ½ Tablespoons celery seed
- 1 teaspoon mustard seeds
- 2 Tablespoons sea or kosher salt
- 2 pounds raw shrimp, peeled, deveined, and tail on (I like 16-20 or 21-26)
Fill the sink with cold water and ice.
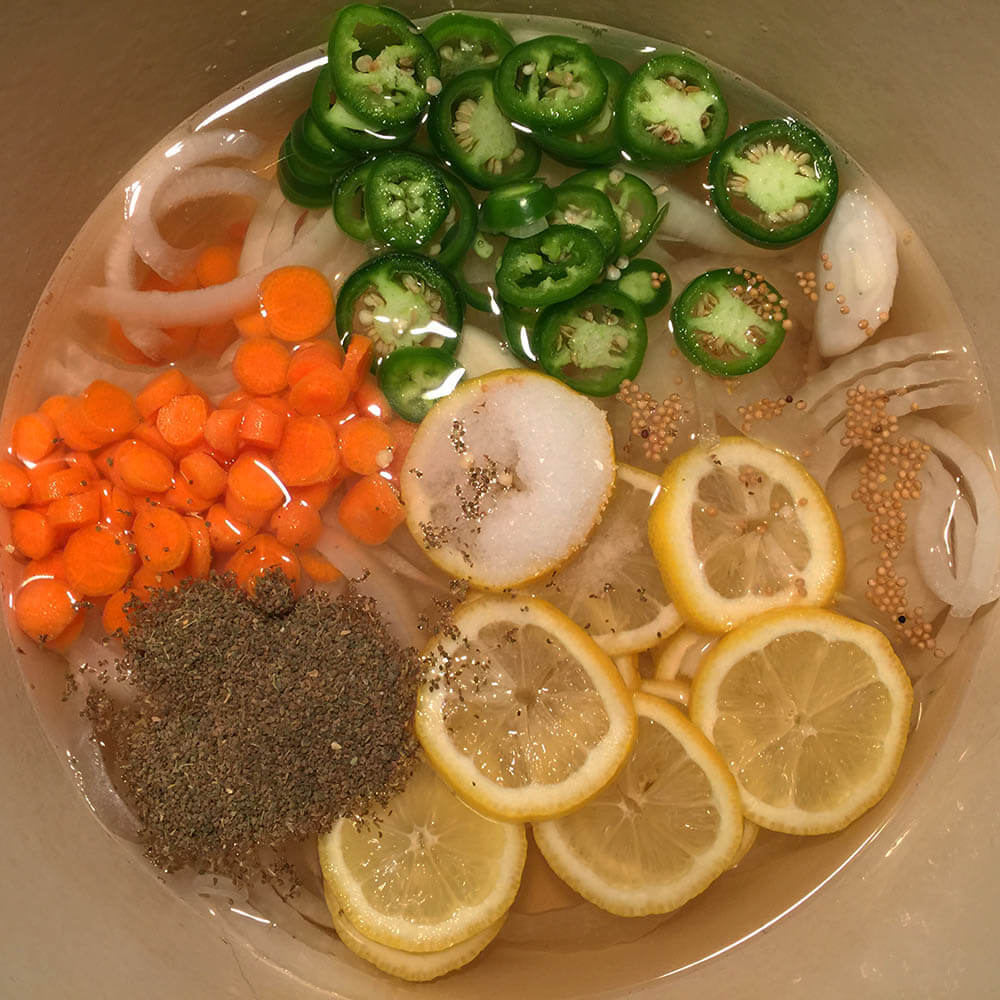
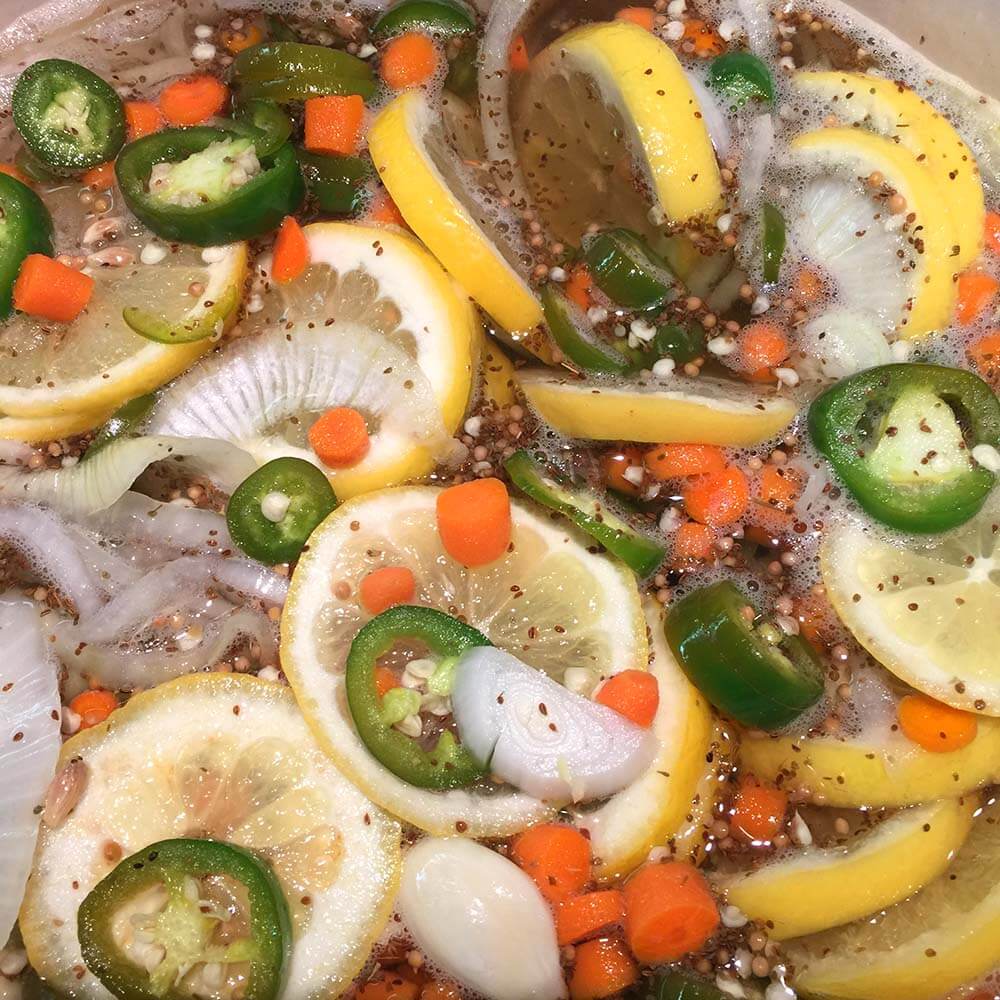
In a large pot, combine all the ingredients, except for shrimp, and bring to a boil.
Using a slotted spoon, remove the chunkies (i.e. everything that is not liquid) to a large bowl, along with 2/3 of the liquid. Be sure to get most of the celery and mustard seeds. (The remaining liquid will eventually be discarded.) Place the bowl in the ice bath and stir periodically to cool. When the brine is cool, refrigerate.
Place the pot back on the stove with what remains of the pickling liquid (about 1/3 of original), and bring back to a low boil Add the first pound of shrimp and when pink, about 30 seconds to a minute, remove with tongs or slotted spoon to a tray and allow to cool. Repeat with remaining shrimp, one pound per batch. The shrimp color should be set and they should be mostly cooked, but they will continue to “cook”, or more accurately cure, as they sit in the brine. When the shrimp are cool, add to the refrigerated brine & vegetables. Cover and refrigerate at least four hours, or preferably overnight. Discard the brine that was used for poaching the shrimp.
To serve, strain off the liquid and serve in mason jars with the pickled vegetables.
Serves 8-10.

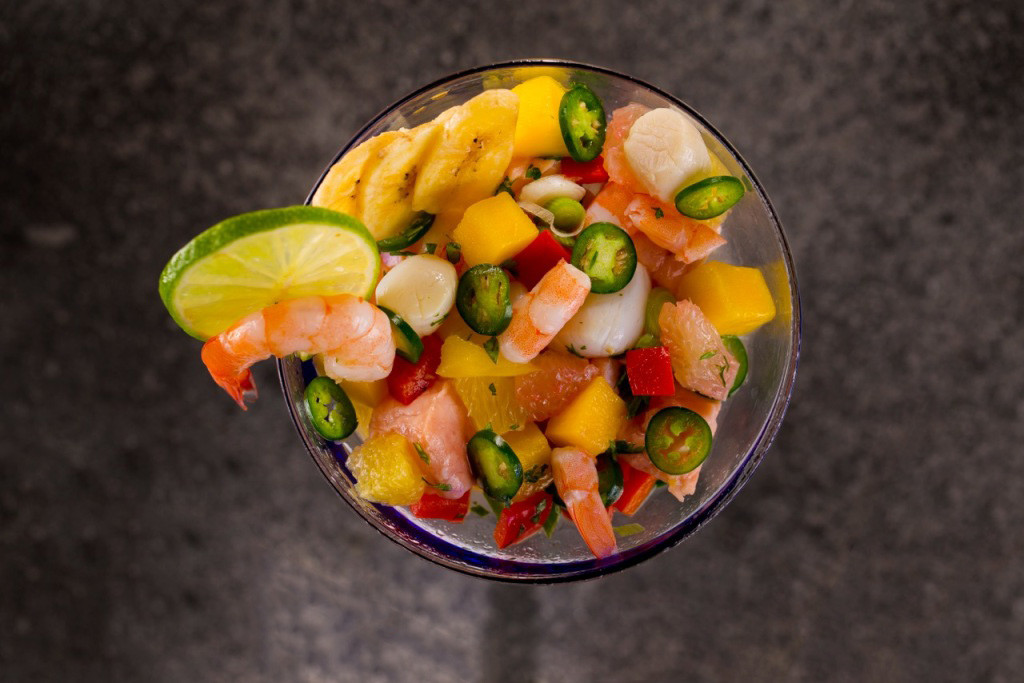
Need another shrimp idea?
Missed previous pot-luckys, or don’t even know what a pot-lucky is?
© Copyright: KatyKeck.com 2016. All rights reserved.
Hey, we want to hear from you!
Don’t forget to Comment, Share & Subscribe to our blog.
Aug 30, 2016 | Desserts & Sweets, Recipes, Savvy Kitchen Tips
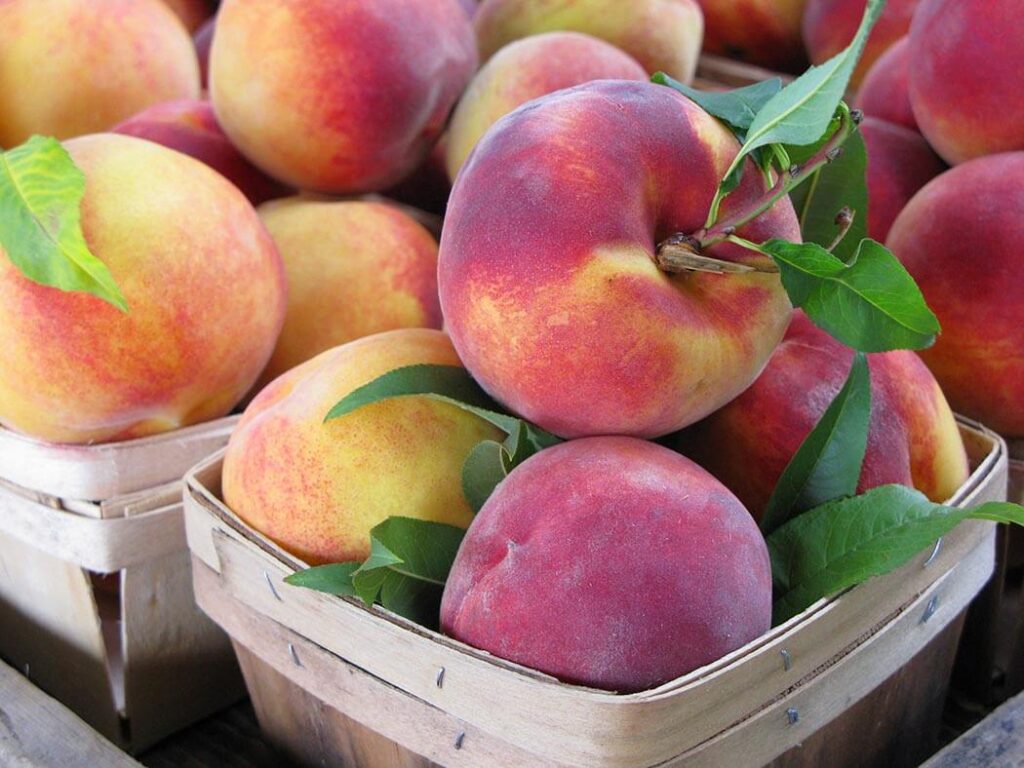
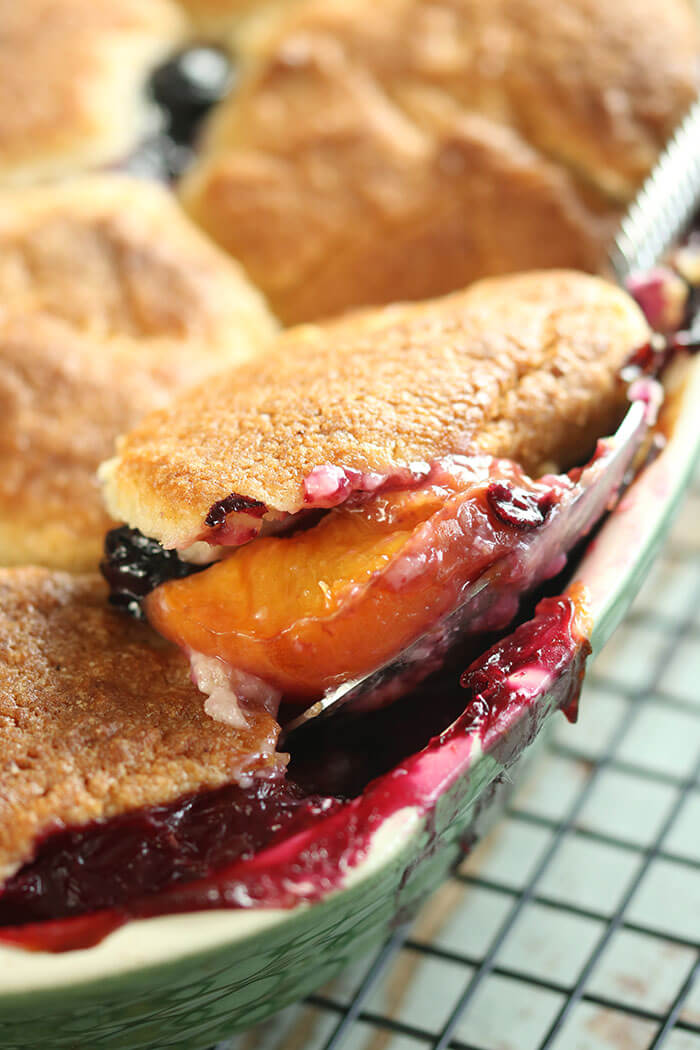
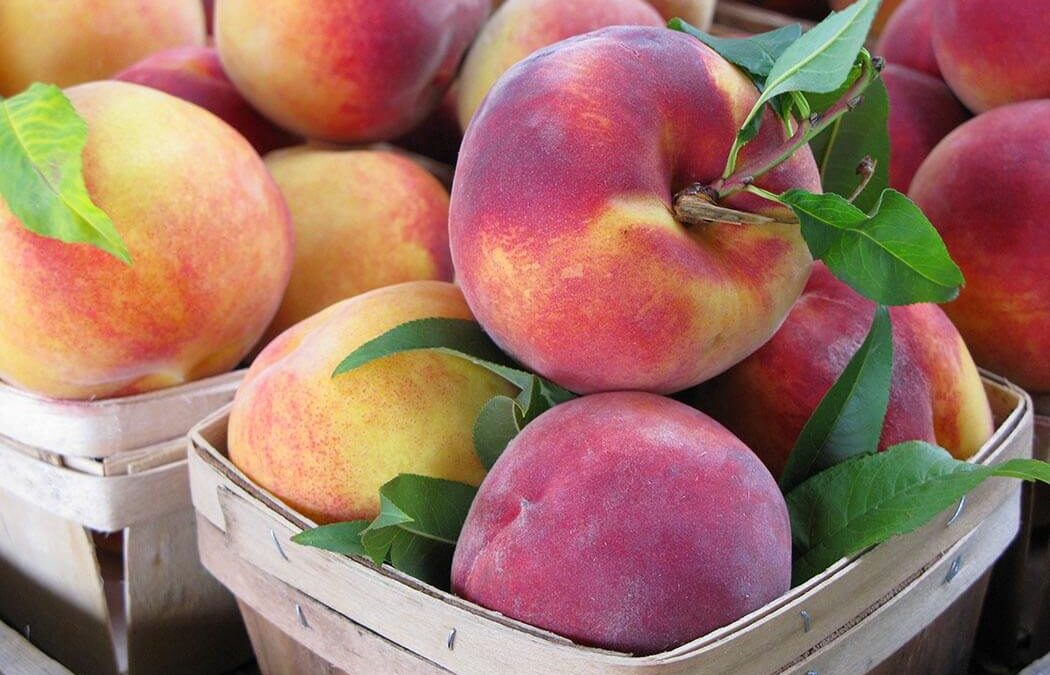
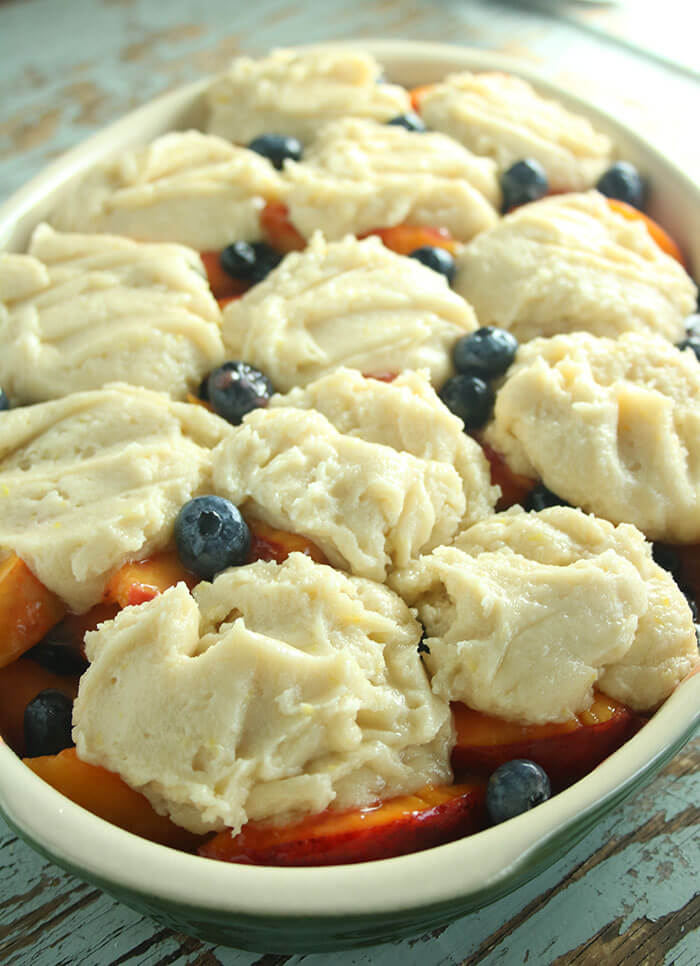
I can see the problem you are having. A giant mound of peach perfection and you are so tired of fruit pie and cobbler (Okay, we should probably admit that is NOT really a thing, being tired of pie and cobbler). But it’s a holiday weekend and you MUST use that beautiful bounty ASAP yet you would rather be on the beach, boat, SUP or _____(fill in the blank). So with that last hurrah of summer celebration hurtling toward you at ram speed, here’s a dessert that you can make in a flash, yet will look like you have been slaving away. Stone fruit –still abundantly available – is the perfect choice for this “cobbler, not-a-cobbler.” Cut into wedges, a peach or nectarine is sizable enough to hold its shape (ain’t nobody likin’ fruit mush) and comes with its own good dose of pectin. I throw in a few blueberries for a wee bit of flavor, color, and texture contrast, but warn against fruit with a high water content and thin skins (I got my eyes on you raspberries and blackberries.)
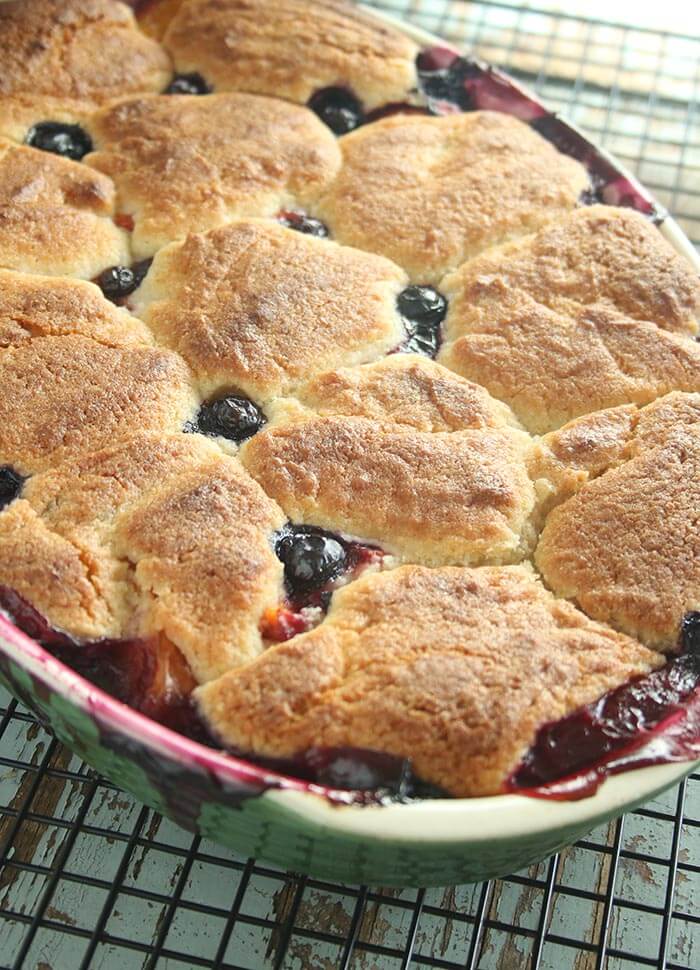
Normally a fruit cobbler comes with a streusel or pastry crumb topping, but I love this idea of biscuits. I would say it’s fresh and new, but since I created this dish at New World Grill some 20 years ago, I will settle on timeless. It’s hard to find a fruit pot pie at all, and the ones I have seen are made with a double pastry crust. This dish has no bottom – which means…..???? You got it!! No soggy bottoms!!! Pastry fraidies unite! You can do this!! Just cook the fruit with a little cornstarch stove-top then drop biscuit dough on top. Super easy to serve as well because everyone gets a heaping spoon of fruit topped with a biscuit topped with …Ice Cream? Whip Cream? Greek Yogurt? Yes. Yes. And Yes. Please. It’s dessert magic.
I have made this with peaches and nectarines (peel the peaches, but no need on the nectarines), but you might also try plums or apricots. And cherries could be a nice alternative to the blueberries I use. Just keep a sturdy skin in mind when improvising. And always let a fruit dessert cool to avoid the juice-bomb. This is best served same-day, an hour from the oven or reheated. Biscuits are a bit of a diva when it comes to humidity, so the longer it sits around the less flaky they will be.
I learned to make traditional biscuits from a woman who said “handle them like you are holding hot coals.” (It was a KFC shoot and we must have made 1000 biscuits). It was good advice – don’t touch them much at all. Biscuits are made by cutting little tiny bits of ice cold butter into the dry ingredients, so that each pea-sized bit is flour-coated. Then you gently add the liquid – buttermilk, perhaps – until it just holds together. If you hot-handle the dough, the butter will start to melt. The butter should melt only once – in your honking hot 425oF oven – because that creates steam and that, my friends, provides lift. Voilà! Flaky!!
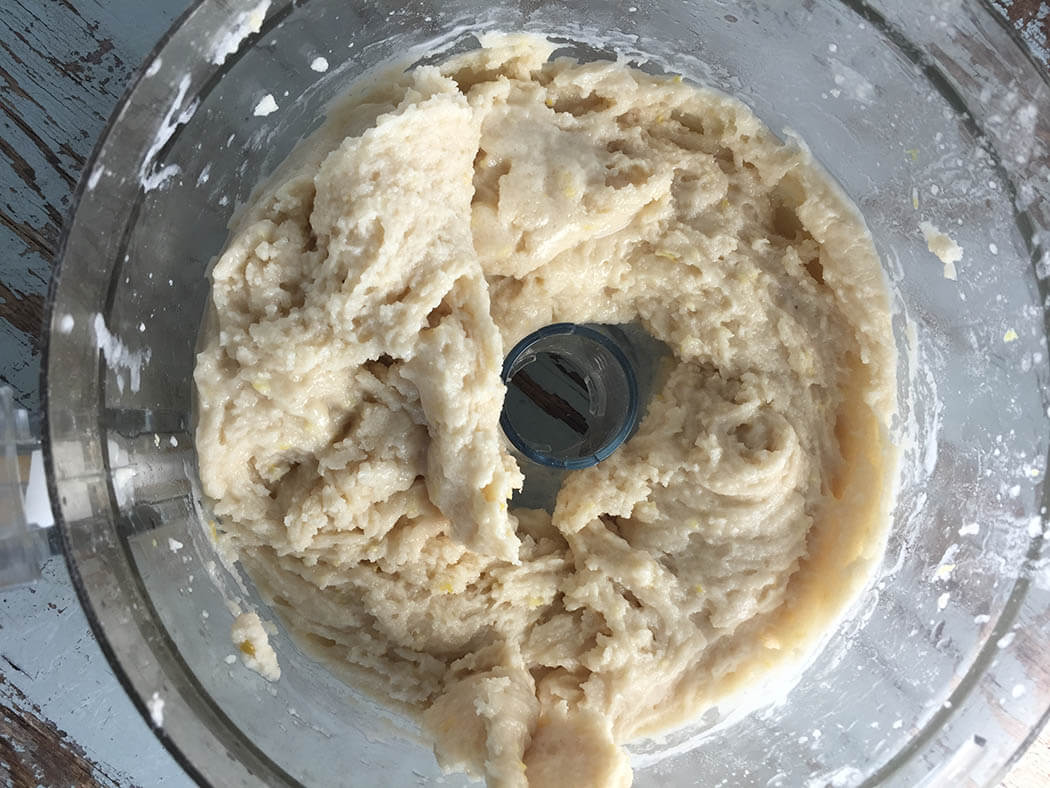
The other reason to lightly handle the dough is to avoid overworking the glutens which will make a tough and sometimes shrunken biscuit. (That joke just wrote itself. I don’t even have to put it in words.) I got you covered here, this dough is NOT fussy and is made in the processor and uses a small amount of boiling water to pull the dough together. It’s a bit of the opposite of everything I have just said – no hot coals. This makes it super simple and you can get away with it in part because it is going atop hot fruit which will also create some steam.
Summer Fruit Pot Pie
Fruit Filling
- 8 cups pitted and sliced nectarines, about 8 pieces or 4 pounds
- Juice of one lemon, about 3 Tablespoons (please zest it first and save the zest for the biscuit)
- 1/2 cup sugar
- 3 Tablespoons corn starch
- 1/2 cup cold water
- 2 cups blueberries
Biscuit Topping:
- 2 cups all-purpose flour
- 1 cup sugar
- 2 teaspoons baking powder
- 1 teaspoon salt
- Zest of one lemon
- 6 ounces ice-cold butter, cut into bits
- ¼ cup + 2-3 Tablespoons boiling water
Preheat oven to 425oF. Butter a 9x13x2-inch 3-quart casserole.
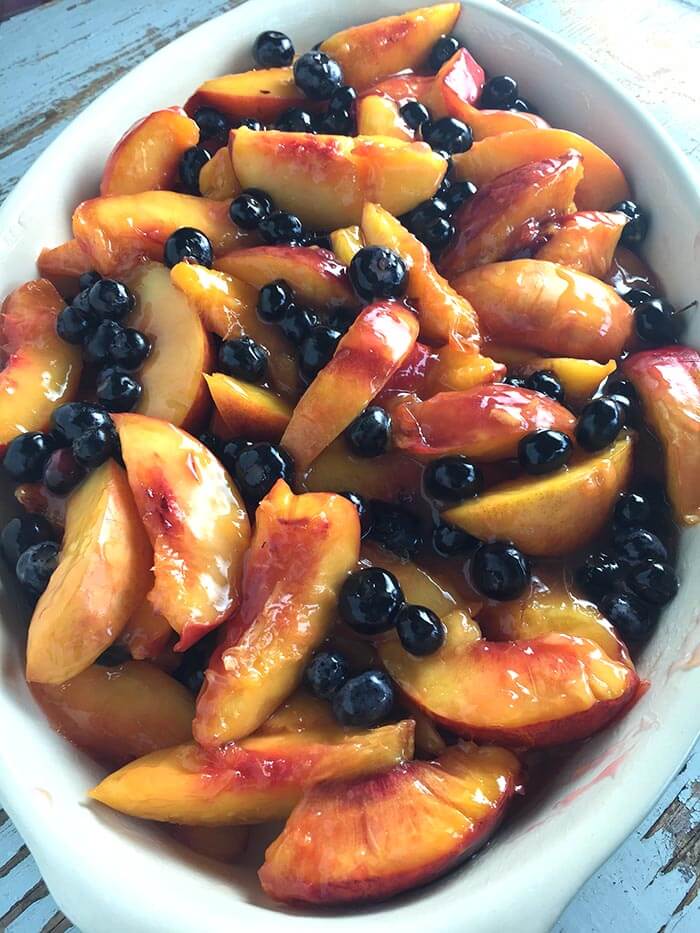
Start the Fruit: Combine the nectarines with the lemon juice and sugar. Set aside. Dissolve the cornstarch in the cold water and set aside for 5 minutes.
Start the Biscuits: Combine flour, sugar, baking powder, salt, and lemon zest in the work bowl of a food processor. Pulse to combine. Cut in the butter with the food processor, by pulsing 8-10 times, until the mixture resembles coarse meal. (You can also use a pastry cutter).
Back to the Fruit: Combine the nectarines with the cornstarch in a saucepan. Bring the cornstarch-nectarine mixture to a boil, and cook for 1 minute. Remove from heat and gently fold in the blueberries. Transfer fruit mixture to the casserole.
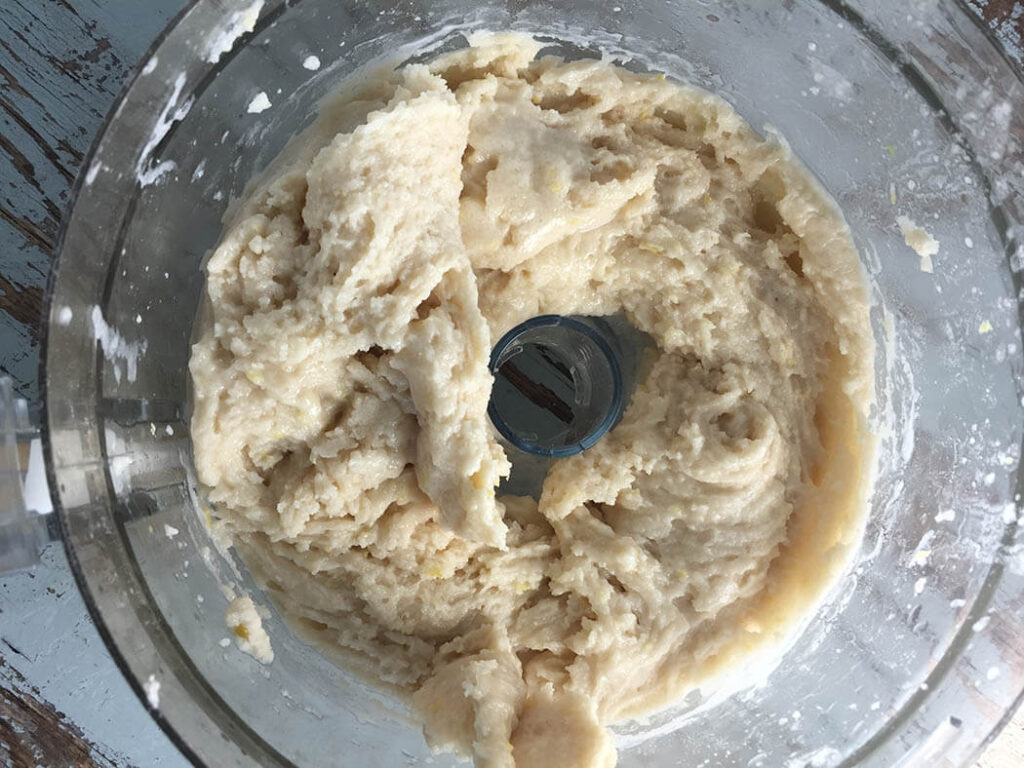
Finish the biscuits: Slowly pour in ¼ cup boiling water and pulse a couple times until just combined. Scrape down sides. Add additional water one Tablespoon at a time, up to 3 additional Tablespoons. Pulse with each addition until dough just comes together and becomes spoon-able. It should remain a bit stiff and not turn gooey. If you add the water all at once, you run the risk of adding too much liquid and melting the butter. Add it gradually and it will just slightly soften it. Drop the dough by scant 1/4 cups onto the fruit to form 12 biscuits. Use a spoon or small spatula to ease the dough out of the cup. All that butter will let it slide out quite easily.
Bake in bottom third of preheated, foil-lined oven for 35 – 40 minutes until fruit is set, biscuits are golden, and a toothpick inserted in a biscuit comes out clean. If the biscuits are getting too brown, cover loosely with foil for the last 10 minutes or so. Transfer to a wire rack to cool slightly. Cool for about an hour, to let the juices set. Serve while still warm or reheat if it has cooled. Top with ice cream, whipped cream, or plain Greek yogurt.
Serves 12 grateful guests.

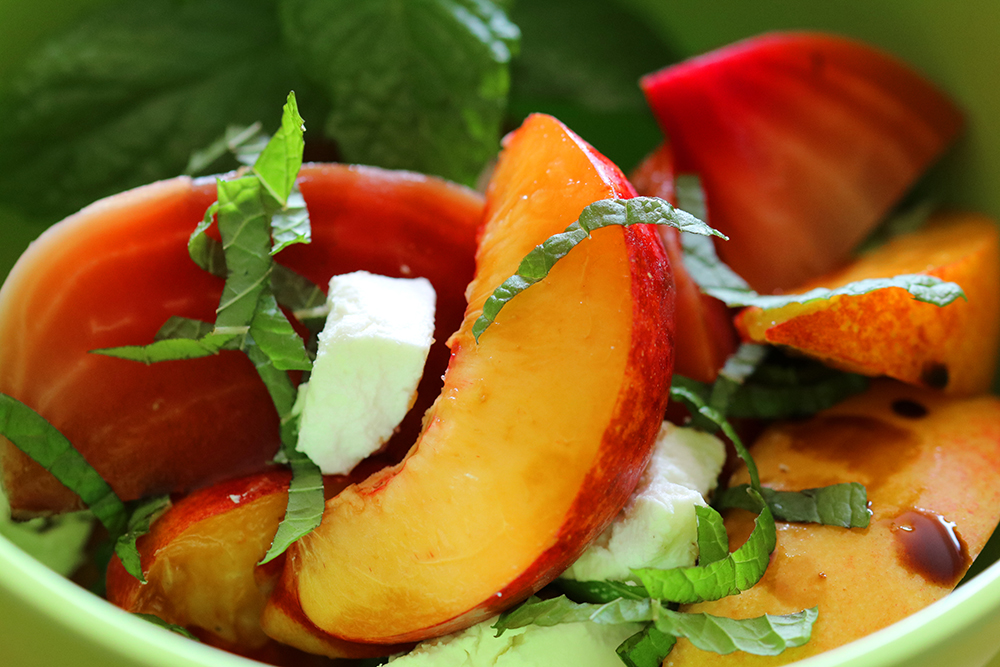
Still got peaches or nectarines a plenty? Don’t forget our old friend – roasted beet and peach/nectarine salad!
© Copyright: KatyKeck.com 2016. All rights reserved.
Hey, we want to hear from you!
Don’t forget to Comment, Share & Subscribe to our blog.
Aug 27, 2016 | Dressings & Sauces, Recipes, Salads, Sides
This time of year when the tomatoes are hanging ripe and juicy, heavy on the vine I am often reminded of two lively ladies from London whom I met styling Panzanella Bread Salad at the Today Show for their River Café Cookbook. Rose Gray and Ruth Rogers set up shop in the Hammersmith section of London along Thames Wharf in the late 80s. It was a stylish and very popular place (still is) and a launching pad for the new generation of star chefs, Jamie Oliver and April Bloomfield, among them. But despite its iconic status and reputation for exclusivity, the restaurant is most famous for serving the kind of familiar food you might eat in an Italian home. Simple, rustic and full of flavor. But don’t be fooled by the seeming simplicity. It takes a lot of work to look that simple. The recipes in that first book were extremely demanding and there is some chance that I resented all those details, if ever so slightly. I had to squeeze and sieve tomatoes by hand to get cups and cups of tomato juice. I had to make A LOT of dishes and each seemed to have endless lists of both ingredients and steps. But I did get what they were doing. They had an immense respect for ingredients and exerted what some called a “moral pressure” to be precise. I like to think I am a bit more of realist than they, and I always point the way toward short cuts when possible. But then again, the Queen hasn’t awarded me with the Most Excellent Order of the British Empire. Yet.
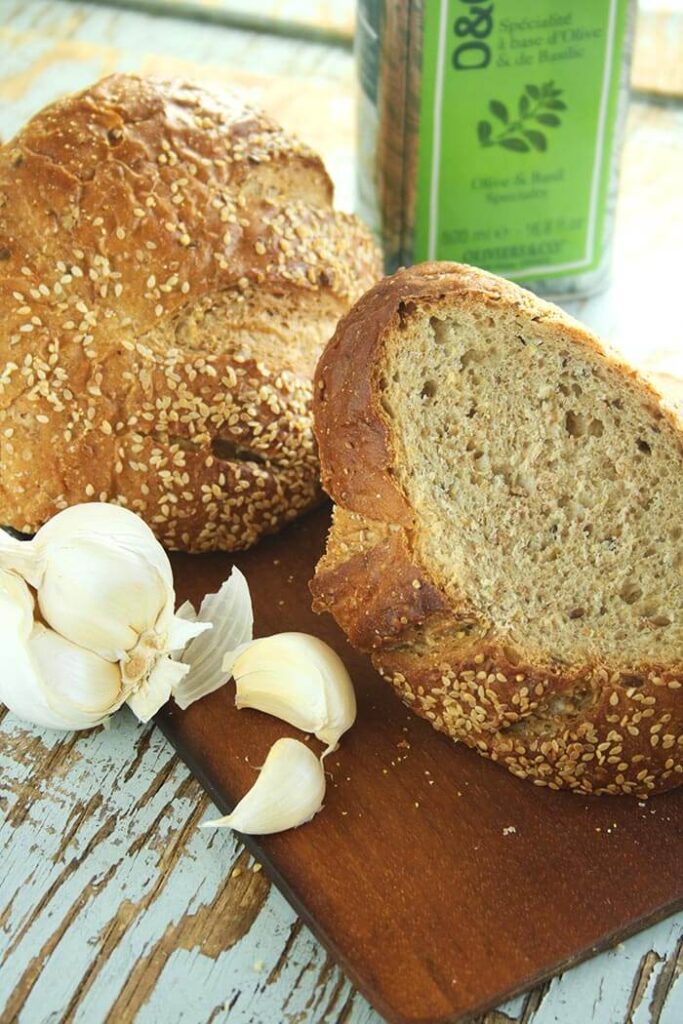
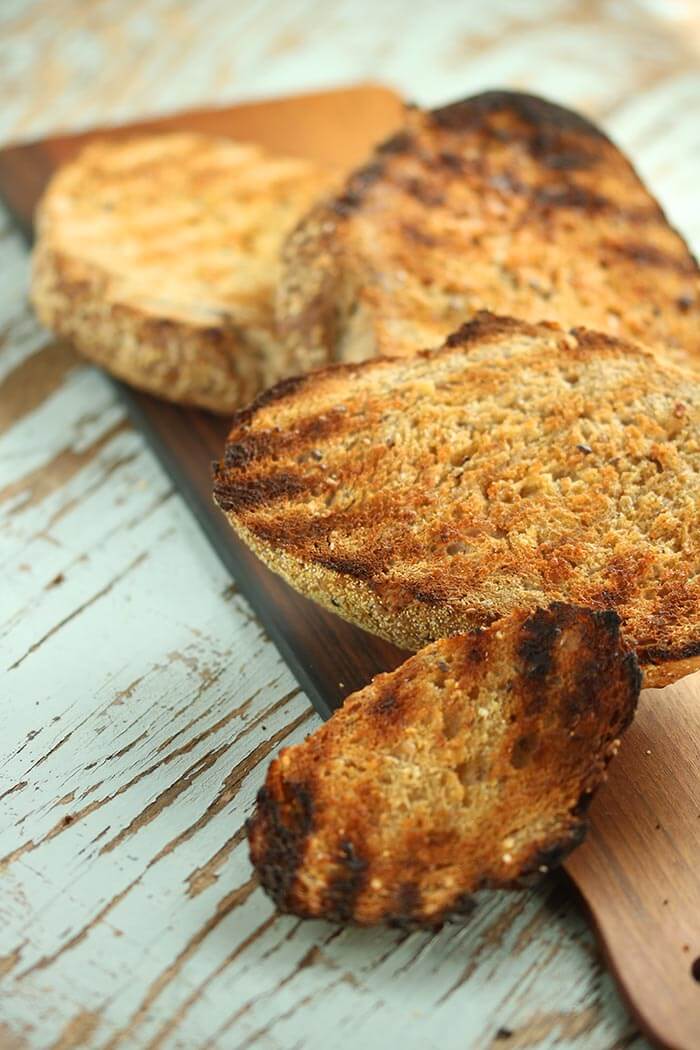
Panzanella – a Tuscan bread salad which incorporates day-old bread – is best when tomatoes are at their peak. N.O.W. Authentic bread salads do not toast bread, but rather rely on stale bread. The traditional panzanella is made with a bread that stales quickly on its own, having been made without salt, a tradition that dates back to the days when salt was heavily taxed and therefore used only for essentials like curing meat and preserving milk (cheese). Bread made without salt will dry out quickly – hence the abundance of Tuscan recipes using stale bread, many of which Ruth and Rose served at River Café: bread soups like ribollita, pappa al Pomodoro or acquacotta. These recipes use this very stale bread, soak it in liquid, and then crumble it into the dish. In our modern American lifestyle, we’re less likely to have stale bread laying around, so I stale it up here by rubbing with garlic, brushing with olive oil and putting the slices on the grill (or under the broiler), then hand tearing and leaving the cubes out to stale a bit more.
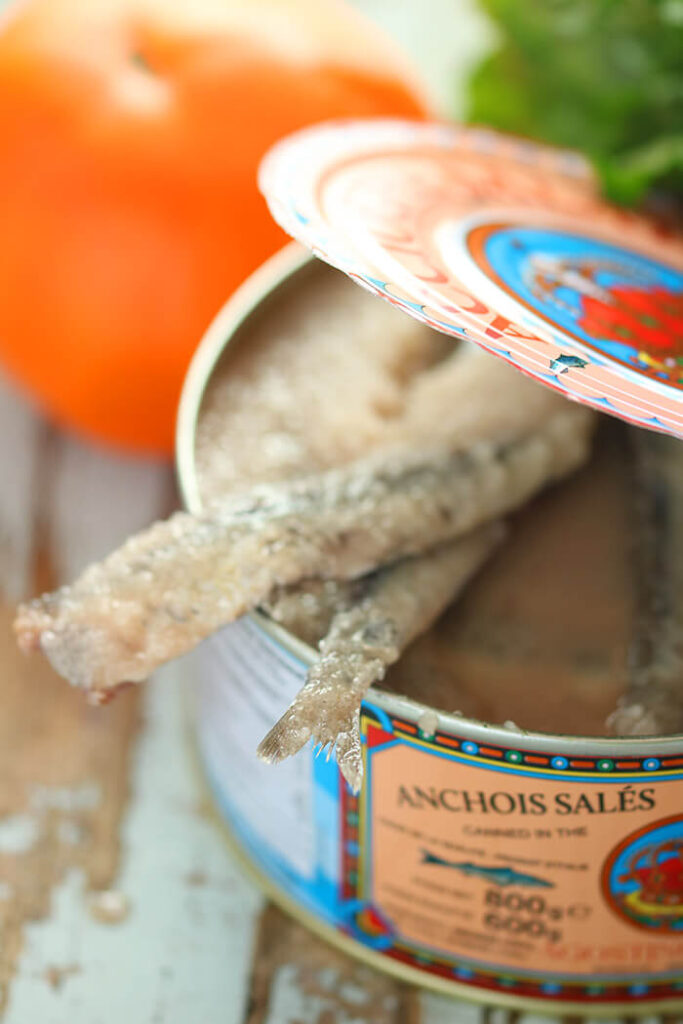
Another precise ingredient Ruth and Rose call for in this recipe is salt-packed anchovies. I know you are already moving toward delete and curling your lip. Stop it. Right now! I promise there are other options, but let me make a brief case for the lowly anchovy, starting by pointing out that I think I know why you are not a fan. In the US, we are exposed to tiny tins of little hairy fish often slapped atop pizzas. Why? Exactly! Why? They are hairy, oily and full of little bones. On the other end of the slimy fish spectrum (trademark pending) are salt-packed anchovies, bearing little resemblance. They are big enough to pry open with a thumbnail and easily lift out the bones. And the salt has wicked away the nasty fishy oils that we don’t so much like. The rich and unctuous saltiness amplifies other flavors and provides an umami (the fifth taste after sweet, salty, sour, bitter) that is impossible to recreate with salt alone. #depthofflavor You won’t have a clue there are fish in this, but you will wonder how tomato juice got this damn tasty. If you don’t want to take the trouble sourcing them (Trouble? Really? Salt-Packed Anchovies are in my shop and available at amazon prime!), go ahead and use the hairy fellas in the little tin. Just cover them in kosher salt and set aside for 20 minutes. That is the easiest DIY way to pull out the fish oils. Just be sure to rinse well and pat dry. These little ones are okay to throw in the blender whole, as their bones will pulverize. If you go the distance – yeah, you! – don’t worry about all the leftovers. Just transfer the remaining salt-packed anchovies from the metal tin into a glass container with air-tight lid, and cover with sea salt and a few drops of water to dissolve the salt. They will keep for a very long time, refrigerated and covered.
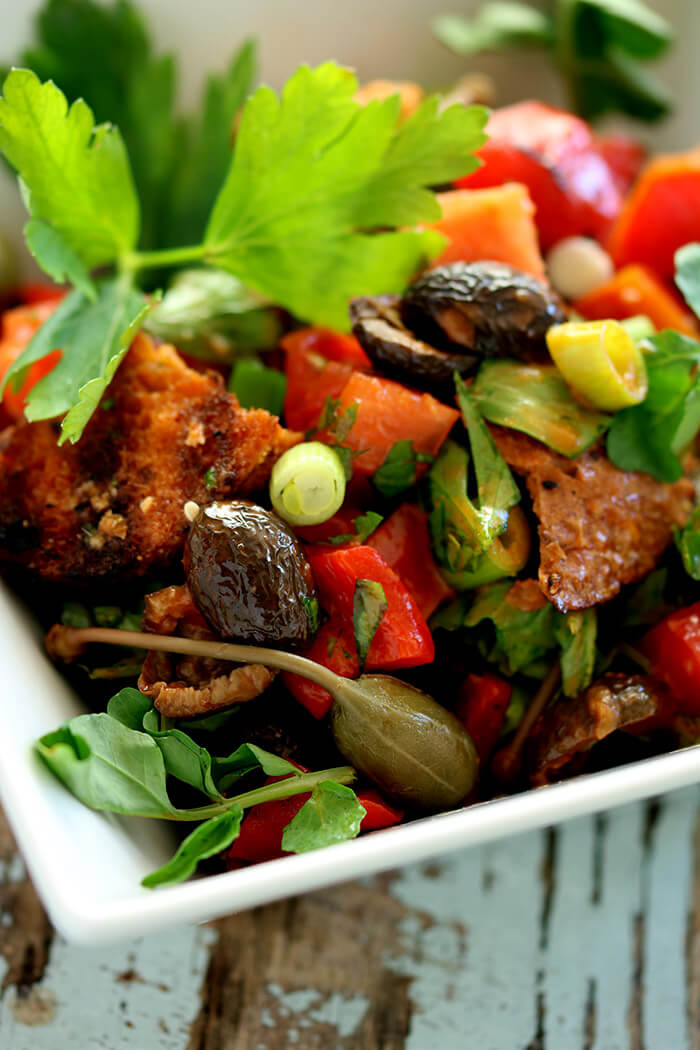
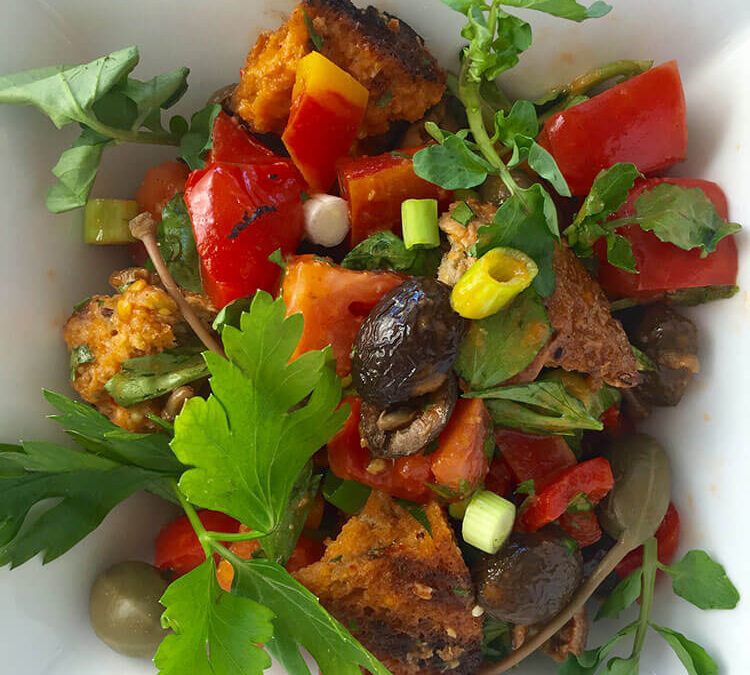
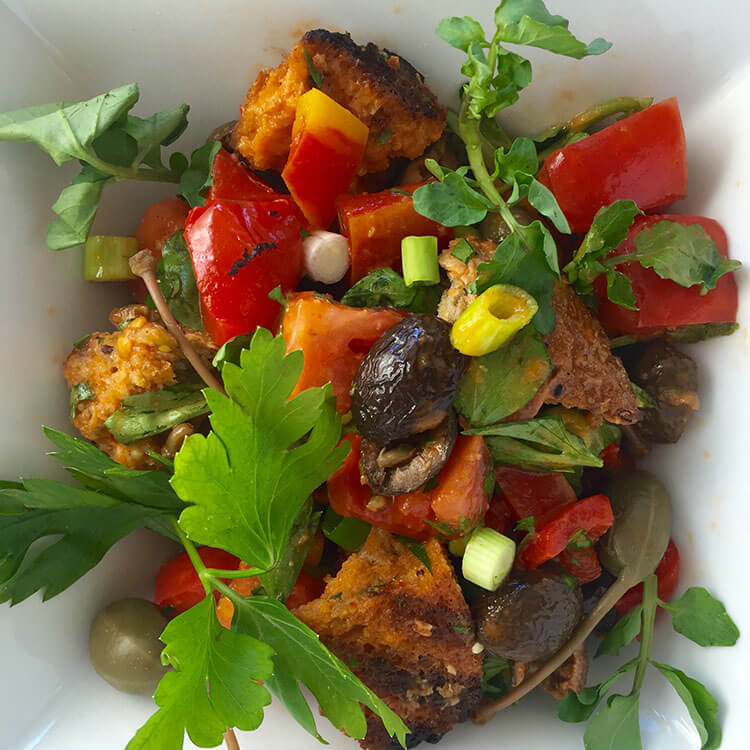
Rustic Tuscan Panzanella Bread Salad
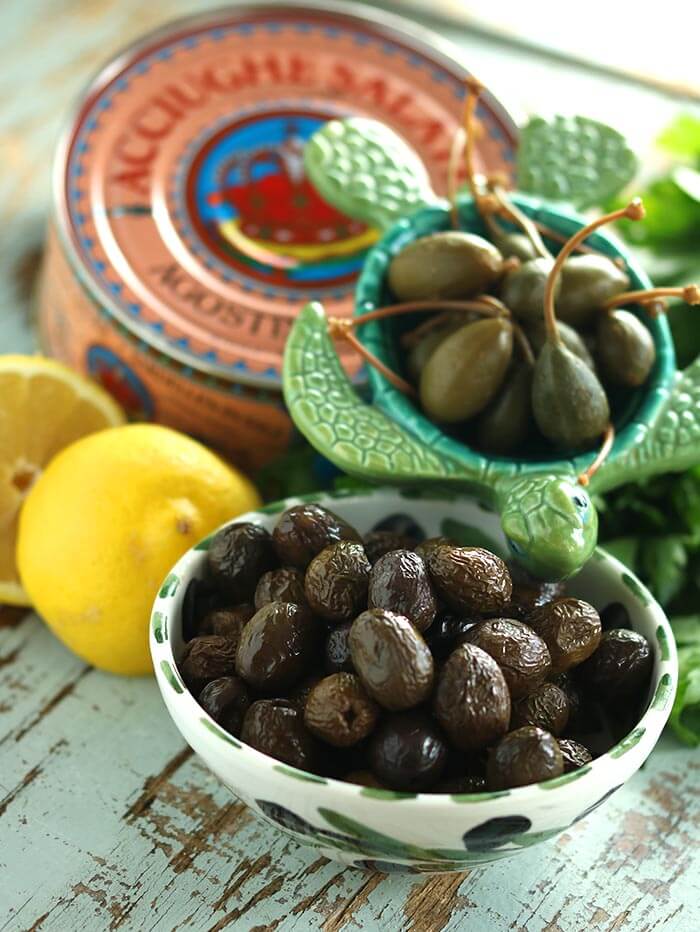
Full disclaimer: you would be hard-pressed to find a salad in Tuscany that looks like this. I have taken the liberty to super-size it American-style: Bigger, less delicate, chunks and a combo of ingredients (in addition to the ubiquitous bread, peppers, and tomatoes) that add both pops of flavors and texture contrasts. Caper berries and oil-cured olives are mine, all mine.
The panzanella bread salad below will use a bit more than half of this dressing. But if you are putting the time into sourcing the ingredients, you will be sorry if you don’t have leftovers. I stopped short of giving you the ratios needed to fill a tub, but you may want to bathe in it. It’s that good. I have short cut the hand squeezing of tomatoes, so use that time to try to find oil-cured olives. Of course you can use pitted water-packed canned black olives….if that’s your cup of tea. But some day give the oil-cured olives a whirl. They are what olives should taste and feel like. And when you are pitting them by hand, don’t cuss at me – think of Rose and Ruth, putting a little “moral pressure” on you.
Spicy Tomato Vinaigrette:
- 1 1/2 cups tomato juice (or two 5.5 ounce cans)
- ¼ cup red wine vinegar
- 2 Tablespoons lemon juice
- 6 cloves of garlic, peeled
- 6 Salt-Packed Anchovies, soaked for 5 minutes, rinsed, bones pulled out, and patted dry (see notes above and below about anchovy options)
- 1/2 teaspoon red pepper flakes
- 1 cup EVOO
Combine all the ingredients, except olive oil, in a blender and puree until the garlic and anchovies are incorporated. With the motor running, pour the olive oil in a thin stream, until all is incorporated and the dressing is emulsified. Listen for the motor to change sounds as you finish with the oil and saturation is reached with the emulsification. It should go from a noisy high-pitched whine to a smooth whir.
Keep in the refrigerator in an airtight container until needed.
Makes 2 2/3 cups vinaigrette.

Panzanella – Best Ever Bread Salad
- 1 pound loaf 1-2 day-old chewy good-quality bread (I used sourdough with seeds), cut in 1 ½” wide slices (about 5 slices)
- Garlic and oil to brush the bread
- 1 ½ cups Spicy Tomato Vinaigrette
- 3 large ripe tomatoes (combo of red and yellow), cut into large chunks
- One 12-ounce jar of roasted red peppers, drained and diced
- 1 yellow bell pepper, seeded and diced
- 1 bunch of watercress, stems removed and torn into bite-sized pieces
- 1 bunch scallions (about 5 or 6), sliced
- ½ cup pitted oil-cured black olives (or whatever olive you prefer)
- One 4-ounce jar of Caper Berries in Brine
 (or capers), drained
- ¼ cup coarsely chopped parsley
Rub the bread slices on both sides with a smashed garlic clove and brush with olive oil. Grill over a hot grill or toast both sides under the broiler or in toaster. Let cool, and then tear into large bite-sized pieces. You should have about 8 cups of bread chunks. Spread out on a sheet pan and let “stale up” a bit more. You can prep to this stage several days ahead. Once they are dried out, store in a zip bag.
Two hours before serving, toss the stale bread cubes with ¾ cup Spicy Tomato Vinaigrette. Set aside.
When ready to serve, add the remaining ingredients and toss with additional vinaigrette, as needed. This is where I normally say taste seasonings and adjust, but this is so full of flavor I can’t imagine what you could do to improve it. Damn, that’s tasty!
Closing arguments for the Case of the Anchovy: If you really really really can’t see your way past their bad reputation, use salt to taste, and maybe even a splash of soy in your vinaigrette. Soy Sauce in all its fermented glory might give you a hint of the umami you’ll be missing. Just know that Rose is rolling in her grave and there isn’t a snowball’s chance in hell that Ruth will ever confirm your dinner reservation. Choice is yours.
Serves 8-10 and makes fabulous leftovers.

This post contains affiliate links. For more of my must-have faves, check out my shop.
© Copyright: KatyKeck.com 2016. All rights reserved.
Hey, we want to hear from you!
Don’t forget to Comment, Share & Subscribe to our blog.
Save
Aug 13, 2016 | Dressings & Sauces, Recipes, Salads, Sides
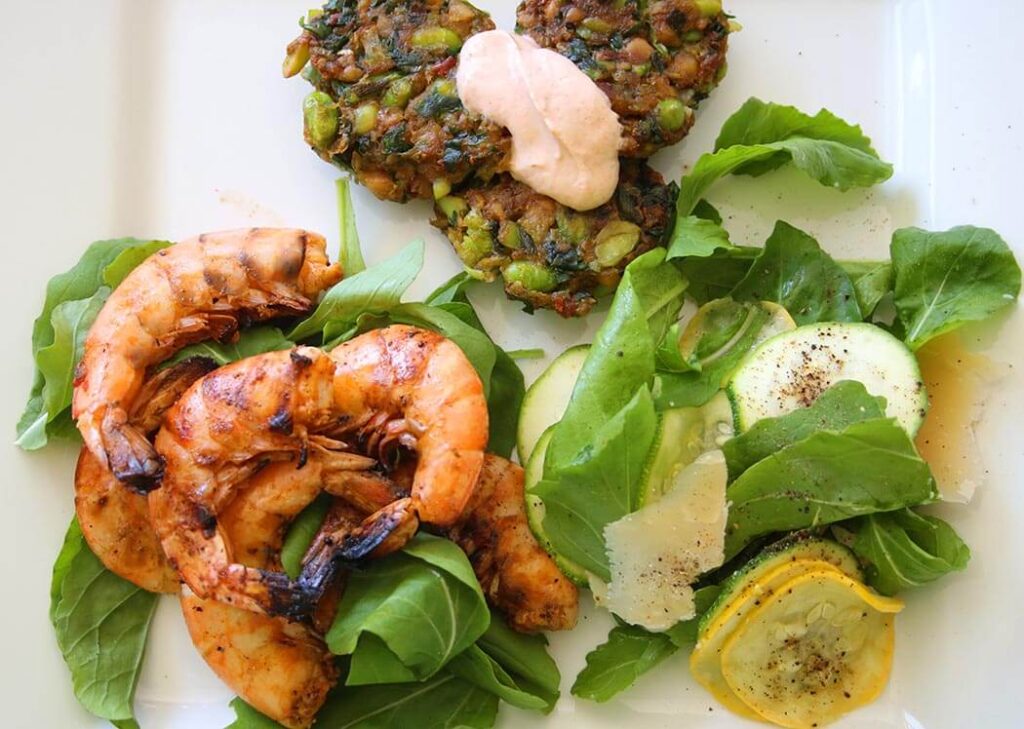
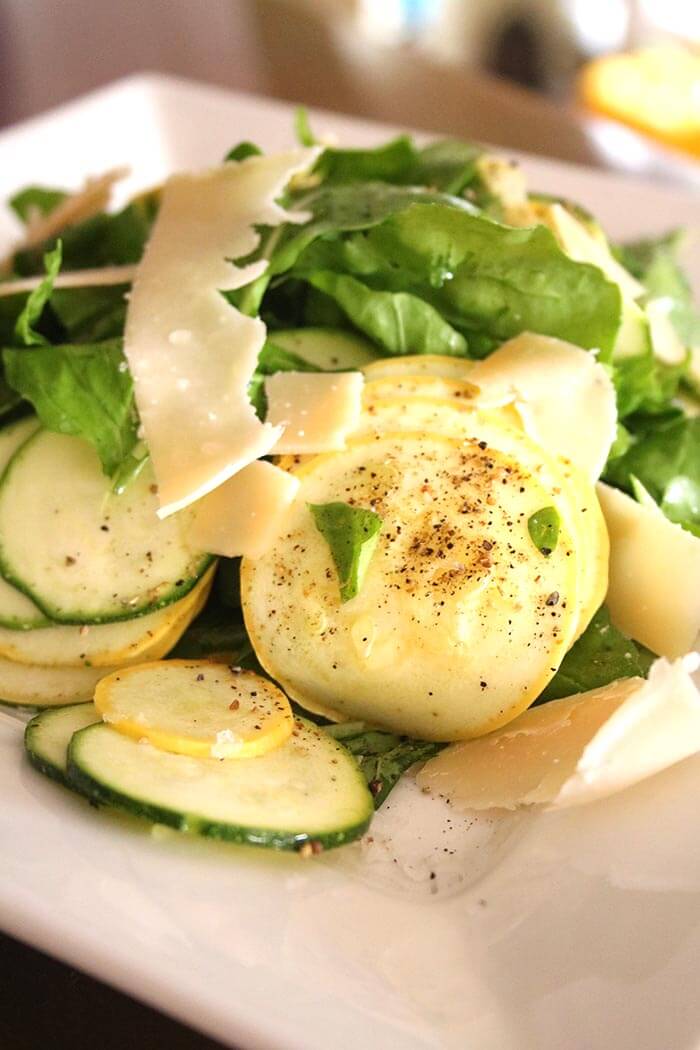
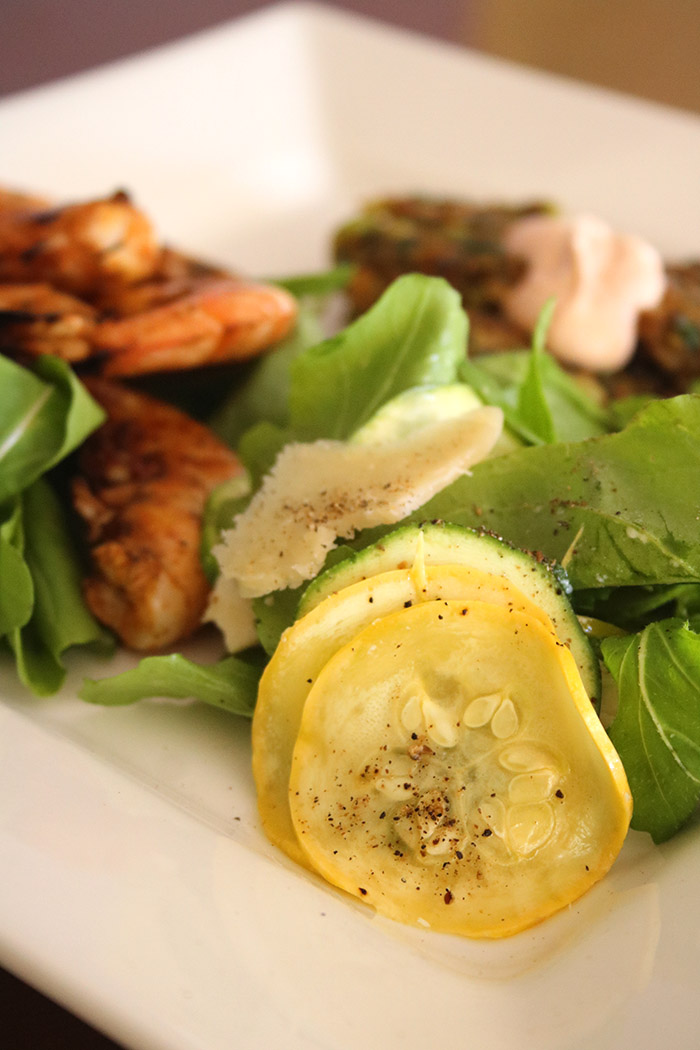
How is it exactly that “Salad Days” has gone from meaning green and naïve (Shakespeare’s Antony and Cleopatra) to the more current American connotation of being at one’s heyday or pinnacle? So American, right? Wait long enough and it can mean whatever you want. And what I want is green – as in green salad with green (and yellow) summer squash. It’s reparation for making you go to that 425o kitchen last week, chasing a cherry pie. This one is perfect for these oppressive muggy days. You won’t have to turn on a thing.
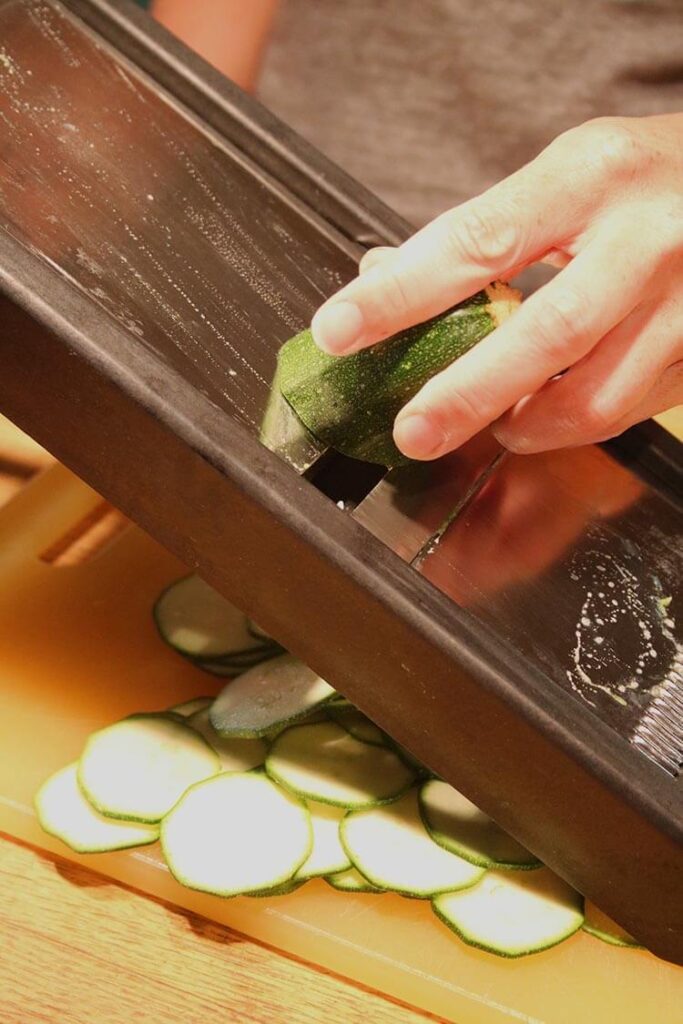
I have to admit, I never really thought about raw squash as a tasty treat, finding it a bit pithy and bland. However a couple summers ago I was on a media tour for a client and met a journalist at a farm to table restaurant in NYC where I promptly fell in love with a version of this salad. The trick is to thinly slice the squash – as paper thin as possible. I like using a mandoline and particularly like the Matfer Mandoline .
.
I once styled a cooking segment on the Today Show for the best chef in the Army, and he turned me on to this fine piece of equipment. I have had it for 15+ years and it is still in great shape. It’s got good safety features, so it’s not scary like some mandolines, and it doesn’t pit or corrode like the one I got in France a zillion years ago and need to toss. Chef arrived on some kind of Army transport so he didn’t have to worry about blades at TSA. However his most important travel companion was an 8 1/2 x 11” flat piece of striped genoise sponge cake that was created by piping razor thin lines of alternating chocolate and vanilla batter. He used it to line a tall glass trifle bowl for an elegant presentation. And he carried it in a manila file folder. Filed under P for pastry? I was pretty much speechless. Given the turn of world events, I often wonder if our military still carry pastry in their file folders.
After first tasting that salad in NYC, I have tweaked it pretty much every time I make it and this is how it rolls this summer. A dear friend recently delivered a spice jar filled with a pepper blend which I found I couldn’t live without. I burned through that jar in short order and have now made my own. Mine seems a lot darker than hers so I suspect mine has more black pepper. She even recommends adding green peppercorns to the mix, but so far I have not tried that. I love the KitchenAid coffee grinder to grind all my spices – and now they have an even better model that comes with an additional bowl fitted with a blade optimized for spices, in addition to the primary bowl specifically tooled for coffee – two gadgets in one – KitchenAid Blade Coffee and Spice Grinder Combo .
.
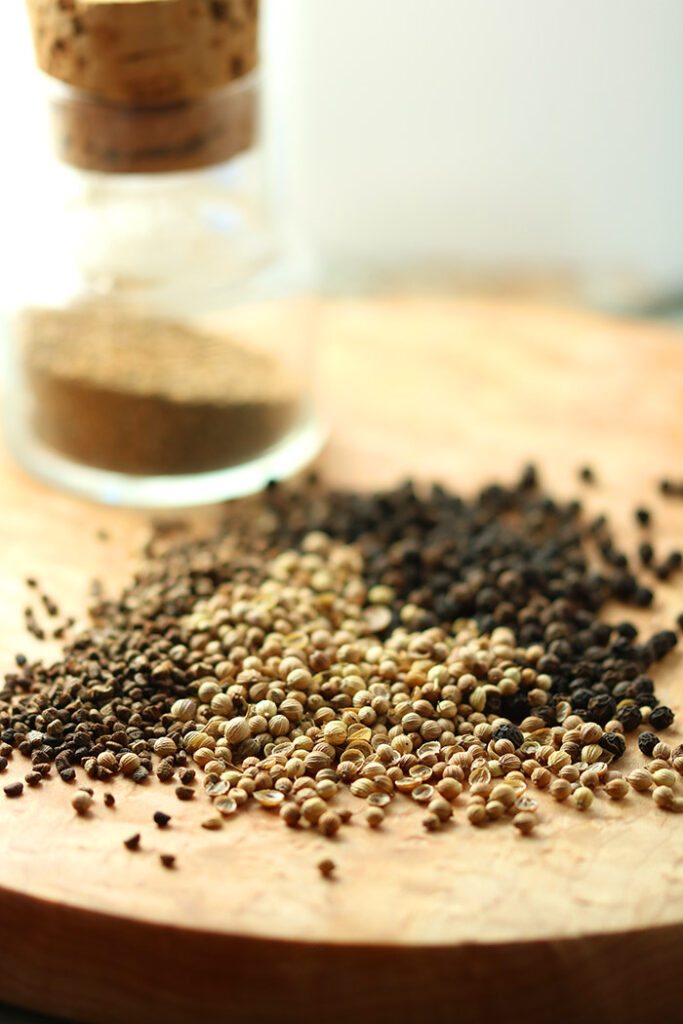
Zesty Pepper Blend
- 1 cup ground black pepper
- 1/2 cup cardamom seeds
- 1/2 cup coriander seeds
Grind each seed separately in a spice grinder or mini chopper. Mix all spices together and store in an airtight container.
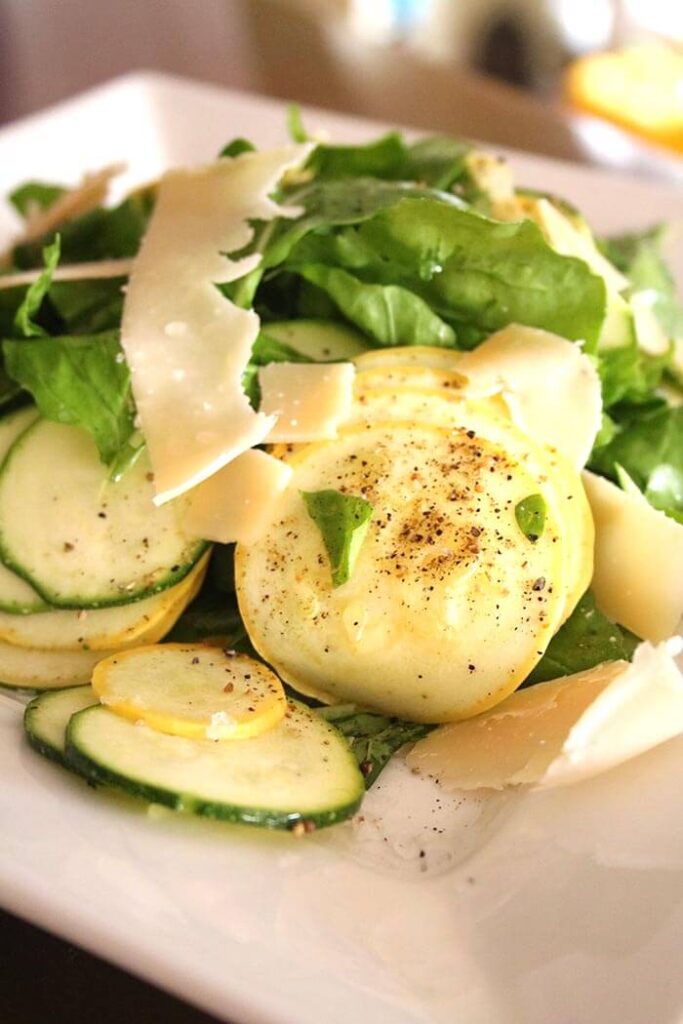
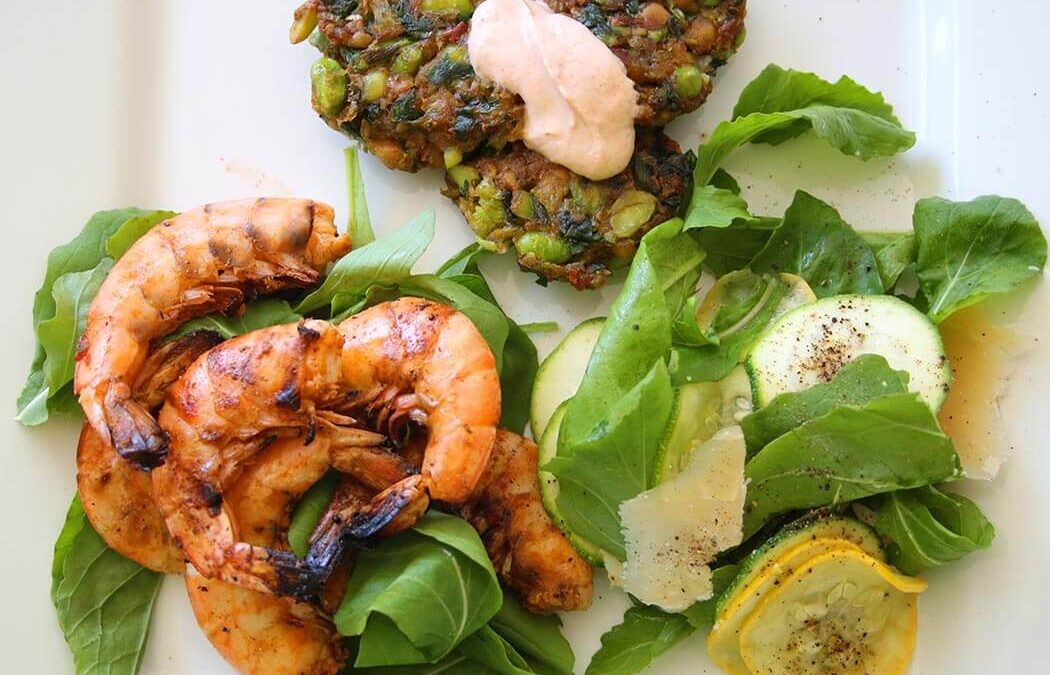
Summer Squash and Arugula Salad
- 1 zucchini
- 1 yellow squash
- 3 cups arugula
- ¼ pound sheep’s milk cheese, such as Ewephoria, cut in shards or with a cheese planer
- Seasoning: flaky sea salt like Maldon Sea Salt Flakes
 and zesty pepper blend
- Dressing: equal parts fresh lemon juice and EVOO, whisked together
Trim the zucchini and yellow squash and slice thinly by hand or using a mandoline.
Arrange the summer squash and arugula on four salad plates. Grate the sheep’s milk cheese on top and season with salt and zesty pepper blend.
Drizzle with lemon vinaigrette.
Serves 4.

This post contains affiliate links. For more of my must-have faves, check out my shop.
© Copyright: KatyKeck.com 2016. All rights reserved.
Hey, we want to hear from you!
Don’t forget to Comment, Share & Subscribe to our blog.

Aug 3, 2016 | Desserts & Sweets, Recipes, Savvy Kitchen Tips
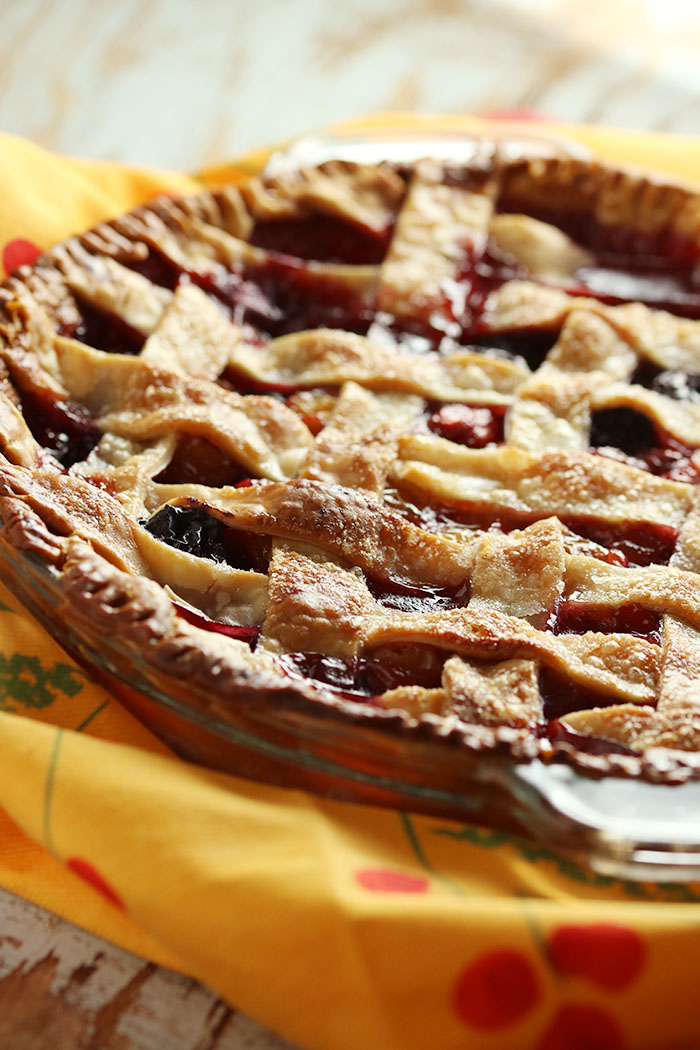
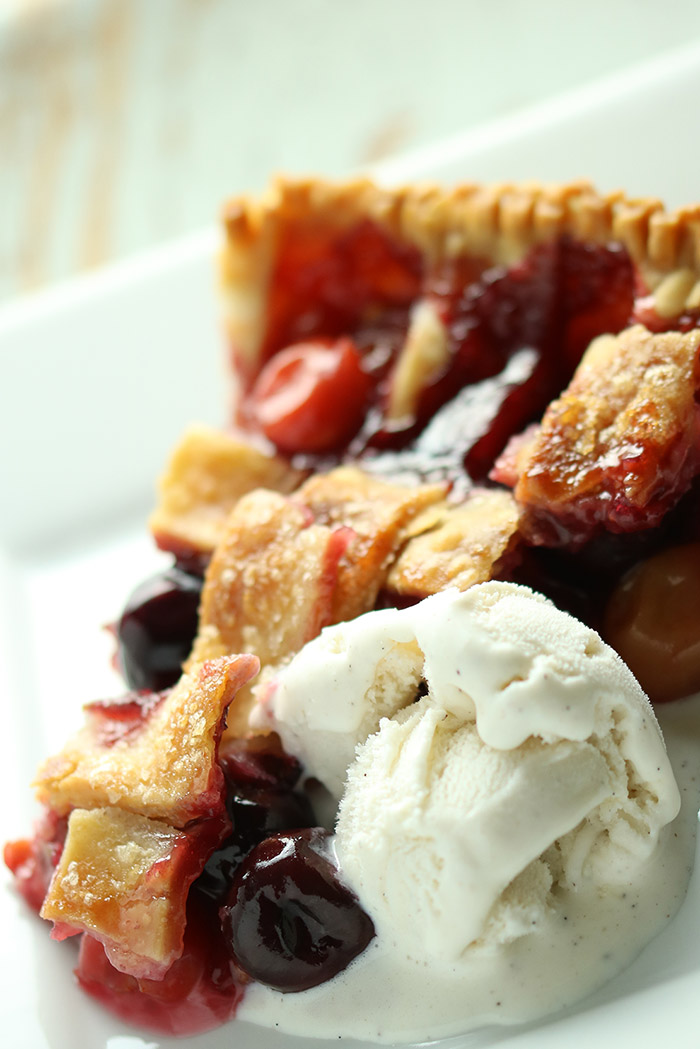
Nothing says summer like a fruit pie, especially cherry pie, warm with a generous scoop of vanilla ice cream. But for me there is one not so tiny problem. The 425oF oven. It’s impossible to get around that aspect of summer pies, biscuits and shortcakes. But what you can do is get in and out as quickly as possible and I have a couple secret weapons that let you trick out store bought dough, pass it off as your own, and get back to the beach. Who doesn’t love that? Face it – while home-made crust is a fabulous nod to bygone days and an awesome salute to Gramma, with our 2016 lifestyle and in the dog days of summer, it’s a crime against the calendar. I hereby give you my permission to do this fast fix.
While the crust hacks are my own, this pie recipe is inspired by one of the late Richard Sax’s Classic Home Desserts . This book is one of my very few must haves and has to be one of the best baking reference books ever written… at least for home-style desserts which are not only my personal favorites, but also the style at New World Grill where I did most of the baking. I am super excited to find out that it is no longer out of print! For years it was only available used, but it has been reprinted and is here for the taking! Not just pies, but cobblers, puddings, dumplings, cakes, tarts, custards, frozen treats and more. Run! Run! Run!
One of the tricky things about fruit pies is how much thickening – usually cornstarch or tapioca – is enough but not too much. There are no easy answers here. It depends on the water content of the fruit, the ripeness, pectin etc. This generally is not a problem with fall fruits like apples, quince, figs, or pears. Food52 had a recent post on “the fickle mistress” of the pie world – fresh fruit. Their suggestions are a lot more time consuming than what I suggest here, but they are also more predictable. I would NOT follow my recipe if you were trying to use super high water-content fruit like raspberries or blackberries. They are …..like 87% water, 12% seeds and 1% fruit. (Source: my vivid imagination). Not good contenders. But this would work super well with peaches and a sprinkling of blueberries. Or cherries as I suggest here. Keep it to fruit with sturdy flesh and you will be fine.

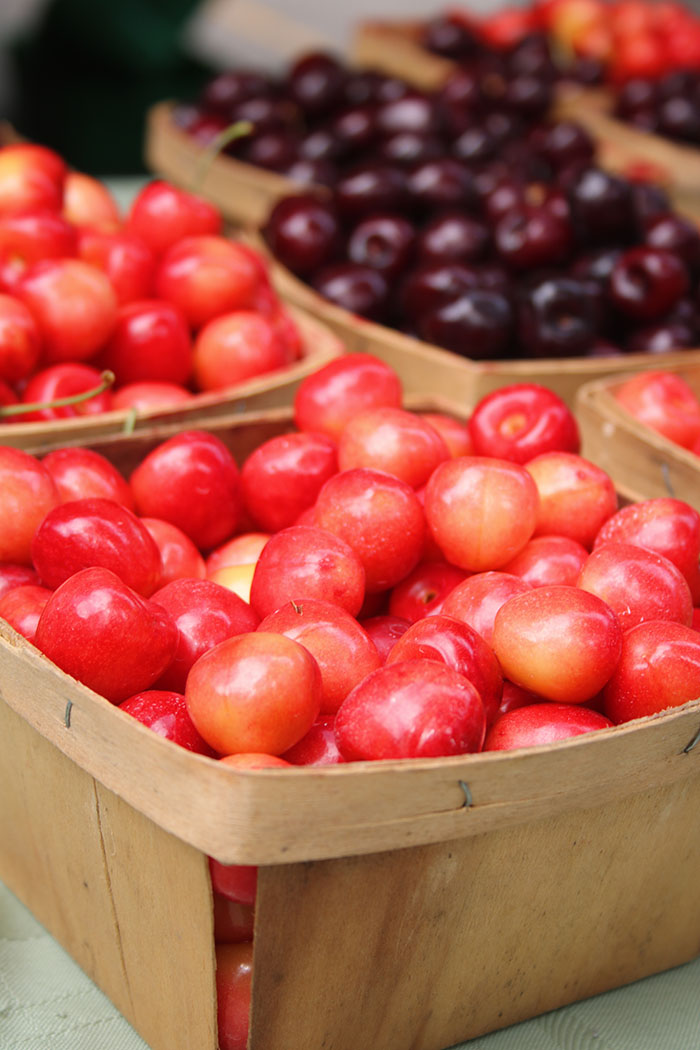
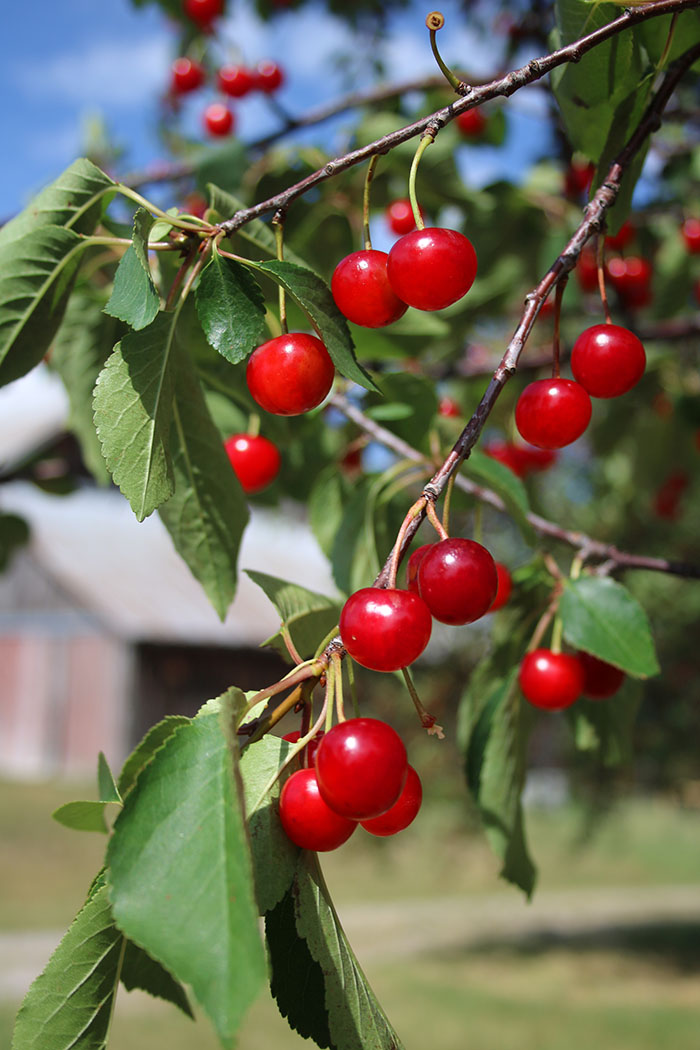
I can’t think of cherry pie without thinking of my Grandmother who was often perched on the piano bench belting out a round of Can She Make a Cherry Pie, Billy Boy Billy Boy. No?? Nobody?? We didn’t actually grow up on cherry pies as a summer staple, but my Dad loved him some bings and spending time in Michigan during the summers, they were and are plentiful. Traverse City has an annual festival dedicated to cherries with races through the orchards, pie eating and pit spitting. The airport is Cherry Capital Airport. Fly right over the Leelanau Peninsula mid-summer and you will be amazed by the vision in bright red. For this pie, I used a combo of those pretty bright red tarts, along with sweet dark cherries and whites. Whenever I get them, I pit them immediately and freeze by color in ziplocks.

Now on to the inside secrets on how to trick out a ready-made crust and pass it as your own. These tricks work best for the pre-made dough that comes rolled up and is found in the dairy case, possibly sporting a chubby white guy with a chef toque. Some of these tips will help you jazz it up and some will help rid you of a soggy bottom. Nobody likes that!
Secrets for success:
- Oven should be hot; pastry should be cold. Always 425oF for crusts.
- Heat a pizza stone while you preheat.
- Use a glass pie plate and butter it well.
- Brush egg white on the inside of the raw bottom crust once you’ve laid it in the pie plate. Back to the fridge til its time to use this.
- Brush the top crust with cream or half & half. Sprinkle with sugar
- Lay a sheet of foil loosely on the top for the first 15 minutes of baking to help the fruit temperature rise more quickly.
- Use a foil-lined (for the mess) sheet pan (to protect the glass on the pizza stone) under the pie.
- Get the best vanilla ice cream – no point in cutting corners here!

Double Crust Three Cherry Pie
- Dough for a double crust pie
- 6-7 cups of cherries, pitted (I like a combo of sweet and tart. If frozen, do not thaw)
- 1/2 cup sugar
- 3 Tablespoons cornstarch
- 1 Tablespoon lemon juice
- 1 teaspoon almond extract (wonderful flavor for both cherries and peaches)

Secret Weapons:
- Butter
- 1 egg white
- Splash of half & half or cream
- 1 Tablespoon sugar
- Glass pie plate, Pizza Stone
 & sheet pan
- Foil
Preheat the oven to 425oF with a pizza stone placed on a rack in the bottom third of the oven. Butter a 9 1/2” deep dish glass pie plate.
Rollout (or unfold) dough for the bottom crust. Fit into the pie plate, leaving any overhang. Brush the inside of the crust with enough egg white to coat. Roll out the top crust. Refrigerate both crusts until you are ready to use them.
Combine the cherries with the sugar, cornstarch, lemon juice and almond extract.
Remove the top crust from the refrigerator and cut into 3/4” wide strips.
Remove the bottom crust from the refrigerator and fill with the cherries. If any sugar mixture has settled in the bowl, sprinkle evenly on top of the cherries. Brush the outside edge of the crust with the remaining egg white and lay half the strips evenly across the top in one direction. Weave the remaining strips cross-wise ”pot-holder style”. Press the ends into the bottom crust around the outer edge and trim excess. Flute or crimp the edges.
Dot the top of the pie with butter, brush the lattice with cream and sprinkle with 1 Tablespoon sugar.
Lay a piece of foil on top of the pie (not tightly wrapped and not tented). This will help the fruit heat up faster and keep the crust from starting to brown too quickly. Place the pie on a foil-lined sheet pan and set on the pizza stone. After 15 minutes, remove the top foil. Continue baking until the crust is golden and the fruit is thickened and bubbly. Keep an eye on the crust color and cover outside edge with foil cut into a ring or entirely, as needed to slow down the crust color while the fruit thickens. This will take about an additional 45 -50 minutes.
Remove the pie from the oven and let it cool thoroughly on a wire rack to thicken up completely. Cut it too early and you have a juice bomb. If you want to serve it warm, reheat it at serving time.
Serves 8 – 10

This post contains affiliate links. For more of my must-have faves, check out my shop.
© Copyright: KatyKeck.com 2016. All rights reserved.
Hey, we want to hear from you!
Don’t forget to Comment below, Share & Subscribe to our blog.
Save
Save
Save
Save
Save
Save
Save
Save
Save
Save
Save
Save
Save
Save
Save
Save
Save
Save
Save
Save
Save
Save
Save
Save
Save
Save
Save
Save
Save
Save
Save
Save
Save
Save
Save
Save
Save
Save
Save
Save
Save
Save
Save
Save
Save
Save
Save
Save
Save
Save
Save
Save
Save
Save
Save
Save
Save
Save
Save
Save
Save
Save
Save
Save
Save
Save
Save
Save
Save
Save
Save
Save
Save
Save
Save
Save
Save
Save
Save
Save
Save
Save
Save
Save
Save
Save
Save
Save
Save
Save
Save
Save
Save
Save
Save
Save
Save
Save
Save
Save
Save
Save
Save
Save
Save
Save
Save
Save
Save
Save
Save