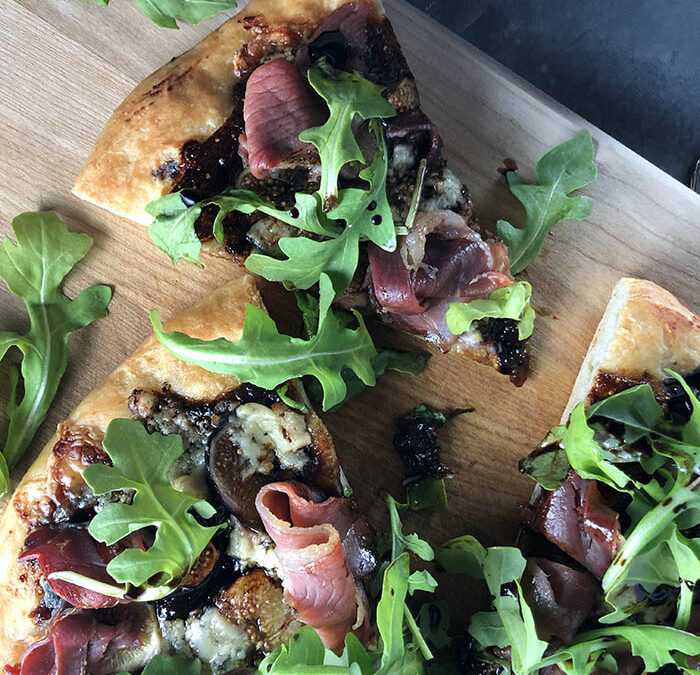
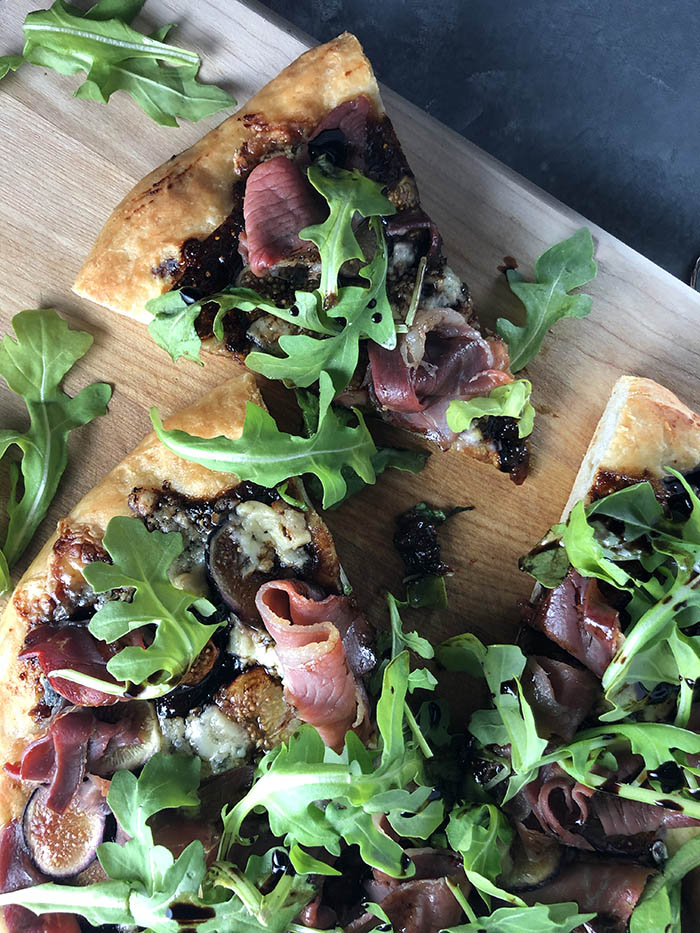
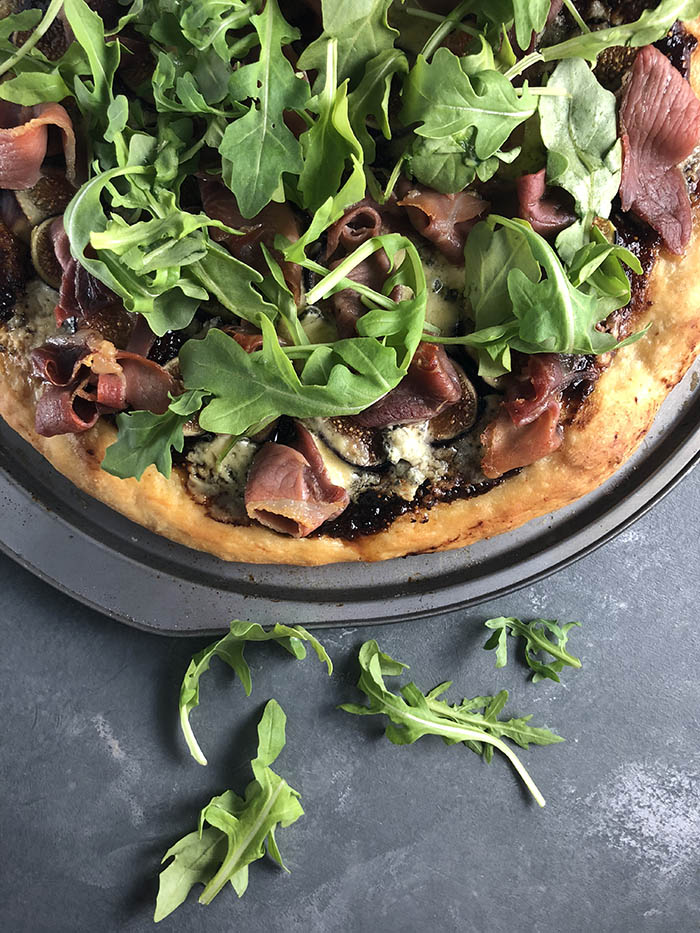
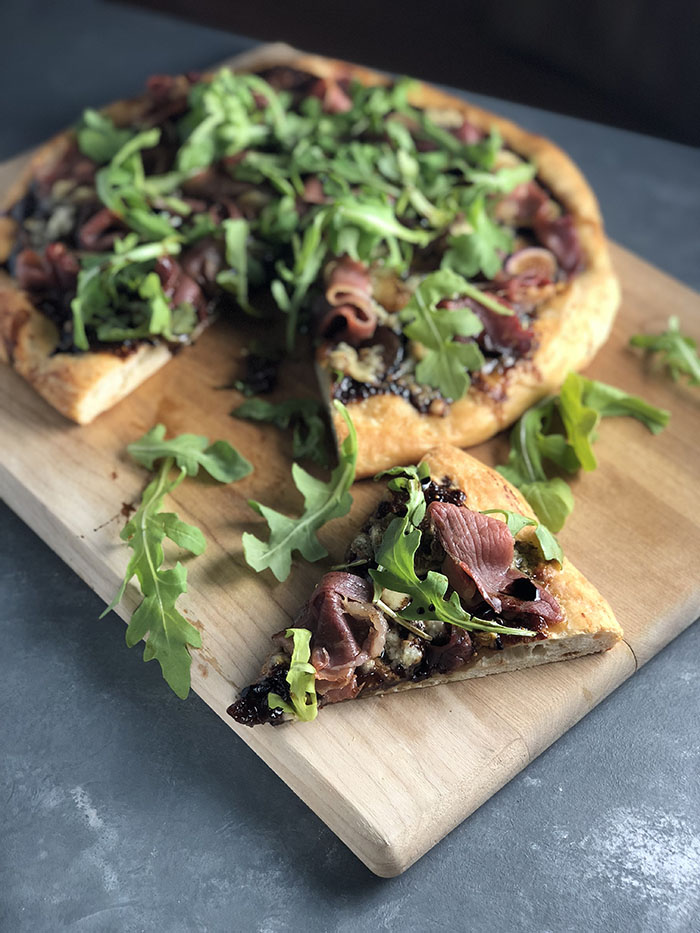
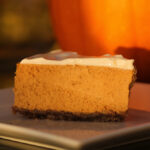
This Fig Prosciutto Pizza is a far cry from those sticky Newtons you grew up on. Sweet jammy fig butter, with crispy and salty Prosciutto, creamy rich Cambozola and fresh luscious figs let this pizza span a meal from appetizer to dessert, while achieving rock star status along the way. If you are like me, your first exposure to figs was the famous Fig Newton. Can’t say I was really a fan. It was kind of gummy and way too seedy for a kid. But yet, against all odds, the Newton became a fan favorite. Must be all that sugar. What really surprises me though is that Newtons are almost always the end of the line for the poor fig. After childhood, we fickle feasters don’t look back and all too often have never seen a fresh fig, much less tasted one. I ran across them in the garden when staying with friends in Italy some thirty years ago. My hostess was not a fan of the texture, and I get that, especially if you pull it from the tree and chomp into it, apple-style. But the flavor!! Oh my. It is a perfect foil for a creamy rich blue cheese and some salty Prosciutto. Hmmm…let me think what else? Thinking. Thinking. Thinking. Pizza dough? Now we’re cooking with gas!!!
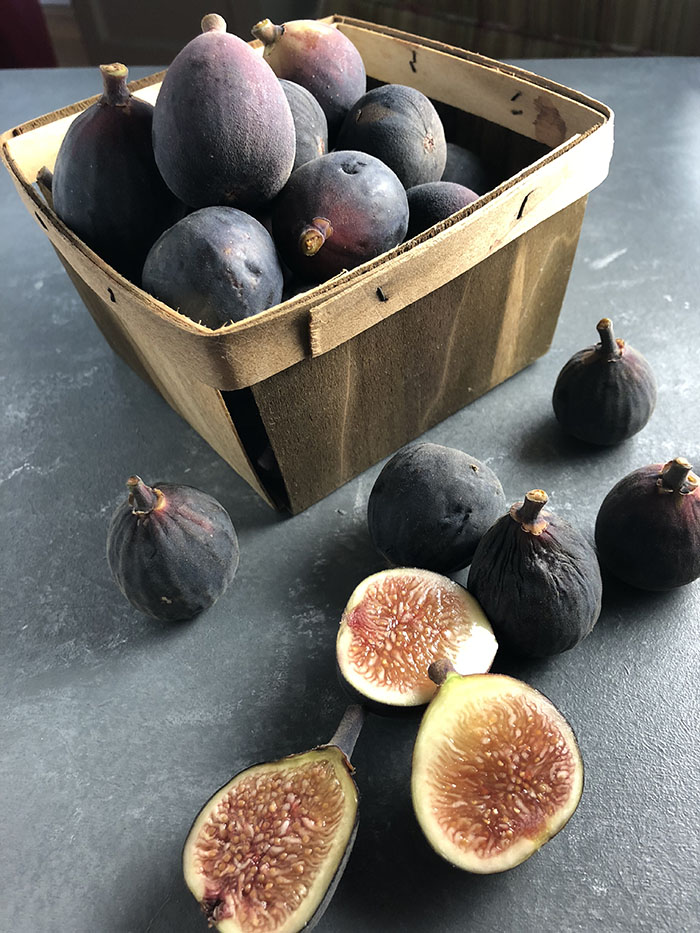
Fresh figs have a fairly short season – found both in the spring and the fall, or if you are in Cali maybe a bit longer. They date back to 9000+ BC and were cultivated more than 1000 years before wheat or rye. Their existence is well documented from Aristotle to the art world. I mean, where would we be without fig leaves? Spanish missionaries brought them to the US in the late 1700s, where the Mission variety thrived in the California sunshine. To this day, Black Mission figs are among the most popular and that is what I used here.
Dried figs used to be a bit tough and required soaking (brandy wouldn’t be so bad) to use. But today there are unsulfured, wonderful, juicy varieties available in resealable pouches. Valley Fig offers organic dried Mission figs and Made in Nature offers dried Smyrna figs that are velvety and have “hints of honey, jam and butterscotch.” If you can’t find fresh figs, try chopping some of these in place of the fresh. As Made in Nature’s package says, “… congrats, nature. You really nailed it on this one.” They’re “figgin awesome.”
For the cheese, I used Cambozola, but there is a wide range of blues from which to choose, especially Stilton or Roquefort. I like the creaminess and richness of Cambozola as an offset to the salty meat and juicy fruit. This cow’s milk cheese, made in Germany, is a triple crème-ripened blue cheese and you might liken it to a cross between a blue and a brie. You would not be all wrong. While the name appears to be a portmanteau of Camembert and Gorgonzola given its similarity to the rich creaminess of Camembert and the blue bite of Gorgonzola, the name is also a nod to its terroir. It is made in Kempten (in Bavaria), whose Roman name is Cambodunum.
Fig Prosciutto Pizza
This is really another non-recipe recipe, which I know y’all love. Proportions are not essential when topping pizzas. Actually, even choosing the ingredients is not critically important. Just remember to aim for a balance of sweet, salty, fat and acid and a mix of textures, and if you dare, a contrast in temperatures. As written below, the jam provides sweetness; the cheese and meat are salty; the cheese adds creamy fat and richness; the vinegar add acid and serves as a light (just a drizzle) dressing for the arugula. The textures range from creamy to crispy, and the temperature is hot pizza with cold salad. Done and Done!
Let me know how it goes, and – as always – I love to read your comments on the website and see your photos on Instagram.
This Fig Prosciutto Pizza is a far cry from those gummy Newtons you grew up on. Sweet jammy fig butter, with crispy and salty Prosciutto, creamy rich Cambozola and fresh luscious figs let this pizza span a meal from appetizer to dessert.
Ingredients
Scale
1-pound fresh pizza dough (see notes)
11-ounce jar of Fig Butter (or fig jam) – may have leftovers
Favorite oil for drizzling on crust (I wouldn’t be mad if you used truffle oil once it comes out of the oven, but brush the crust with something less delicate before baking. Lemon oil is nice)
8 fresh figs, about 1/3 pound, sliced
1/2 pound Cambozola cheese, or other creamy blue like Gorgonzola
Flaky sea salt to finish – like my beloved Maldon’s
Instructions
Preheat oven and pizza stone to 425oF. Check pizza dough directions to confirm this is best for your dough.
Lightly flour a work surface and stretch or roll the pizza dough into a 12” diameter round. If you are using the roll-out dough that comes in a popping-fresh canister, follow those directions and roll into a rectangle, but plan on using more topping ingredients. Transfer the dough to a lightly oiled pan.
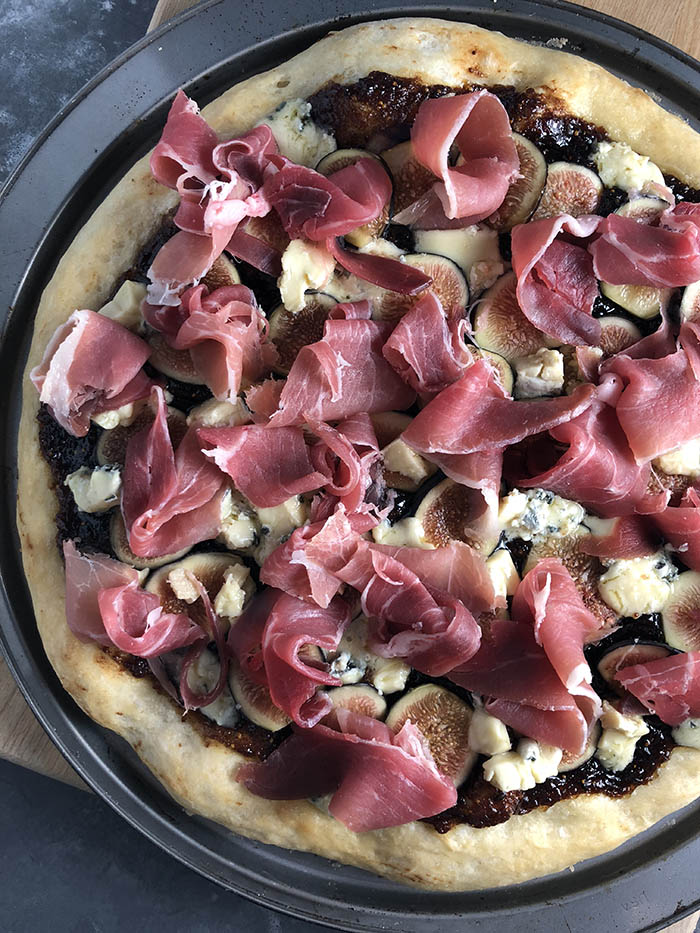
Spread the fig butter to create a thin layer, leaving a 1/2 “ border of dough around the outside. (See notes.) Brush the exposed outer ring of dough with a favorite oil.
Set the pan on the pizza stone and bake for 10 to 12 minutes until the crust is set.
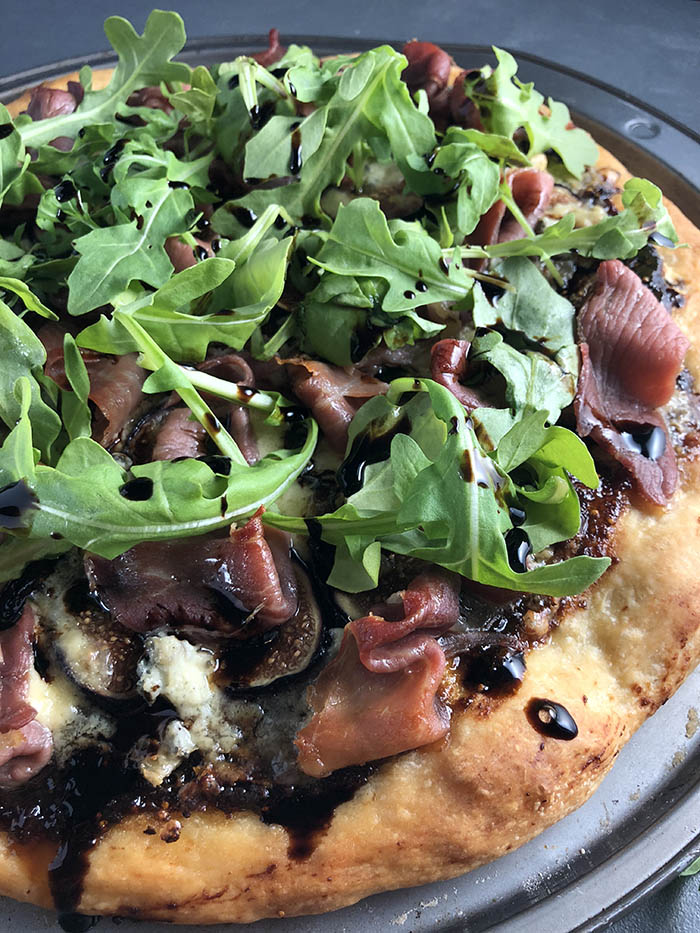
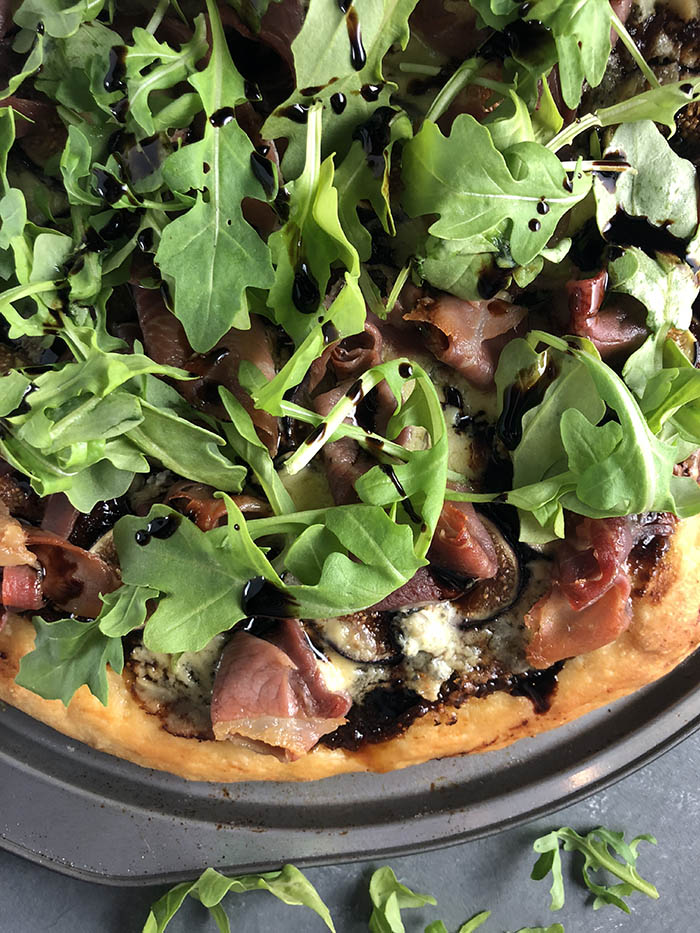
Carefully remove from oven, adding the figs, some dollops of Cambozola and the Prosciutto. I like to take a half-slice of Prosciutto and twirl into a rosette, but some prefer to chop it and distribute the flavor more uniformly. Maybe you should be making two pizzas?
Return to oven and bake for 10 more minutes or until the crust is golden and the Prosciutto starts to crisp. The cheese should be melty.
Remove from oven and top with the arugula. Drizzle with a balsamic reduction (or Crema di Balsamico) and sprinkle with a flaky finishing salt.
Notes
Dessert Pizza or Appetizer? Actually, I have served it both ways. Spread the fig butter according to taste and purpose. If you use the whole jar (don’t judge) it will be pretty sweet. But it will also be nice and jammy. Depending on your taste, you might want to load up a bit more on the salty items like the cheese and Prosciutto.
Trader Joe’s makes a great fresh pizza dough, stashed in the cheese and prepared food refrigerator case. You can find it made with white flour, whole wheat and even gluten-free.
Stonewall Kitchen makes a lovely Fig & Walnut Butter and Valley Fig offers three flavors of fig spread. For this test, I used the Trader Joe’s Fig Butter.
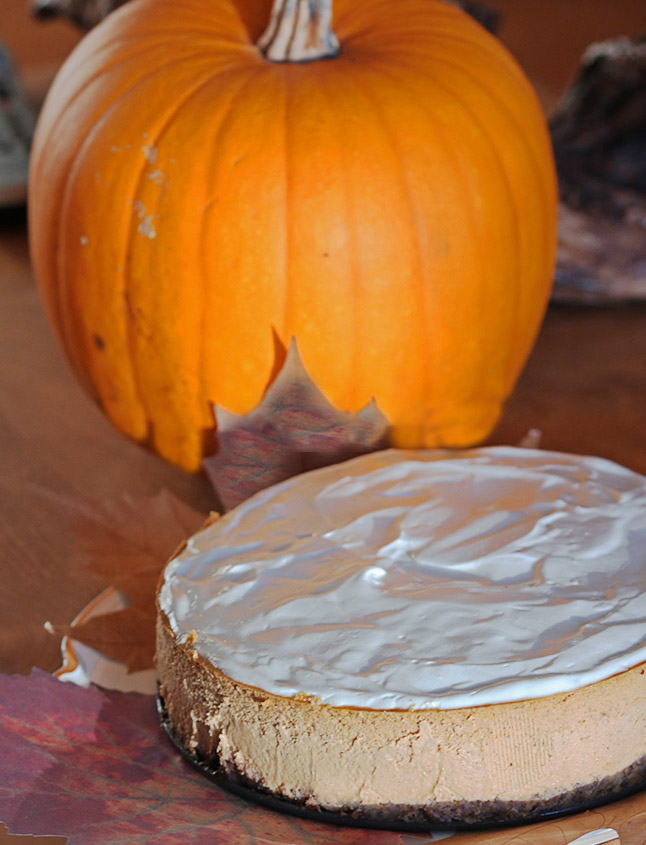
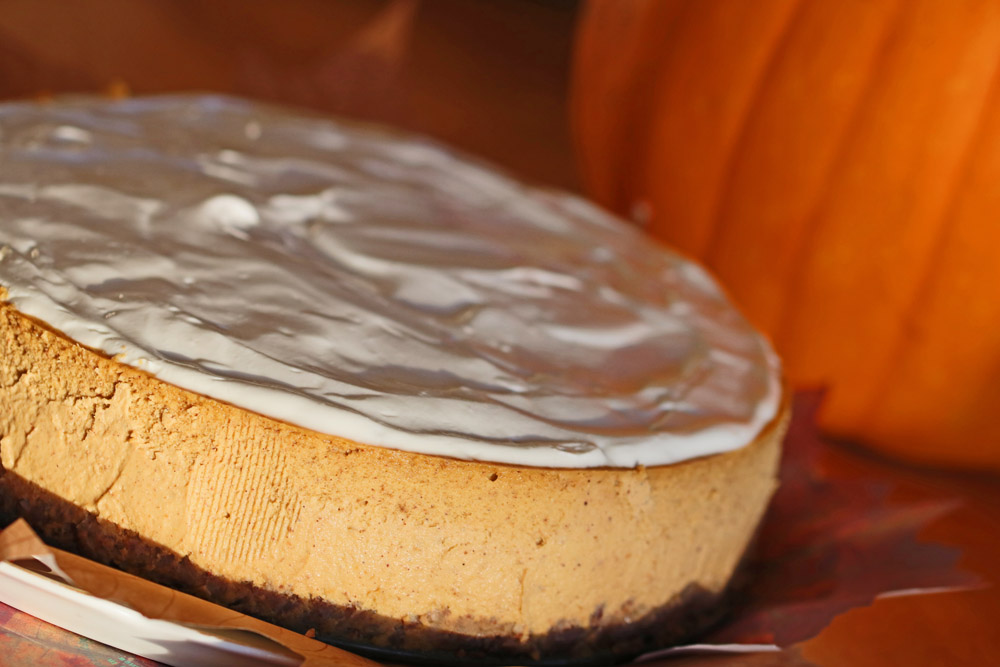
Time is nigh for setting the table and facing that big ole mess we call family…and all that that entails. This seems to be the one holiday when everyone descends on the same day and comes with baggage instead of picnic baskets. But let’s be real – we are indeed so lucky that we can in fact gather, break bread and give thanks. I am hoping the biggest debate your gang faces on Thursday is sweet potato or pumpkin. (I’m looking at you Val – duh, pumpkin!) And my picnic basket this year is loaded with a secret weapon – a dessert that you can make a day or two ahead. Check that box. Move on. Worry about the Beaujolais Nouveau and who will do the dishes. Dessert is mission-accomplished. This pumpkin ginger cheesecake falls smack in the middle of the “consider it done” category. That of course assumes you can keep it safeguarded til after dinner on Thursday. It’s tempting.
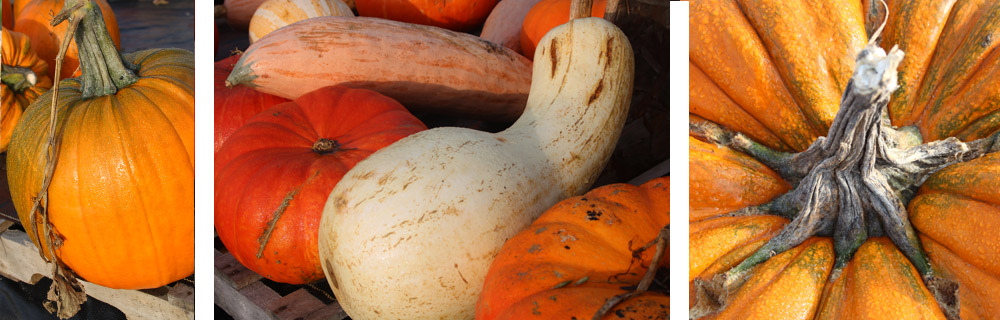
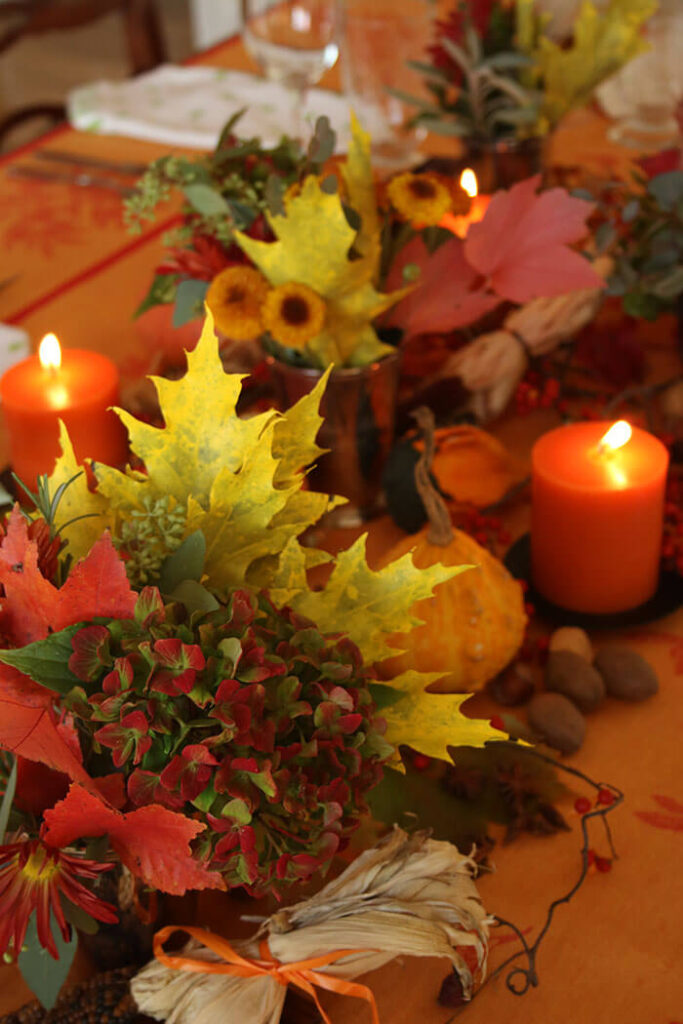
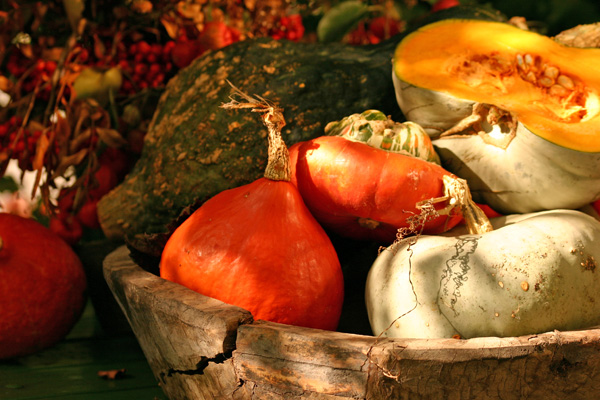
Thanksgiving dinner often gets a bad rap for being a brown meal. But I love the vibrant colors of fall squashes, pumpkins and gourds. Use them for table settings, roast them for a side or salad, make a quick bread, or whip them up in a dessert.
Cheesecakes are pretty flawless desserts to prepare even if you haven’t made them before, as long as you follow a few simple tips. They are super sturdy, so you don’t need a deft hand. I would argue quite the opposite. You really don’t want to be dainty with the batter – don’t incorporate lots of air, do bang the pan, get aggressive. Be bold. If you follow my instructions and read the accompanying notes, you will be a star performer – dare I say, a pastry chef. Start with your ingredients at room temperature, use a good quality springform, and use a food processor, not a mixer. A processor will combine the ingredients without incorporating air which will cause the cheesecake to puff and fall, leaving a crater in the center. Allow all the time needed for cooling to room temperature and then refrigerating. It takes time, but not active time. And know that if all else fails – craters or cracks – you will be slathering a cream topping on and that can cover a multitude of mistakes. Yes, indeed. You are definitely a pastry chef.
This pumpkin ginger cheesecake is surprisingly light, yet creamy. The nutty crust has that I want more-ish quality! And, a dose of Gentleman Jack Daniels keeps the party rolling.
Ingredients
Scale
Crust:
3/4 cup all-purpose flour
1/2 cup dark brown sugar
1/2 cup finely chopped pecans
1/4 cup melted butter
Filling:
15 ounce can pumpkin puree
24 ounces cream cheese, room temperature
5 ounces Gentleman Jack Rare Tennessee Whiskey
1 cup sugar
1 1/2 Tablespoons vanilla extract
1 Tablespoon ground ginger
1 teaspoon ground cinnamon
1 teaspoon ground clove
1/2 teaspoon ground nutmeg
6 eggs, at room temperature, lightly beaten
Topping:
1 cup sour cream
2 Tablespoons Gentleman Jack Rare Tennessee Whiskey
2 Tablespoons powdered sugar
Instructions
Make the Crust:
Preheat oven to 350° F. Combine flour, brown sugar, pecans, and melted butter and mix until crumbs adhere. Press into a 9 or 10″ sturdy nonstick springform pan and bake for 10 – 12 minutes. Remove and cool. Wrap pan in heavy duty foil. Reduce oven temperature to 300°F.
Make the Filling:
In food processor, puree pumpkin until smooth. Add cream cheese and puree until smooth. Add Gentleman Jack, sugar, vanilla, ginger, cinnamon, clove, and nutmeg and pulse until mixed. Add eggs and pulse 2 – 3 times only until just combined. Do not overprocess.
Pour filling into cooled crust and bang pan on the counter to eliminate extra air. Place in a roasting pan and fill with hot water, halfway up the side of the springform. Bake for 1 1/4 – 1 1/2 hours or until set. It may still be a bit wobbly in the center, but it will firm up as it cools.
Turn oven off and leave the cheesecake in the water bath in the oven for 30 minutes more. Remove the roasting pan from the oven, and carefully remove the springform from the water. Remove foil and cool on wire rack until room temperature. Refrigerate until fully chilled.
Make the Topping:
Combine sour cream, Gentleman Jack, and powdered sugar and spread on top of cheesecake. Refrigerate until set.
Gently run a knife or thin metal spatula around inside edge of pan. When cheesecake has released, open outer pan ring and remove.
Notes
Feel free to substitute a dark Rum or Bourbon if you prefer.
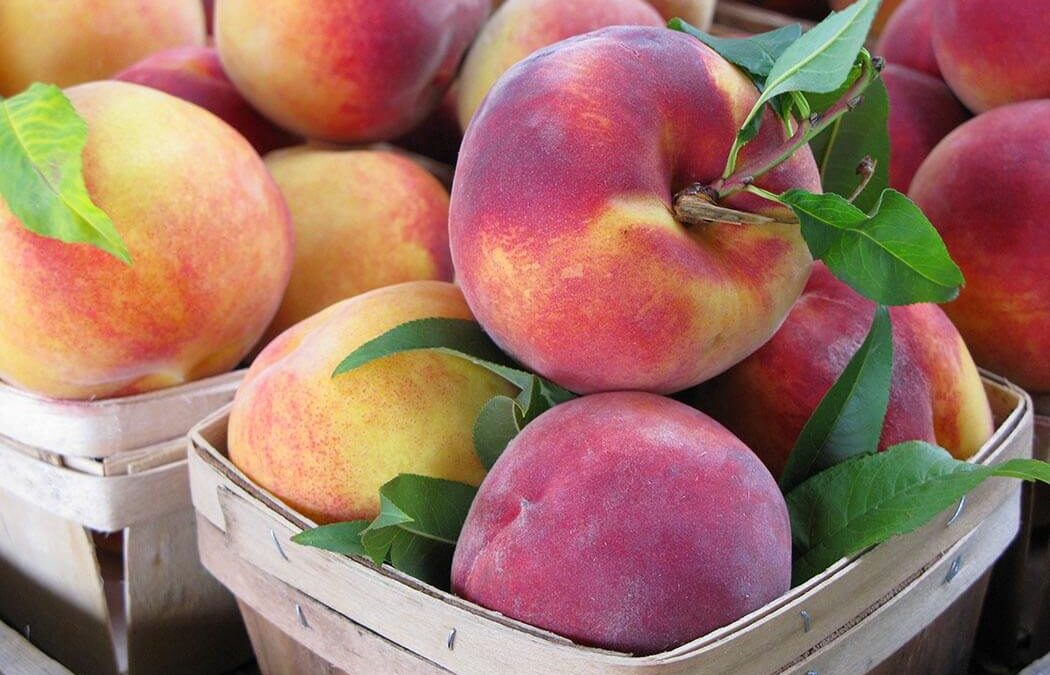
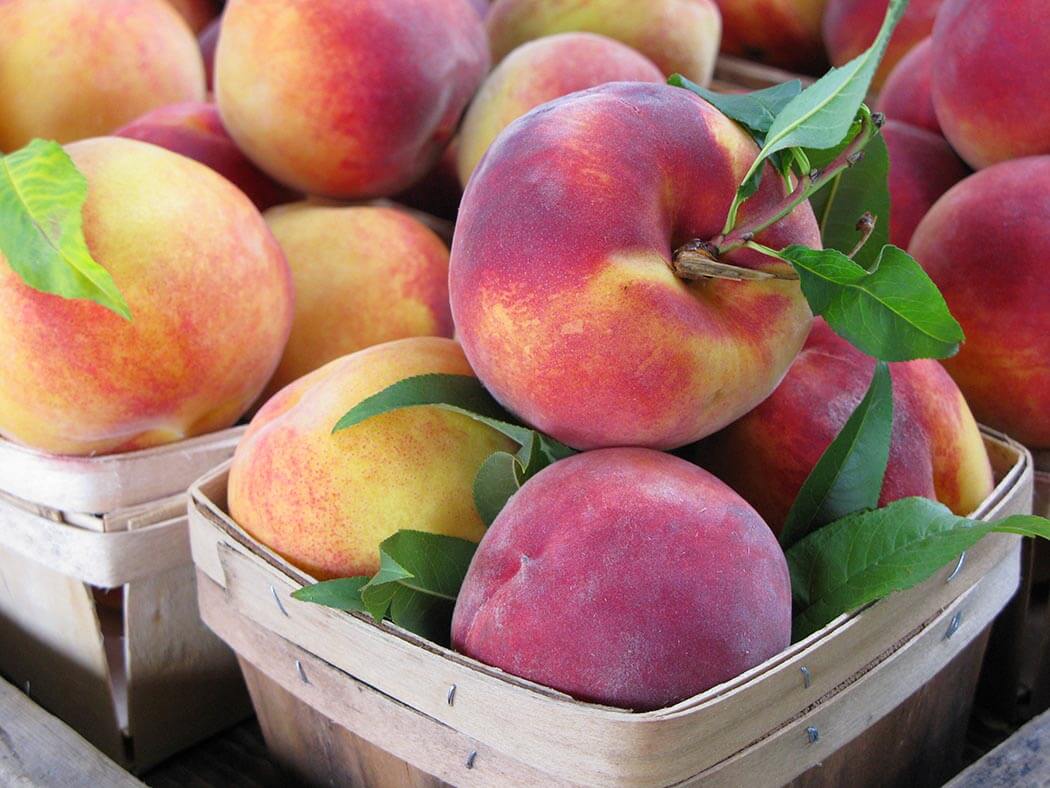
I can see the problem you are having. A giant mound of peach perfection and you are so tired of fruit pie and cobbler (Okay, we should probably admit that is NOT really a thing, being tired of pie and cobbler). But it’s a holiday weekend and you MUST use that beautiful bounty ASAP yet you would rather be on the beach, boat, SUP or _____(fill in the blank). So with that last hurrah of summer celebration hurtling toward you at ram speed, here’s a dessert that you can make in a flash, yet will look like you have been slaving away. Stone fruit –still abundantly available – is the perfect choice for this “cobbler, not-a-cobbler.” Cut into wedges, a peach or nectarine is sizable enough to hold its shape (ain’t nobody likin’ fruit mush) and comes with its own good dose of pectin. I throw in a few blueberries for a wee bit of flavor, color, and texture contrast, but warn against fruit with a high water content and thin skins (I got my eyes on you raspberries and blackberries.)
Normally a fruit cobbler comes with a streusel or pastry crumb topping, but I love this idea of biscuits. I would say it’s fresh and new, but since I created this dish at New World Grill some 20 years ago, I will settle on timeless. It’s hard to find a fruit pot pie at all, and the ones I have seen are made with a double pastry crust. This dish has no bottom – which means…..???? You got it!! No soggy bottoms!!! Pastry fraidies unite! You can do this!! Just cook the fruit with a little cornstarch stove-top then drop biscuit dough on top. Super easy to serve as well because everyone gets a heaping spoon of fruit topped with a biscuit topped with …Ice Cream? Whip Cream? Greek Yogurt? Yes. Yes. And Yes. Please. It’s dessert magic.
I have made this with peaches and nectarines (peel the peaches, but no need on the nectarines), but you might also try plums or apricots. And cherries could be a nice alternative to the blueberries I use. Just keep a sturdy skin in mind when improvising. And always let a fruit dessert cool to avoid the juice-bomb. This is best served same-day, an hour from the oven or reheated. Biscuits are a bit of a diva when it comes to humidity, so the longer it sits around the less flaky they will be.
I learned to make traditional biscuits from a woman who said “handle them like you are holding hot coals.” (It was a KFC shoot and we must have made 1000 biscuits). It was good advice – don’t touch them much at all. Biscuits are made by cutting little tiny bits of ice cold butter into the dry ingredients, so that each pea-sized bit is flour-coated. Then you gently add the liquid – buttermilk, perhaps – until it just holds together. If you hot-handle the dough, the butter will start to melt. The butter should melt only once – in your honking hot 425oF oven – because that creates steam and that, my friends, provides lift. Voilà! Flaky!!
The other reason to lightly handle the dough is to avoid overworking the glutens which will make a tough and sometimes shrunken biscuit. (That joke just wrote itself. I don’t even have to put it in words.) I got you covered here, this dough is NOT fussy and is made in the processor and uses a small amount of boiling water to pull the dough together. It’s a bit of the opposite of everything I have just said – no hot coals. This makes it super simple and you can get away with it in part because it is going atop hot fruit which will also create some steam.
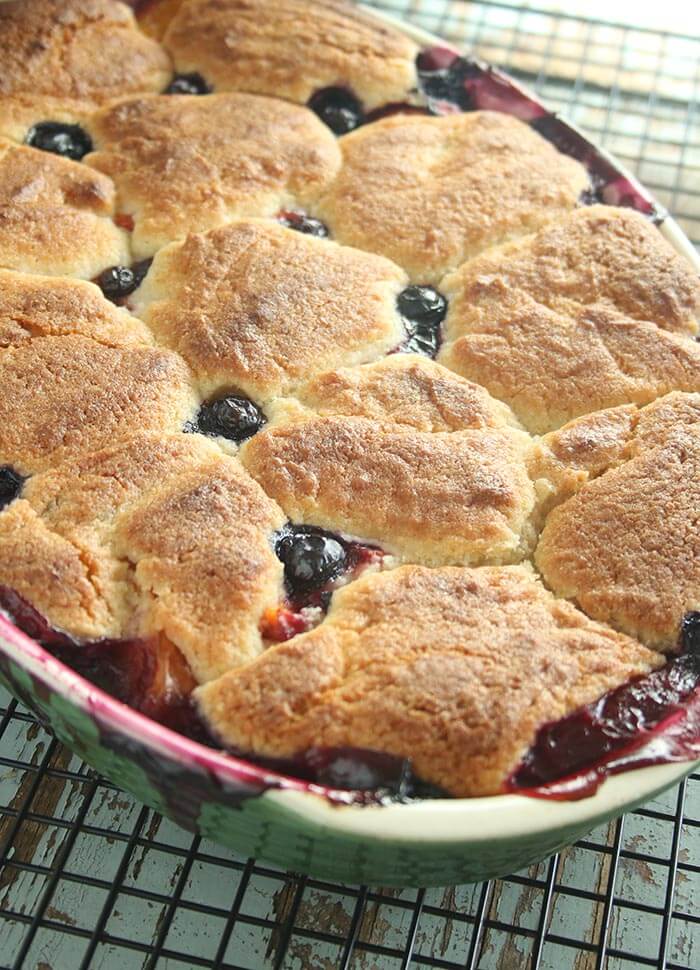
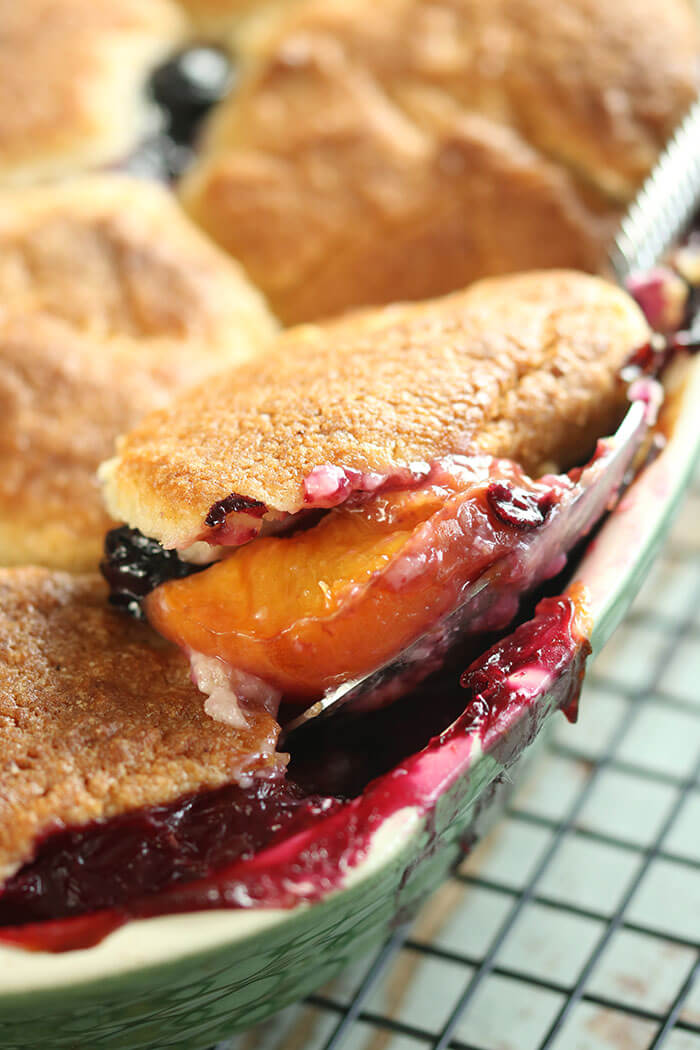
Summer Fruit Pot Pie
Fruit Filling
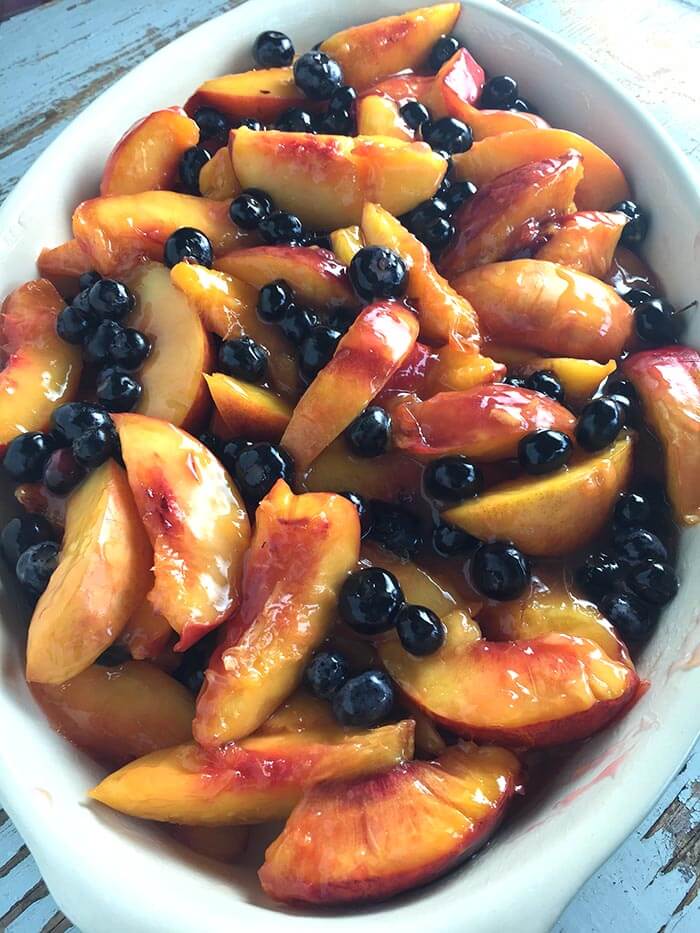
8 cups pitted and sliced nectarines, about 8 pieces or 4 pounds
Juice of one lemon, about 3 Tablespoons (please zest it first and save the zest for the biscuit)
1/2 cup sugar
3 Tablespoons corn starch
1/2 cup cold water
2 cups blueberries
Biscuit Topping:
2 cups all-purpose flour
1 cup sugar
2 teaspoons baking powder
1 teaspoon salt
Zest of one lemon
6 ounces ice-cold butter, cut into bits
¼ cup + 2-3 Tablespoons boiling water
Preheat oven to 425oF. Butter a 9x13x2-inch 3-quart casserole.
Start the Fruit: Combine the nectarines with the lemon juice and sugar. Set aside. Dissolve the cornstarch in the cold water and set aside for 5 minutes.
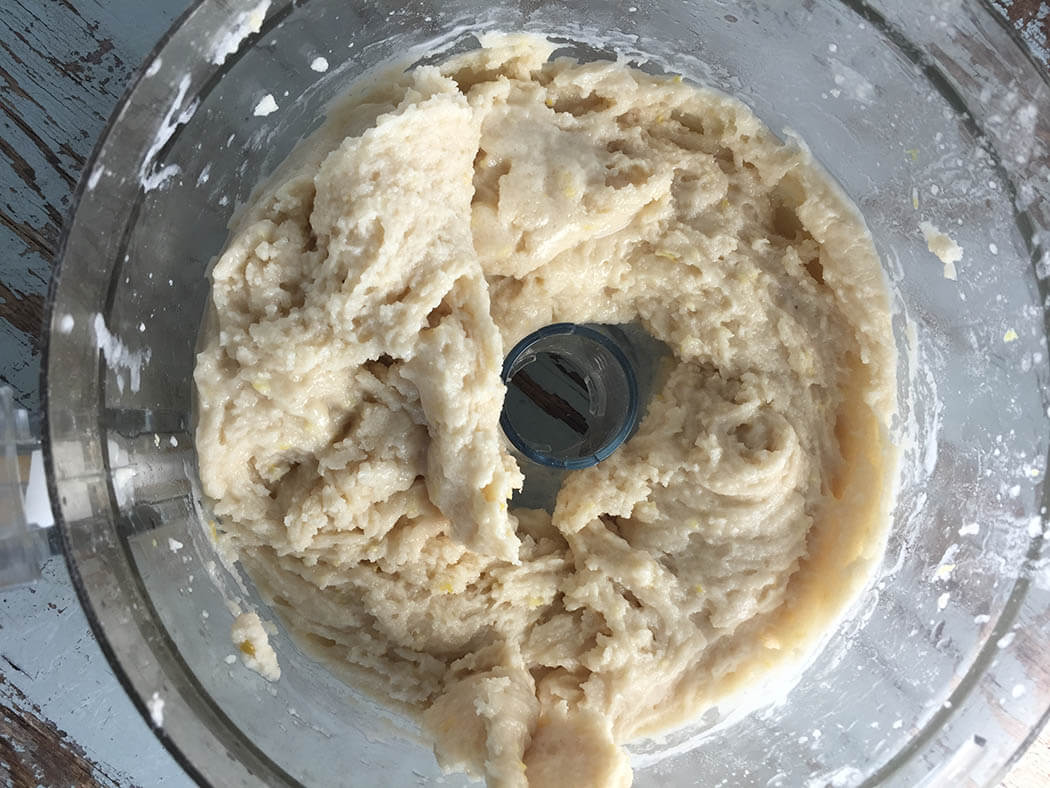
Start the Biscuits: Combine flour, sugar, baking powder, salt, and lemon zest in the work bowl of a food processor. Pulse to combine. Cut in the butter with the food processor, by pulsing 8-10 times, until the mixture resembles coarse meal. (You can also use a pastry cutter).
Back to the Fruit: Combine the nectarines with the cornstarch in a saucepan. Bring the cornstarch-nectarine mixture to a boil, and cook for 1 minute. Remove from heat and gently fold in the blueberries. Transfer fruit mixture to the casserole.
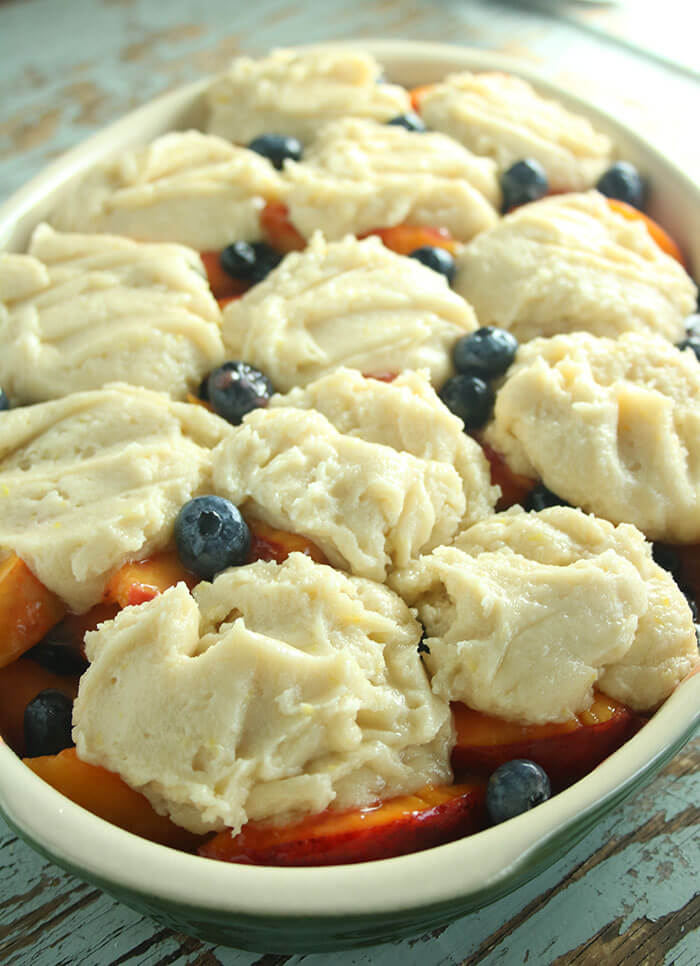
Finish the biscuits: Slowly pour in ¼ cup boiling water and pulse a couple times until just combined. Scrape down sides. Add additional water one Tablespoon at a time, up to 3 additional Tablespoons. Pulse with each addition until dough just comes together and becomes spoon-able. It should remain a bit stiff and not turn gooey. If you add the water all at once, you run the risk of adding too much liquid and melting the butter. Add it gradually and it will just slightly soften it. Drop the dough by scant 1/4 cups onto the fruit to form 12 biscuits. Use a spoon or small spatula to ease the dough out of the cup. All that butter will let it slide out quite easily.
Bake in bottom third of preheated, foil-lined oven for 35 – 40 minutes until fruit is set, biscuits are golden, and a toothpick inserted in a biscuit comes out clean. If the biscuits are getting too brown, cover loosely with foil for the last 10 minutes or so. Transfer to a wire rack to cool slightly. Cool for about an hour, to let the juices set. Serve while still warm or reheat if it has cooled. Top with ice cream, whipped cream, or plain Greek yogurt.
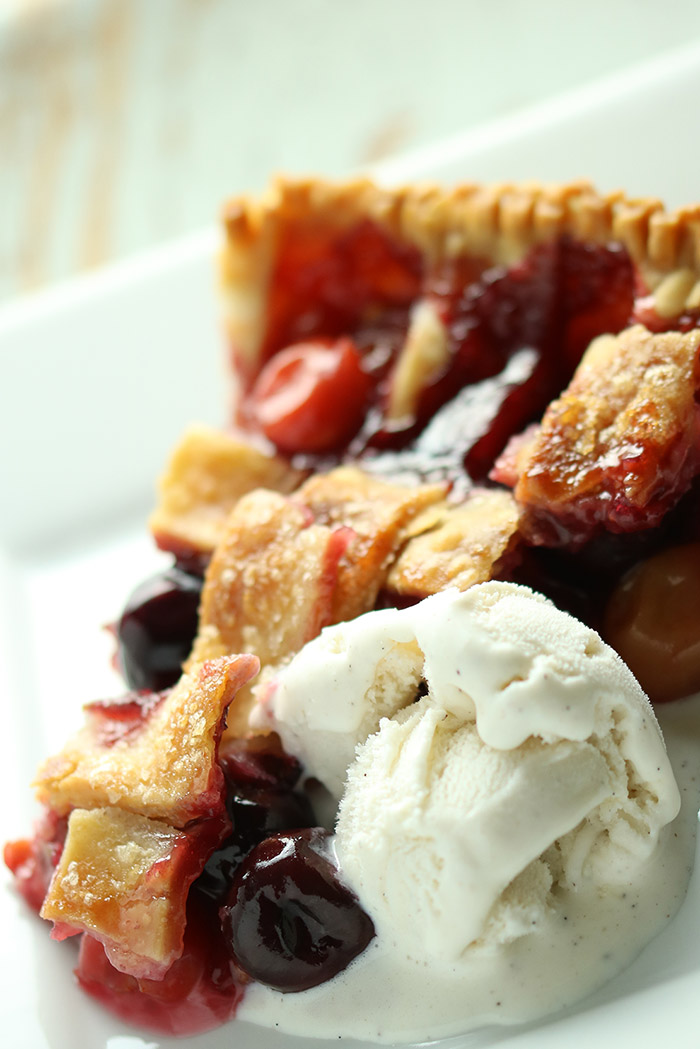
Nothing says summer like a fruit pie, especially cherry pie, warm with a generous scoop of vanilla ice cream. But for me there is one not so tiny problem. The 425oF oven. It’s impossible to get around that aspect of summer pies, biscuits and shortcakes. But what you can do is get in and out as quickly as possible and I have a couple secret weapons that let you trick out store bought dough, pass it off as your own, and get back to the beach. Who doesn’t love that? Face it – while home-made crust is a fabulous nod to bygone days and an awesome salute to Gramma, with our 2016 lifestyle and in the dog days of summer, it’s a crime against the calendar. I hereby give you my permission to do this fast fix.
While the crust hacks are my own, this pie recipe is inspired by one of the late Richard Sax’s Classic Home Desserts. This book is one of my very few must haves and has to be one of the best baking reference books ever written… at least for home-style desserts which are not only my personal favorites, but also the style at New World Grill where I did most of the baking. I am super excited to find out that it is no longer out of print! For years it was only available used, but it has been reprinted and is here for the taking! Not just pies, but cobblers, puddings, dumplings, cakes, tarts, custards, frozen treats and more. Run! Run! Run!
One of the tricky things about fruit pies is how much thickening – usually cornstarch or tapioca – is enough but not too much. There are no easy answers here. It depends on the water content of the fruit, the ripeness, pectin etc. This generally is not a problem with fall fruits like apples, quince, figs, or pears. Food52 had a recent post on “the fickle mistress” of the pie world – fresh fruit. Their suggestions are a lot more time consuming than what I suggest here, but they are also more predictable. I would NOT follow my recipe if you were trying to use super high water-content fruit like raspberries or blackberries. They are …..like 87% water, 12% seeds and 1% fruit. (Source: my vivid imagination). Not good contenders. But this would work super well with peaches and a sprinkling of blueberries. Or cherries as I suggest here. Keep it to fruit with sturdy flesh and you will be fine.
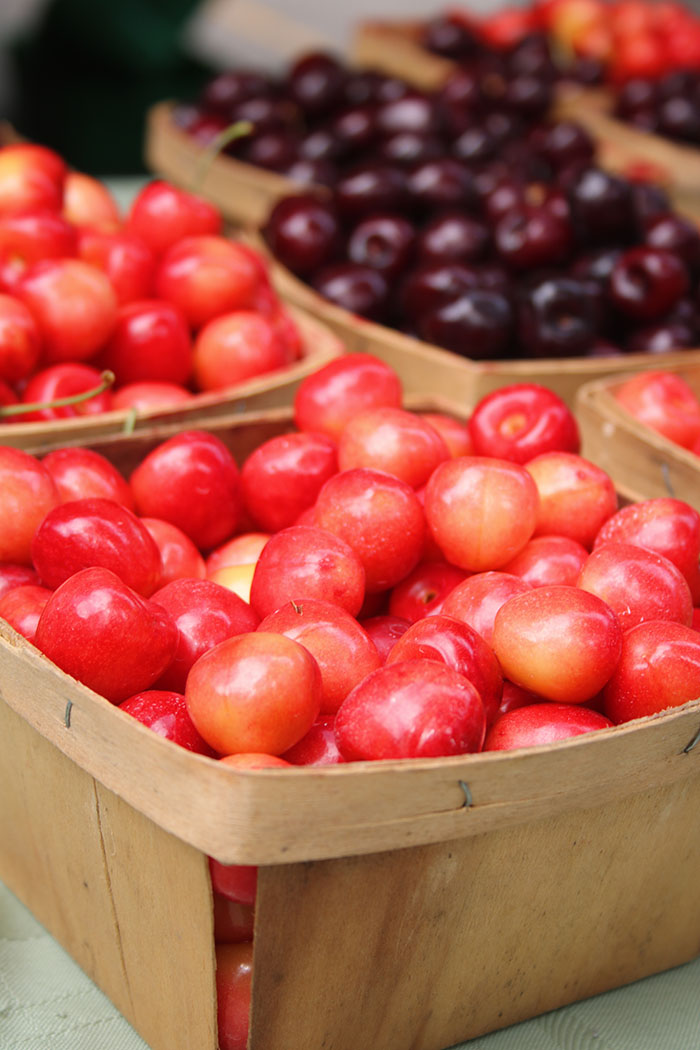
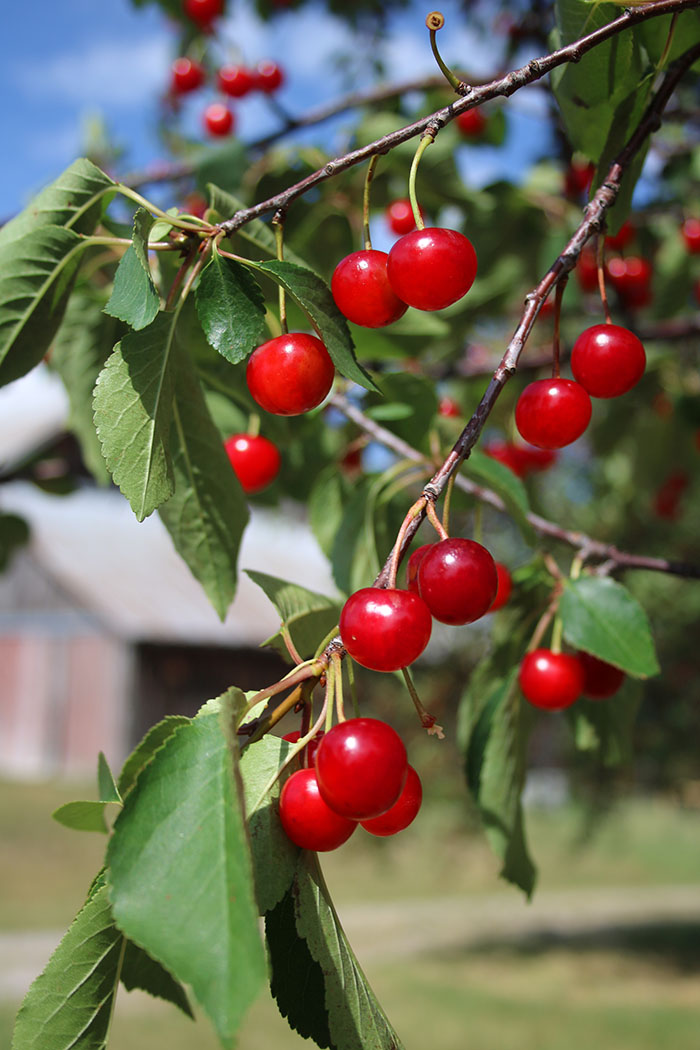
I can’t think of cherry pie without thinking of my Grandmother who was often perched on the piano bench belting out a round of Can She Make a Cherry Pie, Billy Boy Billy Boy. No?? Nobody?? We didn’t actually grow up on cherry pies as a summer staple, but my Dad loved him some bings and spending time in Michigan during the summers, they were and are plentiful. Traverse City has an annual festival dedicated to cherries with races through the orchards, pie eating and pit spitting. The airport is Cherry Capital Airport. Fly right over the Leelanau Peninsula mid-summer and you will be amazed by the vision in bright red. For this pie, I used a combo of those pretty bright red tarts, along with sweet dark cherries and whites. Whenever I get them, I pit them immediately and freeze by color in ziplocks.
Now on to the inside secrets on how to trick out a ready-made crust and pass it as your own. These tricks work best for the pre-made dough that comes rolled up and is found in the dairy case, possibly sporting a chubby white guy with a chef toque. Some of these tips will help you jazz it up and some will help rid you of a soggy bottom. Nobody likes that!
Secrets for success:
Oven should be hot; pastry should be cold. Always 425oF for crusts.
Heat a pizza stone while you preheat.
Use a glass pie plate and butter it well.
Brush egg white on the inside of the raw bottom crust once you’ve laid it in the pie plate. Back to the fridge til its time to use this.
Brush the top crust with cream or half & half. Sprinkle with sugar
Lay a sheet of foil loosely on the top for the first 15 minutes of baking to help the fruit temperature rise more quickly.
Use a foil-lined (for the mess) sheet pan (to protect the glass on the pizza stone) under the pie.
Get the best vanilla ice cream – no point in cutting corners here!
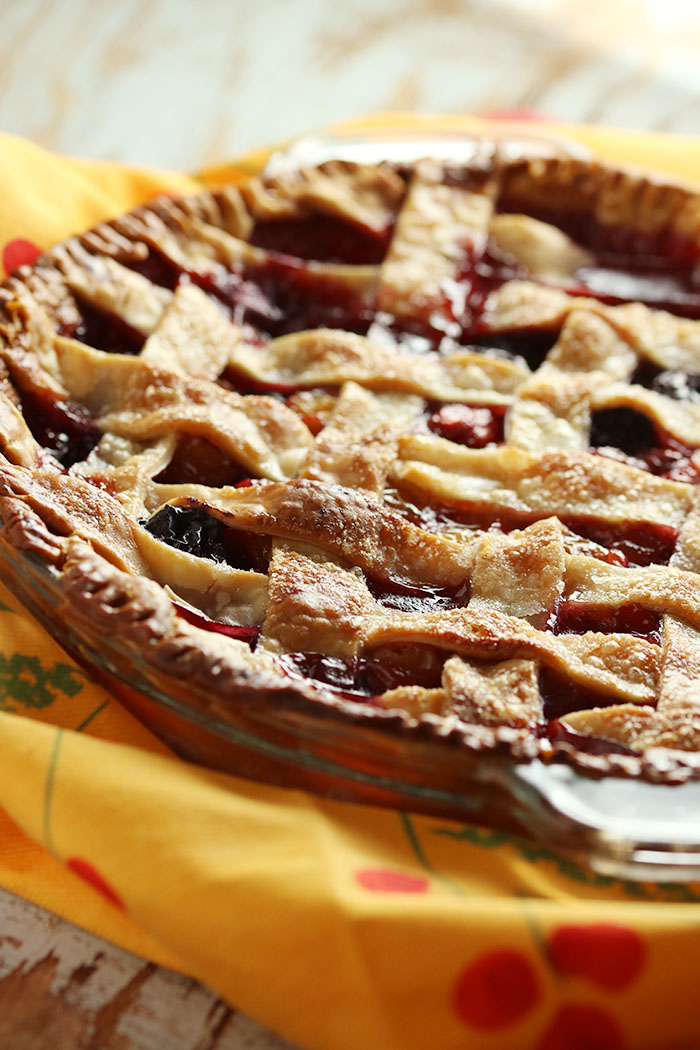
Double Crust Three Cherry Pie
Dough for a double crust pie
6-7 cups of cherries, pitted (I like a combo of sweet and tart. If frozen, do not thaw)
1/2 cup sugar
3 Tablespoons cornstarch
1 Tablespoon lemon juice
1 teaspoon almond extract (wonderful flavor for both cherries and peaches)
Preheat the oven to 425oF with a pizza stone placed on a rack in the bottom third of the oven. Butter a 9 1/2” deep dish glass pie plate.
Rollout (or unfold) dough for the bottom crust. Fit into the pie plate, leaving any overhang. Brush the inside of the crust with enough egg white to coat. Roll out the top crust. Refrigerate both crusts until you are ready to use them.
Combine the cherries with the sugar, cornstarch, lemon juice and almond extract.
Remove the top crust from the refrigerator and cut into 3/4” wide strips.
Remove the bottom crust from the refrigerator and fill with the cherries. If any sugar mixture has settled in the bowl, sprinkle evenly on top of the cherries. Brush the outside edge of the crust with the remaining egg white and lay half the strips evenly across the top in one direction. Weave the remaining strips cross-wise ”pot-holder style”. Press the ends into the bottom crust around the outer edge and trim excess. Flute or crimp the edges.
Dot the top of the pie with butter, brush the lattice with cream and sprinkle with 1 Tablespoon sugar.
Lay a piece of foil on top of the pie (not tightly wrapped and not tented). This will help the fruit heat up faster and keep the crust from starting to brown too quickly. Place the pie on a foil-lined sheet pan and set on the pizza stone. After 15 minutes, remove the top foil. Continue baking until the crust is golden and the fruit is thickened and bubbly. Keep an eye on the crust color and cover outside edge with foil cut into a ring or entirely, as needed to slow down the crust color while the fruit thickens. This will take about an additional 45 -50 minutes.
Remove the pie from the oven and let it cool thoroughly on a wire rack to thicken up completely. Cut it too early and you have a juice bomb. If you want to serve it warm, reheat it at serving time.
Serves 8 – 10
This post contains affiliate links. For more of my must-have faves, check out my shop.
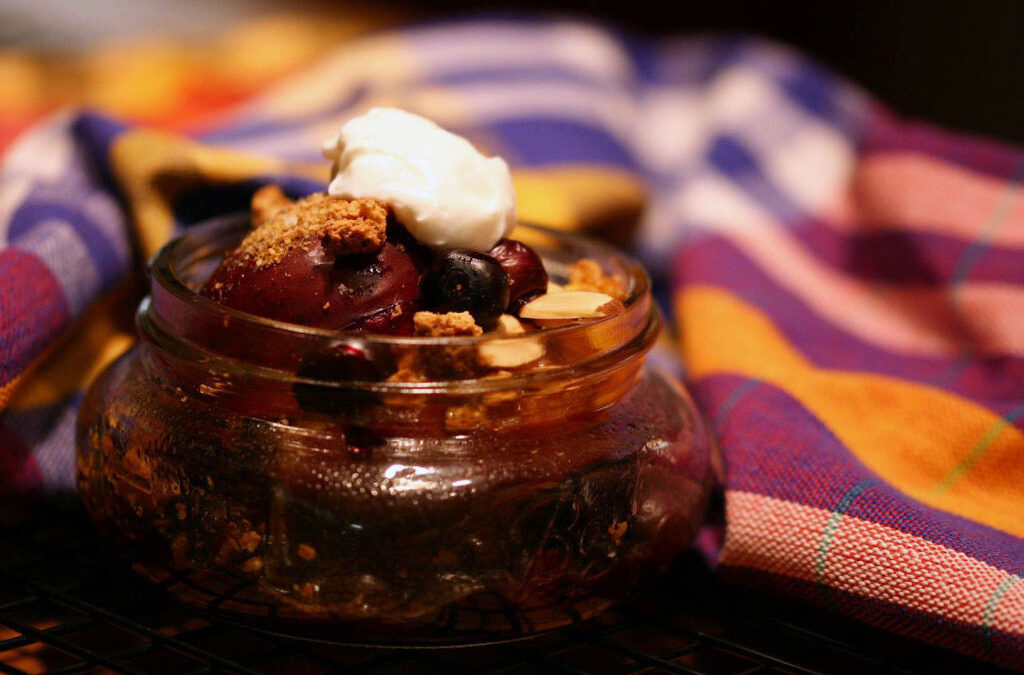
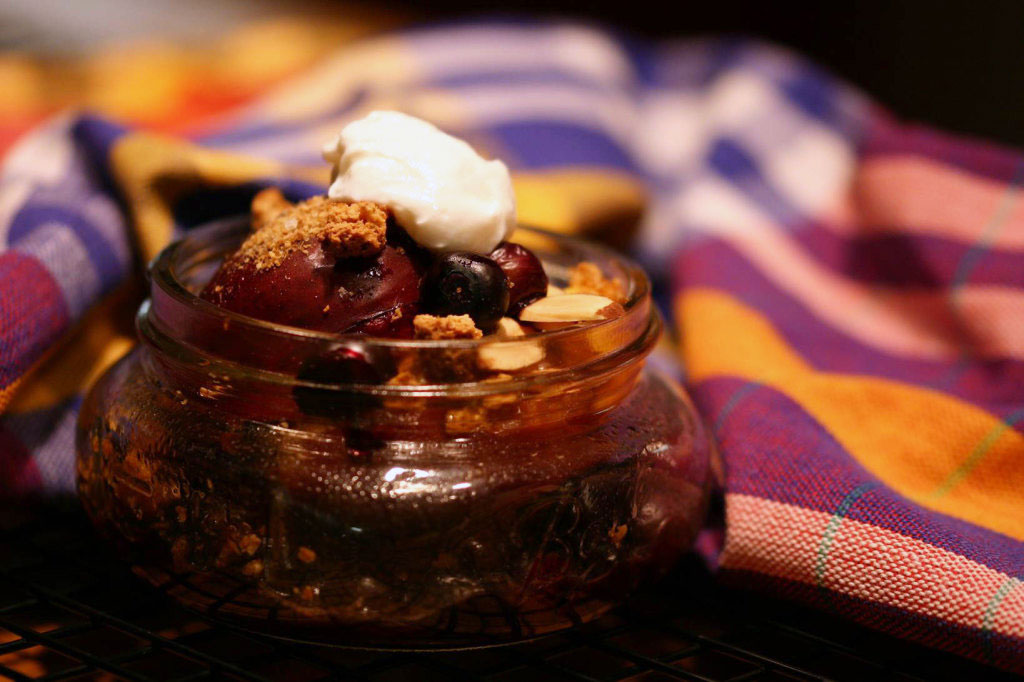
A-comfy-cozy-warm-and-toasty-sit-by-the fire-and-sip-port-dessert. Cutting the butter that normally makes a command performance in the topping, this dessert weighs in at only 117 calories and 2 grams of fat. Ah, but it feels like so much more.
Ingredients
Crumble Topping
6 Amaretti Italian cookies, coarsely crumbled
1 Tablespoon brown sugar
Pinch of salt
Fruit
2 fresh Chilean Nectarines, halved, pits removed
1/2 cup fresh Chilean Blueberries
2 fresh Chilean Plums, halved, pits removed
2 Tablespoons port
1 Tablespoon sliced almonds, toasted
1/4 cup non-fat Greek Yogurt
Directions
Preheat oven to 400° F.
Prepare 4 – 4” (1 1/2 cup) ramekins by coating the sides with a thin layer of butter.
Mix the crushed cookies, brown sugar and salt together in small mixing bowl.
Arrange 1/2 nectarines, cut side up in each of the four prepared ramekins. Divide the blueberries among the dishes. Place the 1/2 plums, cut side down, pushing the nectarines at an angle, so they overlap slightly. Drizzle each with the port. Sprinkle crumble on top and divide nuts among the ramekins.
Place ramekins on a sheet pan, and bake for 18 to 20 minutes, checking the topping after about 15 minutes. Place a small square of foil over the ramekin, if the topping is starting to darken. Fruit should be tender and juicy when pierced.