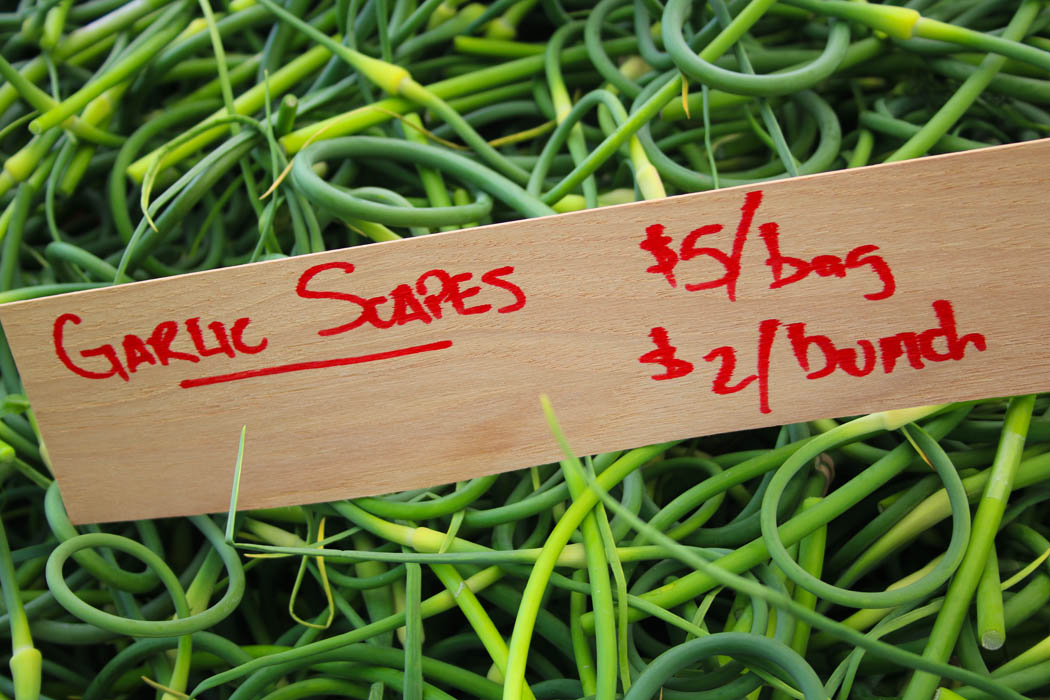
So here’s the full disclosure on Garlic Scapes – you are either going to have to run right now or bookmark this page for next year. I’ve kind of being keeping this secret recipe under wraps so there would be more for me (sorry, not sorry). Depending on your location, you may still be able to get this magical ingredient. #fingerscrossed
Garlic Scapes. While it’s not new to me – I have been going mano a mano with it for years to get the twisty, curly scapes straight enough to chop – it was only last year that I learned about making bundles and roasting them. Scapes are the bud of the garlic plant and are a milder, slightly sweeter version of the bulb. For years, I chopped it – best I could – and threw it raw in salads, especially hearty ones like potato salad. Or sautéed it in brown butter and tossed it with pasta, wilted greens, and some good parm. For a full FAQ on this magical shoot, check out Just Crumbs.
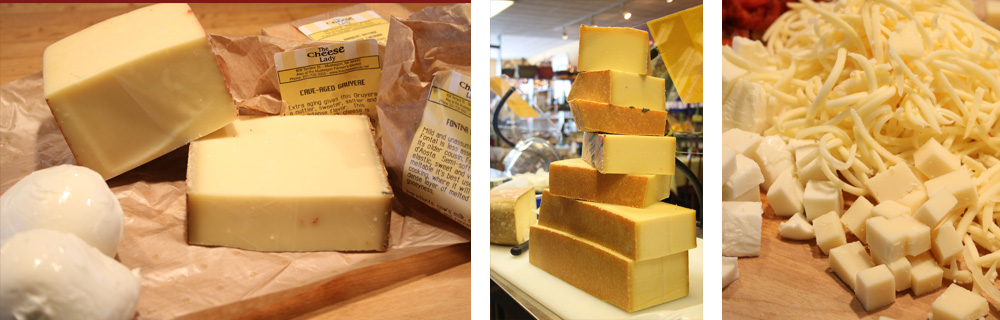
Source (right photo above and below): Maple Achers
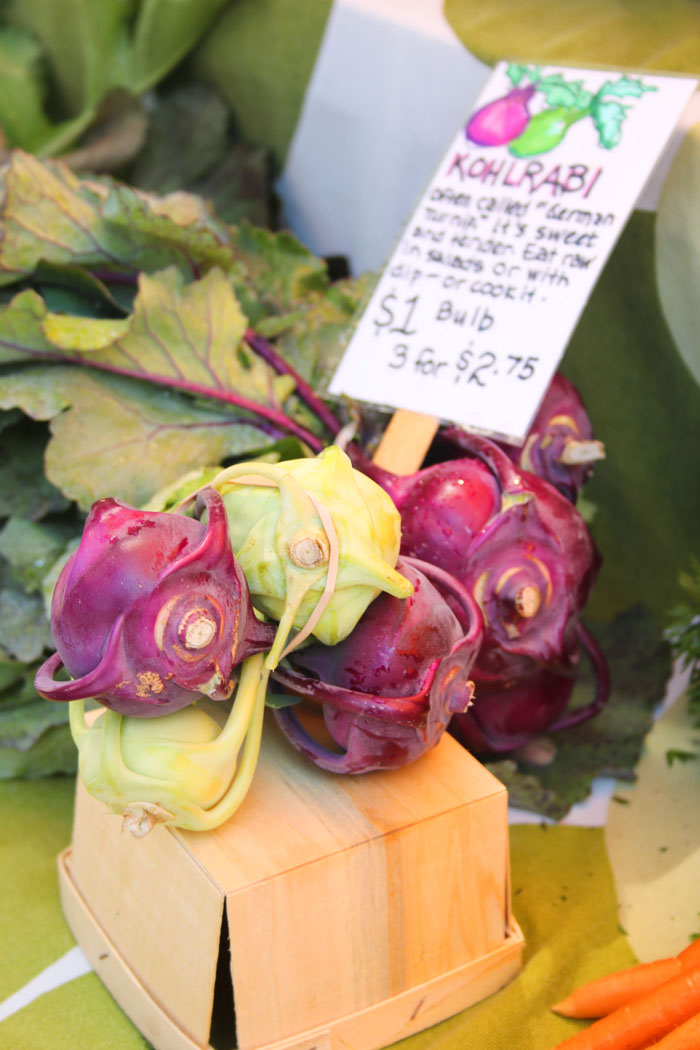
It is no coincidence that I fell in love with this recipe at exactly the same time I met the amazing Russ and Linda Hepler-Beaty of Maple Achers Farm. Who doesn’t love a couple that come to farming a bit later in life and change the spelling of acres to better describe the pain of toiling away in their fields. I met them in Leland, Michigan (Thursday markets during season) with their super festive spread of interesting and often heirloom vegetables stylishly presented from their Veggie-mobile – a tricked out vintage (1965) Airstream with a brightly striped yellow canopy. Years of catering, food styling and a more recent foray into photography make me a sucker for a gorgeous spread. Too often farmers line the wooden baskets with plastic bags for grab and go service, which in my mind not only ruins the aesthetic but also the compostable nature of fresh produce.
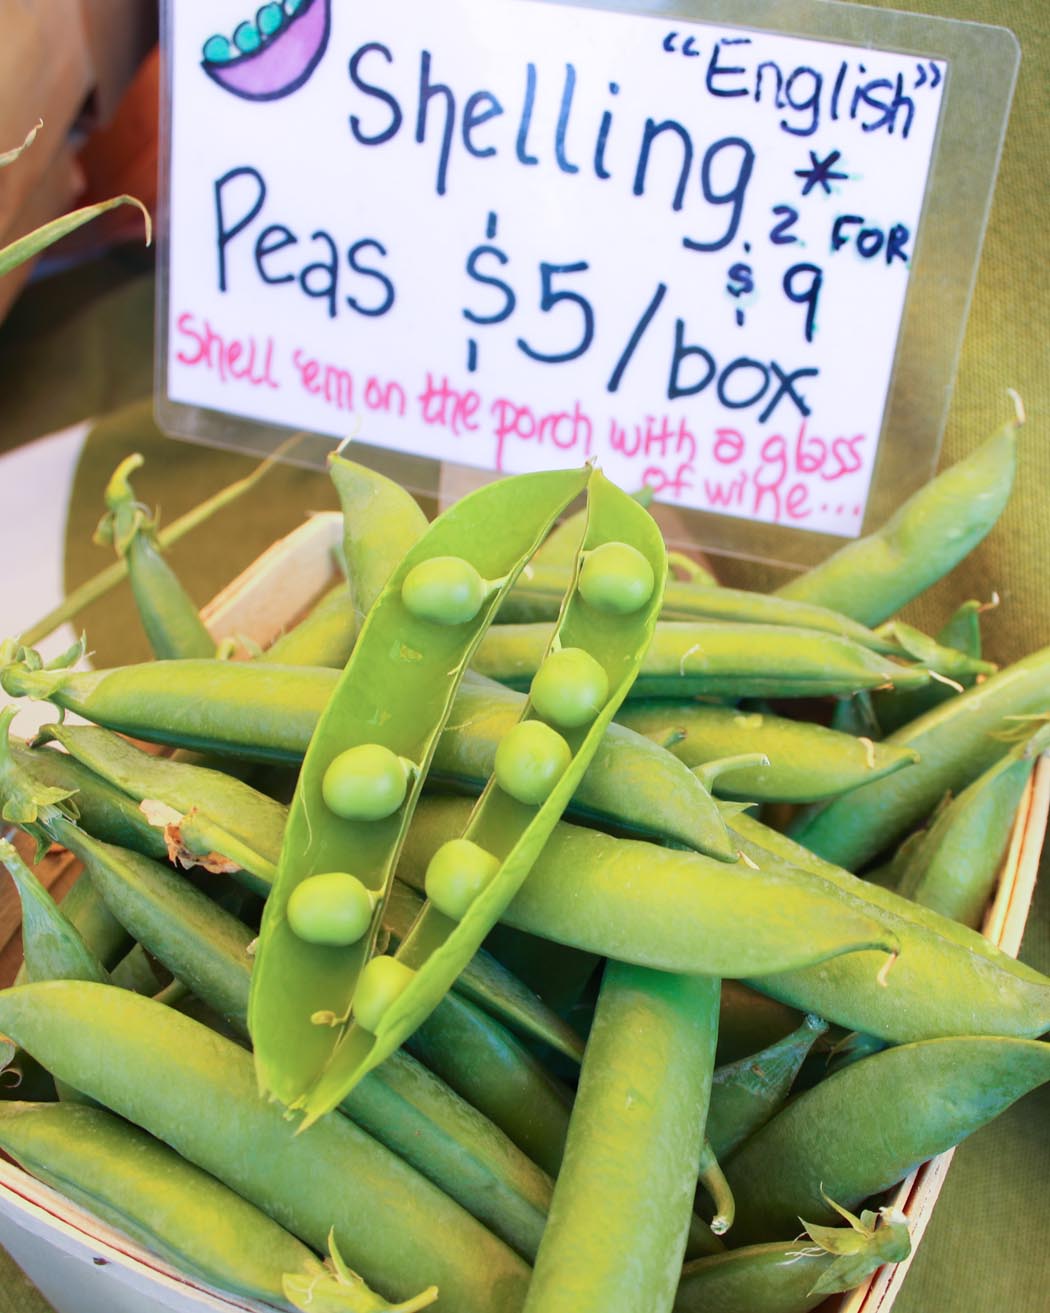
Linda is a genius at using props that scream FARMLAND – maple sap buckets filled to overflowing with Portuguese kale bunches, a 3-tiered galvanized cake stand with bundles of herbs, wooden baskets and colorful fabrics. She and Russ are quick to offer a cooking suggestion – cook the fava beans like edamame – and general advice – drink wine while shelling peas. Hell, yes.
The 10 acre farm in the heart of Leelanau County (Maple City, Michigan) is Certified Naturally Grown. Using plot rotation, nourishing fallow ground with cover crops, along with a strategic release of 300,000 lady bugs over the summer – you CAN get them on Amazon. I checked – they plant about 3+ acres and as foodies-first offer a more unique and interesting veggie line up than most farm stands.
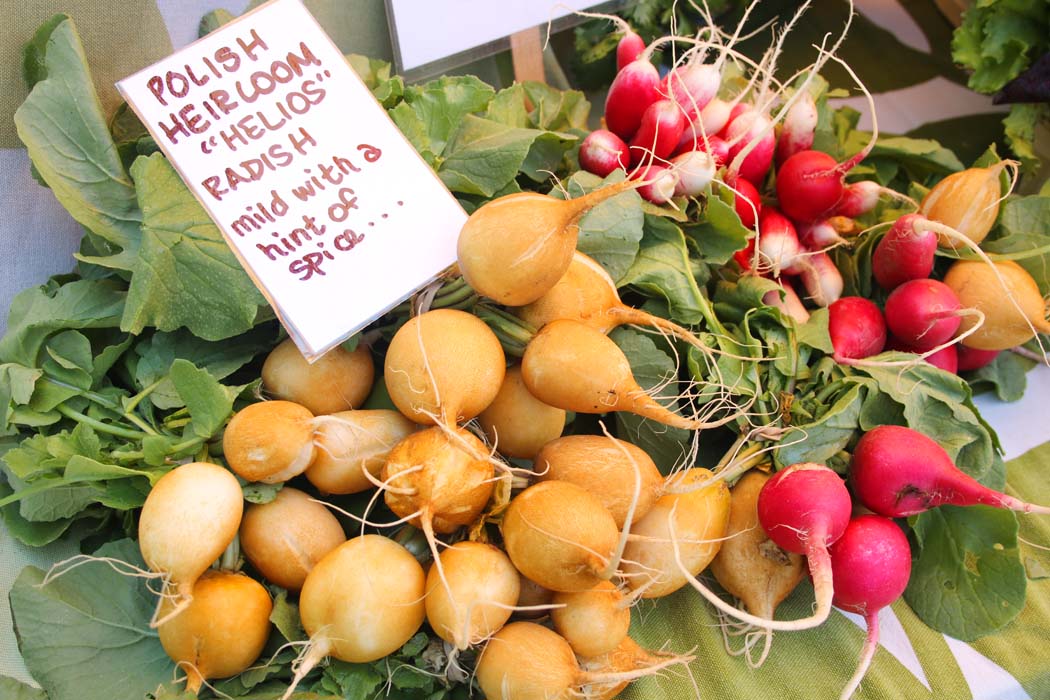
Almost all vegetables come in a variety of colors – beets are garnet, orange and white; potatoes – red, white & blue; cauliflower is lime, white, orange and lavender; even currants are red and pink champagne. Radishes range from yellow Polish Helios to lavender Asian Daikons, with about 6 stops in between. Russ suggested grilling the Bravo daikon, and Linda chimed in with the idea to add grilled escarole, and top with feta and a drizzle of vinaigrette.
Having only a few scapes to test their roasted garlic scapes recipe last year, I waited all winter for the first sign this spring. Apparently used to selling them one by one, I surprised the Grand Haven farmers by scooping up their entire stash. I have since made them a few times and they have that mouth-pop-ability of edamame. Olive oil and salt – what could be bad?
If you are in Leland on a Thursday, check out Maple Achers and try a new veggie. Otherwise, run, run, run to gather up a handful of garlic scapes while you still can! And yes, I’m still holding, so let me know if you are desperate.
Bring a large pot of salted water to a boil. Drop the garlic scapes in the boiling water and cook for about a minute until bright green. Rinse with cold water to stop the cooking.
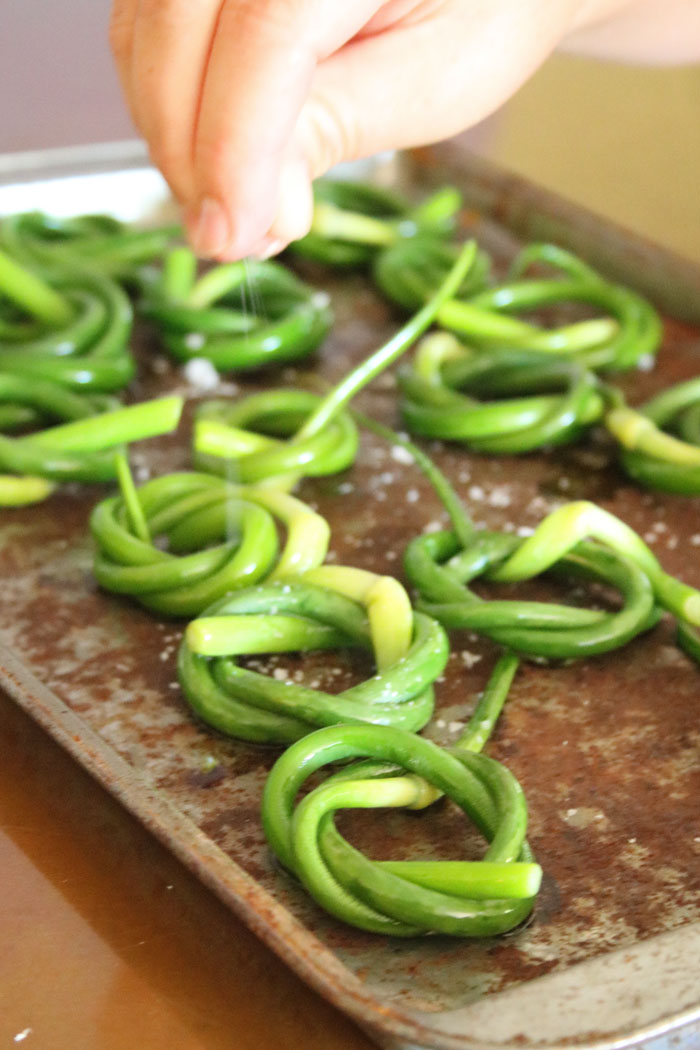
Coil each scape into a circle, following the natural shape, and tucking in the ends in to hold it.
Transfer to a bowl and drizzle with olive oil, tossing to coat.
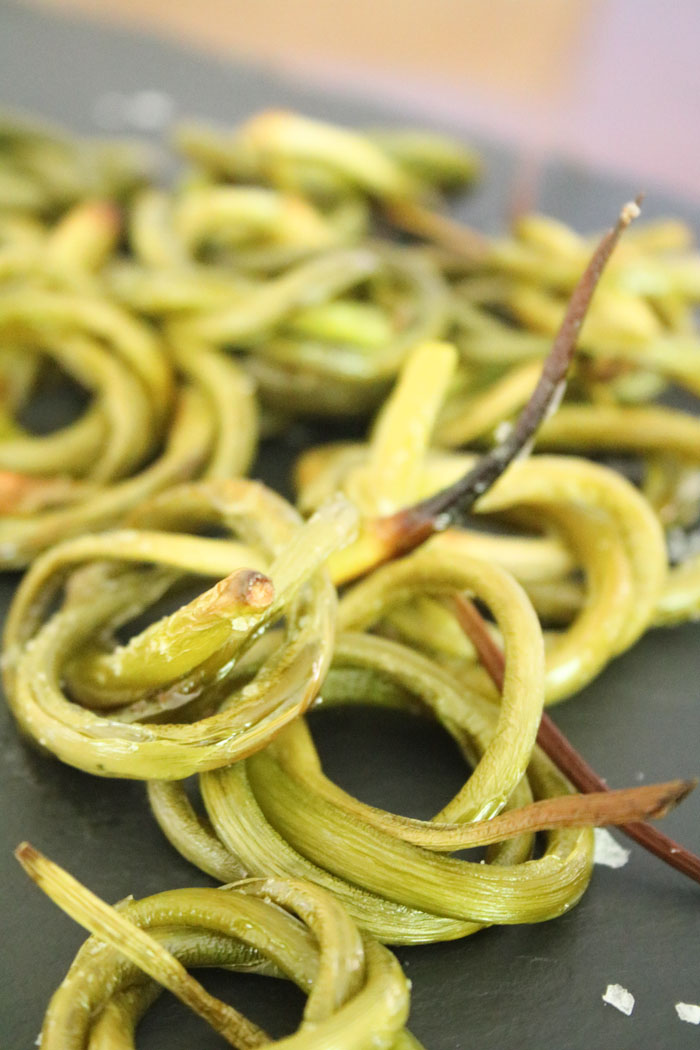
Arrange on a sheet pan, sprinkle with salt, and bake for 12-15 minutes until the ends start to crisp up. Feel free to use a hot grill instead – equally delicious.
Transfer to a serving plate and sprinkle with additional salt, if needed. Best served with a glass o’ vino!
This post contains affiliate links. For more of my must-have faves, check out my shop.
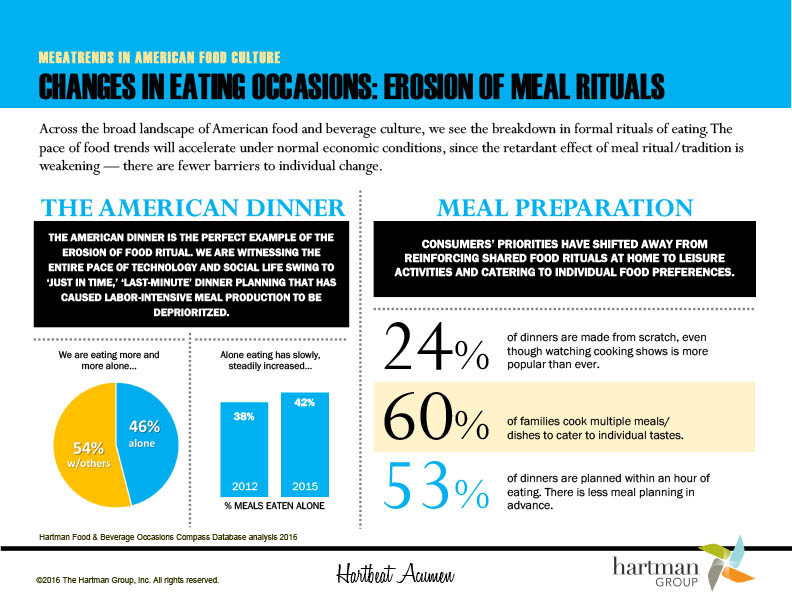
Say it ain’t so!! This sad infographic appeared this week from a consulting company that focuses on food and beverage trends. For me, the really sad part is the title – Erosion of Meal Rituals. According to the Hartman Group, more people are eating meals alone and most meals are planned in less than an hour. The last part sounds really good to me. With a well-stocked pantry, and the fact that spring has sprung and sweet peas are starting to appear, this soul-satisfying dish can be whipped up in no time. But it’s just as easy to make this for two – or three – or four or more – so please don’t eat alone. Breaking bread with friends and family is one of life’s great treats and truth be told is the real soul-satisfying part of any meal.
This spicy horseradish lemon dressing is a fantastic vinaigrette to make in a big batch and have on hand. I always have four or more vinaigrettes available at any time and the flavor profile of each can take a dish in a whole new direction. Lemon/EVOO is a staple, doctored here with a dose of spicy mustard and horseradish. I love a creamy miso dressing, an Asian ginger/soy/sesame oil one and of course something balsamic-based – maple, raspberry, white balsamic, etc. The possibilities are endless.
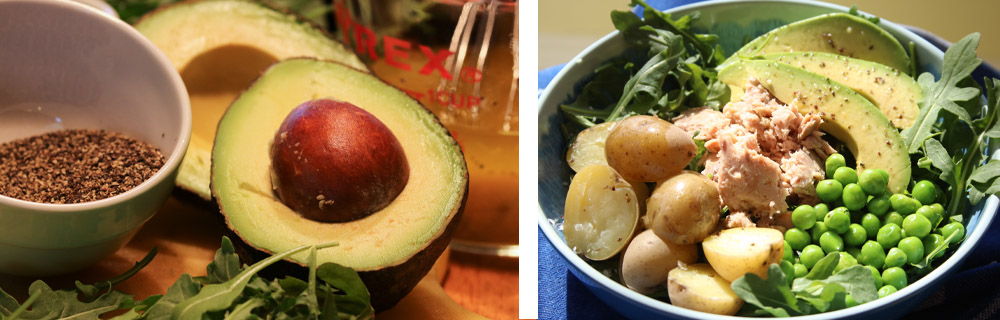
Using classic French technique, salt and pepper are added first with the acid so that they can dissolve before drizzling in the oil in a thin stream for a perfect emulsion. Seemingly every kitchen in France had a different benchmark as to what was the right amount of seasonings. And no matter how I did it, I was American and it was wrong. Oh wait, I was an American Woman, and it was really wrong. I will dedicate a whole post to the classic technique, but for today we will just dump and whisk. As an American, I reserve the right to change the technique and I find that using a grainy salt and pepper in just a measured dose at the end – here I use it strategically on the avocado where its texture and flavor make it a standout – allows for more control over sodium intake which isn’t a bad thing. Certainly not as bad as eating alone. These are my favorite salts today – Maldon Sea Salt Flakes and Maine Coast Sea Seasonings.
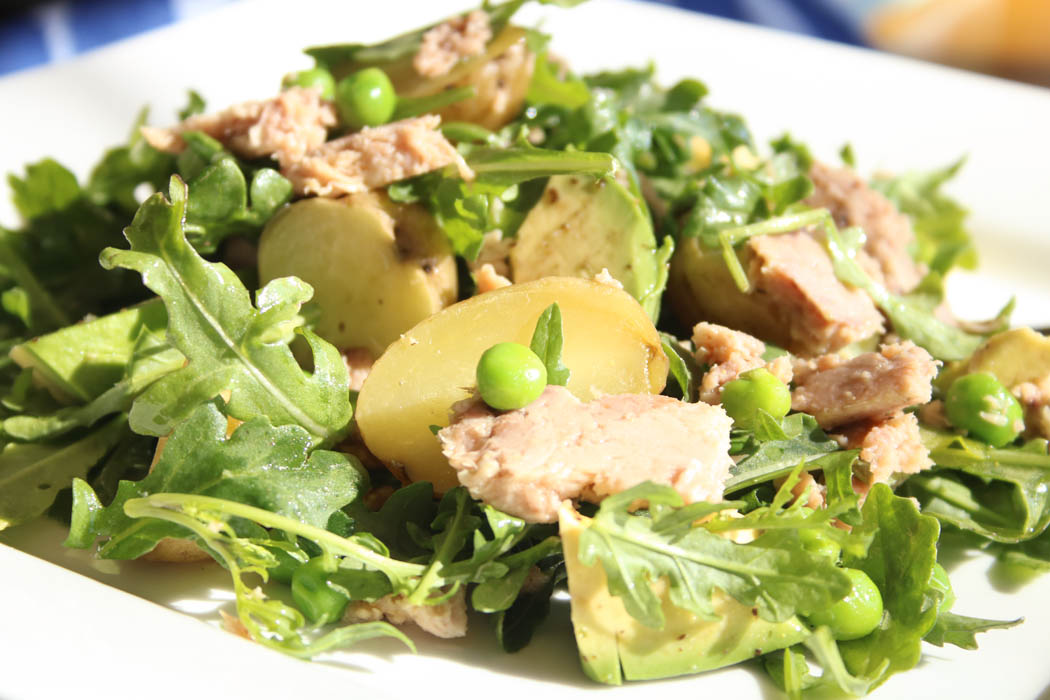
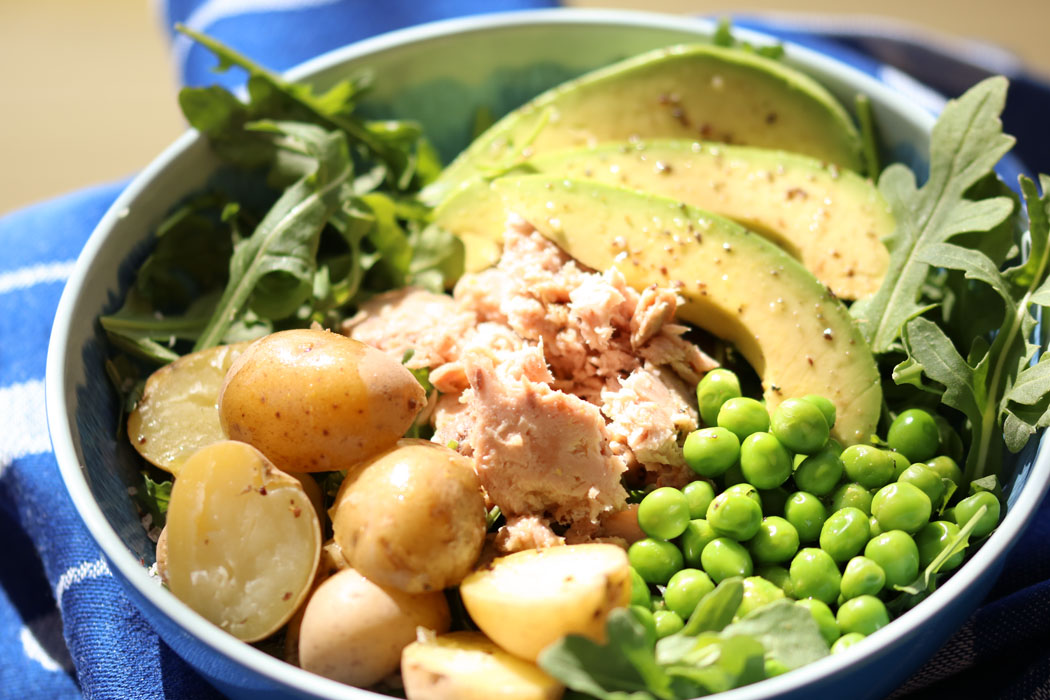
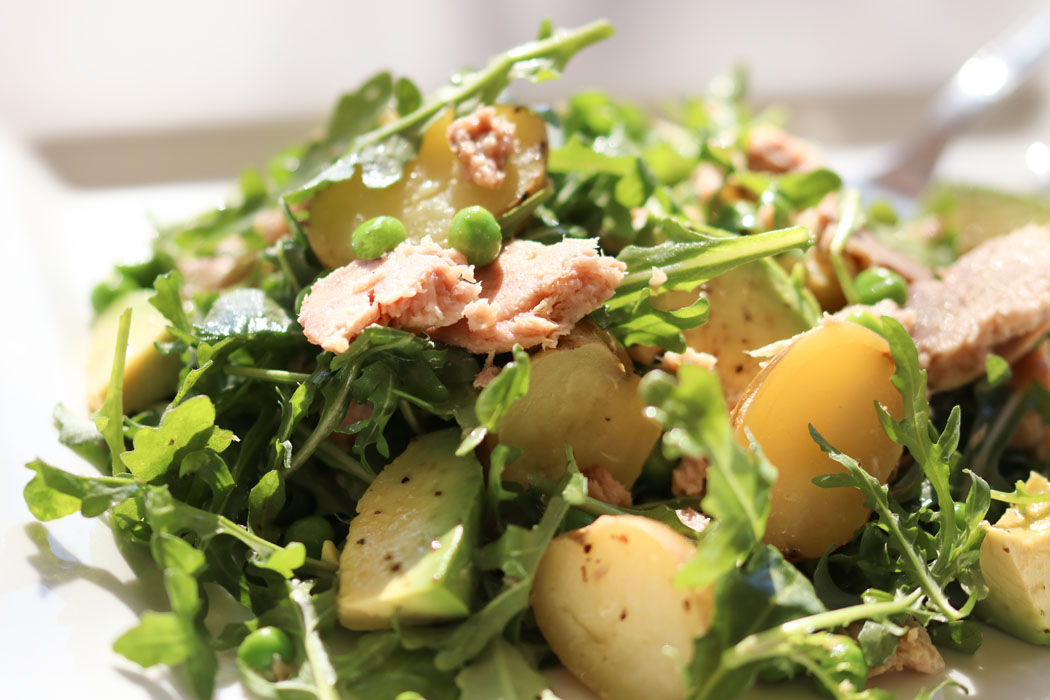
Sweet Peas, Tuna and New Potato Salad
1 pound small new potatoes
½ pound fresh (or frozen) shelled sweet peas
10 ounces tuna (I prefer chunk light tuna in water – especially love the pouches that need no draining)
5 ounces arugula
1 avocado, sliced or chopped
Salt and Pepper to taste
Spicy Horseradish Lemon Vinaigrette
1/3 cup lemon juice
1/3 cup extra virgin olive oil
1 Tablespoon prepared horseradish
1 Tablespoon spicy Dijon mustard
Bring a pot of salted water to a boil. Add potatoes and cook until tender, about 8 minutes. Drain liquid and let potatoes cool to room temperature.
While the potatoes are cooling, place an inch of water in the pot and bring to a boil. Transfer the peas to a steamer basket and add the basket to the pot and cover. (Frozen peas can just be thawed – no need to cook). When tender (about 2 minutes), remove the basket and run under cool water to stop the cooking.
Prepare the Spicy Horseradish Lemon Vinaigrette: Combine all ingredients in a shaker with a tight-fitting lid and shake to combine well, or place in a small bowl and whisk to combine.
Arrange greens in four bowls and divide and arrange potatoes, peas, tuna and avocado. Drizzle with spicy horseradish lemon vinaigrette. Or combine all ingredients in a large serving bowl and drizzle with the dressing and toss to combine. Season with salt and pepper to taste.
Either way – composed (aka deconstructed) or tossed – it’s as fresh as the spring air.
After that fantastic morning cutting the cheese with the Cheese Lady (LadieS, original and 2.0), I wanted, no needed, to drill down on the “recipe cheeses” that Shelley was going on about. Yes, I do like to cook with cheese, but I also couldn’t be happier with a big spread, especially if there are raw milks in the mix. But after sharing my insights into the featured “recipe” cheeses in my last post, I turned around, drove back and bought even more, just for cooking. Mac & Cheese seemed like an easy and simple go to idea, but as you are probably noticing, I’m not one to let well enough alone. Okay, that’s not 100% true – I pendulum-swing from letting stellar ingredients shine (less is more) way across to an insane amount of add-ons (more is more). Have you already forgotten the Everything but the Farmer Farmer’s Market Salad? I rest my case. I’m sure there are good pharmaceuticals for this split personality, but I choose to go it alone and see what boils over each day’s pot.
So this recipe is part Mac & Cheese 101 – including classic French béchamel technique – and part KMG – Katy Goes Mad …in this case, for Pimento Cheese. Two big drivers here: The Cheese Lady Muskegon sometimes has Zingerman’s Pimento Cheese. At the risk of telling you about it and creating a run on the stuff, it’s divine. The second is dear ole Dad. I think pimento cheese sandwiches were a staple his mother made – Grandmother Keck was quite the cook in the farm-girl-vegetable-soup-and-applesauce-by-the-vat-load-sort-of-way. Whatever his inspiration, he was super fond of the spread and, like me sourcing out the goods from Zingerman’s, he had his haunts. (I hate to admit that it was a Stuckey’s gas station on the highway south of Terre Haute….let’s just say this apple rolled a few acres after falling from that tree.) The notion of his love for “pimenna”, as he more or less Hoosier twanged it, lives on, and it wouldn’t be unheard of to find it served at an engagement party or stuffed on whole wheat and into your Christmas stocking – not because you’re dying for it but because it needs to be there. It’s the right thing to do. Some things you just don’t question.
There’s one more reason I’m keen to dose the mac & cheese in the southern way – a recent trip to Atlanta, trend-spotting for a client, had me in awe of the many uses of pimento cheese. From apps almost to dessert, I was hard pressed to find a joint without the ubiquitous spread in the 13 restaurants I visited in 36 hours. It was some kind of heaven and I’m sure my Pop was sitting nearby, somewhere on the right hand.
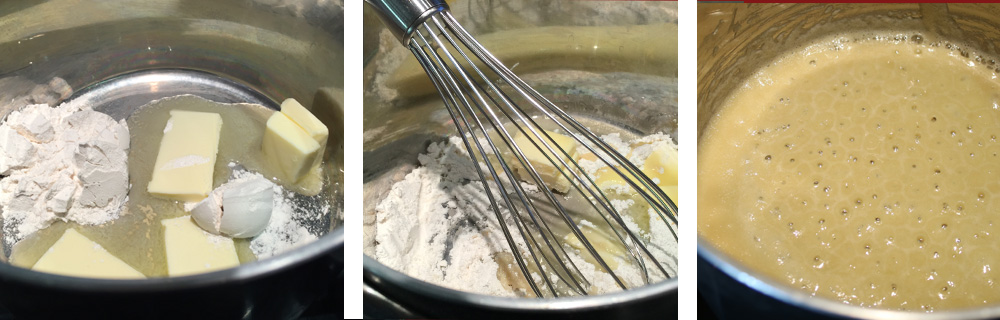
For the basics: The start to any classic flour-based sauce is a roux – equal parts flour and butter (or in the case of gravy, flour and meat or bird fat), generally used in equal portions. It’s always important to toast the flour, once the two are whisked together. That is what gives the sauce a cooked, somewhat nutty taste. For those that thicken pan drippings by whisking in flour at the end, there will always be a slightly raw flour taste. The longer you toast the roux, the deeper the color and flavor. Some gumbos will have it go all the way to a deep rich dark color. But Mac & Cheese is based on a white sauce, so for this the roux, we will only toast it until it just starts to bubble – about a minute or so.
No Shame in Measuring
I can eyeball proportions pretty well and often don’t measure but there is some chemistry at work here and there is no shame in measuring. A little precision will help ensure success. When making gravy at Thanksgiving, even I pour off all the pan drippings to see how much is fat and how much is broth – stay tuned for a Fall drill down on that. In a flat roasting pan, it’s damn hard to tell the ratio – pretty easy in a glass measuring cup when the fat floats.
The key proportions for a sauce of average thickness are:
1 Tablespoon Fat
1 Tablespoon Flour
1 cup liquid
Mac & Cheese is generally started with a white sauce or Béchamel. There you are speaking French again. You’re welcome! The addition of cheeses to this blond roux-thickened base turns Béchamel to Mornay. Add crayfish and you have Nantua Sauce. Sautéed Onions makes Soubise. And you can probably guess what makes Béchamel into Mustard Sauce. FYI, Bechamel is one of three of the five mother sauces that uses roux – so pay attention here! 1 T to 1 T to 1 Cup!
For a pound of pasta, you will need 3 to 4 cups of sauce. I make a mean turkey tetrazzini that uses spaghetti (not such a clingy noodle) and it seems to soak up about 3 cups of sauce. Since you are adding cheese to further thicken this sauce, I find Mac & Cheese with a curly, needy noodle like cavatappi will absorb closer to 4 cups. (Better safe than sorry – err on the “make-too-much” side). So who’s doing the math here? 4 Tablespoons (1/4 cup) butter, 4 T flour, 1 quart of milk.
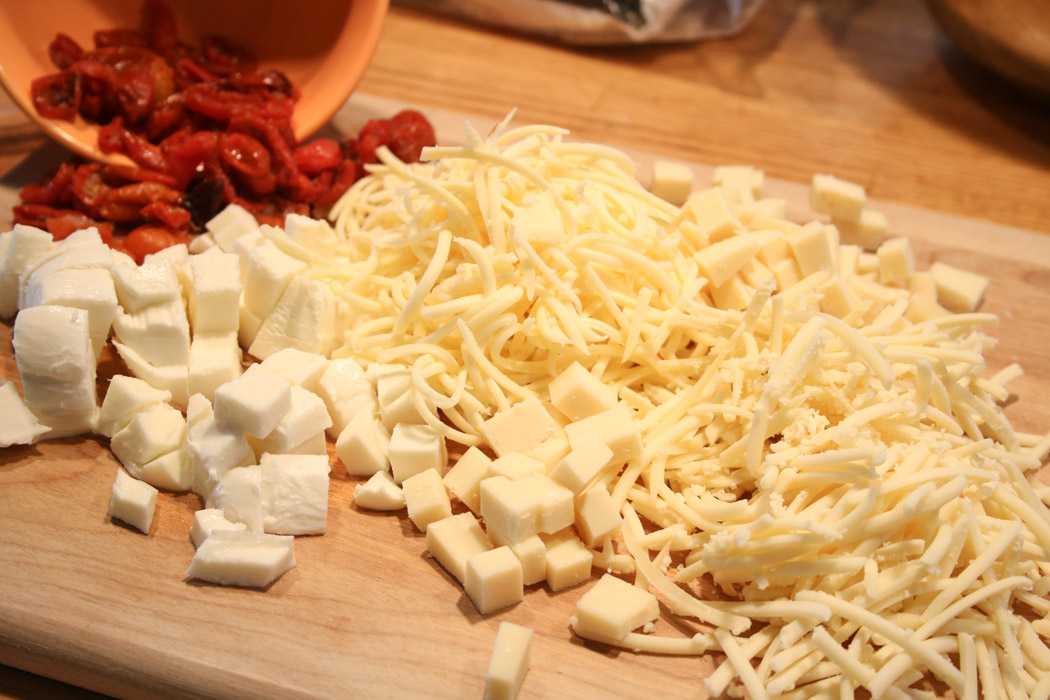
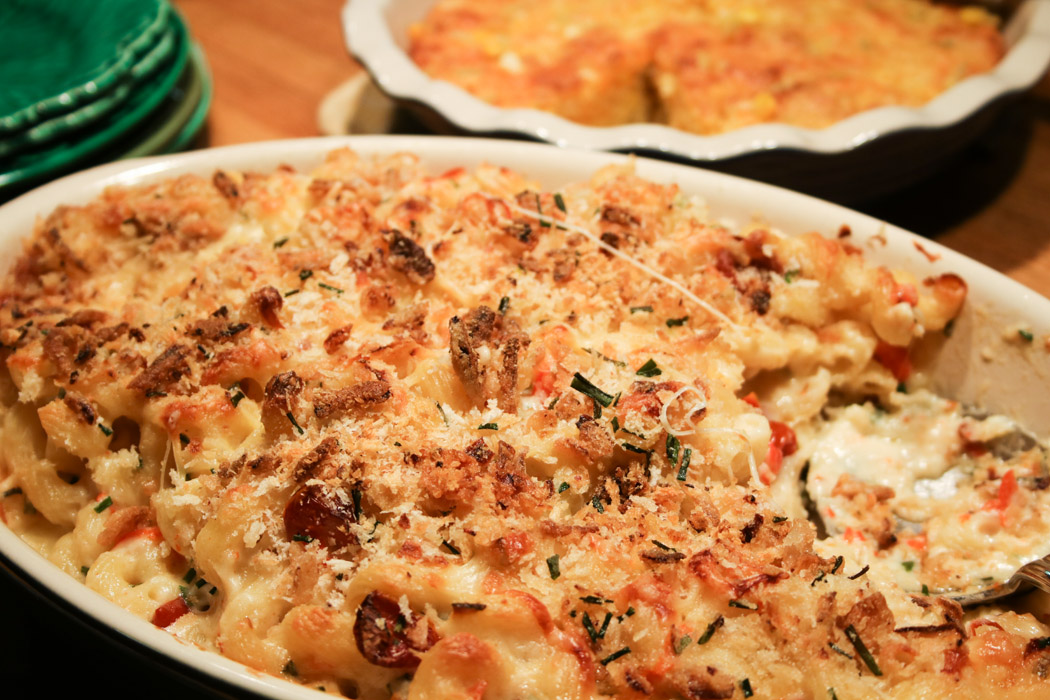
After you finish the sauce, stir in grated cheese(s). I’m not bothered by the color here and chose white cheeses (high quality, of course: Fontina Fontal for its creaminess and ability to hold a sauce and Barber’s Cheddar for its edge). I realize that some of you can’t get over needing the bright yellow – but for the love of God, please use a quality yellow cheddar. Did you see that Kraft recently did the world’s biggest blind taste test? Assuming that fans would complain when they took out some dyes and non-natural additives, they secretly made the switch without changing the packaging (except ingredient list) and way ahead of schedule. Nobody noticed. I did feel pretty much affirmed on my comment last month that commercially produced turmeric “tasted – well, yellow” because Kraft used it in lieu of yellow dyes 5 and 6. I can promise you if the turmeric had tasted like ginger, as intended, someone would have noticed! But the unspoken fact still remains – even though these additives are so called natural, they are not natural to cheese. There is nothing wrong with a white sauce with white cheeses!
The other thing I like to do with the cheeses is grate some and cube the rest so you get pockets of cheesy goodness that melt and string as you pull. If you don’t like that (seriously, WHAT IS WRONG WITH YOU?), then either chop the cheeses more finely, or grate them all. With any of the grated cheeses, use a coarse grater. If you grate too finely (think green shakers of wood pulp/cellulose), the cheese “dust” won’t melt well and will cause the sauce to be a bit gritty. Nobody likes that! If you are using a variety of flavors like I am – or even more distinctive flavors, like a blue or pepper cheese….or blue with pepper (yes! Glacier Wildfire Blue!!!) – it’s really important to add the cheeses separately from the sauce so you get the distinct pops of flavor. If you only added them to the sauce, it would be a blended flavor and the strongest cheese wins. Not the goal! Layer! Layer! Layer!
I’m starting you out with the basics here and including the southern twist, but there are plenty of other ways to jack your mac, and I’ll ‘bring it’ in the future.
Ooey Gooey Mac & Cheese with Southern Twist (“pimenna cheese”)
Béchamel Sauce:
4 Tablespoons butter
4 Tablespoons flour
4 cups of milk
2 teaspoons salt
¼ teaspoon red pepper flakes, or more to taste
2 cups grated cheese (I used a combo of ¼ pound Fontina Fontal and ¼ pound Barber’s Cheddar)
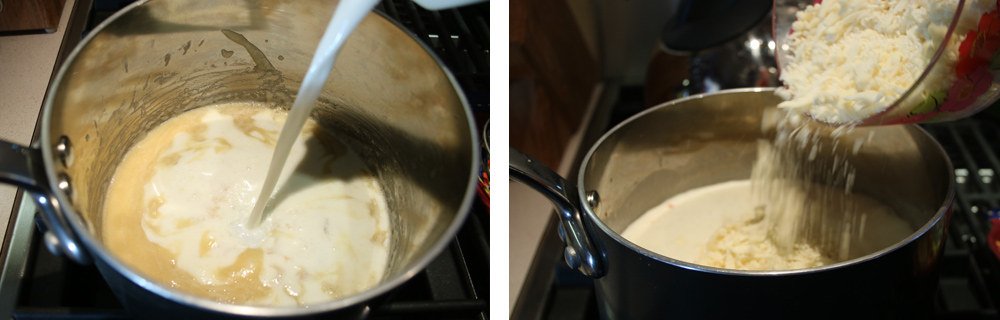
Melt the butter and whisk in the flour to make a roux, the texture of wet sand. Let it start to bubble and continue for one minute. Whisk in the milk and combine well. Add the salt and red pepper flakes. Simmer for 10 to 15 minutes until thickened, whisking from time to time to make sure the bottom does not stick. Add handfuls of the 2 cups of grated cheese and stir until melted.
Meanwhile cook the pasta according to package directions in salted boiling water, stopping about two minutes early. Drain and transfer to a mixing bowl.
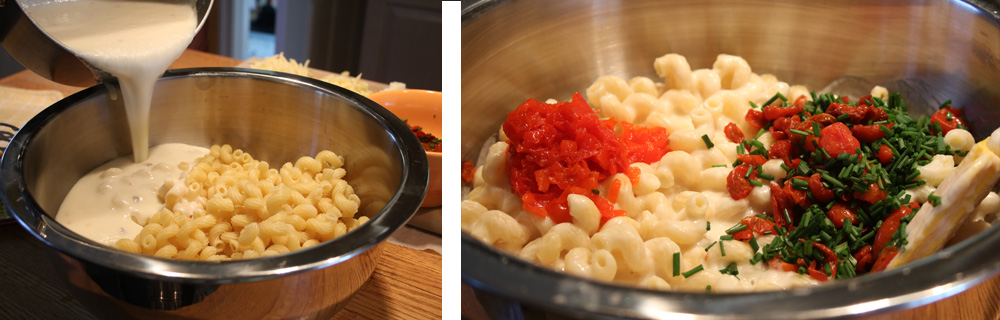
Pour the cheese sauce over the warm pasta, using about ¾ quarters of the sauce to start. Stir until combined, adding additional sauce as desired. (You will likely want it all). Add the You’ll Thank Me in the Winter Oven Dried Tomatoes, peppadew and 2 Tablespoons of chives.
Preheat oven to 350oF.
Transfer 3 cups of the sauced pasta to a buttered 3-quart casserole dish. Layer 1/3 of the remaining cheeses (the grated fontina, grated and chopped gruyere, and chopped mozzarella). Repeat with two more layers of pasta and cheese until all are used, ending with the cheeses.
Combine remaining Tablespoon of chopped chives, panko and fried onion topping in a small bowl. Sprinkle on top of the pasta and dot with butter.
Bake the assembled macaroni and cheese for 30-40 minutes until bubbly. Raise oven temperature to 450oF and bake an additional 7 to 10 minutes until top crisps up.
You know a movement has had its awareness sufficiently raised when a blithe reference slips into a throw-away line on a sitcom. After two posts on food waste last week, imagine my squeals when I heard this from a waiter at a hip millennial launch party on a newish sitcom: “The bruschetta has been made with rescued tomatoes and date of expiration burrata”. I’m squealing. Really. Yipeeeeeeee!
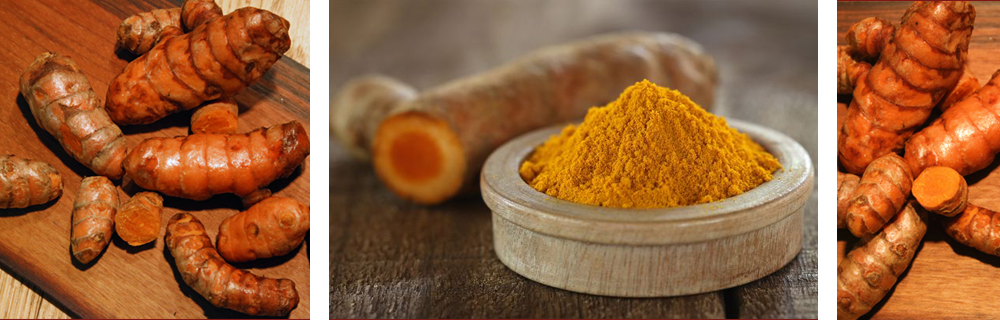
Unfortunately summer bruschetta is the last thing on my cooking mind today. A girl can dream. But as I moped through the grocery looking for anything to lift the gloom of winter’s darkest days, I was thrilled to see fresh turmeric. I didn’t even know you could get this in a mainstream grocery – in the Midwest. It used to be relegated to special trips to Asian markets in big cities. Or more likely it could only be sourced dried and ground. Honestly, I was never a fan of turmeric when I only knew its dried self. I thought it tasted – well, yellow. It didn’t really register much on my palate. But while doing guest chef stints on culinary cruises in the Caribbean, I would gather up ever fresh market item that was a bit unique and had a story and introduce our passengers to these new world treats. I even spent one week being followed by the Food Network, and we hit the Grenada spice market hard.
Turmeric was just one of the many spices I found bears little resemblance to its dry spice counterpart. Mace was another. It makes sense that I love turmeric because it’s related to ginger – and I’m well documented as a “fiend for ginger”. Both are rhizomes, along with galangal, lotus, bamboo, and many more. They spread laterally (called creeping rootstalk) and send shoots up. Many have culinary uses.
Like ginger, turmeric when fresh has a pungent and aromatic taste that can be quite peppery (HOT!), especially when used in excess. It is a key player in many South Asian (Thai, Indian, Vietnamese, and Cambodian) dishes – both for flavor and color; you’ll find it in American food as a colorant that can range from subtle to supreme. Vanilla products like yogurt and pudding turn creamy, not stark white, and mustard turns bright yellow.
But turmeric’s real claim to fame is its medicinal properties. Like ginger, turmeric has powerful anti-nausea (turmeric tea, just boil it up), anti-inflammatory, anti-microbial, and anti-fungal properties. If only this miracle worker could clean the bath!! (Nobody wants a yellow tub, I know, I know). It’s even being studied for treatment of IBS, Alzheimer’s, depression and cancer. Rock stah!
So I grabbed a handful and headed home, determined to make a spicy vegan curry. It doesn’t have to be vegan or even vegetarian, but that is what I had on my mind. Tucking in for the night with a Buddha Bowl of Spicy Goodness.
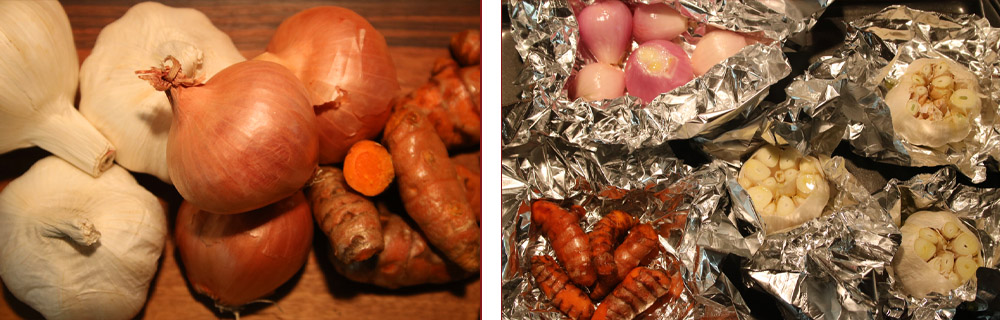
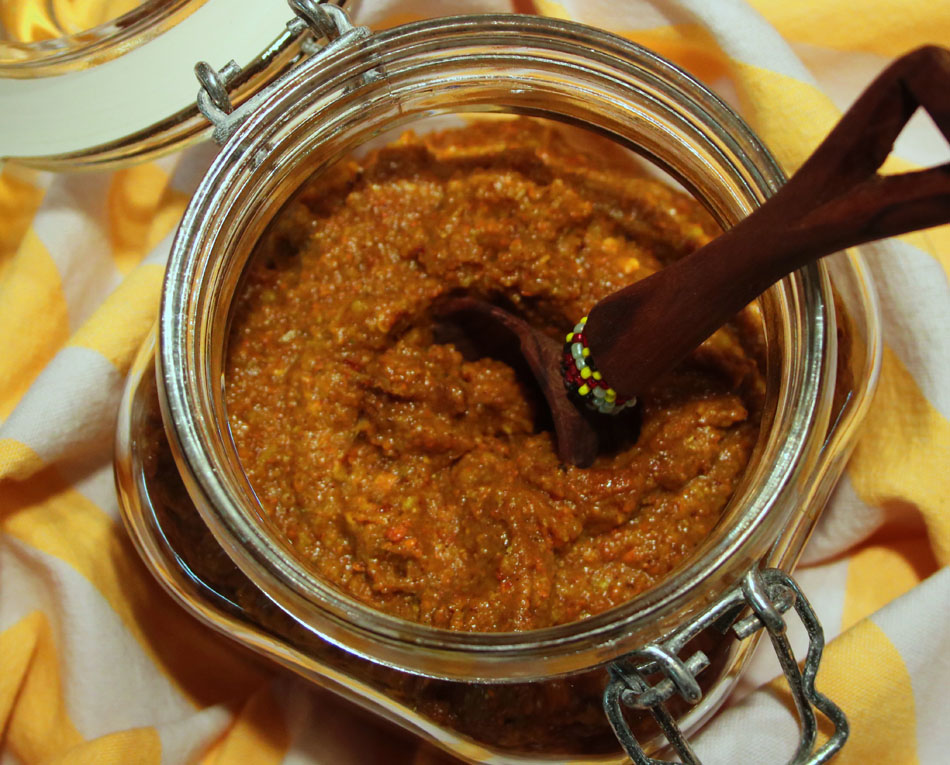
Start by making a Yellow Curry Paste – this will make four times what you need and freezes well. You can add a lot of different ingredients or leave out some of these, but this is what I had on hand and so what I used. Roasting the aromatics and toasting the spices, while a bit more time-consuming, will elevate the taste and develop a real depth of flavor that you simply can’t get by just pureeing all the ingredients. It’s worth the commitment.
Many curry recipes are simple purees, but this one roasts the aromatics and toasts the spices. While a bit more time-consuming, this extra step develops depth of flavor that you simply can’t get with dump and whirl. It’s worth the commitment. And bonus – it freezes well!
Ingredients
Scale
3 shallots
5 pieces of turmeric
3heads of garlic
1 Tablespoon of olive oil (plus more to drizzle on aromatics)
Spice Blend:
2 Tablespoons ground coriander
2 Tablespoons ground cumin
1 Tablespoon red pepper flakes
1 teaspoon ground cardamom
1 teaspoon cayenne
1/2 teaspoon cinnamon
1/2 teaspoon paprika
1/4 teaspoon clove
1/4 teaspoon allspice
3 Tablespoons lemongrass paste (a tube usually found with herbs in produce section)
1 1/2 teaspoons sea salt
Instructions
Preheat oven to 400oF.
Wrap the aromatics, each in their own foil pouch, and place on a sheet pan to roast. (20 minutes for the turmeric; 1 hour for the shallots and garlic)
Shallots – peeled, placed in a foil pouch and drizzled with olive oil
Turmeric – well scrubbed, placed in a foil pouch and drizzled with olive oil
Garlic – loose outer “paper” removed, tops of each head trimmed, placed in a foil pouch and drizzled with olive oil
In a small sauté pan, heat one Tablespoon olive oil and add all the spices. Sauté, stirring, for about two minutes until the spices start to release their aroma. Transfer to the work bowl of a food processor.
Once the aromatics are cool enough to handle, transfer the shallots and turmeric to the bowl of a food processor. Squeeze the roasted garlic cloves into the processor, picking by hand any that linger behind. Discard the garlic “paper”.
Add the lemongrass paste and sea salt. Puree until desired consistency.
Transfer to airtight container and refrigerate or freeze.
Notes
This will last longer than if it were made with raw herbs or aromatics, and it also freezes well.
Prep Time:10 minutes
Cook Time:1 hour
Category:Sauce
Method:Blender/Processor
Cuisine:Indian
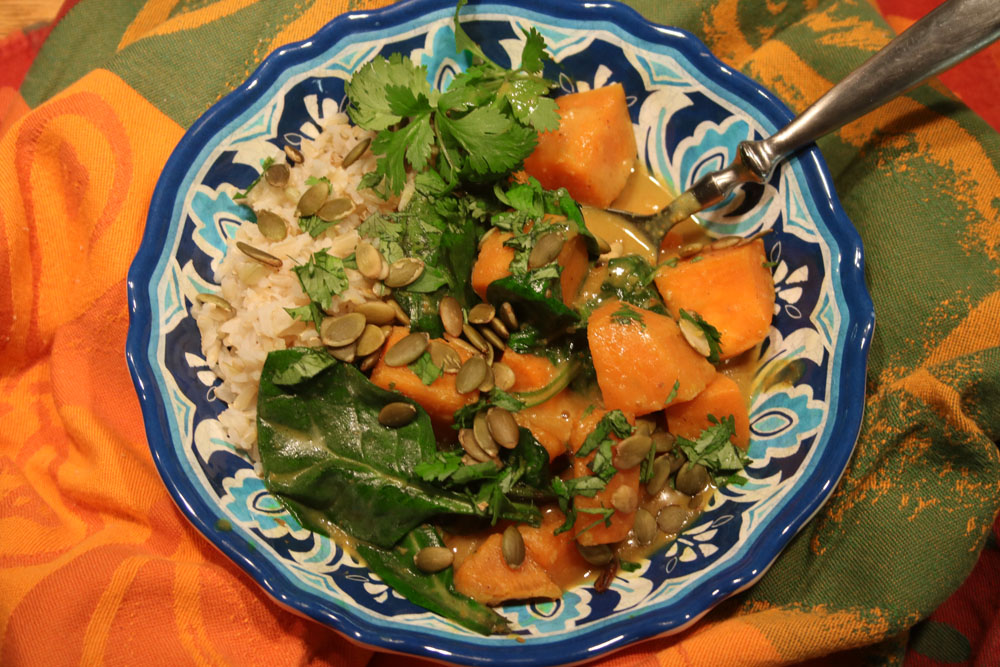
Now that you have that tasty curry, how about whipping up a Coconut Curry Buddha Bowl, filled with hearty and soul-warming sweet potatoes and earthy greens and topped with pumpkin seeds. It’s vegan and you can feel great about that for so many reasons.
Coconut Turmeric Curry with Winter Vegetable Buddha Bowl
Serving suggestion – rice or brown rice* (See note below)
Start the rice.
In a wok or deep skillet, heat the olive oil and sauté the ginger for 2-3 minutes until soft.
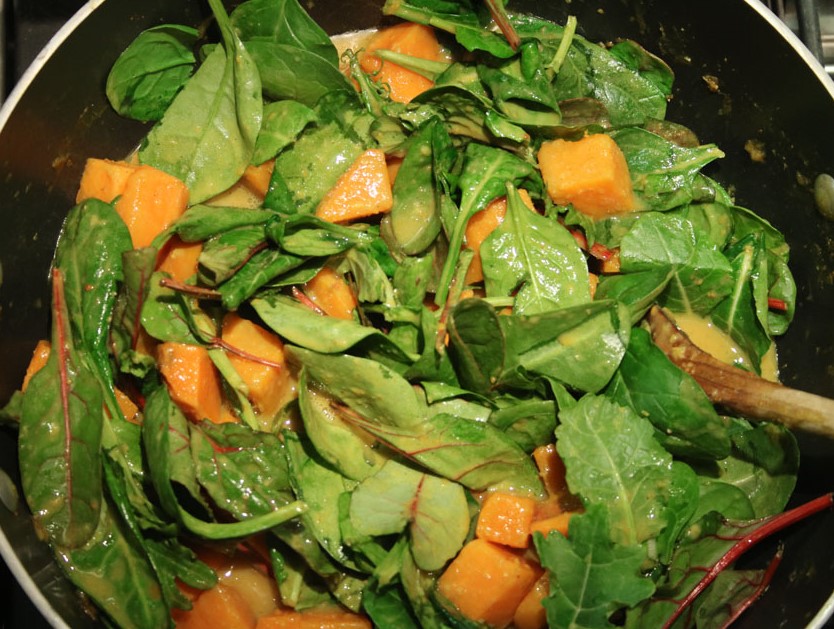
Add the sweet potatoes, curry paste, coconut cream and stock. Bring to a simmer and cook uncovered, stirring periodically, for about 30 minutes or until potatoes are tender and sauce is thickened.
Add the greens and stir until wilted.
Divide rice among bowls and top with sweet potato curry. Garnish with scallions, pumpkin seeds, and cilantro. Serve with lime wedges.
Serves 4.
*Brown rice note: I really prefer brown rice but you’ve likely heard the bad news about arsenic. Because it is a whole grain, it has more potential for danger than white rice which has been stripped of its outer hull (and for that matter its nutritional value). Truth be told, I really don’t eat it very often – once a month or less – so I’m not that worried but I do take a couple precautions. Brown basmati from California, India and Pakistan are the best choices – about 1/3 less risk than other brown rices according to Consumer Reports. The other thing I do is rinse it several times, and then cook it like pasta in a 6:1 water ratio (instead of the normal 2:1) and drain the excess water. That will help wash away the evil-doers lurking in your lovely whole grain. My Grandmother always said “you’ve gotta eat a peck of dirt before you die”. I’m guessing she wasn’t talking about arsenic, but she did make it pass 90. Just sayin.
Sawsuch sawsedge. That’s the way my Dad used to say it. Was he channeling his inner Brooklyn? Fuhgeddaboudit! He cracked himself up when he said it. But this tale isn’t really about sausage or sausage making, it’s about fun with friends. I must however make one quick sausage stop, a reverent moment to pay homage to the mother of all sausage experiences – the sausage bomb. I once had to work for the daughter of a famed crime boss. I would tell you who she was, but I’d have to kill you (read: they may kill me). You think I’m kidding, but when her brother died in a car/mini-bike accident, the car driver was “disappeared.” Have I said too much already? Anyway Princessa Mafiosa wrote a cookbook and Extra was filming a piece at her Lon G-Island mansion. I prepped what I could and took a car service to arrive a bit ahead of the appointed hour. They really hadn’t scheduled sufficient time for me to ready all the beauty food laid out in a magnificent “of course she did this herself” spread. When I knocked on the door of the palace, the circle drive strewn with obligatory black Escalades parked haphazardly Tony Soprano-style, my knock was greeted with a door slam and strict instructions to come back later. I had been doing this long enough to know how much work lay ahead and forceful enough to finesse my way inside, but I always wondered – at what cost?
The first recipe was a pasta dish that called for browning the sausage in 2 cups of olive oil, then adding 2 cups of cold water and a bouillon cube to the boiling oil. It was genius – take out the target without spilling any blood – sausage bomb ??? style. BOOM! I did have the good sense to retrieve my business card from the kitchen counter before leaving lest I find a horse head in my bed. Hopefully with a lovely Béarnaise sauce napping it just so.
But I digress – and still swear this really isn’t about sausage. It’s about hospitality. We’ve just survived the super bowl, the Oscars, and the New York marathon of all home entertaining events- Thanksgiving. It was no doubt stressful. Was the turkey too salty, too dry, too frozen? Did you really have to do it all by yourself? Time now to sit back and enlist the full team to make things happen, and have fun while doing it. I’m not just talking about a potluck people, I mean a real cooking party.
I recently had the good fortune of spending the afternoon at a sausage party. This crowd takes their game meat seriously so we had a variety of flavors, including a beef heart sausage. (Stop it – your face is gonna freeze like that). But the one here is rabbit with dried cherries and toasted hazelnuts. The great thing about making your own sausage is that you have ultimate control over the seasonings and fat/meat ratio, eliminating all preservatives, while having great fun. Win. Win. Win.
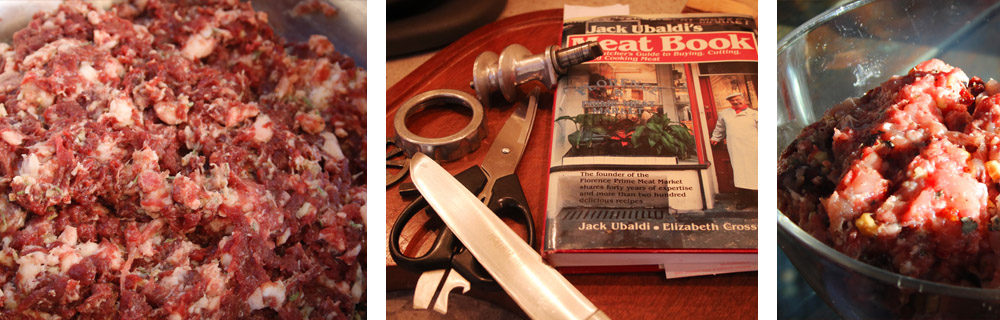
One of my all-time favorite meat books is a seriously old cookbook by Jack Ubaldi. Jack owned the legendary Florence Prime Meat Market in New York’s Greenwich Village. He was a butcher’s butcher. A master of meat. When I came on the food scene, he had just sold it and was teaching. I took both butchering and knife skills from him. He changed my life when I learned that a bread knife is not to be used in a back and forth sawing motion, but rather cut on the forward movement, only dragging the knife back – without action – merely to re-position, so you can cut again on the next forward motion. Who knew? Jack.
Jack’s sausage technique became the base for our afternoon of sausage revelry. I arrived just as the sausage mix was being processed in a meat grinder. My Mom and Grandmothers had manual grinders that C-clamped to their counters. Today you can buy attachments for a variety of machines; I have the grinder attachment for my KitchenAid stand mixer. Here’s what we missed –
Fresh Rabbit Sausage with Dried Cherries and Toasted Hazelnuts:
2 pounds lamb, cut in chunks
2 pounds rabbit, cut in chunks
2 tablespoons kosher salt (if not kosher, at least coarse grain)
2 Tablespoons chopped garlic
1 teaspoon black pepper
1 teaspoon chopped marjoram
1 teaspoon chopped sage
¼ cup chopped dried cherries
¼ cup chopped toasted hazelnuts
Casings, soaked – available from your butcher
Makes about 4 pounds of sausage, or approximately 12 links.
The general rule of thumb is 30% fat to 70% lean meat. If it’s too lean, it will be very dry; too fatty, the fat will render leaving a shriveled up sausage that is way too rich. This sausage was pretty lean, but lots of flavor. The meat went through the grinder with 3/8” plate, and the rest is stirred in by hand, first the seasonings, then the cherries and nuts. Knead by hand until the meat sticks together, about 5 minutes or so. The recipe and technique here are for a fresh sausage, meant to be cooked and enjoyed within a couple days. Drying sausage is a separate technique, which is no longer required for home cooks, now that we have fridges.
The casings you will find are generally hog. They are often sold packed in salt. If your butcher doesn’t carry them there are several onlinesources. About an hour before you start, you should soak the casings in warm water for about 30 minutes. After, run water through the casings, but do not squeeze. Then return them to a container, covered in tepid water. One pound of casings is about 50-60 feet long, and will pack 25 pounds of sausage, though it may be closer to 50 pounds. There is a fairly wide range in capacity because the diameter will vary. If you don’t use them all, wring out the excess water and pack again in salt and refrigerate in airtight container.
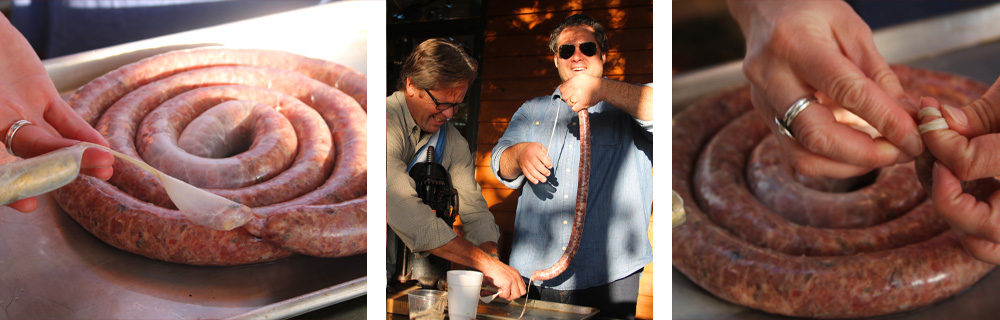
The real fun begins when the stuffing happens. My friends happen to own an antique stuffer, but in addition to the meat grinder attachment, my KitchenAid stand mixer has a Stuffing Attachment. You can always use a funnel for stuffing by hand. Thread the casings onto a wet funnel or stuffing tube until an inch of casing remains. Tie off the end. Add the meat to the hopper and push through. It helps here if you have octopus arms or a friend – one to man the sausage intake and one to manage the casing/stuffing output. Once you have filled a desired length, press gently to ease out any air, even the meat distribution, and make sure there is a little give – i.e. not too stuffed. Tie off this end. Continue filling additional lengths, until you have used all your meat mixture. The next step is to make links: Pinch off a 4-5 inch section at each end and twirl like a jump rope to create an individual link. Generally all the links are kept attached to minimize the waste. At this point you can freeze, simmer, broil, or grill, but if you are like us, you will want them right away with a frosty beer. We threw them on the grill and cooked about 8-10 minutes per side.
There are infinite ways you can customize this concept – fresh sausage, dry sausage, fruit, nuts, organs, animals, fish, veggie, etc. But this story is about camaraderie and spending the day with friends. We cracked a new jar of last season’s habanero mustard – sorry but this recipe is also a mob secret – and served it up with Amy and Todd’s butternut squash soup, topped with crispy bacon, shallots, and apples, then chased it with my gentleman jack pumpkin ginger cheesecake. Fat and happy!!!!
The next cooking party on the docket is a soup party. Stay tuned!
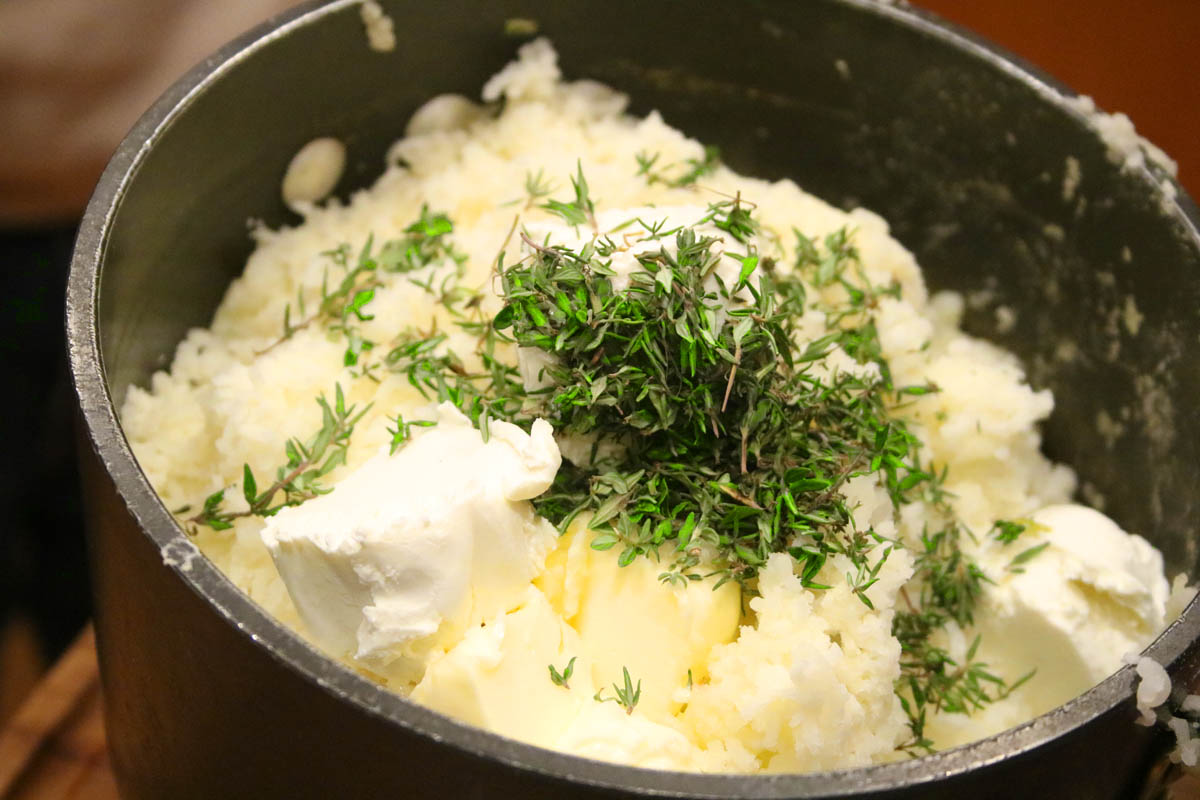
I’m not quite sure how I ever made it through to dessert all those years that I mashed potatoes with a – uh, masher. Oh sure, there was always a brother who made a mean mash with just the right amount of chunks left it. But in my family, the men (technically, THE MAN) were supposed to do the carving. That or keep the mimosas cold. The real magic, I think, behind having a potato ricer is that kids of all ages want to get involved. It’s like a giant garlic press and the potatoes come out all wormy and stuff. What’s not to love? And kids actually volunteering for food prep is win-win. Thank you, Ali Price!
I can’t tell you the exact date that I started my ricer love affair, but I remember the moment like it was yesterday. It was in the early years of New World Grill and I had a rare evening off and chose to dine at the James Beard house. I couldn’t tell you who was in the kitchen, but I remember clearly being seated with Nicole Routhier, author of beautiful books on Vietnamese food, and Florence Fabricant of the NY Times. There was breaking news and Florence arrived a bit late. As she settled in, Florence talked about an upcoming dinner that she and Frank Prial, NY Times’ wine writer, were hosting to benefit the NY Public Library. For a good number of years, the Times offered these magical dinners – which today would be auctioned online and raise a ton of money in minutes – for a flat ticket price, all proceeds to support NYPL. Florence and Frank always offered FOOD & WINE, Times style. There were other dinners, hosted by famous people, all over town at the exact same time. I was most intrigued by Calvin Trillin’s. He invited the guests into his home and served take-out – or to be more precise, the best Chinese take-out NY had to offer. He had stationed minions all over Chinatown, striking with military precision to bring each dish, the most iconic offering from each restaurant, one by one, on a carefully calculated timetable (“…..like the Entebbe raid”………according to the Times) to be served at the precise moment of each dish’s peak.
I asked who was cooking for Florence and Frank’s party and she said she was – of course. I offered to do the event-time cooking to finish off her prep, so she could be with the guests. To say she was skeptical would be an understatement. She did know who I was and had already written about New World Grill, but I was a newbie. Nicole insisted she take me up on the offer. I left knowing the date and time but little else. I doubt I even thought to panic until the week before. Then, total anxiety set in. Especially when I found out she was making Terence Brennan’s short ribs and mashed potatoes for the main, or more accurately she was making Terence Brennan’s short ribs and I was making mashed potatoes. Sure sure sure – it seems simple, but the simplest food is always an acid test of one’s cooking ability. Did you see The 100-Foot Journey? Helen Mirren had her acid test dish to confirm Chef’s talent – and it was seemingly simple. Same deal for Florence’s potatoes – under-season the water, turn the mash to glue, too wet, too dry, too bland – the stakes were incredibly high. To make matters worse – or as it turns out better – she had forgotten her ricer, “whatever that was”, I thought. She called her husband to bring it over and then handed it off to me. Luckily it didn’t come with –nor need – an owner’s manual. I had this. Salted water to cook, white pepper and a lot of butter to finish. Thankfully my performance was worthy of an invitation to greet the guests and a hug from Florence, neither of which were expected. Johnny Carson himself might as well have invited me to the couch. Thank you, ricer.
Incidentally, Florence also introduced me that night to Indiana’s goat cheese producer – Judy Schad of Capriole Farms. After the short rib course, there was a salad with fuyu persimmon and Wabash Cannonball cheese from Capriole Farms. Seriously – I need to get out more.
Perfect Mashed Potatoes
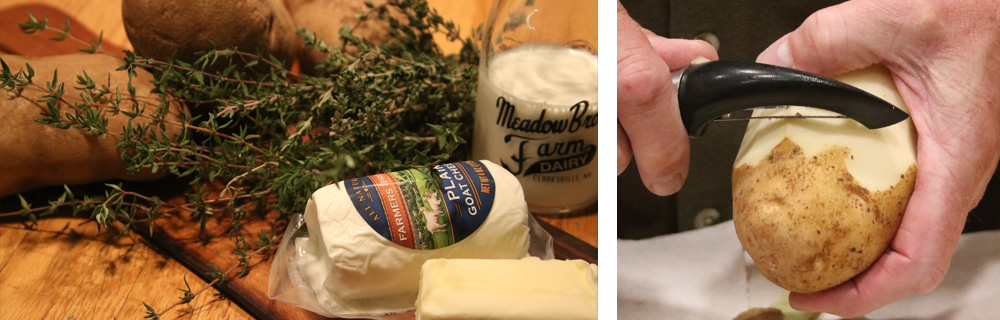
Mashed potatoes are an excellent blank slate for seasoning as you like. A few posts ago, I used the pistachio pesto recipe to flavor the riced potatoes. Today I am adding fresh goat cheese and thyme. But while using a ricer is simple and flawless, potatoes cooked like this are best mashed to order, so dedicating the burner and the last minute attention may be more than you can swing at a stove-intensive holiday like Thanksgiving.
4 Russet potatoes, about 3 pounds, peeled, quartered, and covered in water
½ cup milk, half and half or cream, warmed (microwave is fine)
4 ounces fresh goat cheese, cut in chunks
3 Tablespoons butter, cut in chunks
3 Tablespoons fresh thyme leaves
sea salt and freshly ground pepper
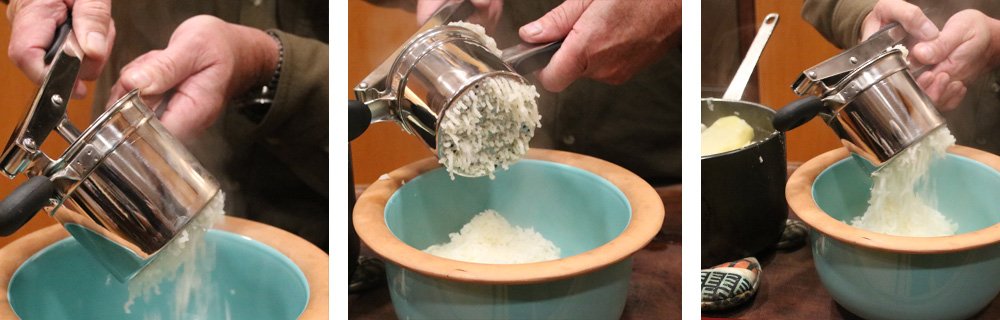
Put the potatoes in a large pot, season with 2 Tablespoons salt and cover with cold water. Bring to a boil and cook until the potatoes release easily when pricked with a fork, about 15-20 minutes. Drain well.
Press the potatoes through a Potato Ricer into a bowl.
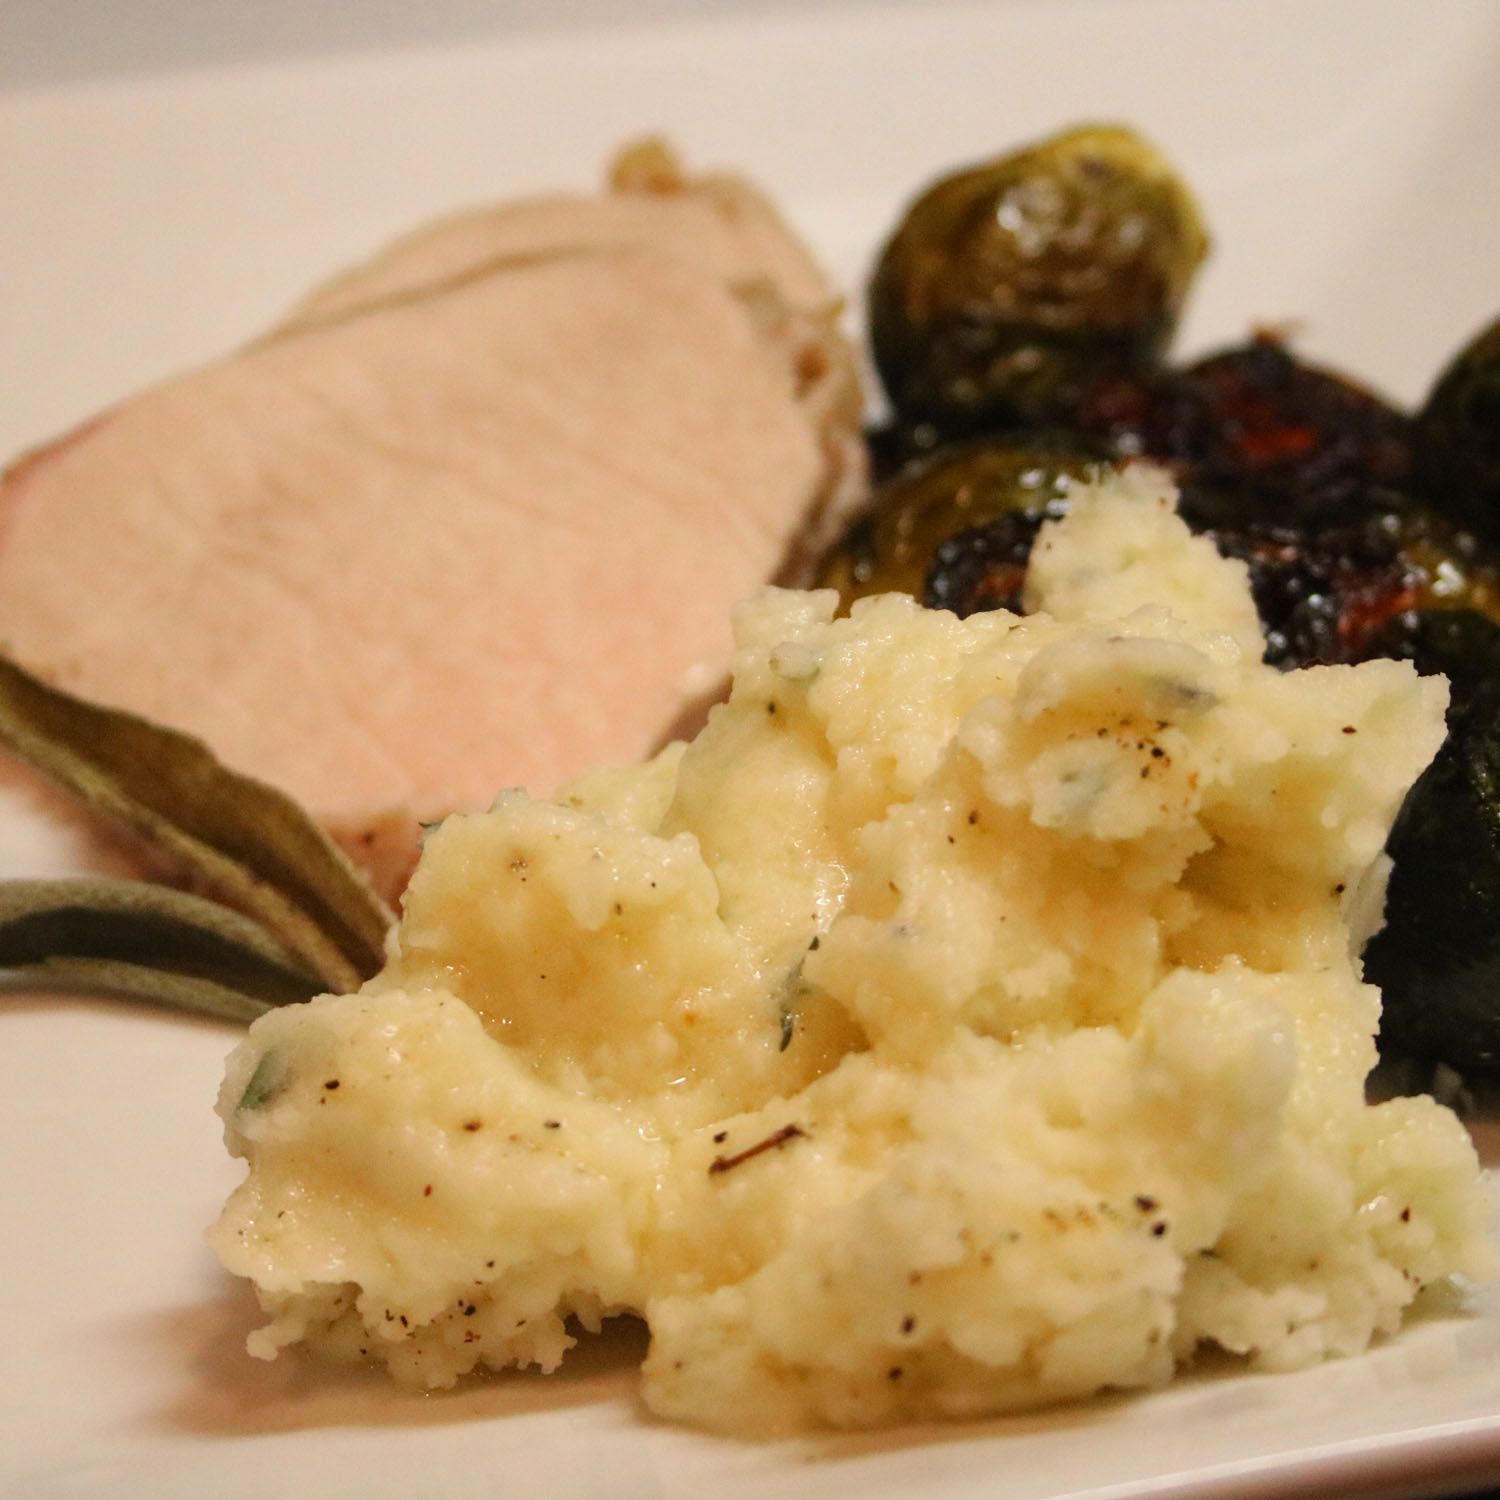
Add about half the milk, as well as the goat cheese and butter. Stir until mixed, adding more milk, as needed to desired texture.
Add the fresh thyme and season with salt and pepper.
Garnish with pats of butter and sprigs of thyme.
Serves 4-6 – depending on how serious (About Mashed Potatoes!!) you are.
To provide the best experiences, we use technologies like cookies to store and/or access device information. Consenting to these technologies will allow us to process data such as browsing behavior or unique IDs on this site. Not consenting or withdrawing consent, may adversely affect certain features and functions.
Functional
Always active
The technical storage or access is strictly necessary for the legitimate purpose of enabling the use of a specific service explicitly requested by the subscriber or user, or for the sole purpose of carrying out the transmission of a communication over an electronic communications network.
Preferences
The technical storage or access is necessary for the legitimate purpose of storing preferences that are not requested by the subscriber or user.
Statistics
The technical storage or access that is used exclusively for statistical purposes.The technical storage or access that is used exclusively for anonymous statistical purposes. Without a subpoena, voluntary compliance on the part of your Internet Service Provider, or additional records from a third party, information stored or retrieved for this purpose alone cannot usually be used to identify you.
Marketing
The technical storage or access is required to create user profiles to send advertising, or to track the user on a website or across several websites for similar marketing purposes.