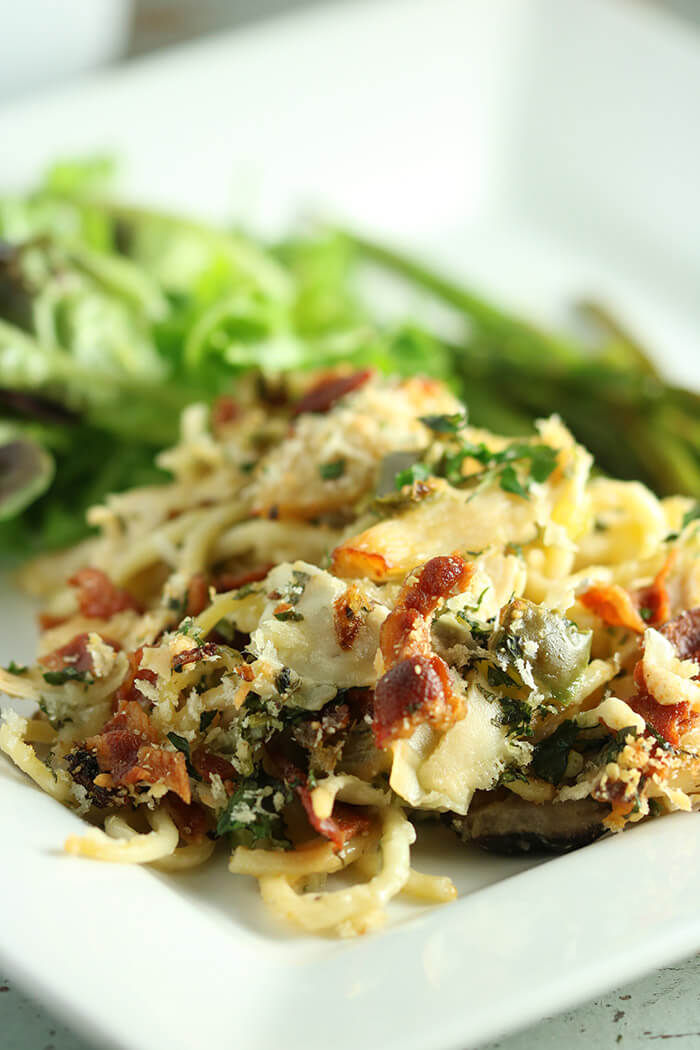
Are you full yet? I know. I know. The mind reels that we are still talking about food. But trust me – this dish does not disappoint. And, be honest. Turkey sandwiches start to feel redundant. Turkey Tetrazzini, a dish I grew up on, however is creamy, hearty, and full of mushroomy goodness. My mom found her recipe (very, very loosely translated below, in part because 50 years ago directions were vague and ingredients were more a suggestion when “the homemaker” already knew how to cook) in the 1968 Panhellenic Meats Cookbook. “Every home should have a good meats cookbook. This cookbook is filled with wonderful recipes submitted by sorority members over the nation. Here you will find all sorts of mouth-watering meats – from tried-and-true favorites such as hamburger pie to exotic foreign treats.” These gals surely got around because despite foreign dishes starting off with lasagna and Canadian meat pie, they also ranged from Turkey to Taiwan to Tahiti.
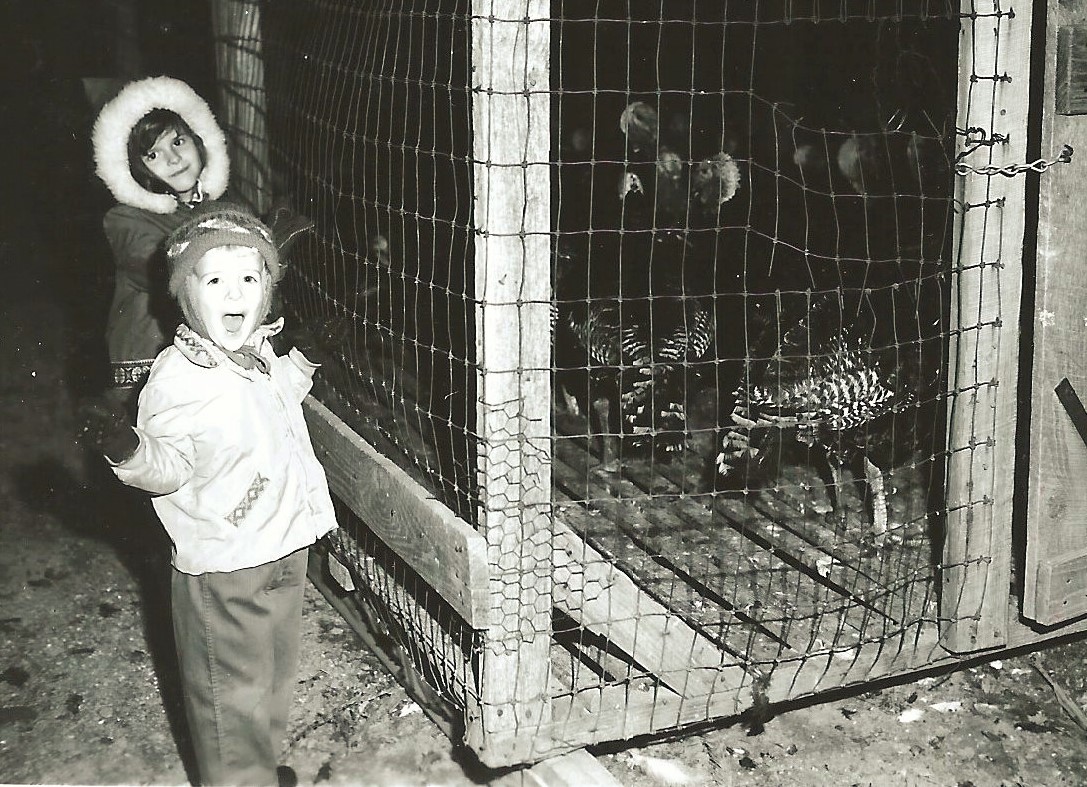
Speaking of the 60s…who’s doesn’t like a good road trip to pick out dinner? I’ll take THAT one!
Tetrazzini was invented in a hotel (debates over whether it was San Francisco or NYC) in the early 1900s. Opera star Luisa Tetrazzini is its namesake. There is seemingly no standard for what ingredients are required, but it generally includes poultry, a cream sauce and long thin pasta. The Meats Cookbook recipe may or may not call for sautéing the onion in bacon grease. I am not sure I can in good conscience call for that. And I’m here to assure you that I always choose the healthier EVOO. But you should know that is probably a lie. It is definitely a lie. It’s your cholesterol. Do what you will. For goodness sake, it’s the day after Thanksgiving. Is this really the time to show restraint?
Instead of talking turkey, let’s just let the Tetrazzini do the talking!
Turkey Tetrazzini
3 Tablespoons flour
About 4 ounces butter, divided per instructions
1/2 teaspoon salt
1/4 teaspoon ground black pepper
1 1/2 cups milk
1 1/2 cups chicken broth
4 ribs celery, sliced
1 green bell pepper, stem removed, seeded and diced
4 shallots, minced
8 ounces shiitake mushrooms, sliced
1 pound spaghetti
4 cups chopped turkey
2 cups grated cheddar
1/2 cup chopped parsley
1/2 cup grated Parmesan
6 pieces of bacon, cooked and crumbled (are you saving the fat for shallot sauté?)
1/4 cup panko breadcrumbs or seasoned breadcrumbs
Preheat the oven to 350oF. Butter a 9x13x2-inch 3-quart casserole.
I’m switching it up here and making a cross between a milk-based Béchamel white sauce and a chicken broth based Velouté. That makes it creamy and also a bit lighter.
Start by making a roux, using 3 Tablespoons each of butter and flour. Melt the butter and whisk in the flour to make a roux the texture of wet sand. Let it start to bubble and continue for one minute. Whisk in the milk and chicken stock. Combine well. Season with salt and pepper. Add the celery and peppers and simmer for 15 minutes until thickened, whisking from time to time to make sure the sauce does not stick, and the vegetables are softened.
Prep the Veggies:
Meanwhile, add 1 Tablespoon of the remaining butter (or the bacon fat if using) to a sauté pan and add the shallots. Sauté until golden and a bit crispy, about 8 minutes. Drain on a paper towel.
Add an additional 2 Tablespoons of butter to the pan and sauté the mushrooms until browned.
Cook the Pasta:
Cook the pasta according to package directions, under-cooking by a minute or so. Drain.
Time to Combine:
In a small bowl, combine the parsley, shallots and Parmesan.
In a large bowl, add the pasta, turkey, mushrooms, cheddar, and gradually add the sauce, folding to combine evenly. Add half the parsley/shallot/Parmesan mixture and toss well. Transfer to the prepared casserole dish.
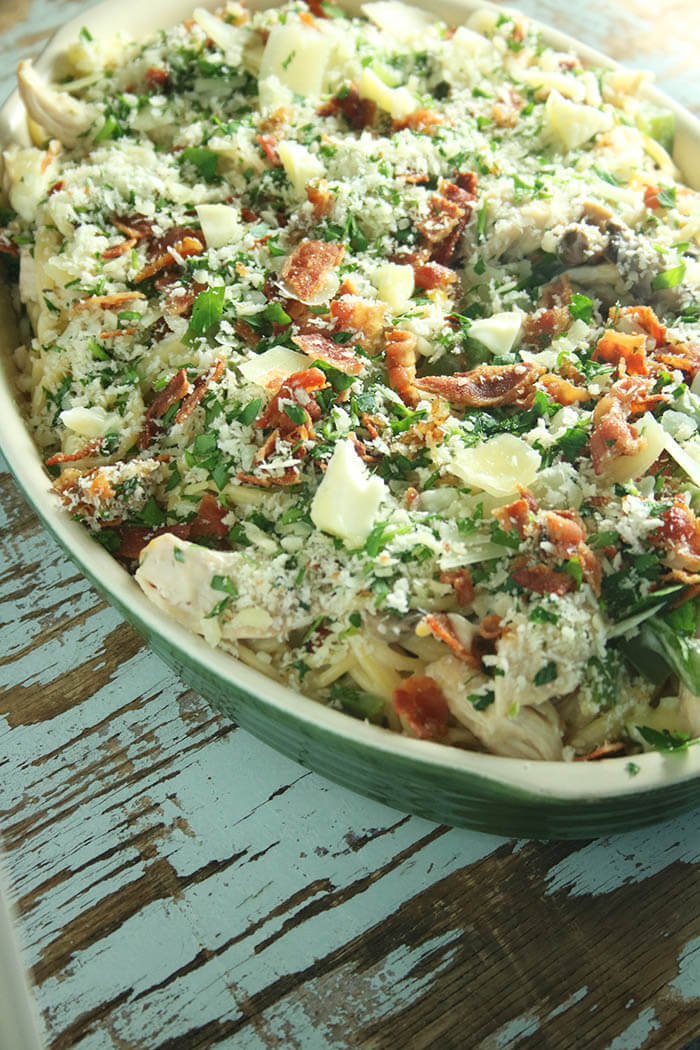
Top the pasta mixture with the remaining parsley/shallot/Parmesan mixture and sprinkle with the bacon and breadcrumbs, dotting with 1 Tablespoon butter.
Bake it Off:
Bake in preheated oven for 45 minutes until bubbly.
Note: Sometimes when I make this, I let it cool to room temperature and freeze until I need it. In that case, I add all the parsley/shallot/Parmesan mixture to the pasta before freezing, and wrap well, without additional toppings. Then when I am ready to bake it off, I top the thawed casserole with bacon, breadcrumbs, and a bit of fresh Parmesan or grated cheddar. Per Darryl Hannah in Steel Magnolias, “it’s in the freezes beautifully section of my cookbook.”
Bon appetit!
Serves ??? How much do you love this? At least 6 or 8, and more if you are willing to share.
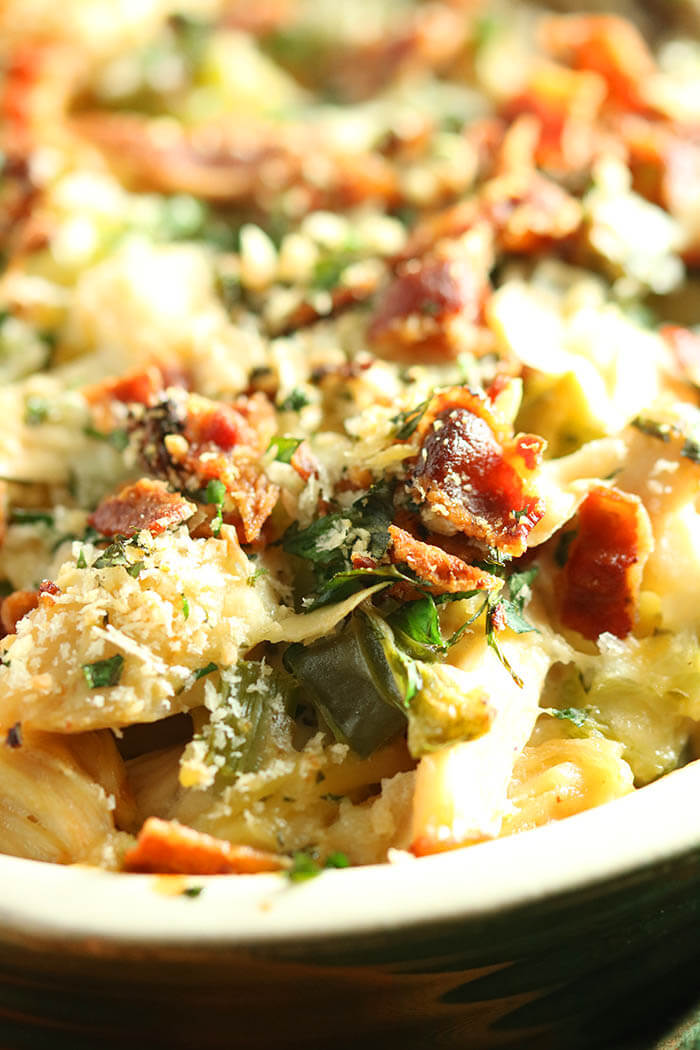
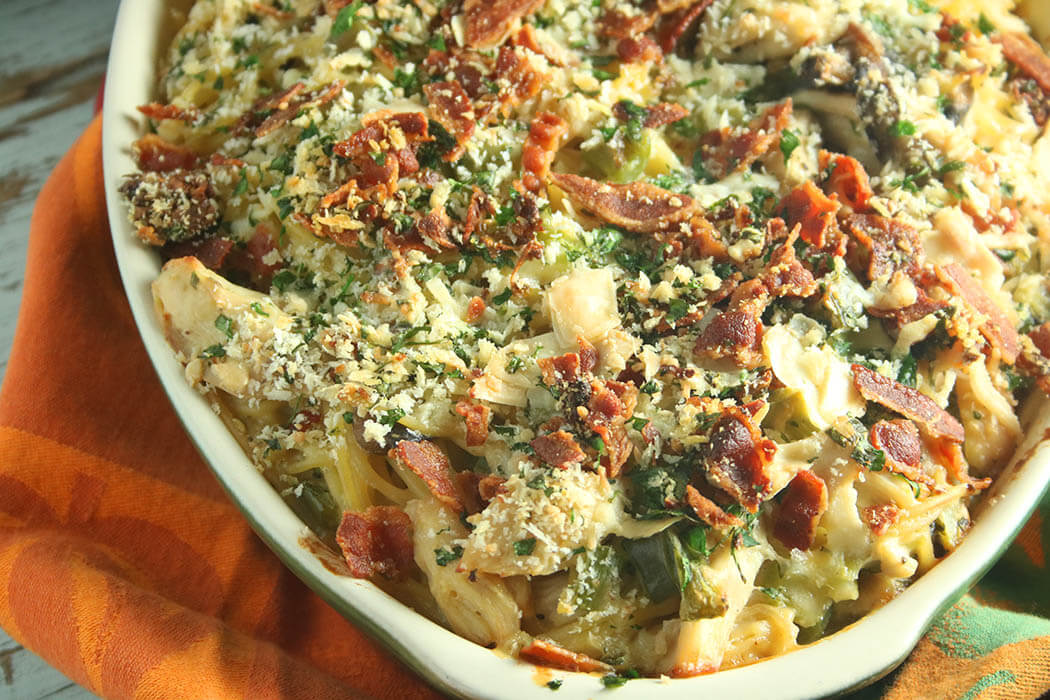
Turkey Tetrazzini, a dish I grew up on, is creamy, hearty, and full of mushroomy goodness. For me, it’s not Thanksgiving unless tetrazzini is in the oven a day or two later.
Ingredients
Scale
3 Tablespoons flour
About 4 ounces butter, divided per instructions
1 1/2 cups milk
1 1/2 cups chicken stock
1/2 teaspoon salt
1/4 teaspoon ground black pepper
4 ribs celery, sliced
1 green bell pepper, stem removed, seeded and diced
4 shallots, minced
8 ounces shiitake mushrooms, sliced
1 pound spaghetti
1/2 cup chopped parsley
1/2 cup grated Parmesan
4 cups chopped turkey
2 cups grated cheddar
6 pieces of bacon, cooked and crumbled (are you saving the fat for shallot sauté?)
1/4 cup panko breadcrumbs or seasoned breadcrumbs
Instructions
Preheat the oven to 350oF. Butter a 9x13x2-inch 3-quart casserole.
Make a roux, using 3 Tablespoons each of butter and flour. Melt the butter and whisk in the flour to make a roux the texture of wet sand. Let it start to bubble and continue for one minute.
Whisk in the milk and chicken stock.(see note below) Combine well. Season with salt and pepper.
Add the celery and peppers and simmer for 15 minutes until thickened, whisking from time to time to make sure the sauce does not stick and the vegetables are softened.
Prep the Veggies:
Add 1 Tablespoon of remaining butter (or the bacon fat if using) to a sauté pan and add the shallots. Sauté until golden and a bit crispy, about 8 minutes.
Drain on a paper towel.
Add an additional 2 Tablespoons of butter to the pan and sauté the mushrooms until browned.
Cook the Pasta:
Cook the pasta according to package directions, under-cooking by a minute or so. Drain.
Time to Combine:
In a small bowl, combine the parsley, shallots and Parmesan.
In a large bowl, add the pasta, turkey, mushrooms, cheddar, and gradually add the sauce, folding to combine evenly. Add half the parsley/shallot/Parmesan mixture and toss well. Transfer to the prepared casserole dish.
Top the pasta mixture with the remaining parsley/shallot/Parmesan mixture and sprinkle with the bacon and breadcrumbs, dotting with 1 Tablespoon butter.
Bake it Off:
Bake in preheated oven for 45 minutes until bubbly.
Notes
I’m switching it up here and making a cross between a milk-based Béchamel white sauce and a chicken stock based Velouté. (same technique and ratio, but different liquids). This makes it creamy and also a bit lighter.
Sometimes when I make this, I let it cool to room temperature and freeze until I need it. In that case, I add all the parsley/shallot/Parmesan mixture to the pasta before freezing, and wrap well, without additional toppings. A 2 gallon ziplock also works well for freezing and is easier to fit in the freezer. Then when I am ready to bake it off, I transfer to a buttered casserole and top the thawed casserole with bacon, breadcrumbs, and a bit of fresh Parmesan, dotted with butter. Bake as directed.
Per Darryl Hannah in Steel Magnolias, “it’s in the freezes beautifully section of my cookbook.”
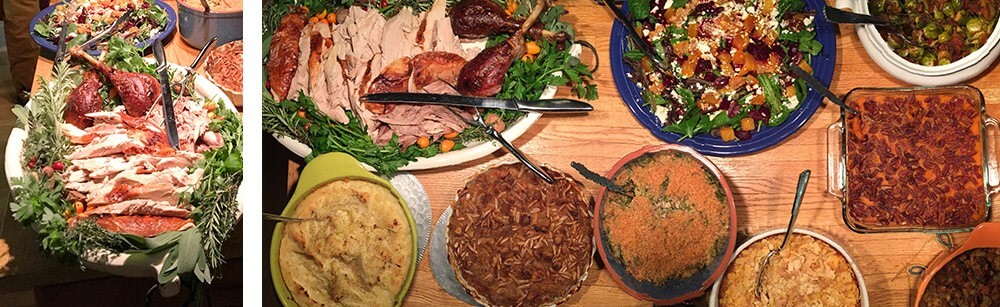
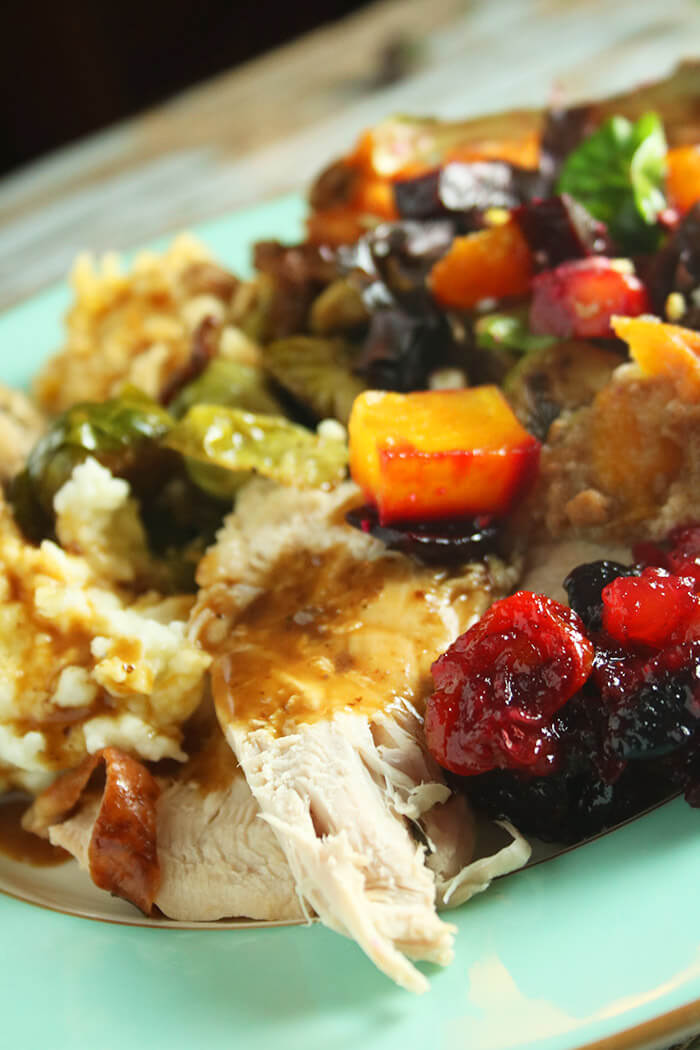
Nary has a Thanksgiving rolled by that I am not peppered with queries from dawn to dusk. I heed the call, alternating with “Gobble Gobble” and “Butterball Hotline.” This year, I say bring it on. I’ve got nothing but time. Yup! I have already cooked my Thanksgiving feast – the roast turkey and the gravy – and served it up with a “Family Favorites Pot-lucky.” Food served. Wine drunk. Dishes done. Trash at the curb. Sorry. Not sorry.
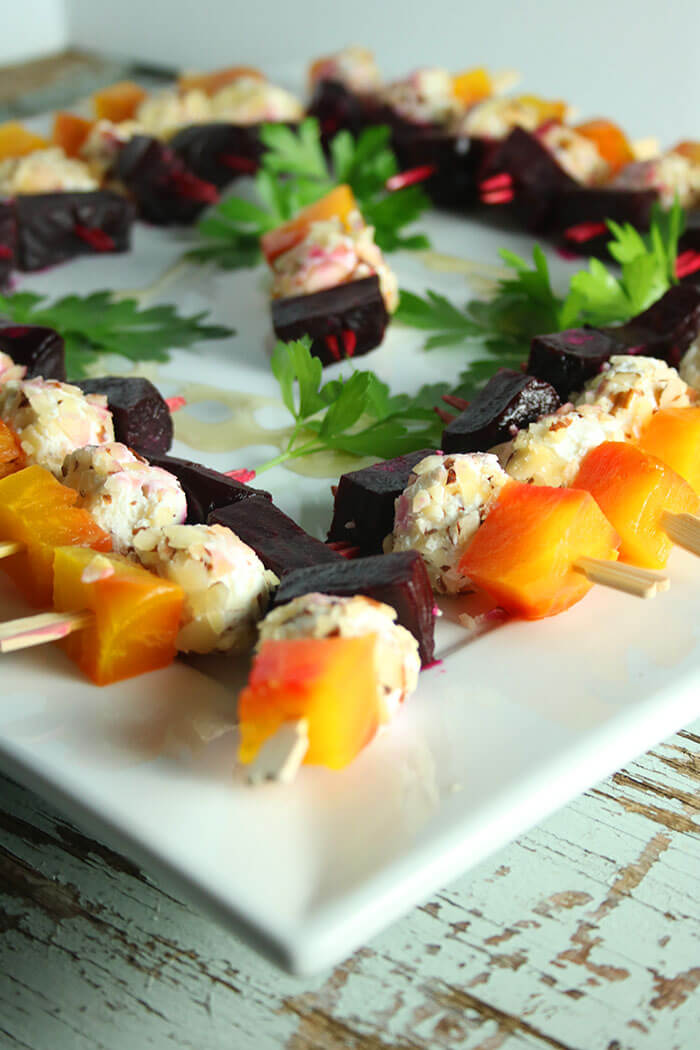
We gathered earlier this month and the pot-lucky theme was Family Treasures – the iconic culinary treats that are essential for fall family feasts. I brought Gaga’s Delmonico apples and a cranberry kumquat chutney, that’s a newer tradition. One couple brought a wonderful red and yellow beet with nutty goat cheese appetizer. The other dishes were both familiar and uniquely twisted – a modern green bean casserole & sweet potatoes with pecans, scalloped corn & sprouts with bacon, and mash taters & an amazing sausage stuffing. It was a tasty trip seeing how others celebrate the season.
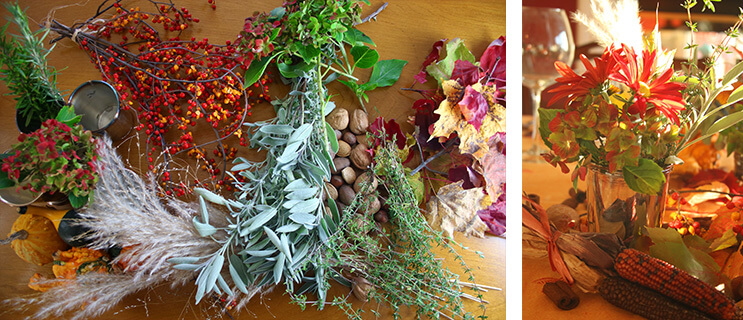
And because it has been so warm, I was able to get most of the décor from the herb bed, grasses and colorful leaves. After one too many table settings that hogged the site line and got moved off the table about 5 minutes after we were seated, I decided to keep it low and used a collection of mismatched short silver cups, more commonly used at Derby time – julep cups! That plus a few candles and some nuts and gourds was all I needed.
I was also in charge of the turkey and over the years I’ve had my share of turkey prep. Some years I have gone from perfect turkey on the Today Show Thursday to turkey leftovers on Good Morning America Friday. By noon on Thursday when others were thinking about the big dance, I had moved on to leftovers prep. One year my balcony was lined by so many wall to wall coolers filled with turkey parts that you’d have thought I was running a soup kitchen. Suffice it to say I have done every show with every possible technique and turkey part. Whole turkeys, turduckens, spatchcocked and deconstructed. Done. It. All.
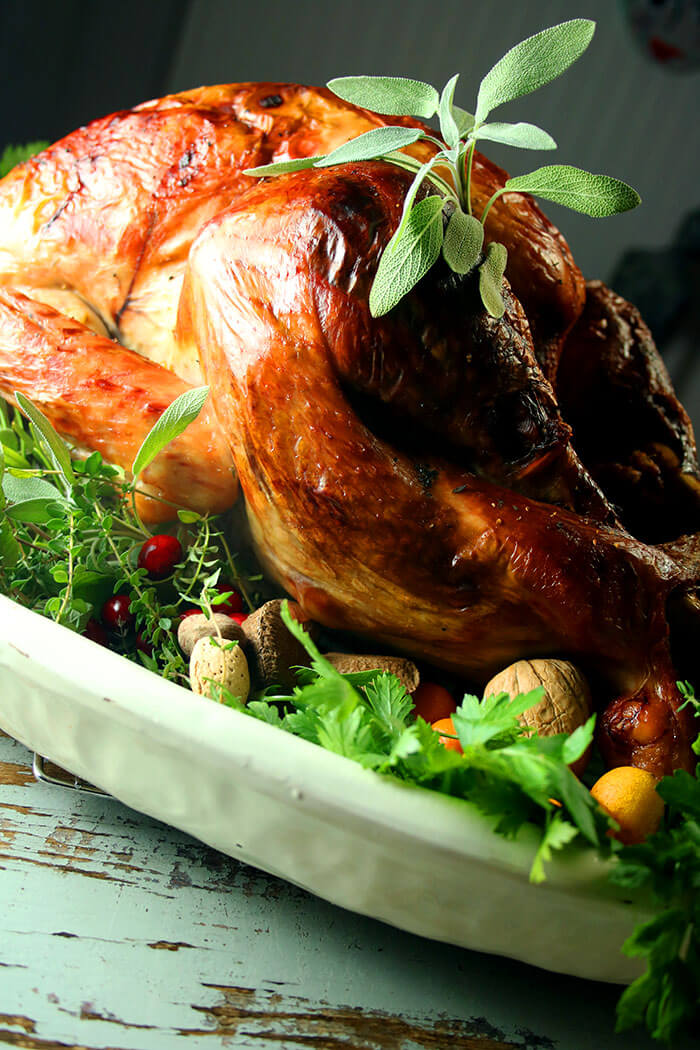
The real secret to Turkey Perfection comes from good preparation, organization, great ingredients and having the right equipment. My turkey this year came from Wise Family Farm and was about 16 pounds. I hope you are so lucky as to have a fresh, locally pastured bird, but if you are only able to source a frozen turkey, you need to get busy now. The safest way to thaw a frozen turkey is in the refrigerator over several days. And don’t forget that it takes 24 hours to thaw every 4 pounds of frozen bird.
If you head to my shop, you will find the tools I find most invaluable – a good Roasting Pan, about 2-3” deep (I prefer “stick” over non-stick – that results in a nice dark brown gravy), a Roasting Rack that raises the turkey for essential airflow, an Instant Read Thermometer to validate estimated cooking time, a Fat Separator to skim off fat and pour the rich stock from the bottom of the vessel, and anything written by Rick Rodgers, including The Turkey Cookbook, Thanksgiving 101, and The Big Book of Sides. I can safely say everything I know about turkey and gravy I learned from Rick. He IS Mr. Turkey.
I find the recipe below to be quite foolproof. It is a classic technique for an average-sized 18-pound turkey, but the instructions can be adjusted depending on the size of your bird. There are many tweaks and twists that can bedazzle the bird, but it always helps to know the basics before you start embellishing. Learned that one from Julia herself! And one of the things I learned from Rick is to have a stock pot going all day so that you can baste before your bird gets juicy and you have everything needed to make gravy, regardless of the amount of juices your bird yields. I have included details on how to do that so you can relax and know you will be gravy-prepared.
Roast Turkey Perfection with Gimme-More Gravy
Turkey Perfection
One (18-pound) fresh turkey
Freshly ground black pepper
Kosher salt
2 carrots, coarsely chopped
2 stalks celery, coarsely chopped
1 small onion, coarsely chopped
3 quarts turkey or chicken stock (I prefer low sodium since this will reduce for hours – you can always add seasoning later)
1 Tablespoon olive oil
4 sprigs Italian parsley
2 sprigs fresh thyme
6 peppercorns
1 bay leaf
1/2 cup* plus 2 Tablespoons unsalted butter, at room temperature
1/2 cup all-purpose flour
*You may not need this if the turkey releases enough fat to yield a half-cup. Commercially produced birds tend to be fattier, but the pasture-raised bird I cooked was very lean and I needed to supplement with the butter when making the roux for the gravy.
Position oven rack in the lower part of oven and preheat to 325° F.
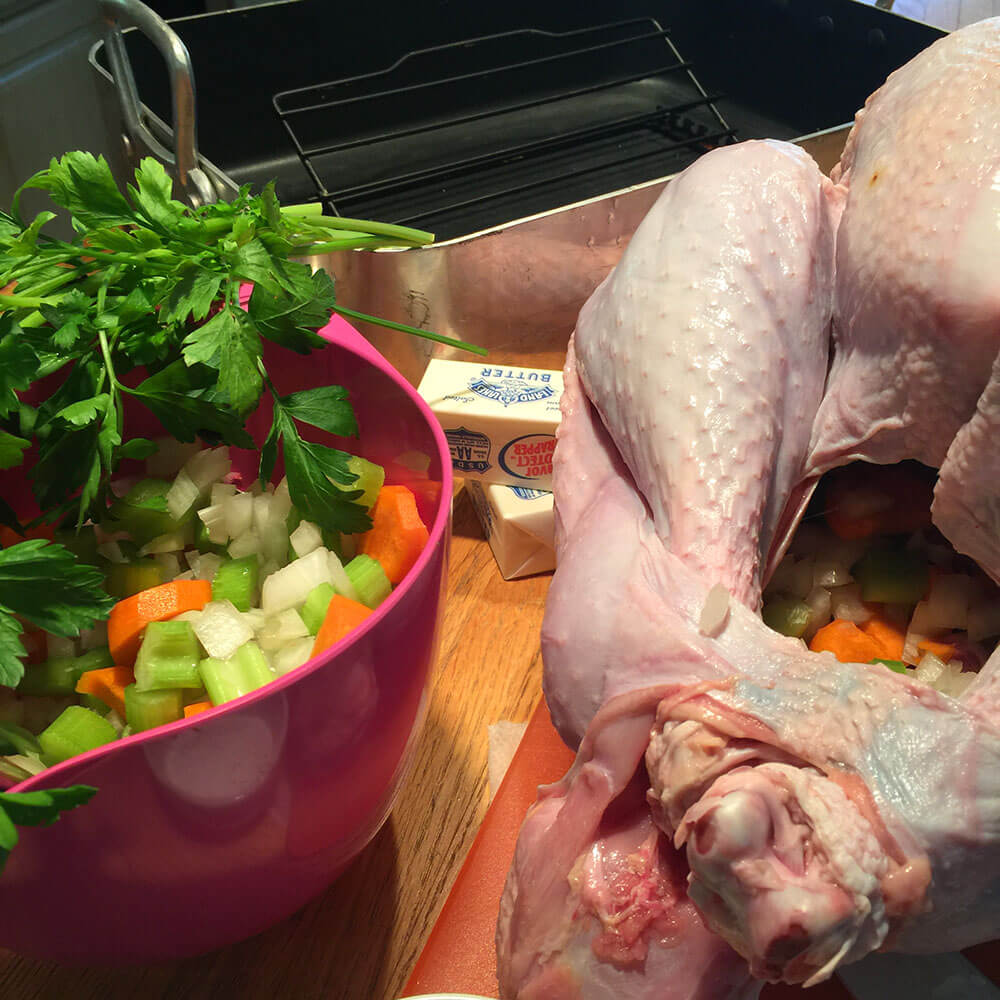
Remove any pieces/parts inside the turkey – the neck and giblets (which includes the gizzard, heart, and liver) – and set aside.
Rinse the turkey inside and out with cold water. Pat dry with paper towels and wipe out the cavity. Rub cavity with salt and pepper and stuff loosely with 1/3 of the carrots, celery, and onions.
Pin the turkey’s neck skin to the back with a bamboo skewer or trussing pin. Tuck the wings akimbo (“hands” behind the back, elbows turned outward) to keep the tips from burning.
Place the drumsticks in the hock lock. Some birds will be butchered with a skin flap as shown above. Others may have a plastic loop to lock the legs. If all else fails, tie them together with kitchen string.
Place the turkey, breast side up, on a rack in a roasting pan. Rub all over with 2 Tablespoons softened butter. Season with salt and pepper.
Tightly cover the breast area with aluminum foil. (Not tented, just pressed tightly onto the breast. You will remove this during the last hour of roasting).
Pour 2 cups of turkey or chicken stock into the bottom of the pan and place in the pre-heated oven.
Stock Pot
As soon as the bird is in the oven, start the stock pot. This will give you juices for basting during the early hours when the bird hasn’t given off much liquid. It will also provide backup turkey stock for a bird that is a low juice producer.
Hack the turkey neck into 4 or 5 pieces. Trim away the gizzard’s silver skin and membrane and coarsely chop. Some like to also chop up the liver and heart and add it here, but I think they are a bit bitter when boiled. I’m more likely to save them and sauté later with onions and then add them to stews, fried rice, or place atop avo toast.
In a large stock pot, heat the olive oil, add the turkey neck, any giblets, and sauté until brown, about 5-7 minutes. Add the remaining carrots, celery, and onions and sauté for 5 minutes. Add 1 quart of turkey stock, along with the parsley, thyme, peppercorns and bay leaf. Bring to a boil and reduce to a simmer. Continue to simmer, using this to baste the turkey as needed. Periodically skim any floaters. (I’m trying really hard not to say scum, but you know what I’m talking about.) Add additional turkey stock to the pot to maintain a 1-1 ½ quart level.
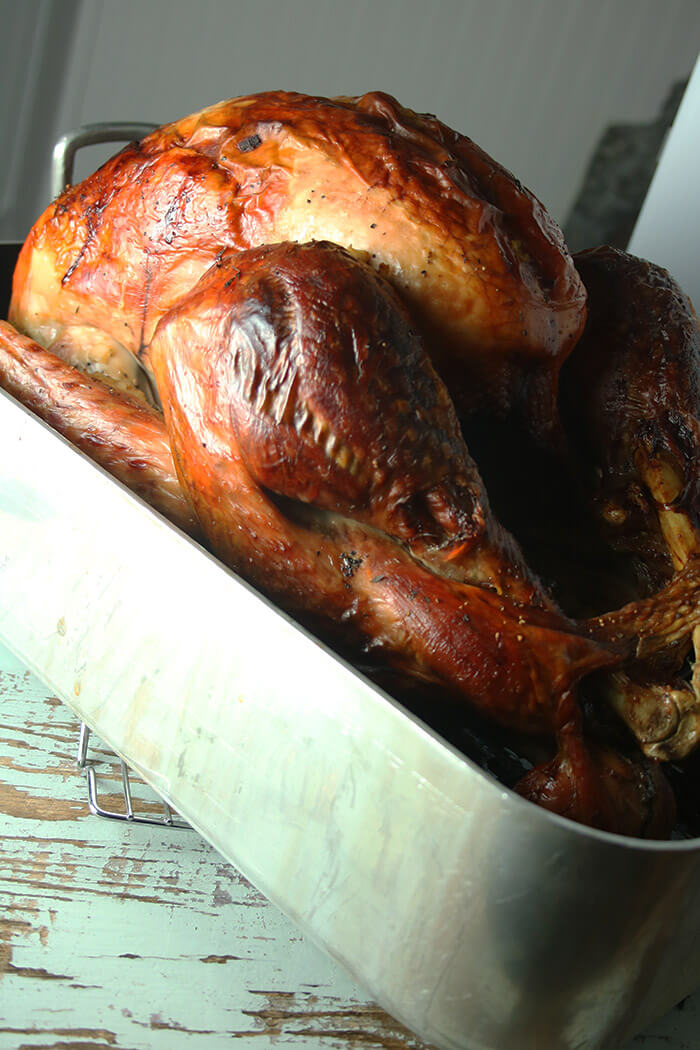
Basting
Roast the turkey, basting all over every hour with the juices in the bottom of the pan or from the stock pot. Lift up the foil to baste the breast area. I usually rotate the pan periodically to make sure there are no oven hot spots and the bird roasts evenly. Roast until an Instant Read Thermometer inserted in the meaty part of the thigh (but not touching the bone) reads 180° F and the breast is 165° F, about 4 hours. Whenever the drippings evaporate, baste from the stock pot and add a bit more stock to the roasting pan. Remove the foil from the breast during the last hour to let the skin brown.
It’s better to pad your estimated cooking time by 30 minutes, so nobody is standing around drinking too much while waiting for the bird. I say that like it’s a bad thing. I always defer to the thermometer, but use the times below as a guideline. Stuffing your turkey will add about 5 minutes per pound, so I cook the stuffing on the side (doesn’t that make it dressing??). Since you need to let the bird rest 30 minutes and carving takes time, you have most of an hour to finish or warm the rest of the sides when the oven is no longer needed for the turkey.
Estimated Roasting Times – Unstuffed Turkey – about 15 – 20 min a pound
Transfer the turkey to a large serving platter and let it stand for at least 30 minutes before carving. Pour any juices that have run off back into the roasting pan.
Gimme-More Gravy
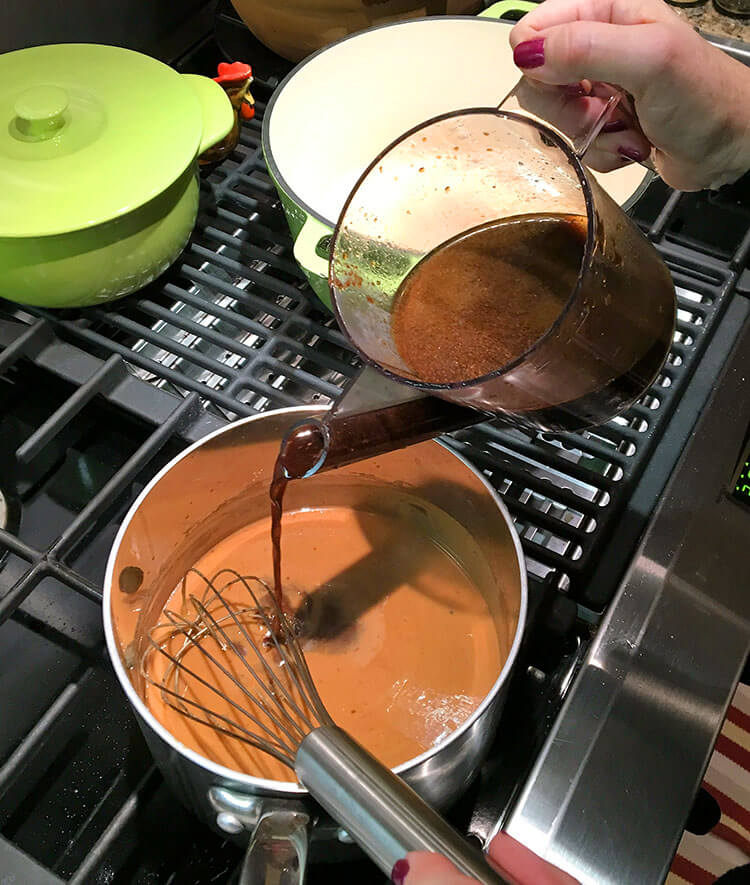
Once the turkey is out of the oven and resting, pour the drippings from the roasting pan into a Fat Separator or heatproof glass measuring cup. Let stand 5 minutes, then skim off and reserve the clear yellow fat that rises to the top. Measure 1/2 cup fat, adding butter, if needed, to make 1/2 cup.
Check the measurement on the broth remaining in the fat separator, once you have skimmed the fat. If you have less than one quart of liquid, add enough strained liquid from the stock pot to the skimmed drippings to make 4 cups.
Place the roasting pan on low across two stove burners (or scrape all the brown bits from the roasting pan into a saucepan) and add the turkey fat or fat/butter combo (1/2 cup total).
Whisk in the flour to make a roux, scraping up the browned bits on the bottom of the pan, and cook until the paste is lightly browned, about two minutes. Whisk in the turkey broth. Cook, whisking often, until the gravy has thickened and no trace of raw flour flavor remains, about ten minutes.
If desired, finely chop whatever giblets you have prepared and add to the gravy. Check the seasonings and add salt and pepper, as needed. Transfer the gravy to a warmed gravy boat.
Carving
Remove the wing and leg on one side and slice the breast, carving parallel to the center/breast bone. Repeat on the other side. It’s become very popular to remove the breast and slice cross-wise like a loaf of bread. It’s not the way I was trained. But my Dad’s process which took an hour to carve…one slice for the platter, one for the man with the knife….and never ended up with enough food on the platter (What? You want more than one paper-thin slice???) has left some family members in therapy. I can’t be sure but I think some people that I may or may not be related to shred their turkey by hand just to avoid any brush with our torturous past. You are on your own – #NoJudgment – but know that there are plenty of videos on carving techniques!
However you carve it, enjoy and be sure to smother with amazing gravy and serve with gratitude! And be sure to share your family favorite sides in the comments below.
Serves 18 with about 4 cups of gravy
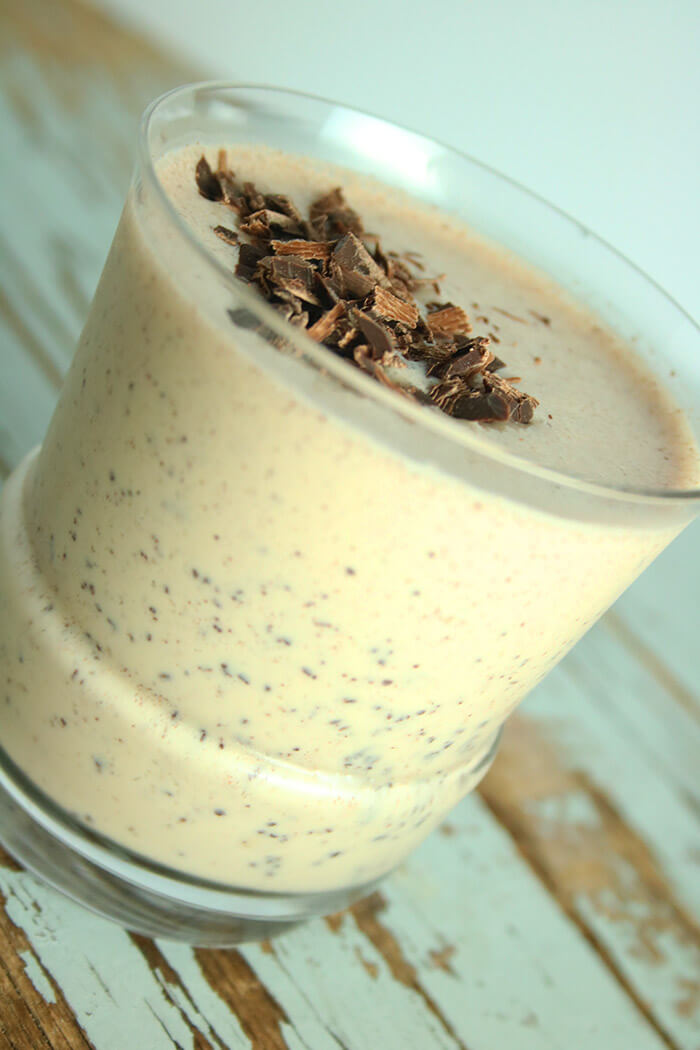
Take a page from this book and consider liquid dessert! Kind of a perfect way to end a meal – no further chewing needed.
Gobble! Gobble!
This post contains affiliate links. For more of my must-have faves, check out my shop.
I have seriously gone down the Pot Lucky rabbit hole, or as I have recently taken to calling it – the Curated Pot Luck. It was only a matter of time after sausage making, soup swapping, and pizza topping, that I would dive head first into a burger blast. No doubt I have mentioned that I rarely get dinner invites, despite my dear friend Cindy running ahead and telling people they’ll have me at hambur…. (hint, hint, hint – I’m a gracious guest, really I am). If this party didn’t crystallize that concept, I’m destined to dine at home. Burgers, burgers, burgers and more burgers.
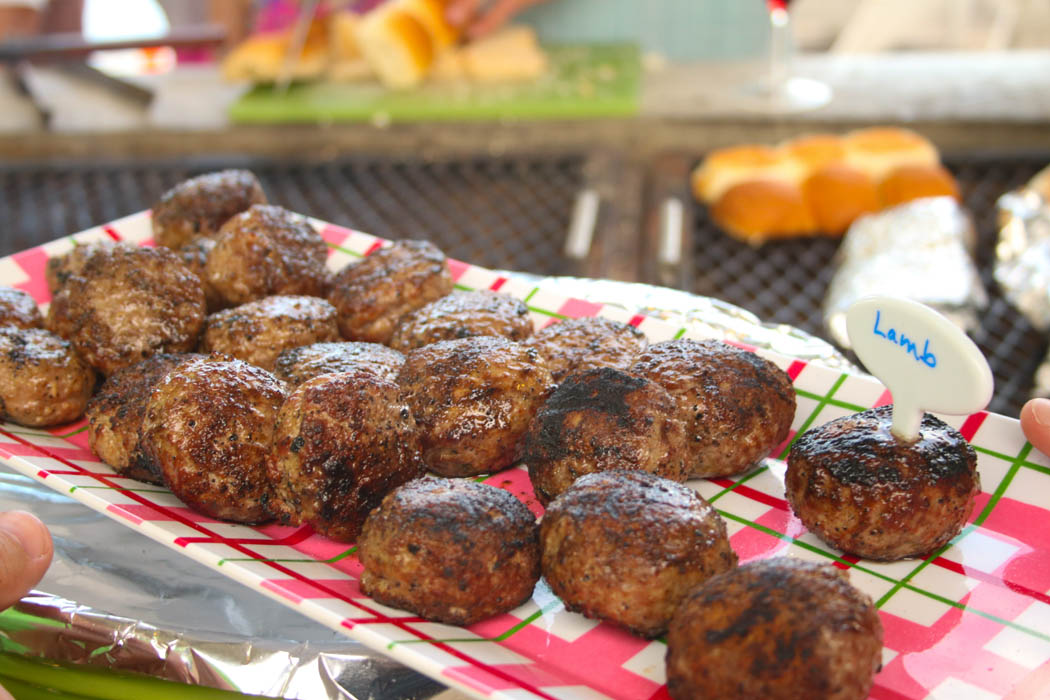
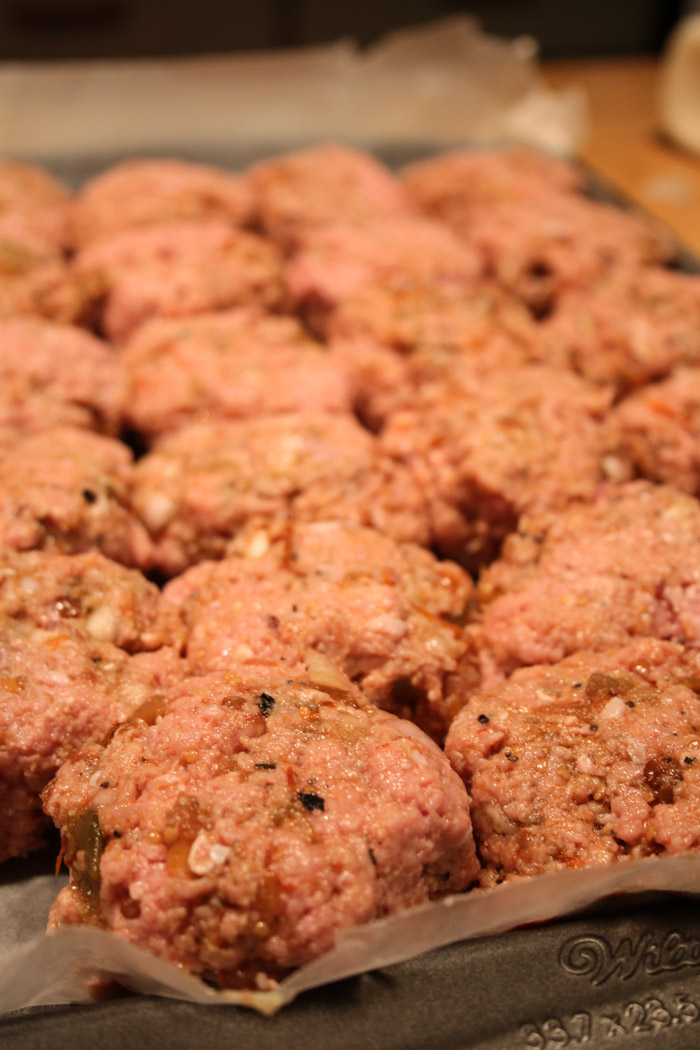
The gang has started to embrace (or run for the hills) the idea of bringing together a culinary creation around a theme. This time I first lined up six people as the Patty People. The call went out for each to bring a different flavor, 3 pounds divvied up into 2-dozen sliders. Yup! That’s 12 dozen sliders. Plenty to share for any one that wandered our way. We ended up with turkey burgers – one of my go-to recipes – a three-cut beef blend, lamb, bison, shrimp and a beef raised locally by the pattier himself. (Note to Dan: standing invite).
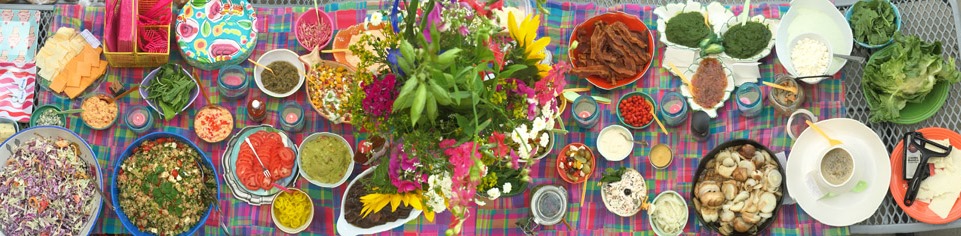
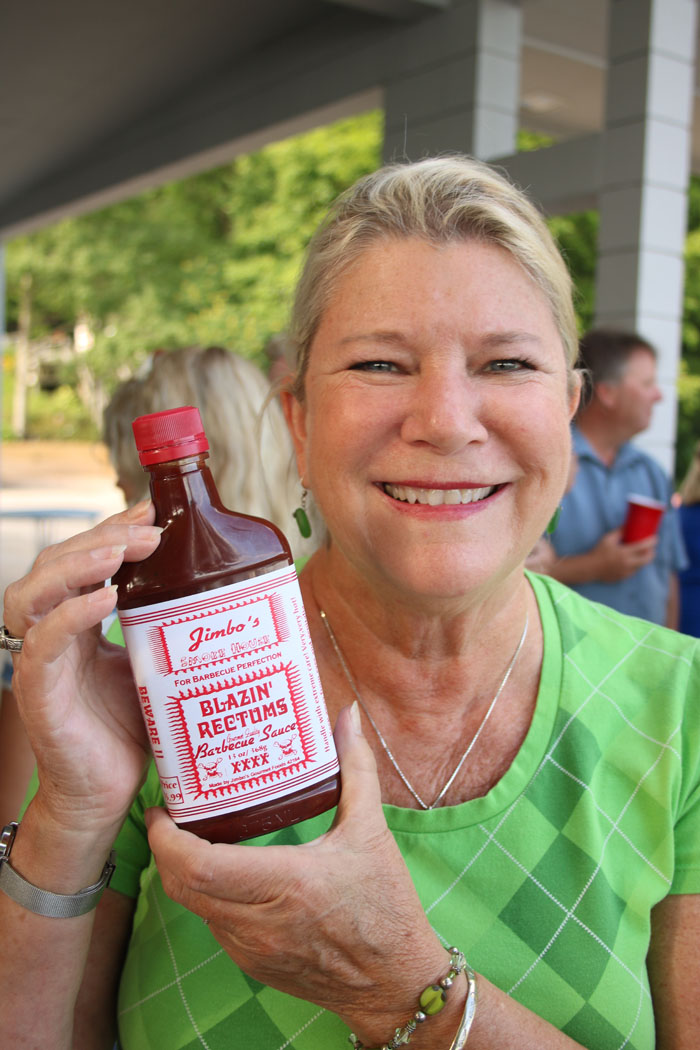
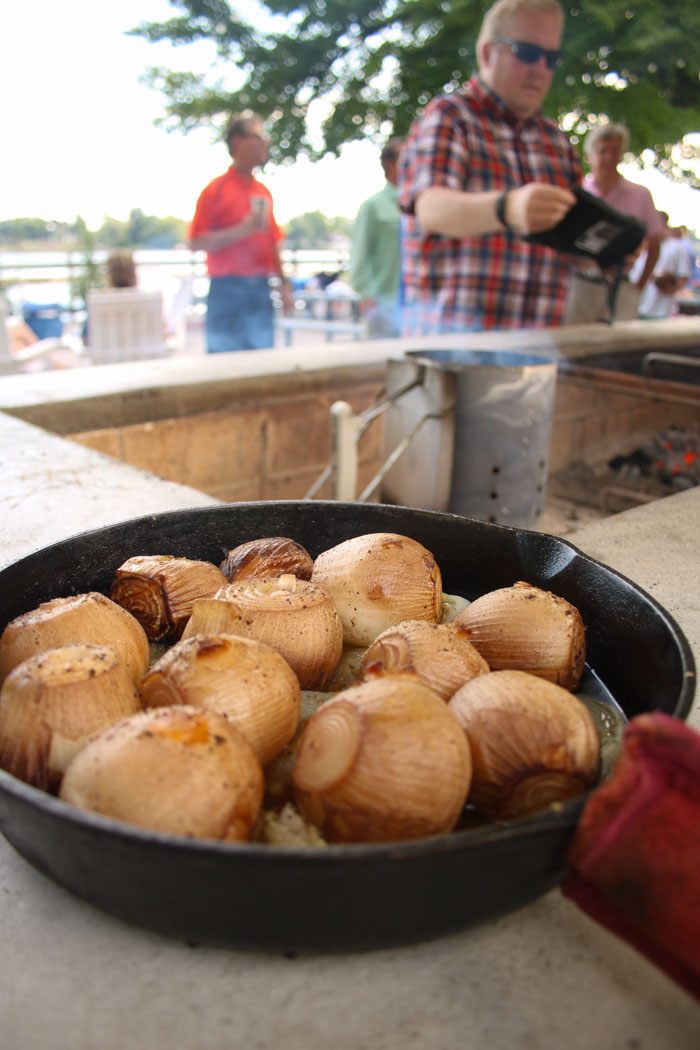
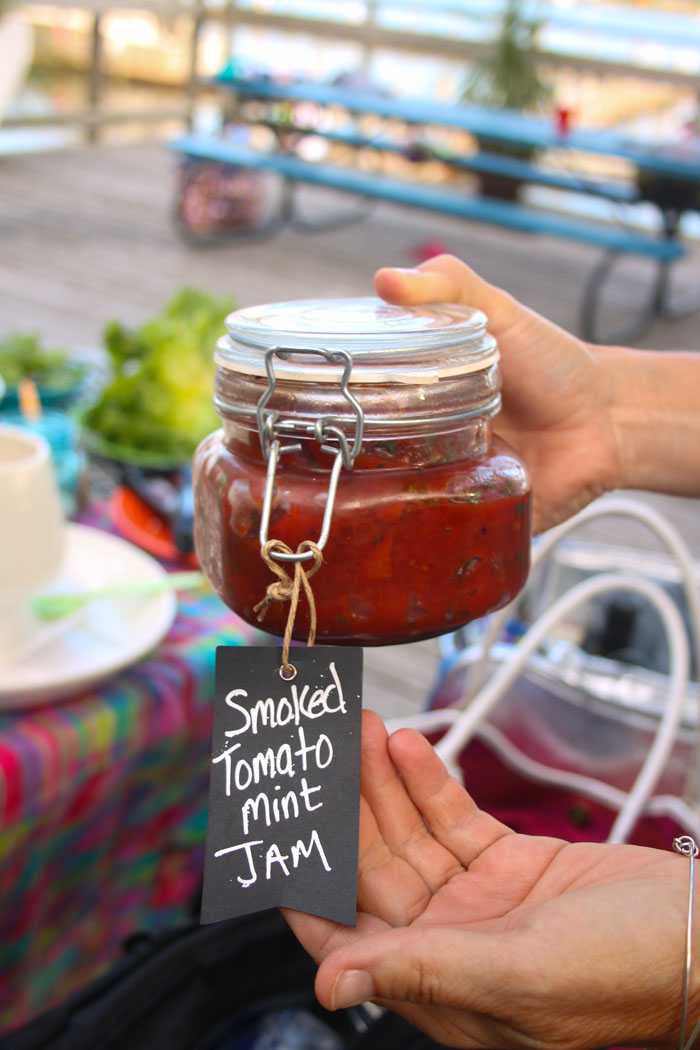
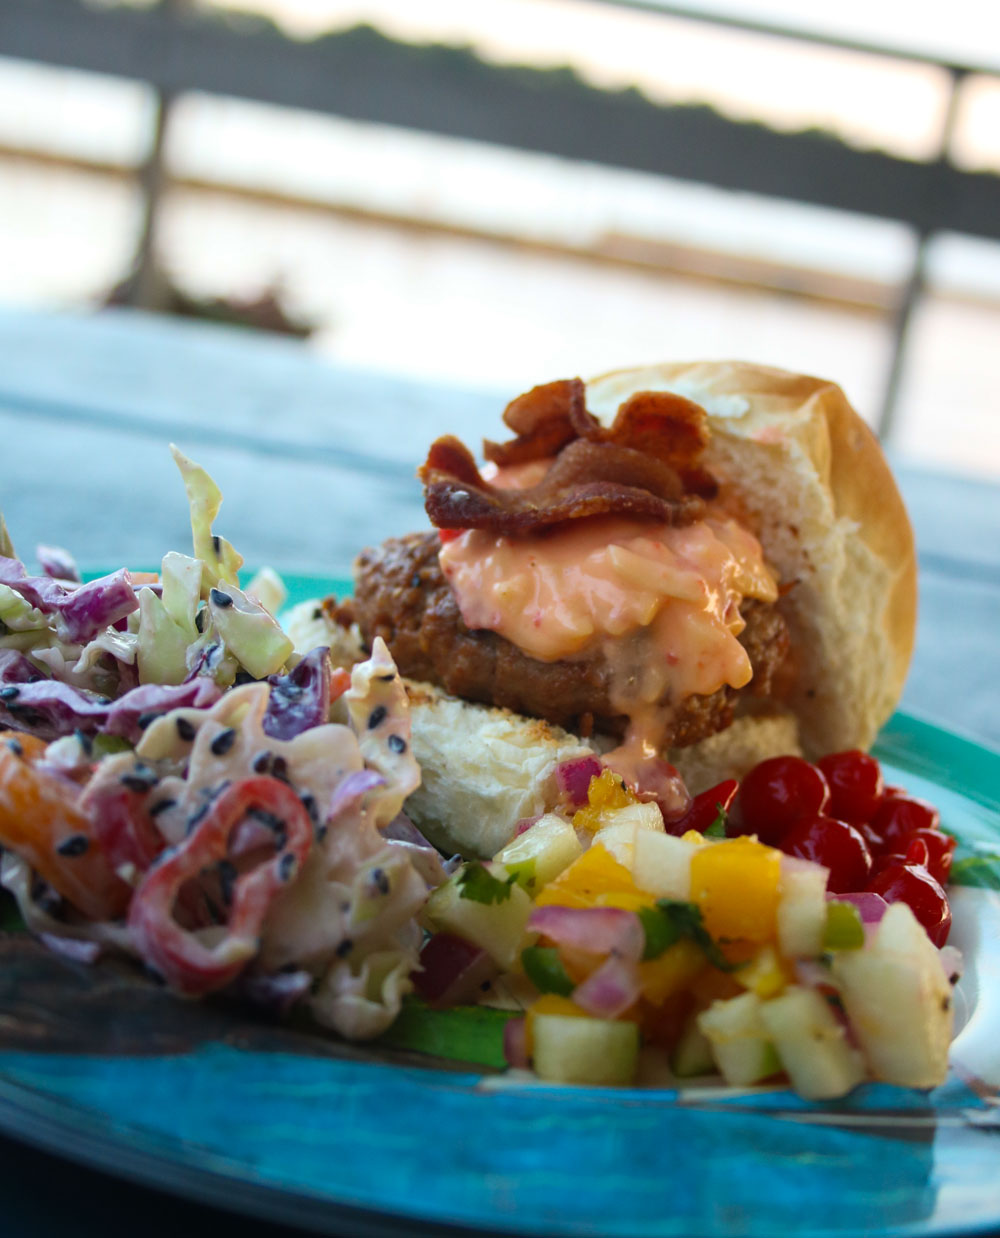
I provided the Designated Toppers with a range of ideas, but the contributions far exceeded that list. Cheeses, veggies, special sauce and more. In case it’s not yet clear – “more” means bacon. Or it means more bacon. The contributions ran from an irreverently-titled hot sauce to smoked onions stuffed with garlic, and on to smoked tomato mint jam (Noyce!!! A fabulous complement to the lamb burger). I felt a bit like the butterball hotline, holding court and making pairing recommendations. A cup or two of each topping is plenty if you shoot for the wide range that we recruited – no need to prepare vats-full.
Here are a few of the amazing items that painted the burger canvas:
Cheeses:
Goat
Bleu Cheese Crumbles
Pepper Jack
Jalapeno Pimento Cheese
Veg & more:
Mushrooms Bourguignon
Smoked Onions
Mango Salsa
Arugula
Pickled Peppers
Lemon Feta Pepperoncini
Julienne purple radish
Bacon
Special Sauce:
Salsa Verde
Chimichurri
Cumin Yogurt
Mint Pesto
Chipotle Aioli
Roasted Pineapple Habanero Sauce
Guacamole
Tzatziki
Smoked Tomato Mint Jam
Amazingly there were only about 3 of the 144 sliders left. Clearly no one went home hungry and everyone was very (wink, wink) “happy”. Sharing a grill and creating your own masterpiece is a great way to get the group mingling – everyone has something to say about their personal favorite combo.
Talking Turkey
If you have ever visited me in Michigan, you have probably had a turkey burger. Because I add drained salsa to the very lean (read: potentially dry) meat, I tend to do a jar or two’s draining at once. Then I patty the burgers out and wrap individually in saran and freeze on a sheet pan to keep their shape, zipping them up when frozen. It’s great to have as a staple when company comes unannounced (unless they come three times in one day – you know who you are!) This is the kind of dish I always make well ahead of guests and if I’m not freezing the patties, each wrapped in saran, I put them on a tray with wax paper below and on top of the burgers, and refrigerate for up to two days. If I’m holding for more than a few hours, I’m sure to wrap the whole tray in saran. This resting time really helps firm up a somewhat wet patty.
At the very beginning of my career, I assisted my cooking school teacher Rick Rodgers in classes and at book signings. He wrote both the Turkey Cookbook and Thanksgiving 101. He has written well over 30 books now and there is not a dud among them. Every recipe is always impeccably tested. I have links to a couple of the books in my shop but truthfully they are all fantastic. I have a vague memory that we made turkey burger sliders for some book signings and served them on little potato rolls. I think that is where the idea of drained salsa first came to my attention. Since then turkey burgers were a staple on the menu at my restaurant New World Grill, where we made Pico de Gallo in-house and added cumin, shallots, and a splash of white wine. However you do it, these stir-ins add a lot of flavor and keep the lean meat from being dry. I really love these with pepper jack and grilled onions on an onion roll. Go big or go home.
Turkey Burger
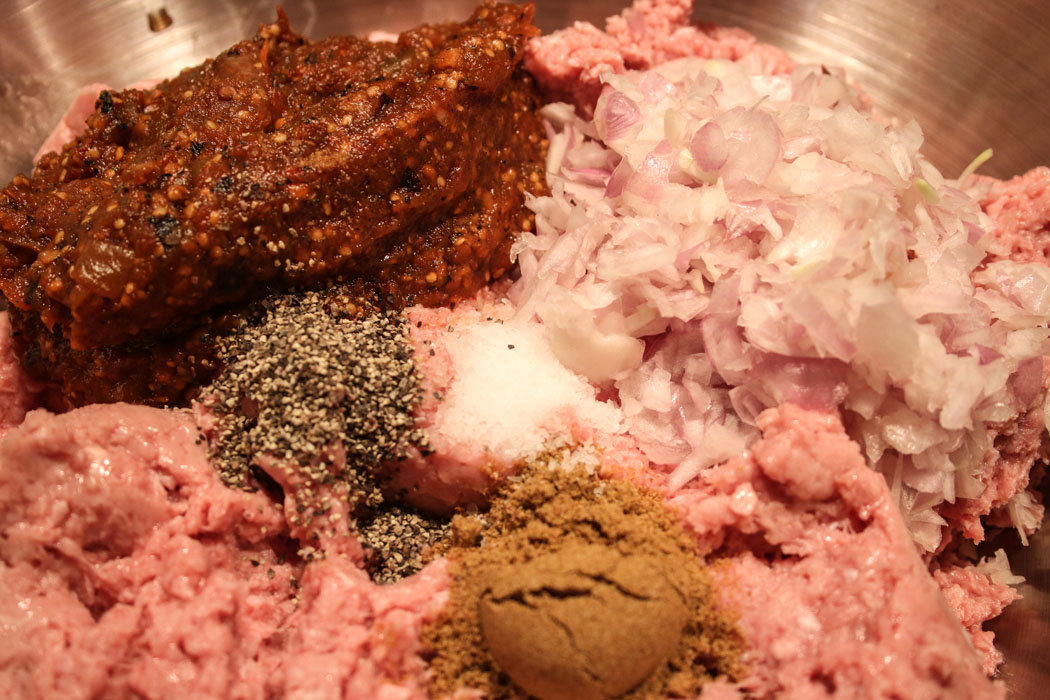
For the burger pot lucky, I used one of my very favorite salsas: Frontera Chipotle Salsa. Because ground turkey is a blank canvas, you almost can’t over-season it. In other words, more heat, more spice. Please.
16 ounce jar of favorite salsa, drained and liquid discarded (or save and use to season a sauce, etc.)
3 pounds ground turkey
3 shallots, chopped
2 teaspoons ground cumin
1 teaspoon salt
½ teaspoon ground black pepper
Pour the salsa into a fine mesh strainer, set over a bowl. Set aside for 20 minutes or more until the liquid has been released. Discard the liquid or save/freeze for something else.
Mix the turkey, drained salsa, shallots, cumin, salt and pepper by hand until incorporated and shape into patties. See note above about stocking your freezer or letting them rest for an hour (up to two days) in your fridge before grilling.
Grill over a medium-hot fire until cooked through (timing depends on burger size). Poultry should always be thoroughly cooked. If you find it hard to flip, show a little patience. A hot grill will always release the stuck food when it’s ready.
Serve with firecracker cole slaw – recipe is coming soon!!
Makes 24 sliders or 8 full size burgers.
This post contains affiliate links. For more of my must-have faves, check out my shop.
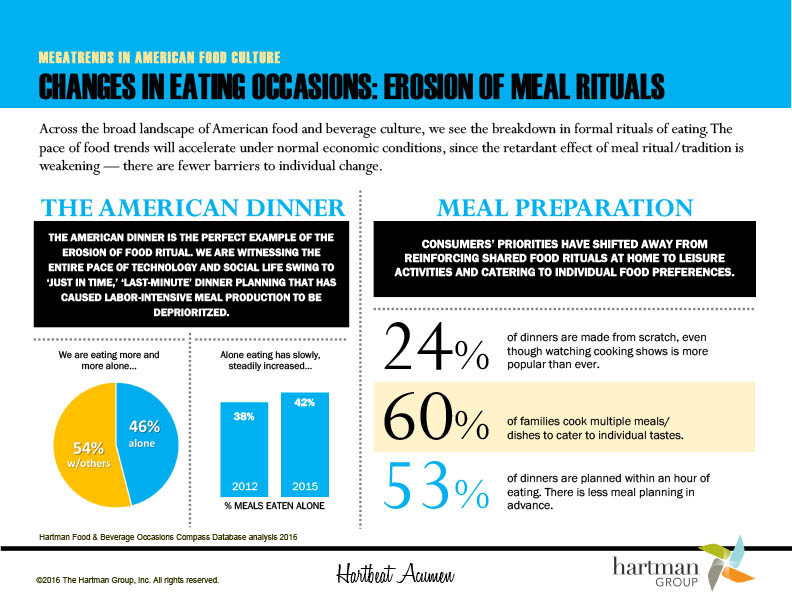
Say it ain’t so!! This sad infographic appeared this week from a consulting company that focuses on food and beverage trends. For me, the really sad part is the title – Erosion of Meal Rituals. According to the Hartman Group, more people are eating meals alone and most meals are planned in less than an hour. The last part sounds really good to me. With a well-stocked pantry, and the fact that spring has sprung and sweet peas are starting to appear, this soul-satisfying dish can be whipped up in no time. But it’s just as easy to make this for two – or three – or four or more – so please don’t eat alone. Breaking bread with friends and family is one of life’s great treats and truth be told is the real soul-satisfying part of any meal.
This spicy horseradish lemon dressing is a fantastic vinaigrette to make in a big batch and have on hand. I always have four or more vinaigrettes available at any time and the flavor profile of each can take a dish in a whole new direction. Lemon/EVOO is a staple, doctored here with a dose of spicy mustard and horseradish. I love a creamy miso dressing, an Asian ginger/soy/sesame oil one and of course something balsamic-based – maple, raspberry, white balsamic, etc. The possibilities are endless.
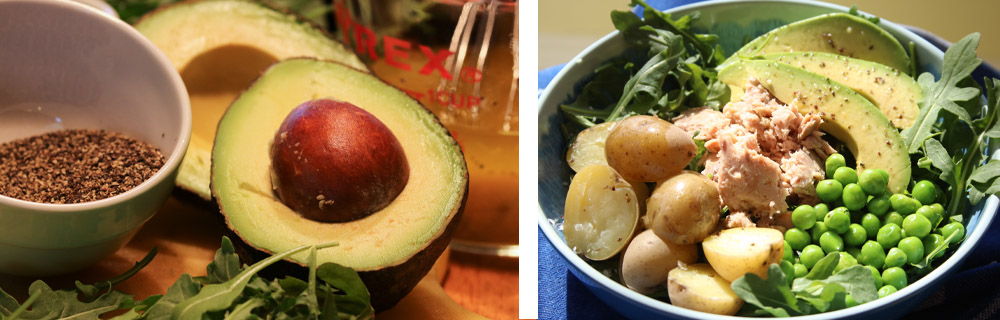
Using classic French technique, salt and pepper are added first with the acid so that they can dissolve before drizzling in the oil in a thin stream for a perfect emulsion. Seemingly every kitchen in France had a different benchmark as to what was the right amount of seasonings. And no matter how I did it, I was American and it was wrong. Oh wait, I was an American Woman, and it was really wrong. I will dedicate a whole post to the classic technique, but for today we will just dump and whisk. As an American, I reserve the right to change the technique and I find that using a grainy salt and pepper in just a measured dose at the end – here I use it strategically on the avocado where its texture and flavor make it a standout – allows for more control over sodium intake which isn’t a bad thing. Certainly not as bad as eating alone. These are my favorite salts today – Maldon Sea Salt Flakes and Maine Coast Sea Seasonings.
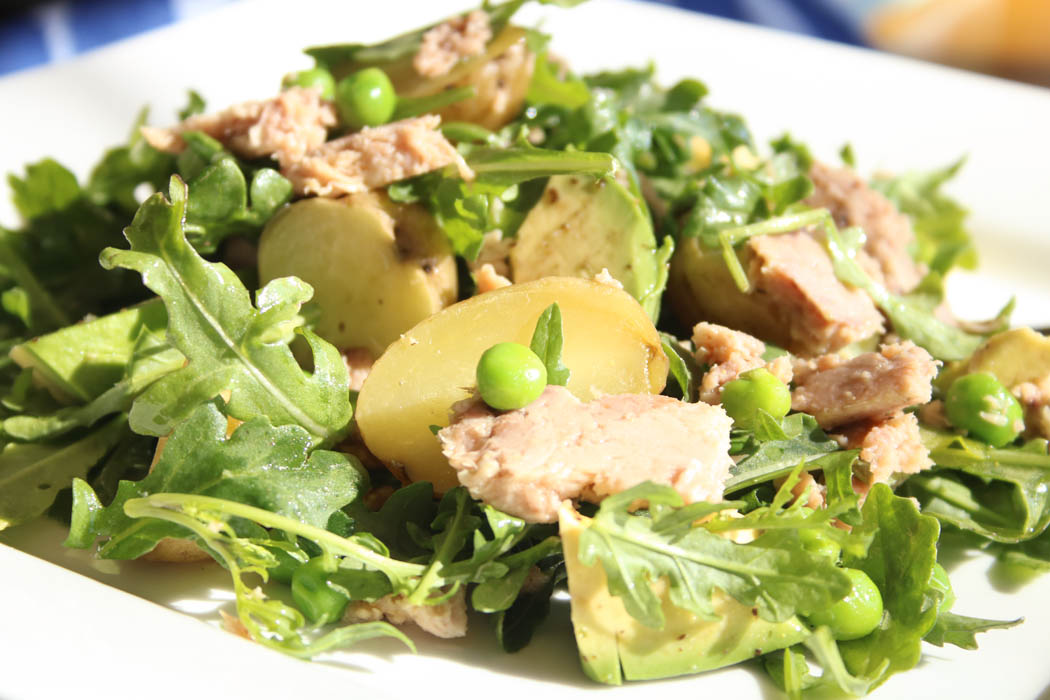
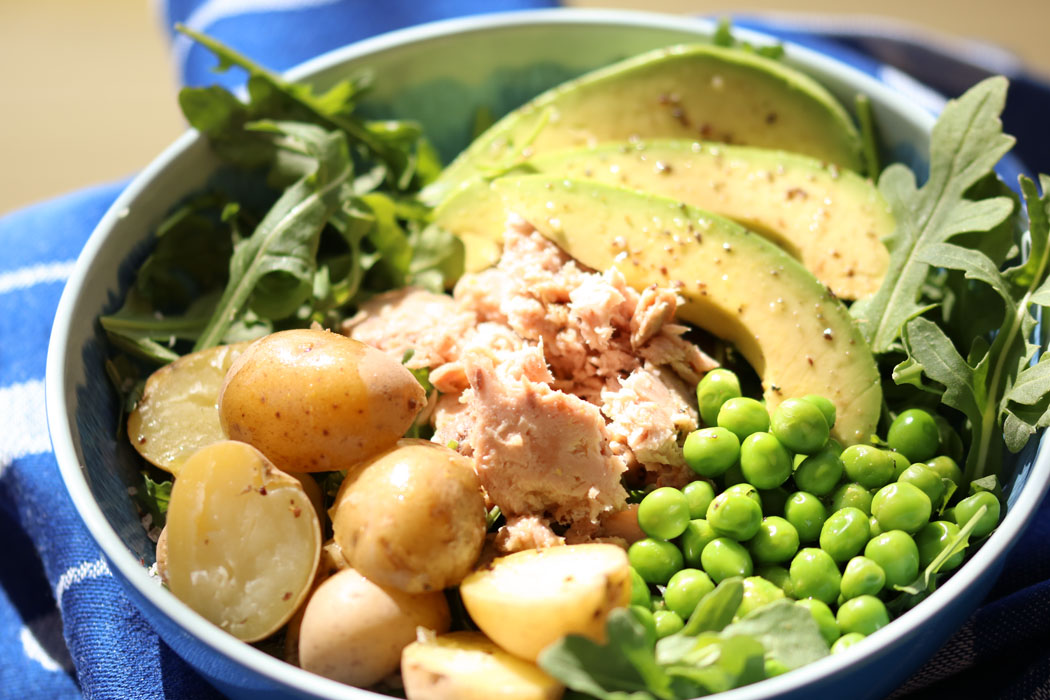
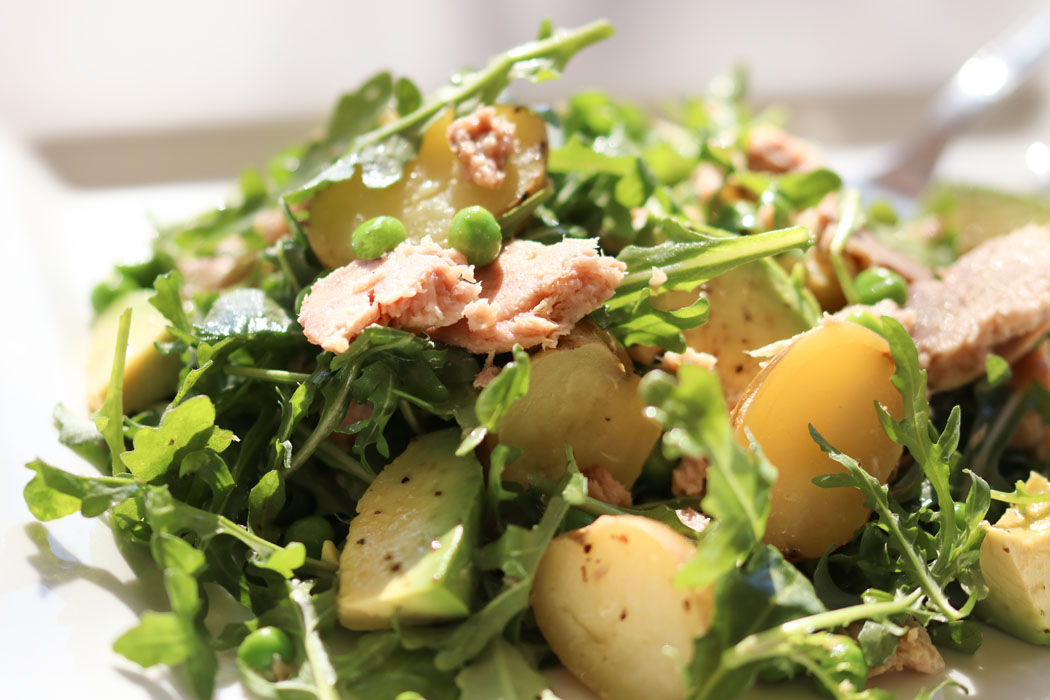
Sweet Peas, Tuna and New Potato Salad
1 pound small new potatoes
½ pound fresh (or frozen) shelled sweet peas
10 ounces tuna (I prefer chunk light tuna in water – especially love the pouches that need no draining)
5 ounces arugula
1 avocado, sliced or chopped
Salt and Pepper to taste
Spicy Horseradish Lemon Vinaigrette
1/3 cup lemon juice
1/3 cup extra virgin olive oil
1 Tablespoon prepared horseradish
1 Tablespoon spicy Dijon mustard
Bring a pot of salted water to a boil. Add potatoes and cook until tender, about 8 minutes. Drain liquid and let potatoes cool to room temperature.
While the potatoes are cooling, place an inch of water in the pot and bring to a boil. Transfer the peas to a steamer basket and add the basket to the pot and cover. (Frozen peas can just be thawed – no need to cook). When tender (about 2 minutes), remove the basket and run under cool water to stop the cooking.
Prepare the Spicy Horseradish Lemon Vinaigrette: Combine all ingredients in a shaker with a tight-fitting lid and shake to combine well, or place in a small bowl and whisk to combine.
Arrange greens in four bowls and divide and arrange potatoes, peas, tuna and avocado. Drizzle with spicy horseradish lemon vinaigrette. Or combine all ingredients in a large serving bowl and drizzle with the dressing and toss to combine. Season with salt and pepper to taste.
Either way – composed (aka deconstructed) or tossed – it’s as fresh as the spring air.
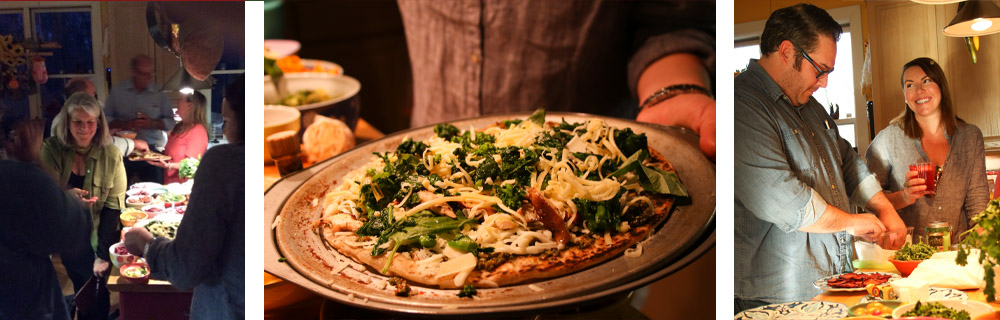
Bring your own pizza toppings. Pizza Party extraordinaire.
In case you haven’t guessed, these newfangled pot lucks (emphasis on the LUCKY, not the pot) are a big hit. Perhaps the reason typical pot lucks scare me just a wee bit is their origin. Historically, pot lucks date back to the European middle ages when nothing, but nothing, was thrown away. (Maybe we could take a tiny page from that lifestyle – I’m looking at you 40% food waste). Rather, leftovers were thrown into a pot and kept warm kind of indefinitely, available to any unplanned arrivals on short notice. This practice was especially prevalent in taverns and inns in medieval times, so no matter when you arrived, you could be treated to the “luck of the pot.” It’s entirely possible, to me at least, that modern day pot lucks could be of equally suspect food safety, never mind random items. But the Pot Lucky aims to change all that!
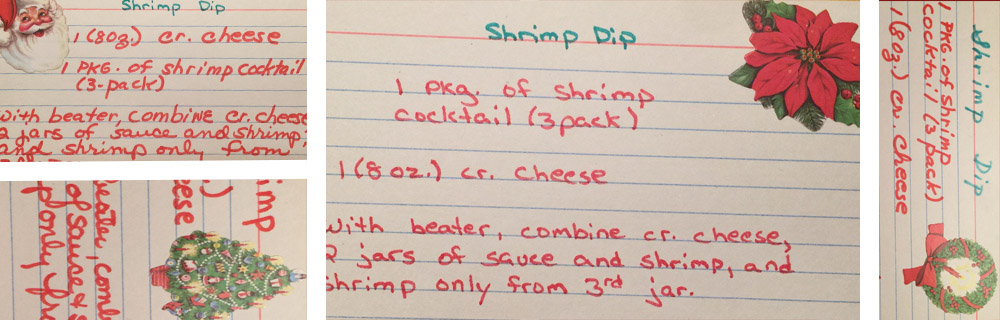
While on the subject of random items, who can forget the famous shrimp dip? My hosts, the charming Bob and Sally Oyler, were no doubt surprised when not only did a guest plop down a somewhat lame-ass (editorial comment mine, certainly not that of the gracious hosts) hors d’oeuvre smack dab in the middle of their fabulous holiday buffet, but said hors d’ was accompanied by kitschy recipe cards to take away. By the end of the party, pretty much every card remained – apparently not a dish that you really need (nor want, for that matter) a recipe for. And now, for more than 35 years, they have appeared in my mail, tucked inside Christmas cards from Sally, their daughter Barb, and most recently hand-delivered by a grandson, something of a recipe card mule, given he had no idea what was in the envelope he bore. I have gotten the last card from Sally, but trust, hope they will keep coming. Anybody want that recipe? I might have a few to share.
Like everything, pot lucks have a silver lining. The beauty of the pot luck is that it spreads both the effort and the expense and makes entertaining a you-don’t-have-to-be-Martha-Stewart snap. After the sausage making party and the soup swap, both definite fan faves, I landed on BYOPT – bring your own pizza toppings. A Pizza Party. “Best Party Ever”, according to one guest. I think part of the fun was that everyone got a quick turn at playing chef – drawing from the 40 some toppings, sauces, and cheeses that found their way to the kitchen island. And by playing chef, I mean this in the truest sense of the word – all the items were prepped (mise en place) and assembly is both the easy and the creative part. I committed to providing the dough (Trader’s Joe has fresh flour, whole wheat and herbed dough, as well as a frozen organic dough). Then I threw out some ideas for both pizza combos and individual toppings, organized by sauce/base, oils, toppings (veg and meat), and cheeses. You can plan it two ways – have people chose from a list of toppings and mix and match at the party, or have them bring enough for their own concoction and they are responsible for everything but the dough on that pie. We got a bit of both. Just a little coordination will keep you from having a lot of dupes.
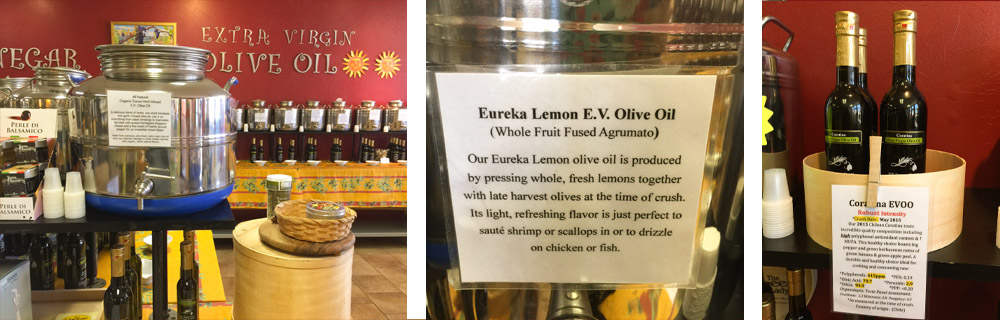
I of course had to make a run to the Cheese Lady, not just for the fabulous ooey-gooey meltable cheeses, but also for her fine collection of oils and vinegars. I settled on a lemon oil (fabulous to drizzle with my lemon pistachio pesto) and a white truffle oil. Super aromatic oils like truffle need to be drizzled after the bake. They are too good to go on before the oven. Good news guys – a phone call to the Cheese Lady and these puppies can be on their way to you. They don’t ship cheeses, but do take phone orders on the wonderful assortment of oils and vinegars. There is a divine maple balsamic that makes a killer vinaigrette with the lemon oil, and the raspberry balsamic is wonderful drizzled into a seltzer. Super refreshing!
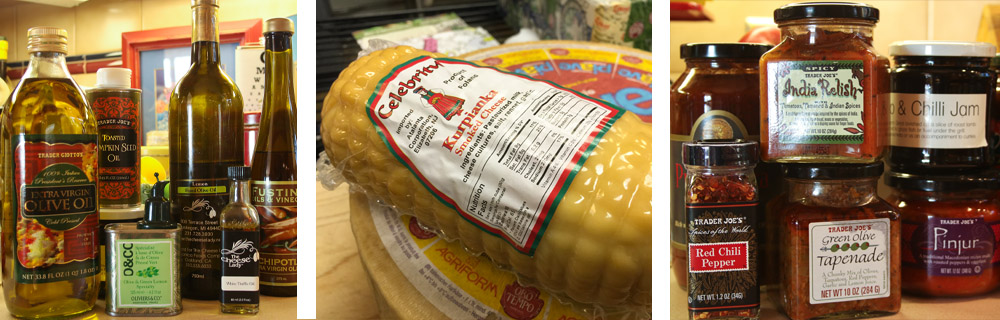
I had to get a couple cheeses that weren’t on my radar – one was meadowkaas which I did know about but didn’t expect to see til June. This is a special (aren’t they all?) style cheese that is made from the first milk from the cows that wander into North Holland’s (the Netherlands, not Michigan!!!) first grasses each spring. An importer found some 65 wheels from 2015 and upon Cheese Lady deeming it delish, they found their way to her. Yahoo! However, the other cheese I bought I had never heard – Kurpianka smoked cheese from Poland. Its touch of garlic and springy texture make it a perfect melting pizza cheese. Yum. Oh and it looks like a cheese grenade. I love that!
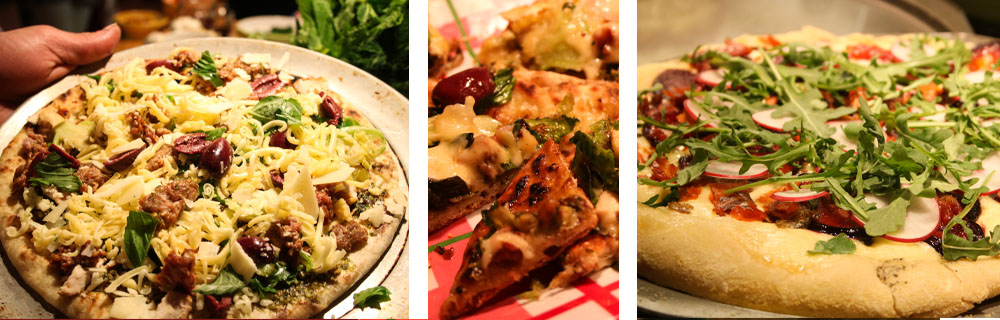
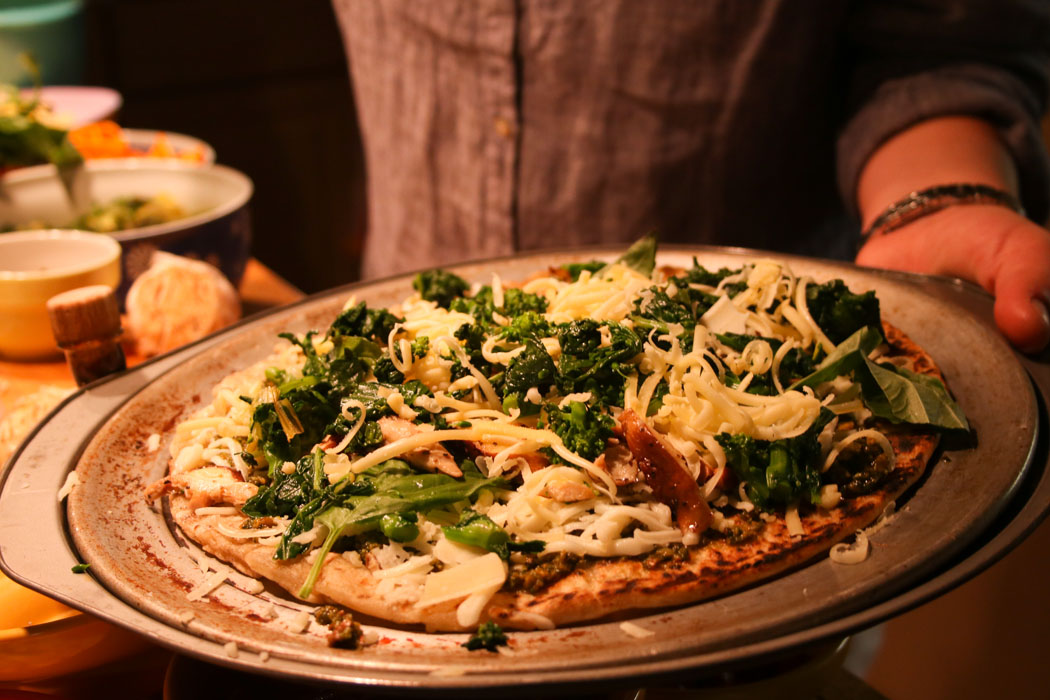
The most important detail you can tell your guests is to make sure the ingredients are “pizza-ready.” That means olives are pitted, zucchini and shiitake-types are quickly sautéed, and bacon is at least par-cooked. Otherwise you will get both a free for all with your limited space and a real mess. I considered a change of address halfway through the party. But a little organization goes a long way. I had a building station with sauces and oils, a topping station, a cutting station, a bar area, and a plates & salad serving area. My kitchen isn’t nearly as big as it sounds. But it worked – just barely. We had about 18 people and made about 13 pies. I find that so hard to believe because I swear I made 15 myself and ate at least 20. #CarbFreeMay
It helps to have some basic equipment – a Pizza Peel to transfer the prepped pizzas, a Pizza Stone or two (or three) always hot in the oven, pizza pans, and plenty of cutting boards and pizza wheels. Everyone brought what they had. I think there may have been six pies in the oven and two on the grill at one point. For the grilled pizza, we used the frozen dough. If you make your own or use fresh dough, it is best to roll it as thinly as you can and then freeze it to make a smooth transfer to the grill. Oil the grill and cook the dough on both sides to color and get grill marks. Then transfer to the building area where you can add toppings. Slide back on the grill and close the lid to melt the toppings. This will only take a few minutes. The oven (400-425oF) pizzas work well if you dust the peel with corn meal or make sure the dough is well floured and not sticky. Build the pie and slide onto the hot stones. All in all, it’s pretty neck-down in the execution, once you do a couple test pies to get down the technique.
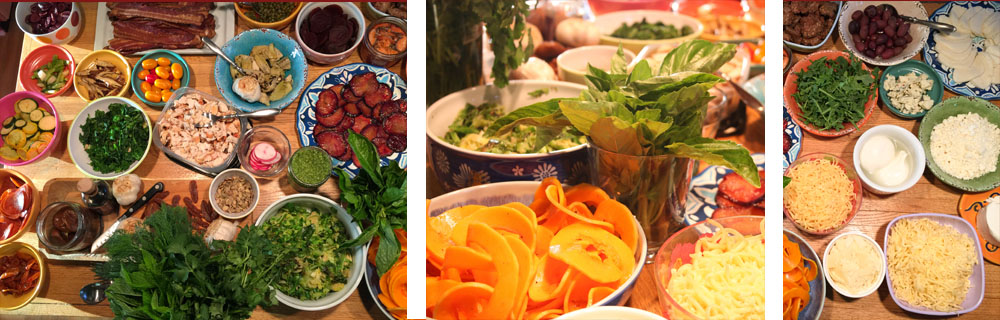
We had some pretty fantastic Pizza Party toppings – here is a select list (email if you want my master list):
Sauces: red sauce, lemon ricotta, lemon pistachio pesto, fruit chutney, kale pesto, green olive tapenade, horseradish dill drizzle
Oils: EVOO, lemon oil, white truffle oil, Toasted Pumpkin Seed Oil (divine on the butternut squash ribbon pie), chipotle oil, fig balsamic
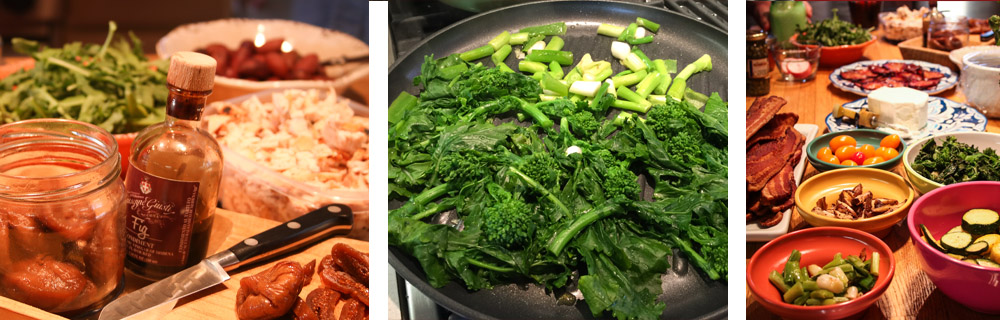
Arugula, charred scallions, roasted garlic, sautéed shiitakes, grilled zucchini and yellow squash, you’ll thank me in the winter oven dried tomatoes, sautéed broccoli rabe, fresh basil, Kalamata olives, artichoke hearts, spinach, roasted beets, dried figs, butternut squash ribbons (the Paderno Spiral Vegetable Slicer worked perfectly), Brussels sprouts, smoked salmon, capers, roasted plums, radishes – wait…..seriously??? A partial list????
Pepperoni, prosciutto, shredded chicken, ham, bacon, sausage
To provide the best experiences, we use technologies like cookies to store and/or access device information. Consenting to these technologies will allow us to process data such as browsing behavior or unique IDs on this site. Not consenting or withdrawing consent, may adversely affect certain features and functions.
Functional
Always active
The technical storage or access is strictly necessary for the legitimate purpose of enabling the use of a specific service explicitly requested by the subscriber or user, or for the sole purpose of carrying out the transmission of a communication over an electronic communications network.
Preferences
The technical storage or access is necessary for the legitimate purpose of storing preferences that are not requested by the subscriber or user.
Statistics
The technical storage or access that is used exclusively for statistical purposes.The technical storage or access that is used exclusively for anonymous statistical purposes. Without a subpoena, voluntary compliance on the part of your Internet Service Provider, or additional records from a third party, information stored or retrieved for this purpose alone cannot usually be used to identify you.
Marketing
The technical storage or access is required to create user profiles to send advertising, or to track the user on a website or across several websites for similar marketing purposes.