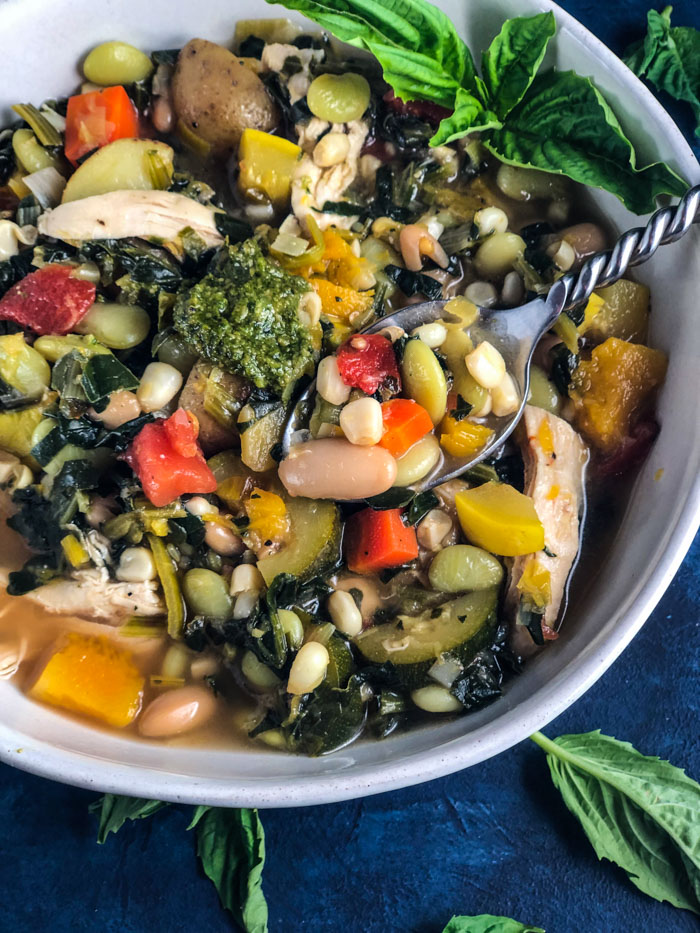
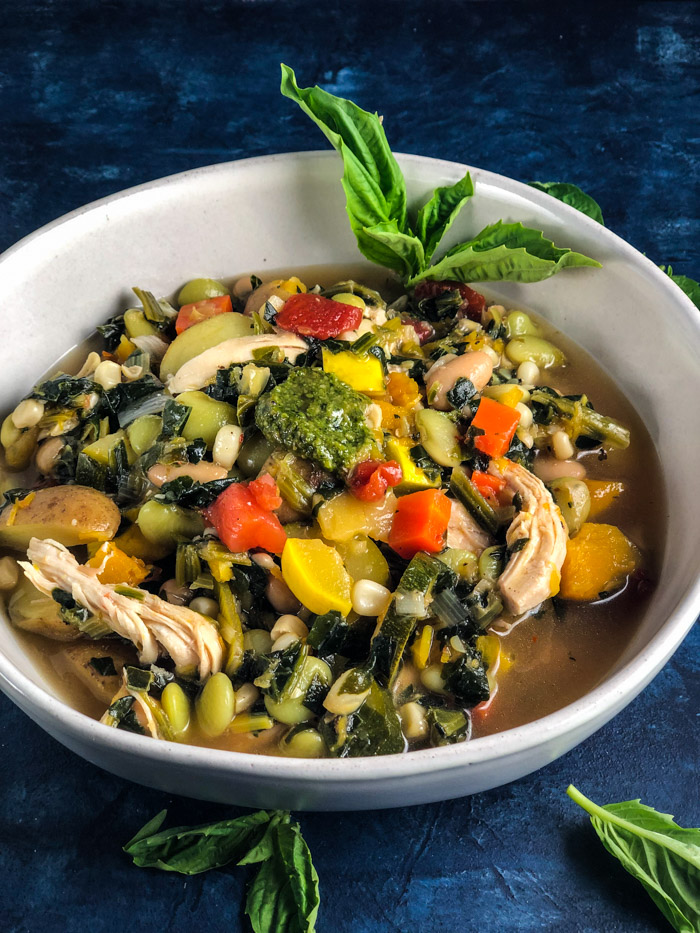
This hearty, healthy vegetable soup will get you through until the farmers’ markets are cranking out peak of the season produce again. A dollop of pesto will brighten the flavors and get you jonesin’ for sweet summer corn and tomatoes.
It probably seems like it’s way past soup season but bear with me. It’s about time that we take a second to think again about food waste and making a difference in the way we take advantage of the bounty of the season. If you have been following me for a while, you know that I am a big fan of taking any produce that you overbought and saving it in the freezer until you can use it. Ziplock it fresh, oven-dry it or sauté it and cover in broth before freezing…all to add to sauces, salads, pastas and soups through out the year. Now that we are looking down the barrel of summer, it’s time to clean the freezer and put all last season’s produce to good use. Healthy vegetable soup to the rescue!
Unfortunately we are still wasting 40% of the products that our hardworking farmers produce every year. Some are deemed too ugly to make it onto our supermarket shelves. Some are past their use by date. I love this campaign by the Ad Council. Best if used. Period. Look closely. $1500. That’s how much a family of four spends on food that goes into the trash every year. How great would that extra cash be?
And landfills filled with rotting food result in higher greenhouse gas emissions than US beef production. All that wasted food AND it is bad for the environment? No bueno!! So think about ways to re-purpose this produce and extend its life.
How to Save Vegetables
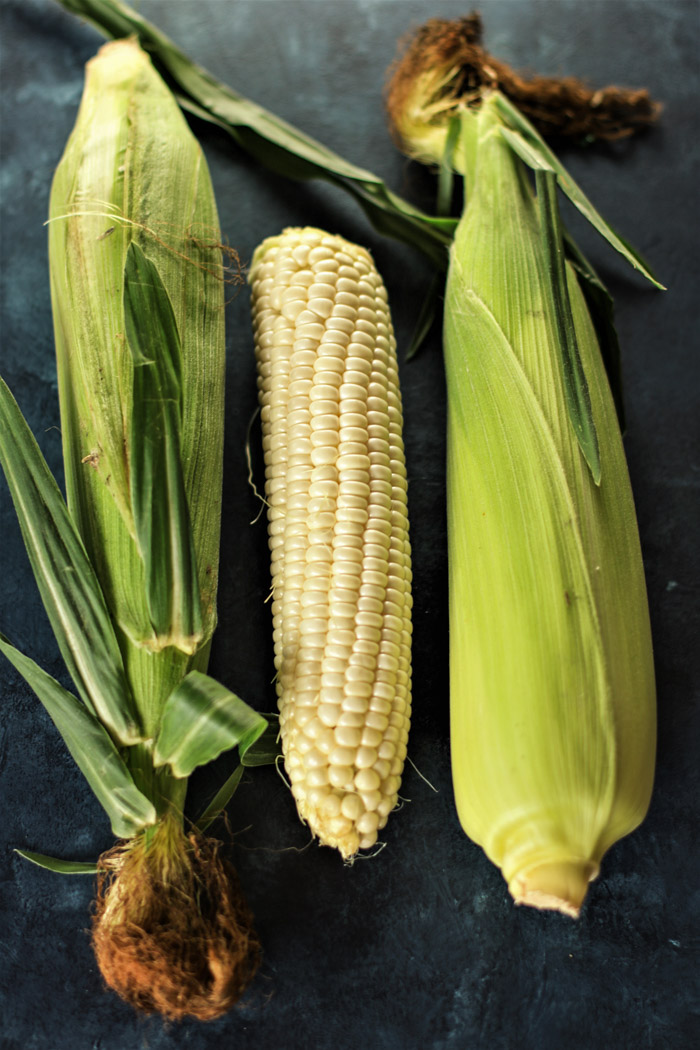
Fresh corn: cut it off the cob and ziplock it to freeze
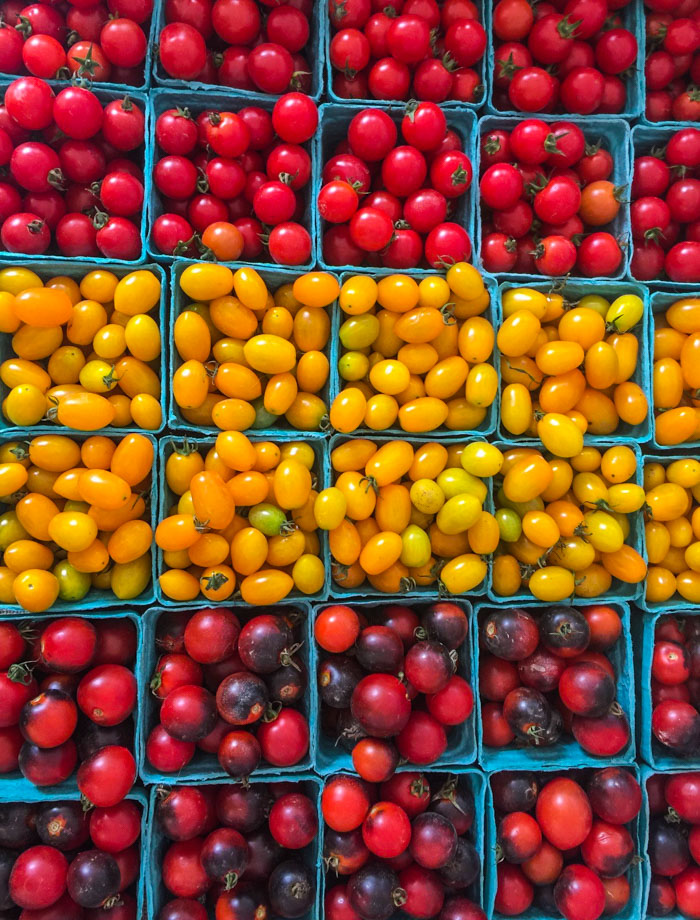
Tomatoes:oven-dry and once cooled, ziplock and freeze
Zucchini, peppers: sauté and cover with broth, then freeze to add to soups and stews
Leafy greens: steam and squeeze out the excess liquid, then ziplock and freeze
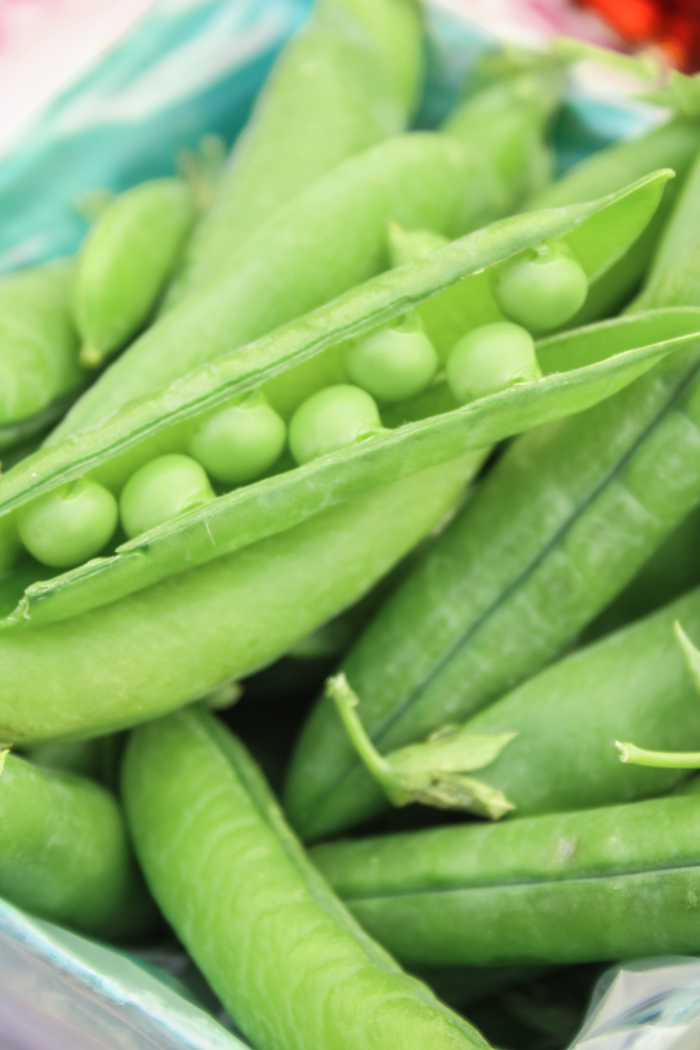
Peas: shell and ziplock raw and freeze
Winter squashes: peel, seed and cube, then ziplock and freeze
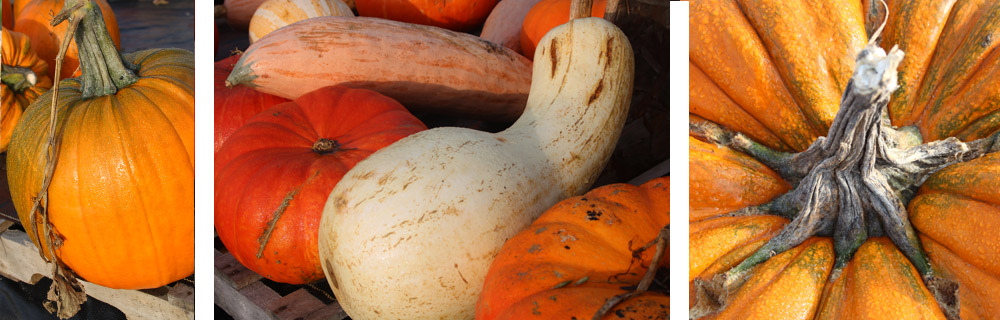
Here are some of the things coming your way soon, so start thinking about it now. Of course, try to buy the right amount, but don’t throw out your excess. Respect the food and preserve it. Or if you are like me and know the corn will never be better, do buy extra and save it for the long, cold winter.
Sweet corn and sweet peas.
Heirloom cherry tomatoes definitely worthy of oven-drying to preserve for winter.
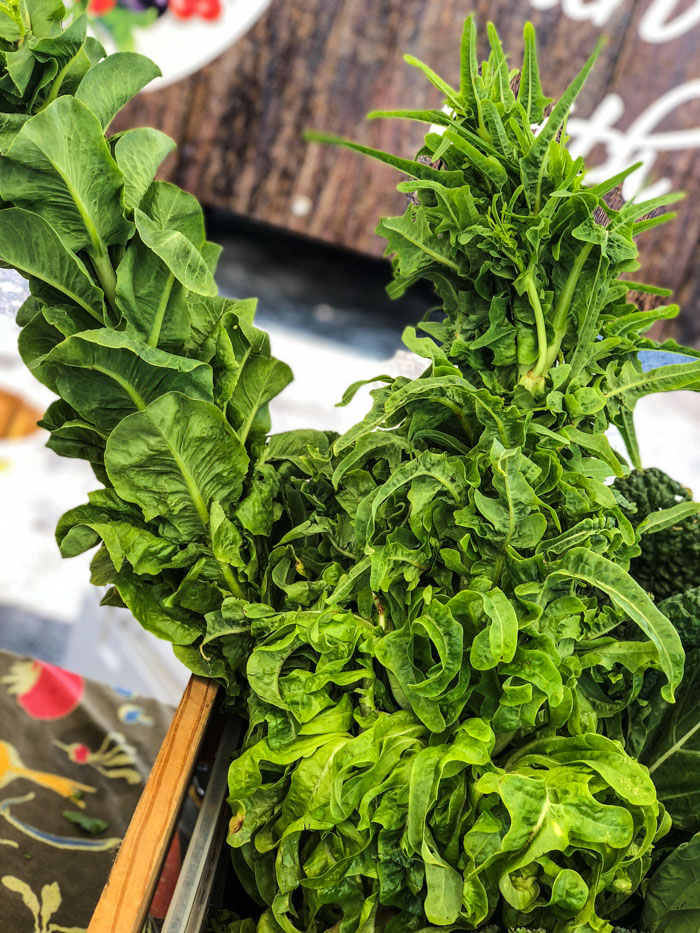
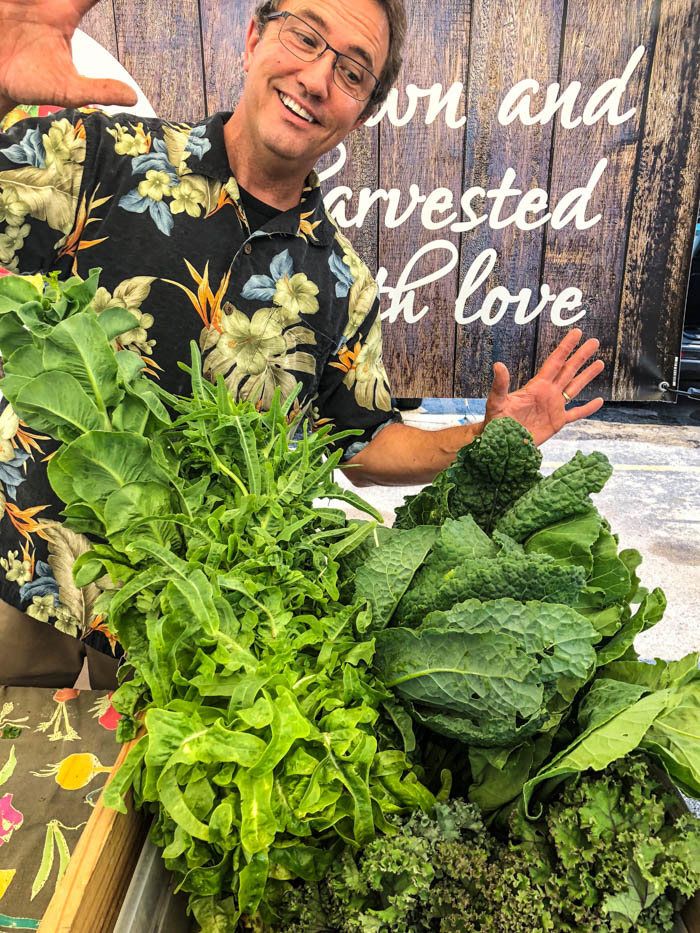
If you think this Kale is Krazy, wait until you see the farmer.
Told ya!
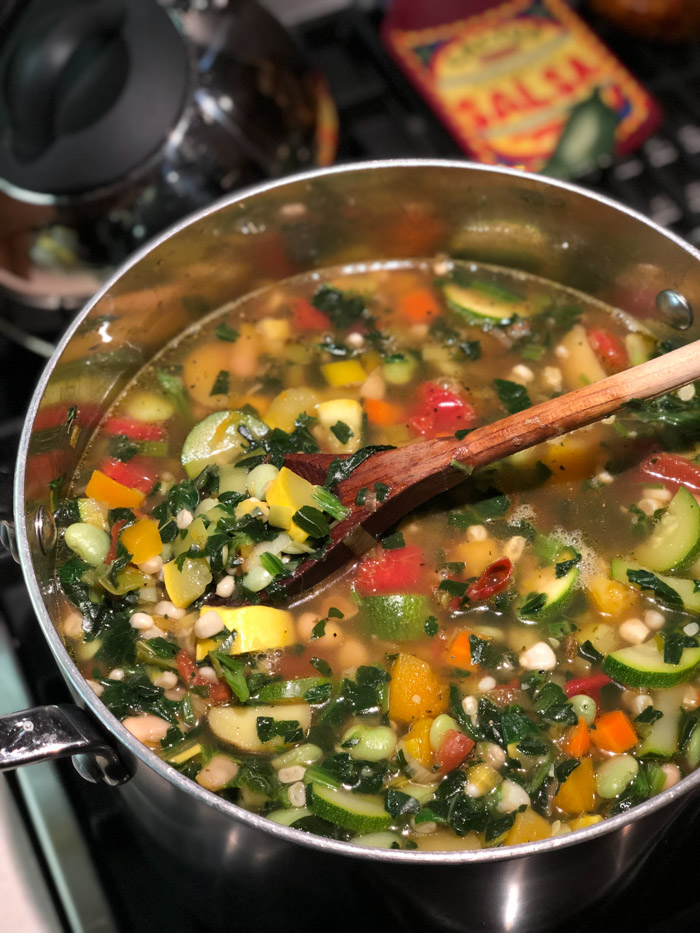
Best Ever Healthy Vegetable Soup
This soup takes advantage of many things I had in my freezer. I just made a big batch this weekend. I will put a few quarts away in the freezer for upcoming long days, but much I will eat this week. Saturday I start eating like a Syrian refugee as part of the Ration Challenge. More on that in the next post, but suffice it to say I am in a full-on panic about no fresh veggies for a week. Whole lotta rice and beans, with a sardine here and there.
You can customize this yummy, healthy vegetable soup to your own palate, but I found corn, butternut squash, edamame, and spinach all in the freezer. The canned cannellini and diced tomatoes I had in the pantry. And the remaining ingredients consisted of only a few fresh vegetables – leeks, zucchini, summer squash, and potatoes. In fact, this soup started as a leek and potato soup and then became a runaway vegetable extravaganza! You could even go so far as to add some chicken – either leftover roasted, poached or a rotiserrie chicken – to add a little lean protein.
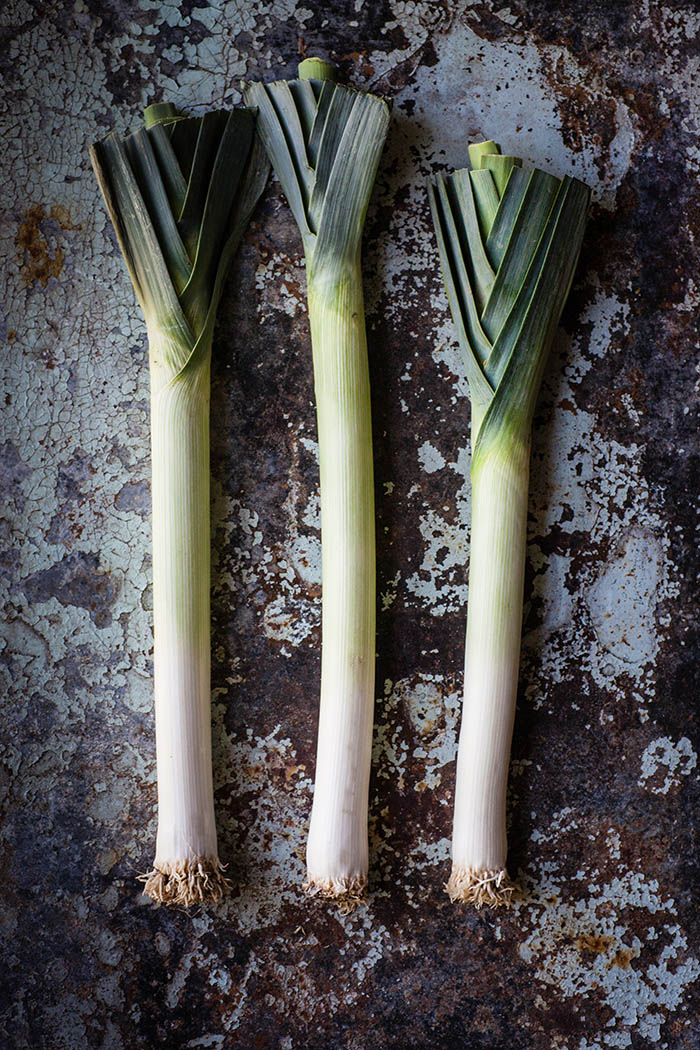
Photo credit: Heather Gill for Unsplash
How to Clean a Leek
Sidebar note on cooking with leeks: LOVE THEM!!! They always seem to be available because they scare people and they get left behind. They add all the depth of flavor of an onion, with none of the bite. And they are really easy to use. However, they retain a lot of dirt, so they need a thorough wash first. Trim off the woody dark green leaves at the top (and save them for a stock pot), but leave the hairy root end intact for now. Once the top is trimmed, slice lengthwise down toward the root (without cutting through), first in half, then in quarters, using two long cuts. Now holding onto the root end, run it under cold water, fanning it out to remove all the grit. It’s a bit like a brush with long bristles. Shake, shake, shake. Once thoroughly cleaned, towel off excess water and cut crosswise in desired slices. Discard the root end when you get there. Some prefer to slice and then clean and here is a quick video on that.
I finish it off with a dollop of pesto – homemade or store-bought. That is how I finished it off on our spring vegetable soup with pistou on the very first menu at New World Grill. The vegetables were very precisely and finely minced. That’s a far cry from the hearty chunky way I cook today. Gone are the tedious and tiny tidbits. Welcome, chunky and hearty veg.
What Vegetables are best?
While I am tempted to say you can’t go wrong, I can actually think of a couple that I might pass on. I love all vegetables that keep their shape and color. With this being a relatively quick cooking time, that would include most. Eggplant probably deserves a pass. It can get bitter and breaks down to a seedy, gummy mess. And I would avoid certain mushrooms that will absorb too much liquid and get squeaky. Know what I mean? Like a portabello. Tiny enoki might be nice in here though. In general, I prefer mushrooms in a more dry sauté dish or when pureed. Lastly, beets are going to bleed and will overly flavor the broth. But you do you, I’ll do me. Give it a whirl and see how you like it.
A Note on Prep Time Listed
In spite of 3 decades of foodstyling for television, where every ingredient is in its ramekin for a dump and stir demo, and despite 15 years as a chef/restaurateur, where all mise en place (prepped ingredients) are ready in the reach-in for cooking during service, I do not cook that way at home, nor should you. It takes a lot more time to get everything ready for dump and stir. I’m not saying you shouldn’t pull all your ingredients together in advance. However, if an onion is going to cook until golden for 12 minutes, I don’t chop the next ingredients until I get that on the burner cooking. I prep as I go. Multi-task anyone? The prep time I give in a recipe is just the minimal prep time required in order to start cooking. Once cooking commences, I start the count-up clock to track how long it takes to finish the recipe. There will be some prep during the cooking time. You may note that the ingredient list calls for the items to be already prepped (e.g., 1 cup diced zucchini). I have detailed it this way simply to space-save on a recipe printout. Don’t think you need to get it all done before you start. The more you know 🙂
This hearty, healthy vegetable soup will get you through until the farmers’ markets are cranking out peak of the season produce again. A dollop of pesto will brighten the flavors and get you jonesin’ for sweet summer corn and tomatoes.
Ingredients
Scale
3 Tablespoons olive oil, divided per below
2 leeks, cleaned and sliced
3/4 pounds mini potatoes, such as Boomer Gold, cut in half or quarters depending on size
2 medium carrots, peeled and diced
1 pounded winter squash, such as butternut or acorn, peeled and diced
2 32-ounce chicken or vegetable stock
1 medium zucchini, trimmed and diced
1 medium yellow squash, trimmed and diced
1 15.5-ounce can cannelini beans, rinsed and drained
1 14.5-ounce can diced tomatoes
1 pound shelled edamame, lima beans, or peas
1 pound frozen, chopped spinach
1 pound sweet corn
1 teaspoon pink Himalayan salt
1/2 teaspoon freshly ground black pepper
1/2 teaspoon red pepper flakes
Optional Garnish: Dollop with pesto
Instructions
In an 8-quart stock pot, heat two Tablespoons olive oil over high heat. Add the leeks and cook until wilted and starting to brown, about 5 minutes. Push to the side and add the remaining Tablespoon of olive oil. Add the potatoes and cook for 5 minutes. Stir potatoes and leeks to combine.
Add the carrots and winter squash. Stir to combine.
Add about one cup of the stock, to deglaze the pan, scraping up the brown bits. Add the zucchini and yellow squash and remaining stock. Bring to a simmer and reduce the heat. Simmer for 30 minutes. Check the doneness, especially for potatoes and squash.
Add the cannellini beans, tomatoes, edamame (or lima or peas), spinach and corn. Simmer for 10 minutes.
Season with salt, pepper and red pepper flakes. Adjust seasonings to taste.
Top with a dollop of pesto (recipes linked below).
Notes
Optional: add 1 pound cooked chopped chicken, about 2 cups. Yield will be higher, if chicken is added.
If any of the vegetables you are using are commercially frozen, check to see if they are par-cooked. If so, you may want to add them toward the end with the quick cooking ingredients like corn and spinach.
If freezing, I like to wait to add seasoning until later when I serve it. I also find I may need to add a bit more stock if it’s been frozen.
Prep time in the recipe includes only the time needed to get cooking. You can continue prepping while the first step is cooking. While total time accurately reflects the total time required, the prep time is the shortest time til you fire up the stove, not the time required to prep all ingredients to their ready-to-use state.
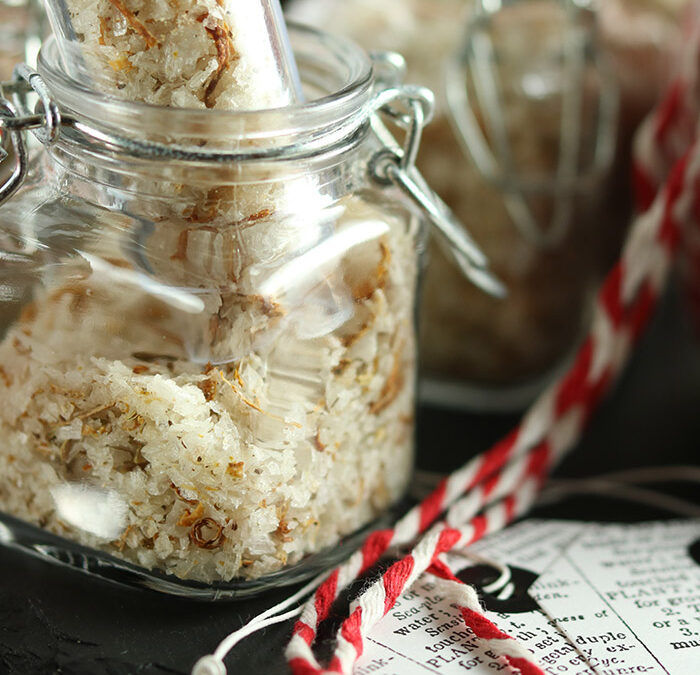
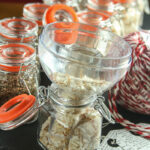
Seasonings Greetings! Just saying that reminds me of the Christmas card from years ago where I clipped measuring spoons to my lobes and stood among hip-high bags of spices in a market – caption: Seasonings Greetings. Cheesy? You betcha. But that’s the way I roll. And giving gifts that are edible is another way I roll. Be honest. What rivals something homemade? Maybeeeeeee….something that you can use up? I think so. This salt & pepper gift pairing does double duty as homemade and consumable, and it is a perfect stocking stuffer. Or a gift exchange. Or a hostess gift.
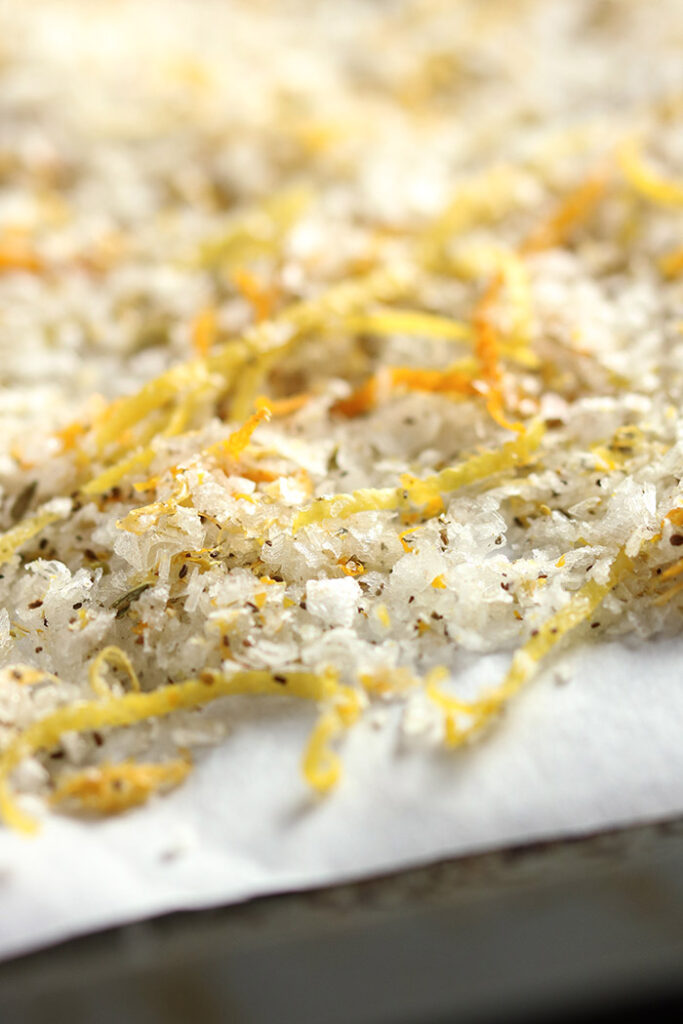
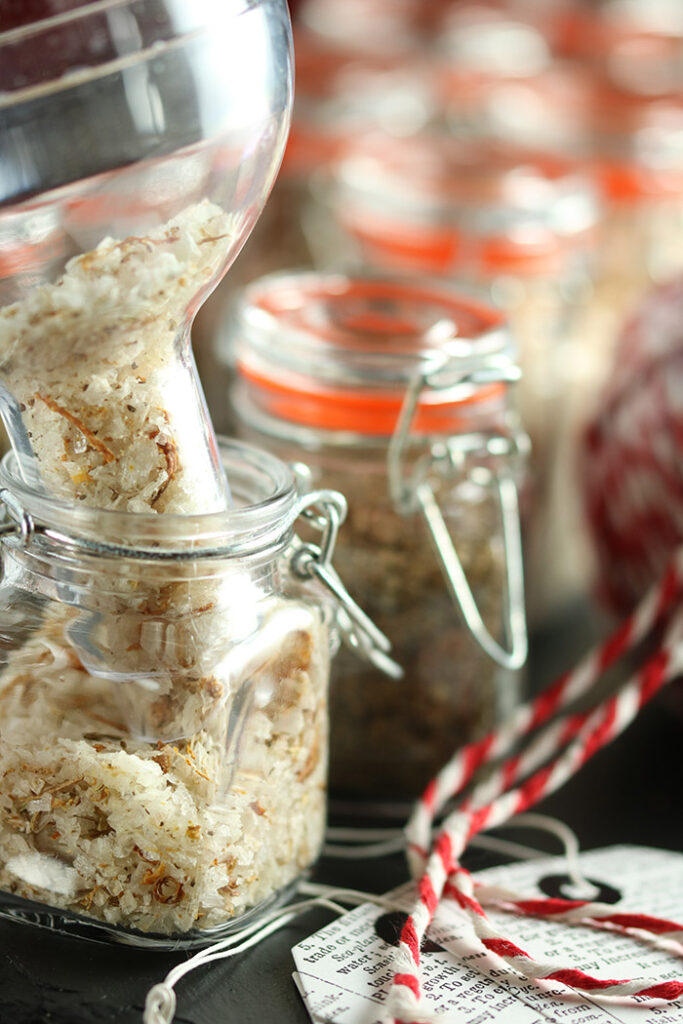
Citrus and Seeds
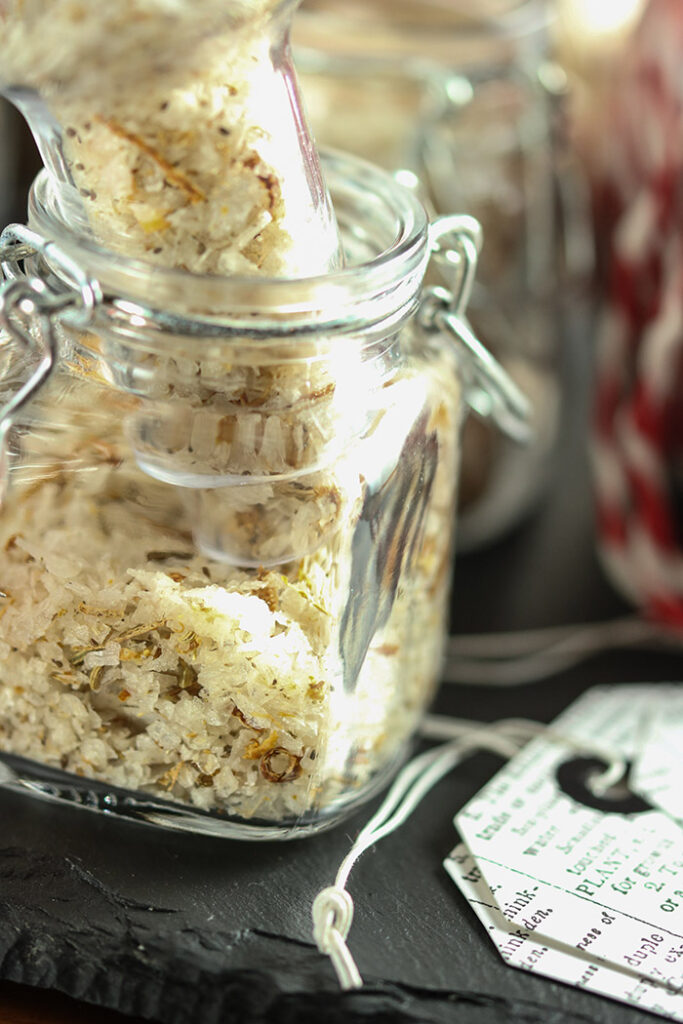
This salt blend benefits from a quick round of oven-drying citrus zest. Combining orange, lemon and grapefruit adds just the right amount of sweetness and acidity. And, the added fennel and celery seeds add a hint of fresh herbs, but provide a shelf life longer-lasting than fresh.
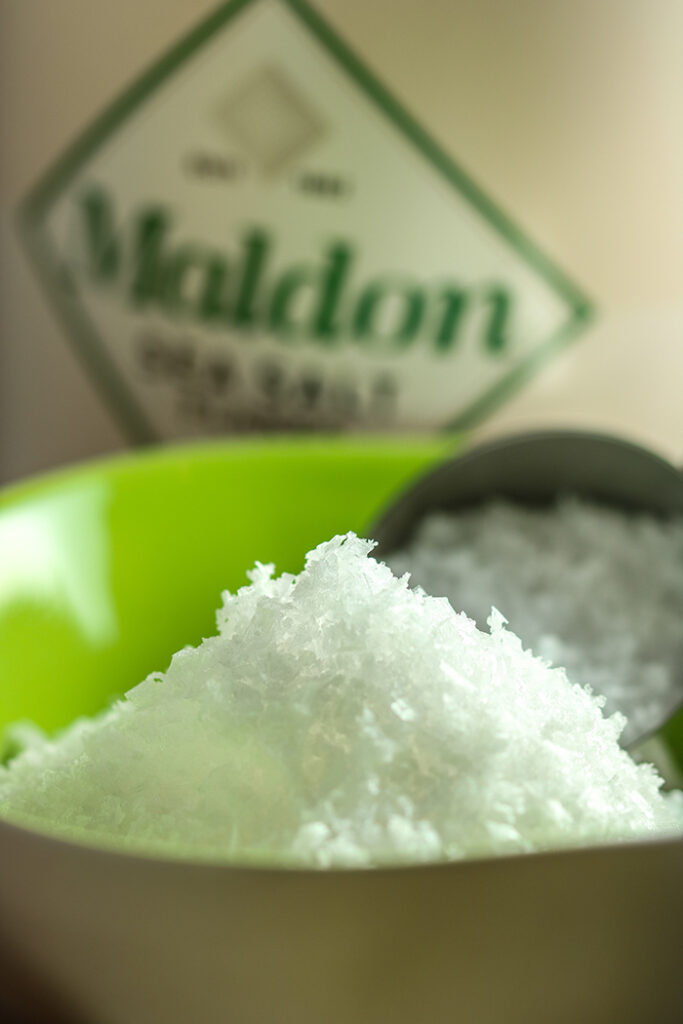
Picking the Right Salt
I am a big fan of Maldon Sea Salt and use it for its flaky form as a finishing salt. It’s delicate and thin, with crispy flakes. And great news! When I initially started making salts a few years ago (my maiden voyage in gift salts was a trio of this spiced citrus, along with kale-walnut and hazelnut-spice), I found a 3.3 pound tub of Maldon which had to be shipped from England, where the salt has been harvested along the coast since the early 1800s. Today that tub is available on Amazon. It makes using an uber high quality salt easily sourced and affordable for gift making, with plenty left over for personal use. Try it on anything that needs a sprinkle of salt – like chocolate espresso shortbread or salted caramels.
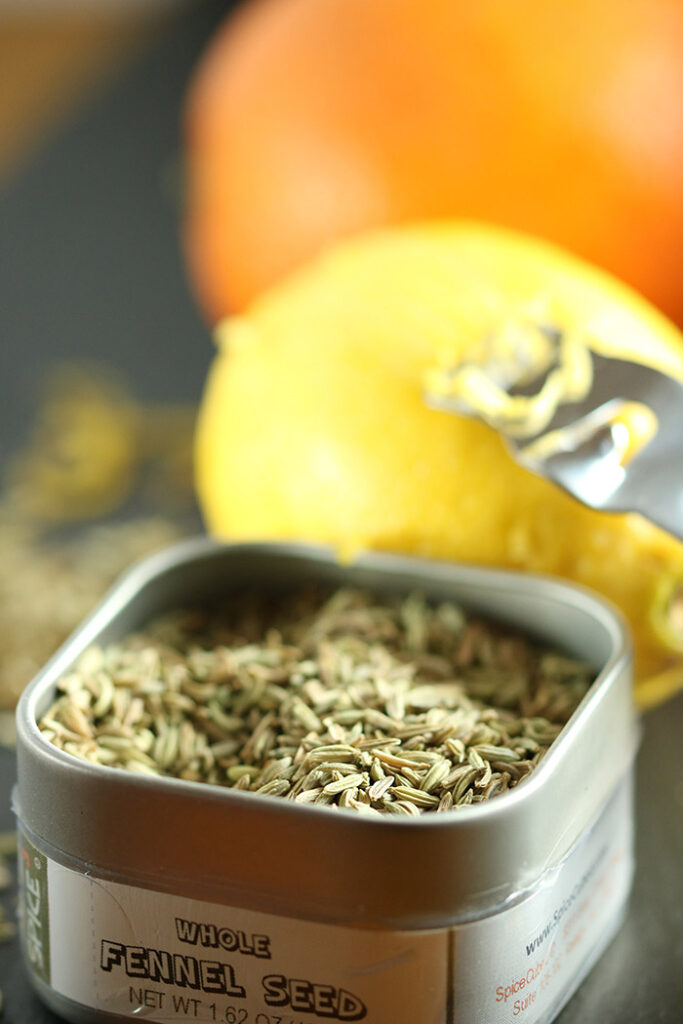
Zesting the Citrus Peel
When zesting the citrus to make the salt blend, I like to use a bar tool that makes long thin strips (use the section with the little holes, not the channel knife.) But you can also easily use a microplane which works well in removing only the outer peel of the citrus. The key is to avoid grating too deeply, thereby grabbing the white pith which adds unwanted bitterness.
Mix all the salt ingredients and spread out on a parchment-lined sheet pan and pop in the oven. It should take about 20 minutes to dry out the zest, but check after 15 minutes and give the salt a stir.
From Zesting to Zesty
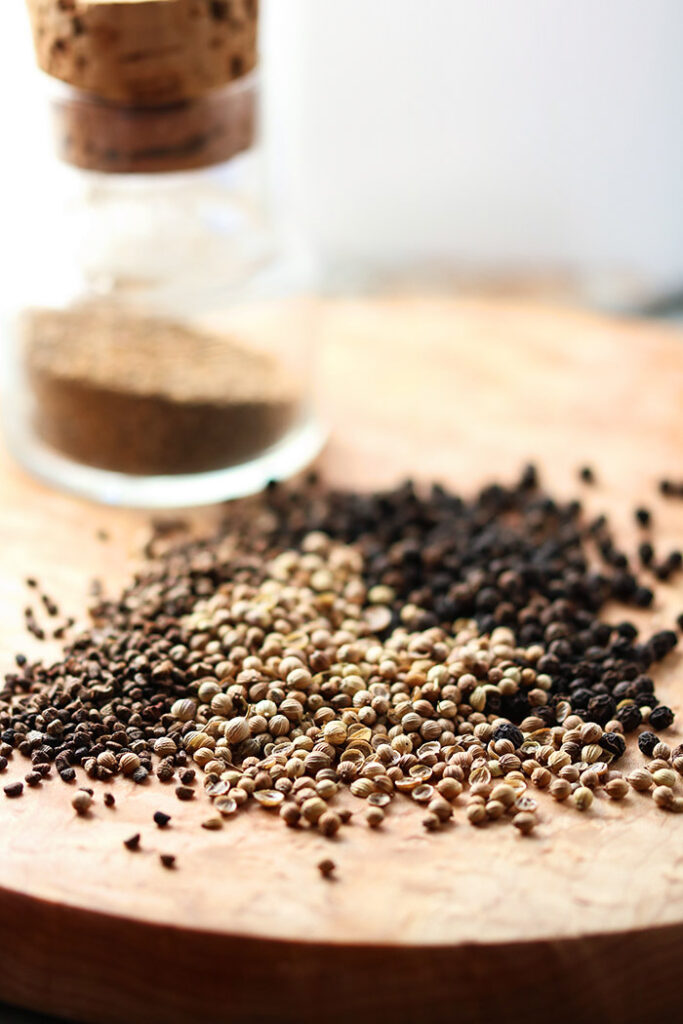
And what’s salt without pepper? Salt: sister from another mister. Pepper: brother from another mother. Salt & Pepper: we are fam-i-ly! This particular pepper blend was introduced to me by a dear friend. I made my own ratios so the end result is a bit different, but she was spot on in marrying cardamon and coriander with black pepper to get a blend with more zip than any ingredient could deliver on its own. Yahoo!
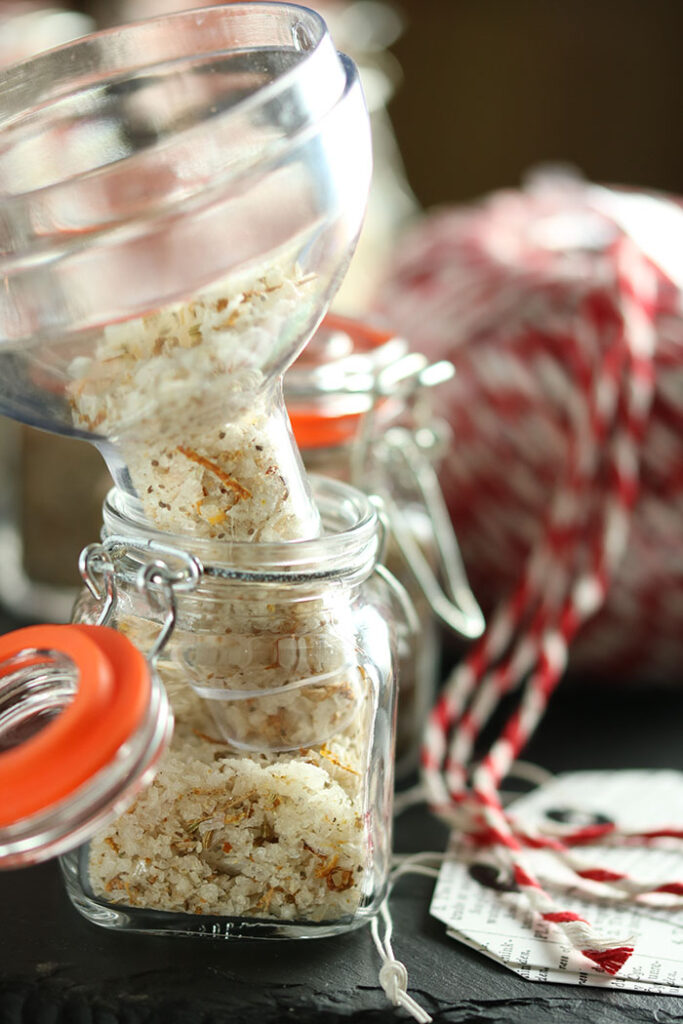
Once the blends are assembled and the salt is fully cooled, the only thing left to do is put them in cute little spice jars, tied with a decorative label identifying the goods inside. I have taken these to a gift exchange, and this was the top sought after gift once the stealing began. Showing up with an armful of these salt & pepper gifts at any holiday party is sure to earn you the Best Guest tiara!! Enjoy!
Nothing is better than a handmade holiday gift. In my book, bonus points if it can be consumed and if it adds a little sumthin’ sumthin’ to my pantry. This spiced citrus salt and zesty pepper blend is my favorite spice combo! Salt & Pepper, you rock!!!
Preheat oven to 275oF. Line sheet pan with parchment.
Mix salt with citrus zests and ground seeds. Mix until well combined. Spread evenly on the parchment paper and bake until the zest is fully dehydrated, about 20 minutes. Check after about 15 minutes and stir the salt, turning over the bottom which may still be a bit wet. Once completely dried, remove from oven and allow to cool completely.
Transfer to sterilized airtight containers. Stores well for at least 3 months.
For zesting citrus, I prefer the long strands from a bar zester versus the shorter zest from a microplane. However, I’ve been known to do a bit of both and combine.
Prep Time:40 minutes
Cook Time:20 minutes
Category:Spices
Don’t forget the yumster English toffee that I wrote about last year. It, too, makes a wonderful holiday gift. Cookie Exchange ladies – brace yourselves. This is headed your way!
This post contains affiliate links. For more of my must-have items, visit my shop.
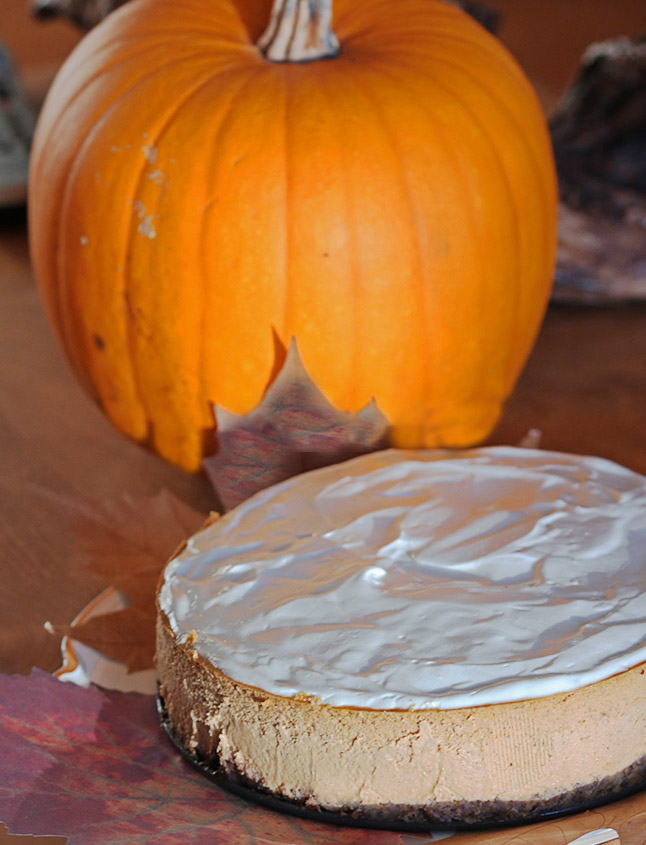
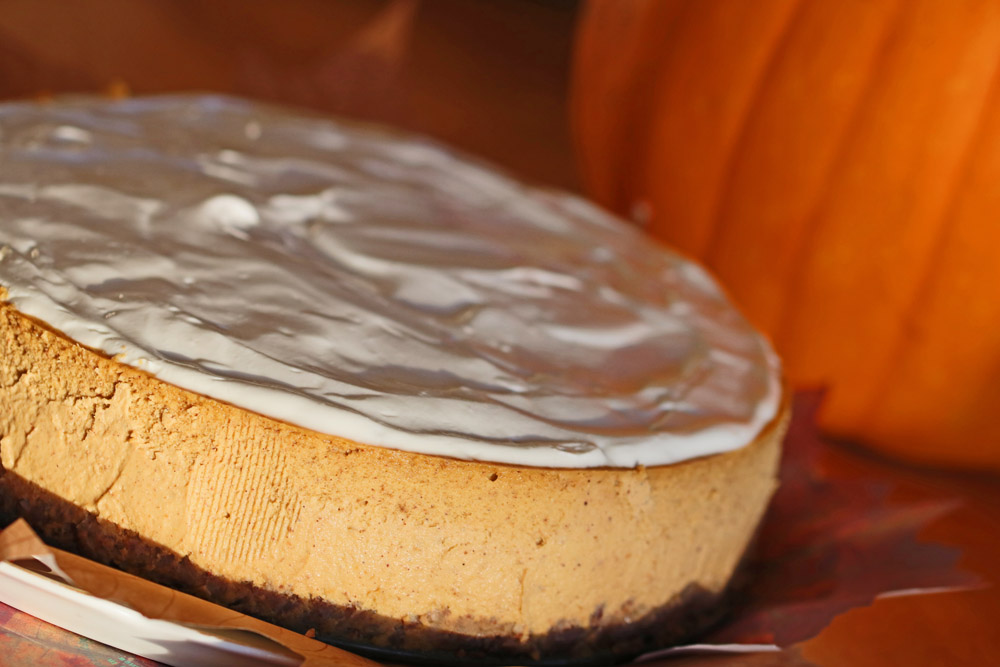
Time is nigh for setting the table and facing that big ole mess we call family…and all that that entails. This seems to be the one holiday when everyone descends on the same day and comes with baggage instead of picnic baskets. But let’s be real – we are indeed so lucky that we can in fact gather, break bread and give thanks. I am hoping the biggest debate your gang faces on Thursday is sweet potato or pumpkin. (I’m looking at you Val – duh, pumpkin!) And my picnic basket this year is loaded with a secret weapon – a dessert that you can make a day or two ahead. Check that box. Move on. Worry about the Beaujolais Nouveau and who will do the dishes. Dessert is mission-accomplished. This pumpkin ginger cheesecake falls smack in the middle of the “consider it done” category. That of course assumes you can keep it safeguarded til after dinner on Thursday. It’s tempting.
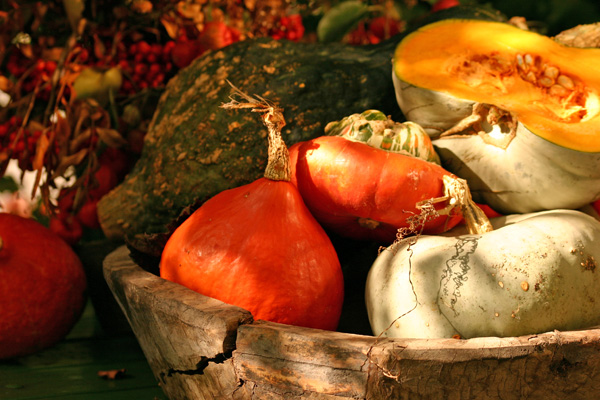
Thanksgiving dinner often gets a bad rap for being a brown meal. But I love the vibrant colors of fall squashes, pumpkins and gourds. Use them for table settings, roast them for a side or salad, make a quick bread, or whip them up in a dessert.
Cheesecakes are pretty flawless desserts to prepare even if you haven’t made them before, as long as you follow a few simple tips. They are super sturdy, so you don’t need a deft hand. I would argue quite the opposite. You really don’t want to be dainty with the batter – don’t incorporate lots of air, do bang the pan, get aggressive. Be bold. If you follow my instructions and read the accompanying notes, you will be a star performer – dare I say, a pastry chef. Start with your ingredients at room temperature, use a good quality springform, and use a food processor, not a mixer. A processor will combine the ingredients without incorporating air which will cause the cheesecake to puff and fall, leaving a crater in the center. Allow all the time needed for cooling to room temperature and then refrigerating. It takes time, but not active time. And know that if all else fails – craters or cracks – you will be slathering a cream topping on and that can cover a multitude of mistakes. Yes, indeed. You are definitely a pastry chef.
This pumpkin ginger cheesecake is surprisingly light, yet creamy. The nutty crust has that I want more-ish quality! And, a dose of Gentleman Jack Daniels keeps the party rolling.
Ingredients
Scale
Crust:
3/4 cup all-purpose flour
1/2 cup dark brown sugar
1/2 cup finely chopped pecans
1/4 cup melted butter
Filling:
15 ounce can pumpkin puree
24 ounces cream cheese, room temperature
5 ounces Gentleman Jack Rare Tennessee Whiskey
1 cup sugar
1 1/2 Tablespoons vanilla extract
1 Tablespoon ground ginger
1 teaspoon ground cinnamon
1 teaspoon ground clove
1/2 teaspoon ground nutmeg
6 eggs, at room temperature, lightly beaten
Topping:
1 cup sour cream
2 Tablespoons Gentleman Jack Rare Tennessee Whiskey
2 Tablespoons powdered sugar
Instructions
Make the Crust:
Preheat oven to 350° F. Combine flour, brown sugar, pecans, and melted butter and mix until crumbs adhere. Press into a 9 or 10″ sturdy nonstick springform pan and bake for 10 – 12 minutes. Remove and cool. Wrap pan in heavy duty foil. Reduce oven temperature to 300°F.
Make the Filling:
In food processor, puree pumpkin until smooth. Add cream cheese and puree until smooth. Add Gentleman Jack, sugar, vanilla, ginger, cinnamon, clove, and nutmeg and pulse until mixed. Add eggs and pulse 2 – 3 times only until just combined. Do not overprocess.
Pour filling into cooled crust and bang pan on the counter to eliminate extra air. Place in a roasting pan and fill with hot water, halfway up the side of the springform. Bake for 1 1/4 – 1 1/2 hours or until set. It may still be a bit wobbly in the center, but it will firm up as it cools.
Turn oven off and leave the cheesecake in the water bath in the oven for 30 minutes more. Remove the roasting pan from the oven, and carefully remove the springform from the water. Remove foil and cool on wire rack until room temperature. Refrigerate until fully chilled.
Make the Topping:
Combine sour cream, Gentleman Jack, and powdered sugar and spread on top of cheesecake. Refrigerate until set.
Gently run a knife or thin metal spatula around inside edge of pan. When cheesecake has released, open outer pan ring and remove.
Notes
Feel free to substitute a dark Rum or Bourbon if you prefer.
It’s impossible for me to wrap my brain around the holidays without thinking about family and reflecting on memories from childhood. Especially when it comes to food. English toffee? Yaas!!! All those special meals and holiday traditions that started in the kitchen. Hells Yaas!!! I was lucky enough to have three amazing women (four, if you count Florence on whom they all relied) that each had their own special place in the kitchen. Mom read Gourmet magazine in the 60s and was the first of all my friend’s mothers to make spinach dip. In a bread bowl. Mic drop! She loved party-fied food and was always looking for that next something special that was sure to dazzle. Her mother – Gaga – was legend for fancy food. Crab bisque with a splash of sherry or Belgian waffles dusted with powdered sugar. To be fair, I mainly saw her at holidays and birthdays so my sampling may not be statistically valid and may show a bit of bias. But when it came to Christmas cooking, nobody beat Grandmother Keck (“don’t call me Gramma!!!”). She was well known in our small town and she shared her holiday baking with all. Her English toffee was the best in town. JMHO.
Actually, all her Christmas candy made her a rock star – date balls, divinity, chocolate salted-peanut clusters, apricot balls and what she called butterscotch. It was really toffee. The thing that stands out in my mind is that I don’t have a single written recipe of hers. I think she just really knew how to cook. I have recipes from the other three women, but not her. Yet I can trace many of the things I know how to make straight to her. She was nearly 70 when I was born (she’s the one on the right in this photo) and had had more than a few years to hone her kitchen skills. This photo is from my baptism which was on December 18….a few years ago. As the story goes, city water was out and the font was dry, so they sourced my eternal life spring from a church furnace. It really explains so much when you think about it.
I spent a good bit of time cooking with Grandmother and usually came home and wrote it all down. I have to smile when I see in my handwriting a note on chess pies: don’t remove the pie from the oven when you set it back. Even then my computational brain was worried that turning the oven down might result in a period when the temperature was between the high temperature and the more moderate one and that would not be correct. Should I wait til it reaches the new temp? I understand that little girl’s thinking so well. Her baking skills were not so great – removing a pie mid-bake would be disastrous – but she asked the right questions.
I had not made butterscotch in many decades when I made it three years ago. I didn’t even have to look for proportions because it was so clearly ingrained on my brain. I call for 14 Tablespoons of butter below but the way Grandmother told me: use two sticks of butter and take 1 Tablespoon off of each. Add 1 pound of brown sugar. Boom. Done. Never forgot it.
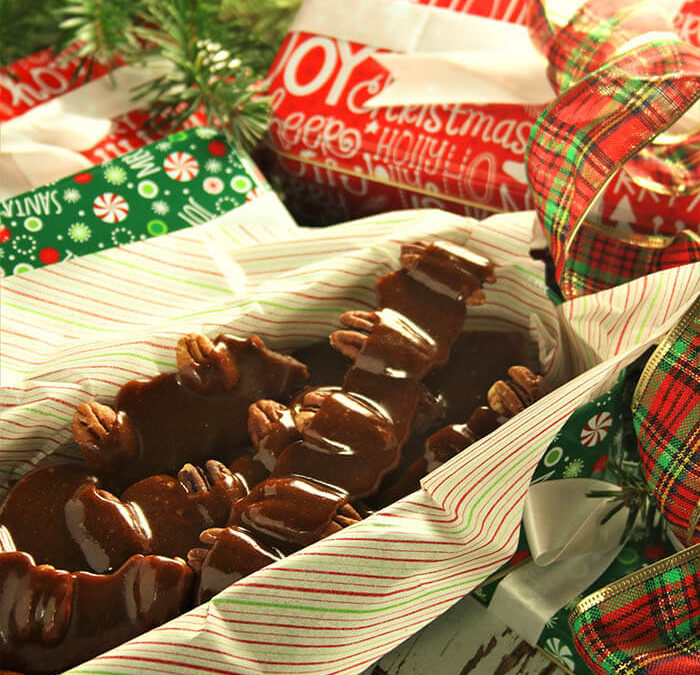
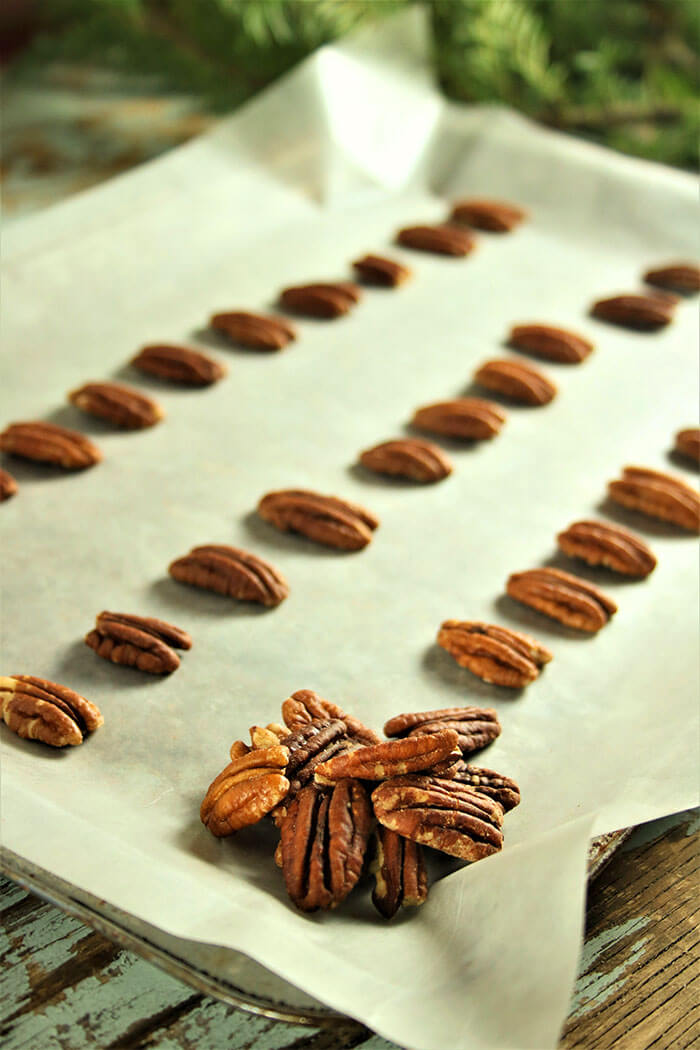
She too made it in long ribbons over rows of pecans. I have changed nothing. I also love that she taught me hard crack candy using a cold water test. She didn’t have or need a candy thermometer. Just a glass of ice water in which you drizzle the candy and then test to make sure it cracks and crunches when you bite into it. I remember going to others’ houses and having a gummy crumbly crystallized version of this. They had not taken the sugar far enough. At 10, I knew the difference and there was no comparison to butterscotch done right. Might have been a little judgy, was a little judgy. But come on people, make it right!
The cold water test is always good to know in case you don’t have a thermometer or it’s not working right and needs recalibration. As sugar cooks, the more the water is cooked out, the harder it will be. Drizzling a teaspoon of the candy into cold water will result in increasingly harder textures as the cooking time lengthens. Starting with “thread”, then passing through the “balls” (soft, firm, hard) and on to soft crack, a hard crack, the sixth stage, is reached at about 300oF.
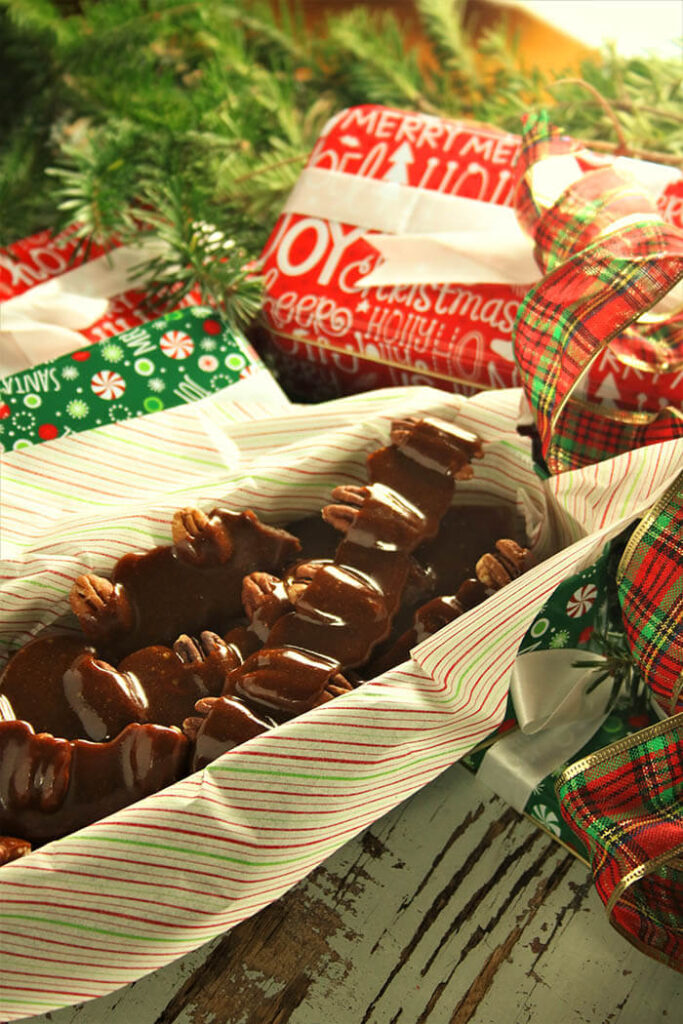
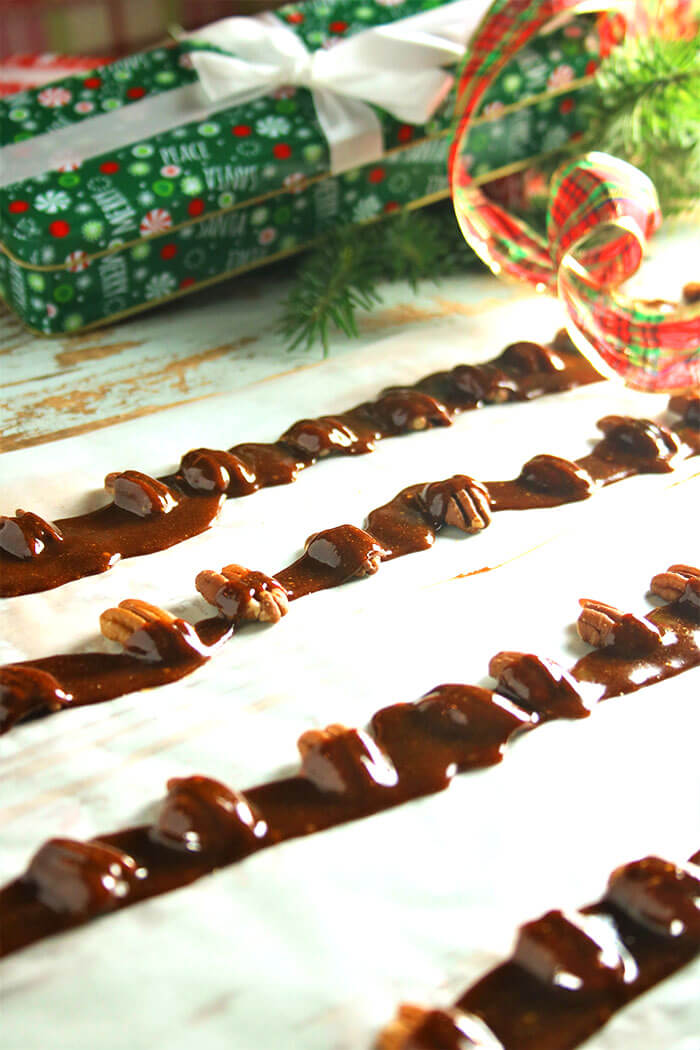
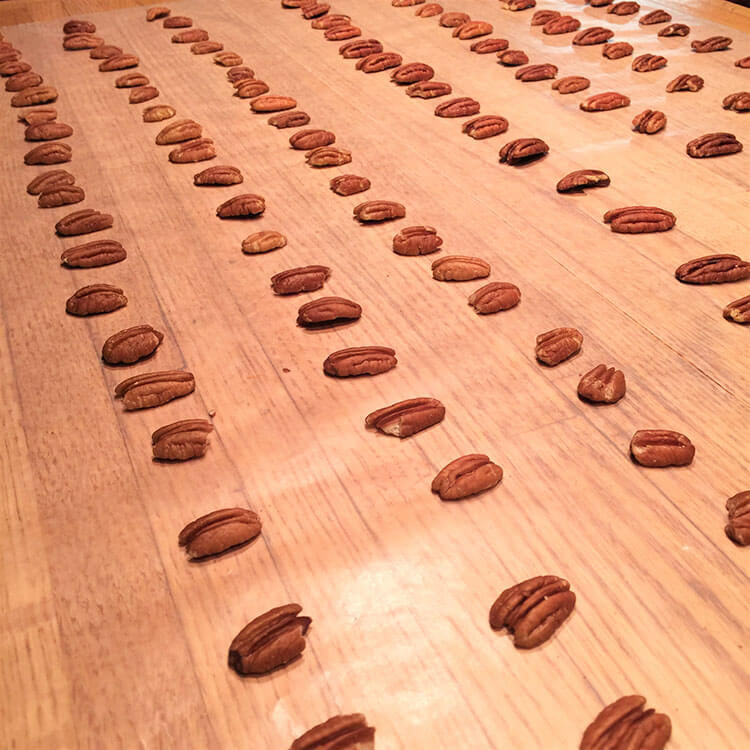
It is best to be ready to pour when that moment ………more like 1/2 or even 1/4 moment…..comes, so in advance I lay out rows of pecans on wax paper on the counter. The second the candy hits hard crack, the color reddens a bit, it becomes very pourable and there is a whiff of char in the air. Turn the heat off and move quickly. When I pour, I walk down the kitchen island pouring on the row farthest away within reach, then reversing the pour on the next row, etc. For this much toffee, I make 8 rows of pecans, each about 4 feet long. I start pouring on the fourth row back, then 3, 2, and 1. Then I walk around the island and repeat.
The toffee will set immediately. Because of the amount of butter, it will peel right off the wax paper, breaking naturally every few pecans. I like to try for 3-4 nuts per piece. Since the candy is in long strips, I was happy to pack my gifts in the cutest rectangular candy tins I found on Amazon. Rectangular works so much better than round tins.
English Toffee with Pecans
1 pound light brown sugar (you could also use dark brown, but the light brown is easier to track changes in color)
14 Tablespoons butter, cut into 1 Tablespoon pieces
4 cups of pecans, about 12 ounces
Cover your work surface with wax paper and lay out the pecans in rows, about one inch apart. I got 8 rows, each about 4 feet long.
In a large non-stick sauté pan, melt the butter with the brown sugar and stir until combined. This pan and your spoon (no plastic spoons or rubber scrapers) will be the next 30 minutes of your life. Relax. It’s kind of Zen. For the first 5 minutes over medium-high heat, stir casually as the butter and sugar melt. It will likely look like there is too much butter at that stage. The butter will not entirely incorporate.
Once combined, turn the heat down to medium and stir constantly. Assuming you are not at altitude* (you are on your own there, but you are probably used to compensations), practice your wax on/wax off stirring technique. Not much will happen for 20 minutes, but don’t walk away. Keep stirring. It will start to bubble and look kind of gritty, and it will be a bit stiff.
Do as I say, not as I do. This spoon didn’t make it any further because I realized the sugar was about to get way too hot. Only use metal or wooden spoons.
Stir on. Between 20 and 25 minutes, it will start to get much more liquid and very shiny. You are getting close. Start cold water testing (see above) after 15 minutes, just so you know what you are dealing with. I made this twice yesterday and both times the magic happened right at 28 minutes (not including that first 5 minutes). That is when it turned reddish, I got a cold water hard crack, it became very liquid and easy to pour, and it fell in ribbons off the spoon. Right then exactly, I also got a whiff of char. If you are using a candy thermometer this will be about 300oF. Here’s more info on temperatures and candy stages.
When you are getting toward a hard crack in your cold water test, it is time for diligence. And once you get a whiff of char, turn off the heat and move the pan ASAP. Remember the pan is hot so this is still cooking. Pour quickly using the technique I outlined above.
Even if you miss a few nuts or your pouring is uneven, no one will know once it is broken into pieces. I try to get every last bit, just pouring the last dribs and drabs in a puddle and perhaps studding with a few more nuts on top.
*Julia Child side bar note: Once I watched the grand lady make a caramel in Aspen at Food & Wine. She wasn’t prepared for high altitude, but quickly realized the liquid was cooking off too quickly and at a lower than expected temperature. It was a surprise, but she was unflappable. She grabbed a nearby bottle of rum – the nearest liquid – and muttered, “Well then, I have added some rum, probably not enough. But, I need some for me, too.”
Jingle Bells!
This post contains affiliate links. For more of my must-have faves, check out my shop.
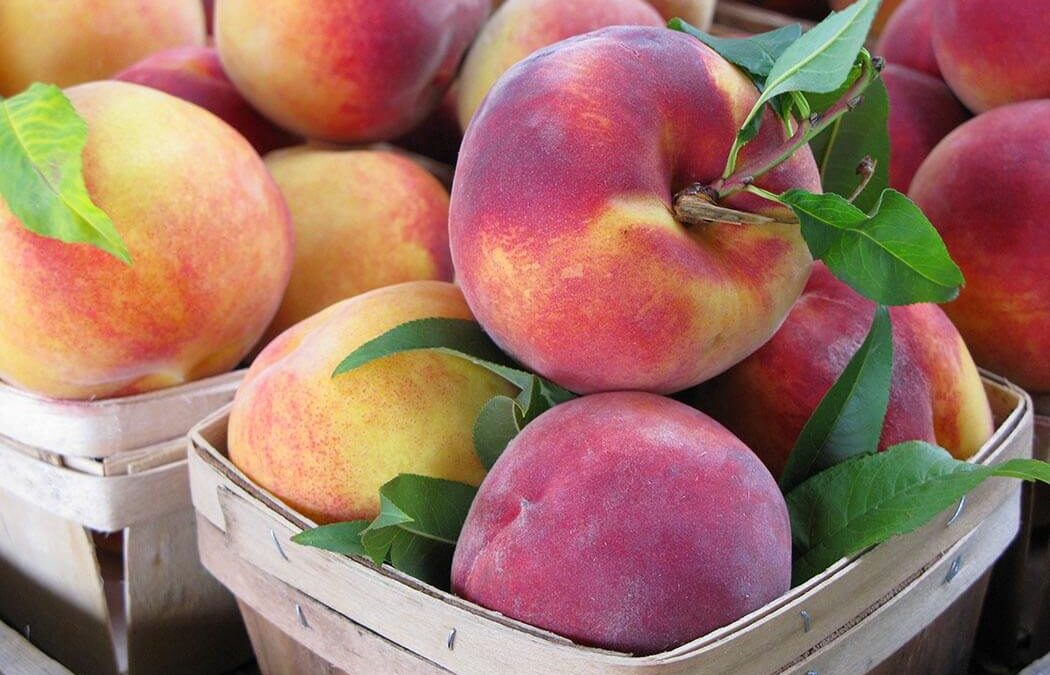
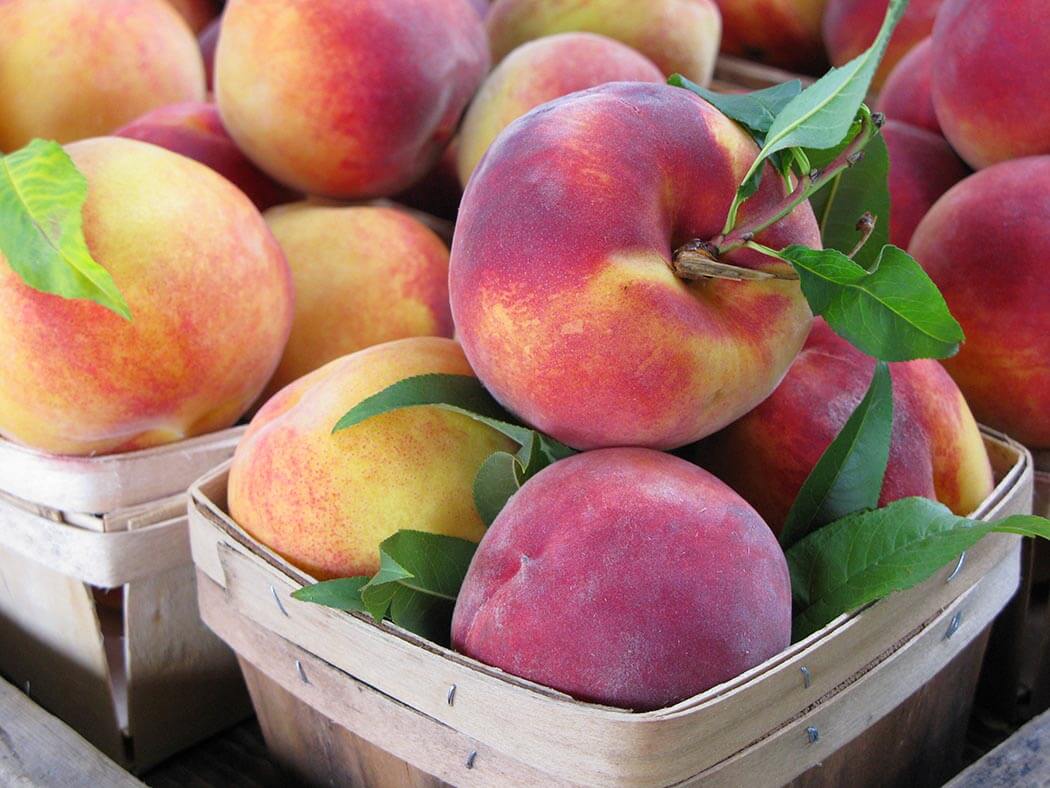
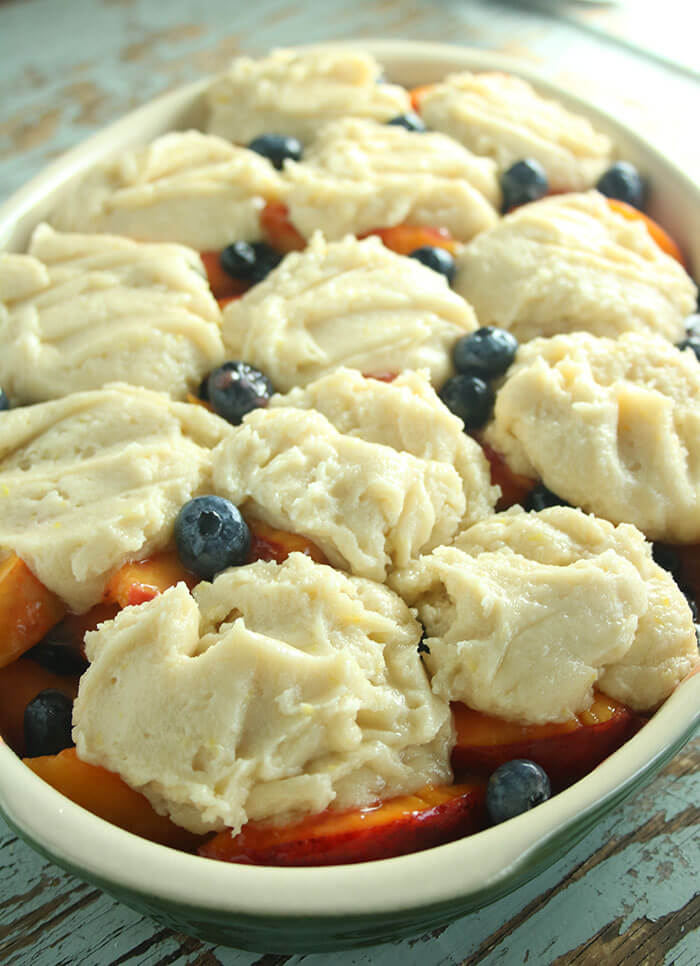
I can see the problem you are having. A giant mound of peach perfection and you are so tired of fruit pie and cobbler (Okay, we should probably admit that is NOT really a thing, being tired of pie and cobbler). But it’s a holiday weekend and you MUST use that beautiful bounty ASAP yet you would rather be on the beach, boat, SUP or _____(fill in the blank). So with that last hurrah of summer celebration hurtling toward you at ram speed, here’s a dessert that you can make in a flash, yet will look like you have been slaving away. Stone fruit –still abundantly available – is the perfect choice for this “cobbler, not-a-cobbler.” Cut into wedges, a peach or nectarine is sizable enough to hold its shape (ain’t nobody likin’ fruit mush) and comes with its own good dose of pectin. I throw in a few blueberries for a wee bit of flavor, color, and texture contrast, but warn against fruit with a high water content and thin skins (I got my eyes on you raspberries and blackberries.)
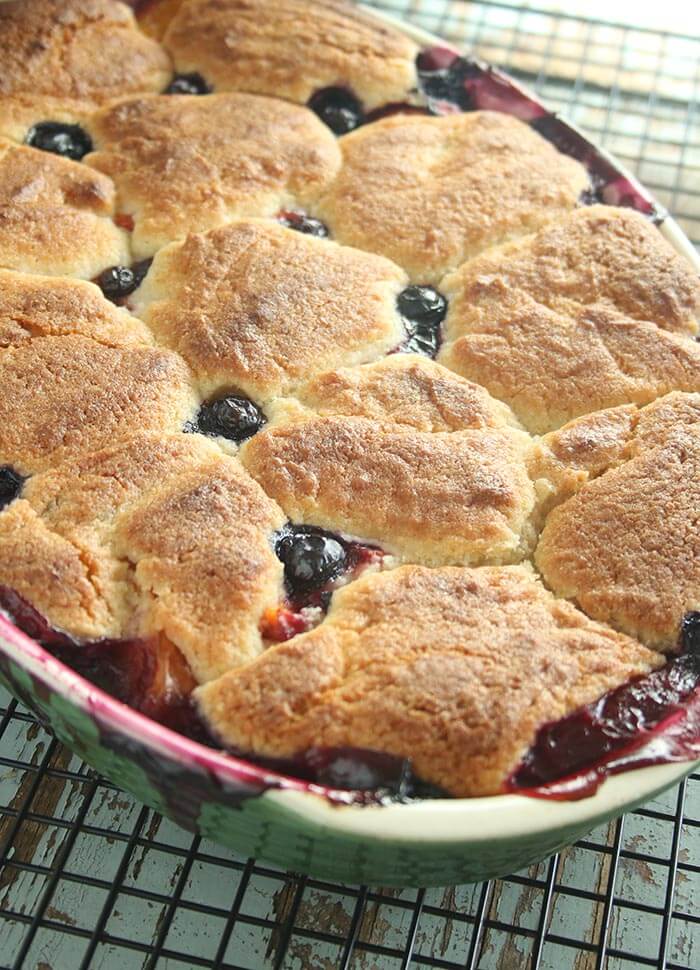
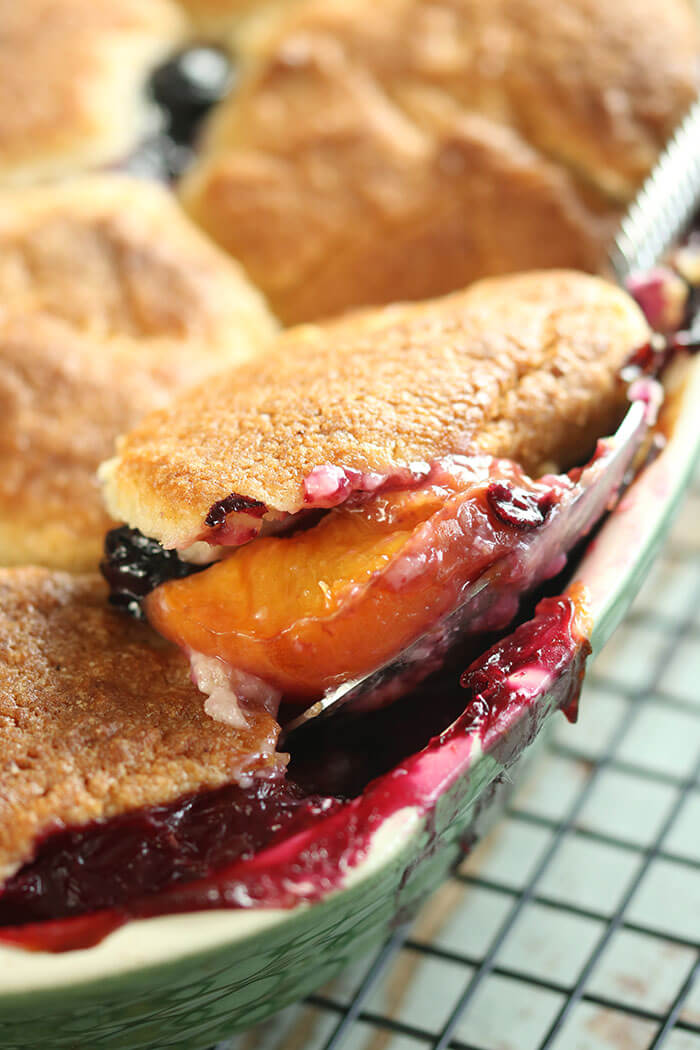
Normally a fruit cobbler comes with a streusel or pastry crumb topping, but I love this idea of biscuits. I would say it’s fresh and new, but since I created this dish at New World Grill some 20 years ago, I will settle on timeless. It’s hard to find a fruit pot pie at all, and the ones I have seen are made with a double pastry crust. This dish has no bottom – which means…..???? You got it!! No soggy bottoms!!! Pastry fraidies unite! You can do this!! Just cook the fruit with a little cornstarch stove-top then drop biscuit dough on top. Super easy to serve as well because everyone gets a heaping spoon of fruit topped with a biscuit topped with …Ice Cream? Whip Cream? Greek Yogurt? Yes. Yes. And Yes. Please. It’s dessert magic.
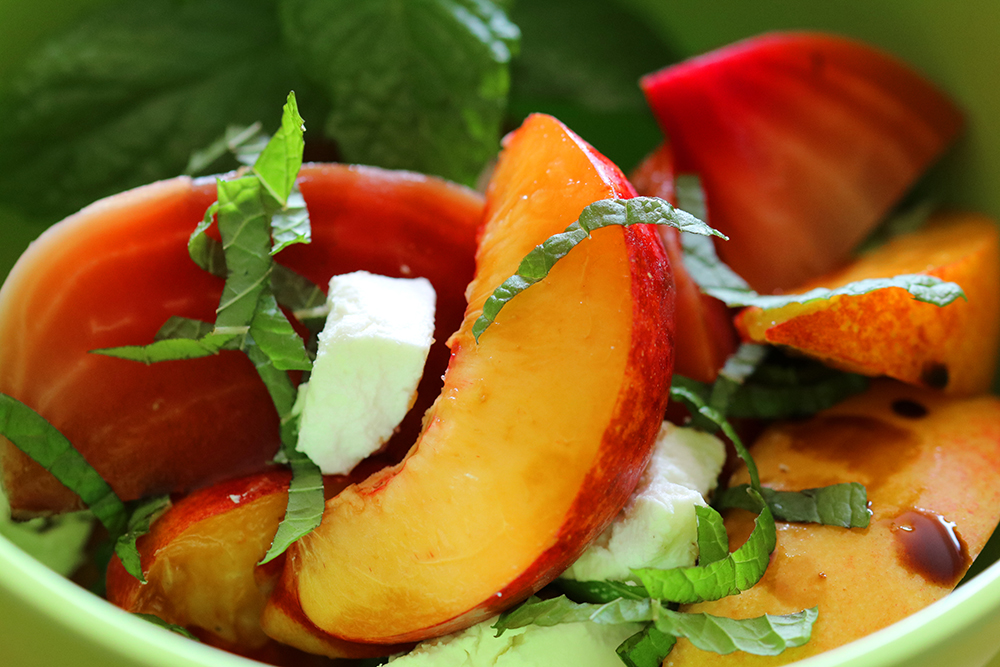
I have made this with peaches and nectarines (peel the peaches, but no need on the nectarines), but you might also try plums or apricots. And cherries could be a nice alternative to the blueberries I use. Just keep a sturdy skin in mind when improvising. And always let a fruit dessert cool to avoid the juice-bomb. This is best served same-day, an hour from the oven or reheated. Biscuits are a bit of a diva when it comes to humidity, so the longer it sits around the less flaky they will be.
I learned to make traditional biscuits from a woman who said “handle them like you are holding hot coals.” (It was a KFC shoot and we must have made 1000 biscuits). It was good advice – don’t touch them much at all. Biscuits are made by cutting little tiny bits of ice cold butter into the dry ingredients, so that each pea-sized bit is flour-coated. Then you gently add the liquid – buttermilk, perhaps – until it just holds together. If you hot-handle the dough, the butter will start to melt. The butter should melt only once – in your honking hot 425oF oven – because that creates steam and that, my friends, provides lift. Voilà! Flaky!!
The other reason to lightly handle the dough is to avoid overworking the glutens which will make a tough and sometimes shrunken biscuit. (That joke just wrote itself. I don’t even have to put it in words.) I got you covered here, this dough is NOT fussy and is made in the processor and uses a small amount of boiling water to pull the dough together. It’s a bit of the opposite of everything I have just said – no hot coals. This makes it super simple and you can get away with it in part because it is going atop hot fruit which will also create some steam.
Summer Fruit Pot Pie
Fruit Filling
8 cups pitted and sliced nectarines, about 8 pieces or 4 pounds
Juice of one lemon, about 3 Tablespoons (please zest it first and save the zest for the biscuit)
1/2 cup sugar
3 Tablespoons corn starch
1/2 cup cold water
2 cups blueberries
Biscuit Topping:
2 cups all-purpose flour
1 cup sugar
2 teaspoons baking powder
1 teaspoon salt
Zest of one lemon
6 ounces ice-cold butter, cut into bits
¼ cup + 2-3 Tablespoons boiling water
Preheat oven to 425oF. Butter a 9x13x2-inch 3-quart casserole.
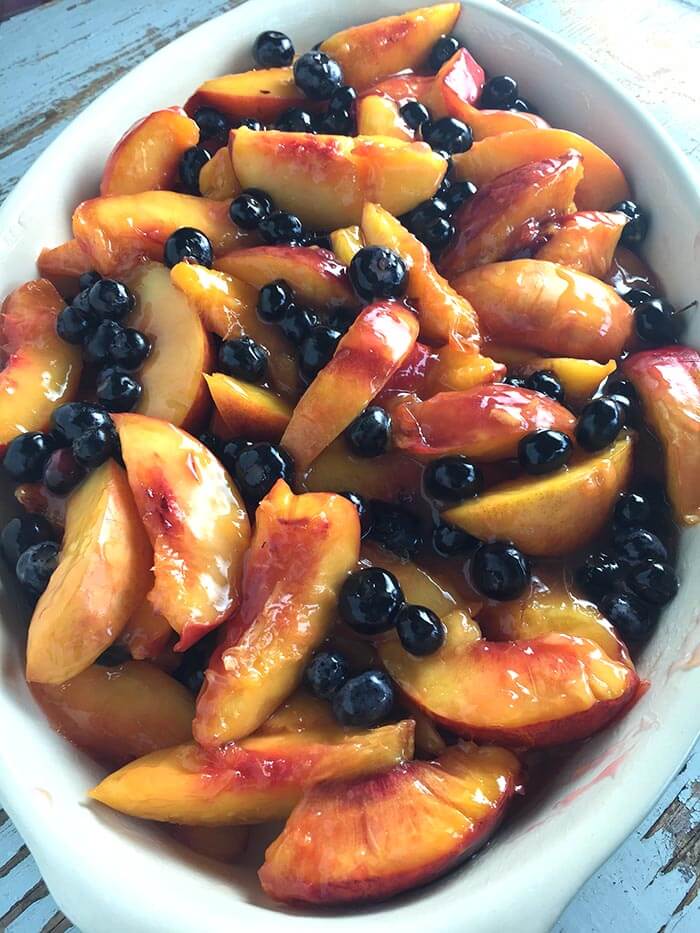
Start the Fruit: Combine the nectarines with the lemon juice and sugar. Set aside. Dissolve the cornstarch in the cold water and set aside for 5 minutes.
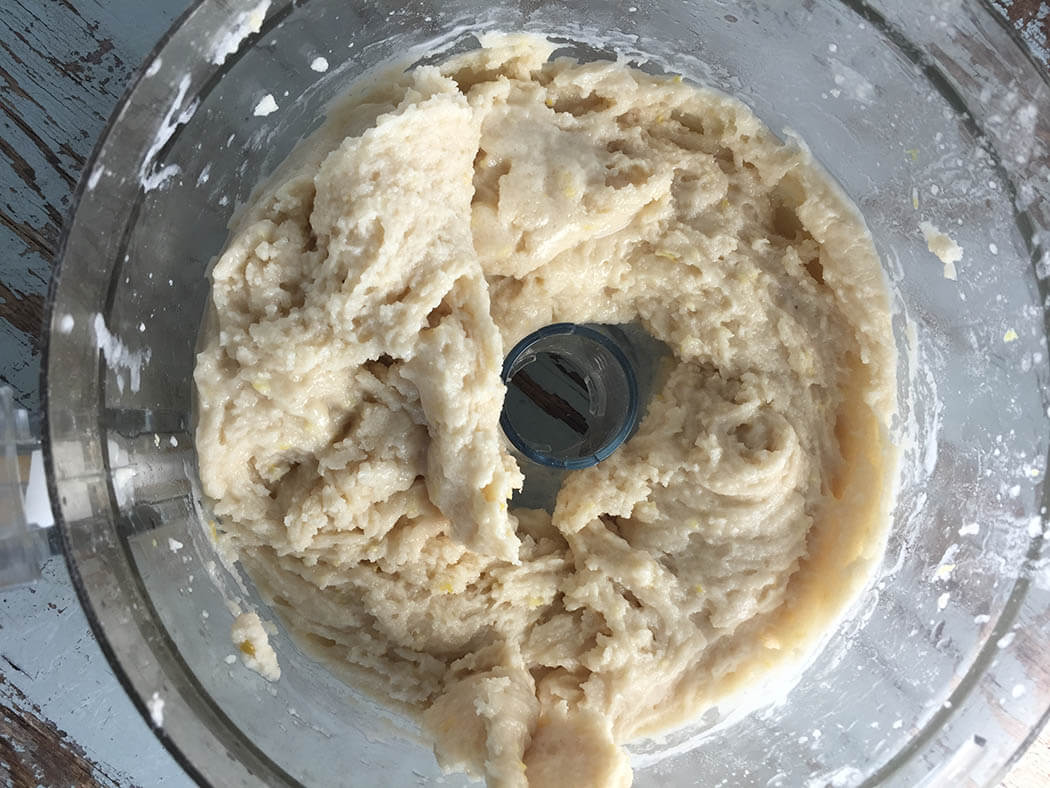
Start the Biscuits: Combine flour, sugar, baking powder, salt, and lemon zest in the work bowl of a food processor. Pulse to combine. Cut in the butter with the food processor, by pulsing 8-10 times, until the mixture resembles coarse meal. (You can also use a pastry cutter).
Back to the Fruit: Combine the nectarines with the cornstarch in a saucepan. Bring the cornstarch-nectarine mixture to a boil, and cook for 1 minute. Remove from heat and gently fold in the blueberries. Transfer fruit mixture to the casserole.
Finish the biscuits: Slowly pour in ¼ cup boiling water and pulse a couple times until just combined. Scrape down sides. Add additional water one Tablespoon at a time, up to 3 additional Tablespoons. Pulse with each addition until dough just comes together and becomes spoon-able. It should remain a bit stiff and not turn gooey. If you add the water all at once, you run the risk of adding too much liquid and melting the butter. Add it gradually and it will just slightly soften it. Drop the dough by scant 1/4 cups onto the fruit to form 12 biscuits. Use a spoon or small spatula to ease the dough out of the cup. All that butter will let it slide out quite easily.
Bake in bottom third of preheated, foil-lined oven for 35 – 40 minutes until fruit is set, biscuits are golden, and a toothpick inserted in a biscuit comes out clean. If the biscuits are getting too brown, cover loosely with foil for the last 10 minutes or so. Transfer to a wire rack to cool slightly. Cool for about an hour, to let the juices set. Serve while still warm or reheat if it has cooled. Top with ice cream, whipped cream, or plain Greek yogurt.