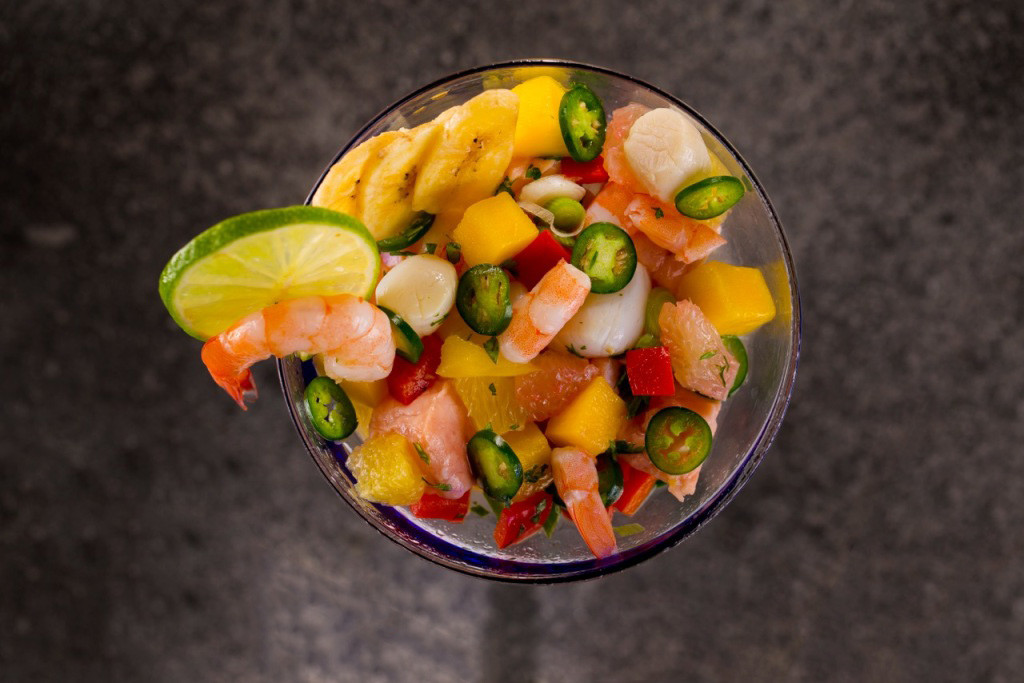
Even though #NationalShrimpDay is meant to be a 24-hour thing, I feel it’s more like a birthday and should really be celebrated for a week, a month, or even a season! I mean if Bubba can do it, you can too. “Anyway, like I was sayin’, shrimp is the fruit of the sea. You can barbecue it, boil it, broil it, bake it, sauté it. There’s uh, shrimp-kabobs, shrimp creole, shrimp gumbo. Pan-fried, deep-fried, stir-fried. There’s pineapple shrimp, lemon shrimp, coconut shrimp, pepper shrimp, shrimp soup, shrimp stew, shrimp salad, shrimp and potatoes, shrimp burger, shrimp sandwich. That…that’s about it.” Wait, Bubba, Wait!! You missed Sriracha & Chipotle Spicy Grilled Shrimp!
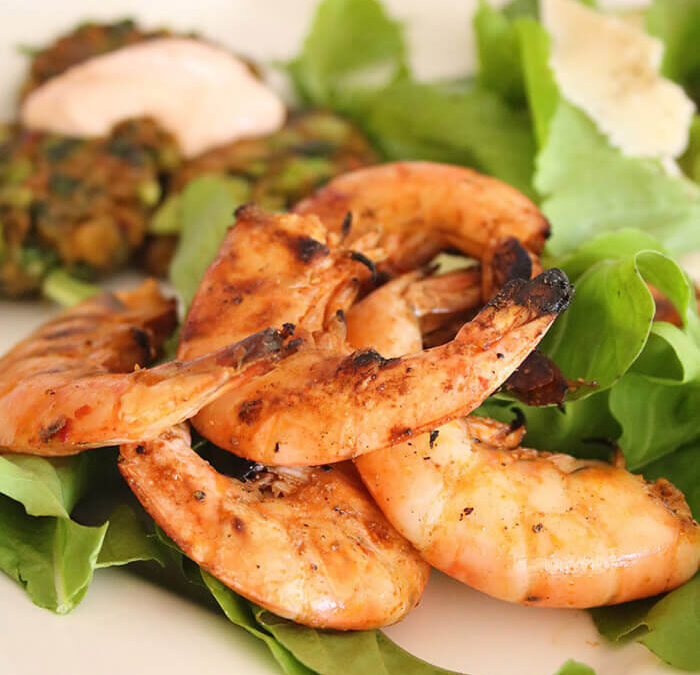
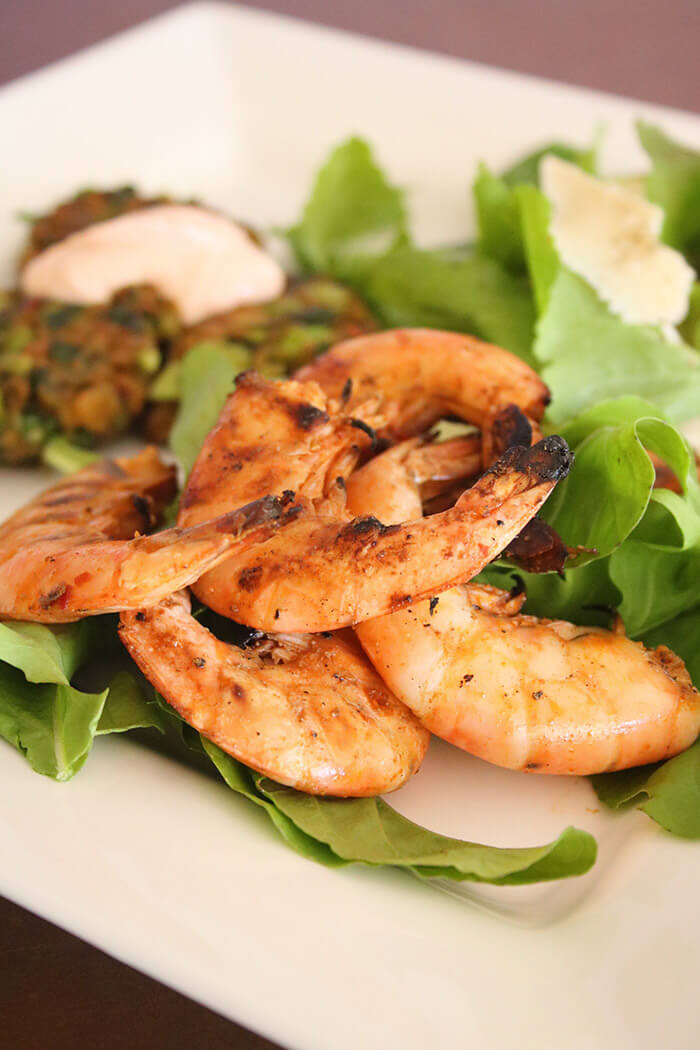
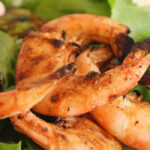
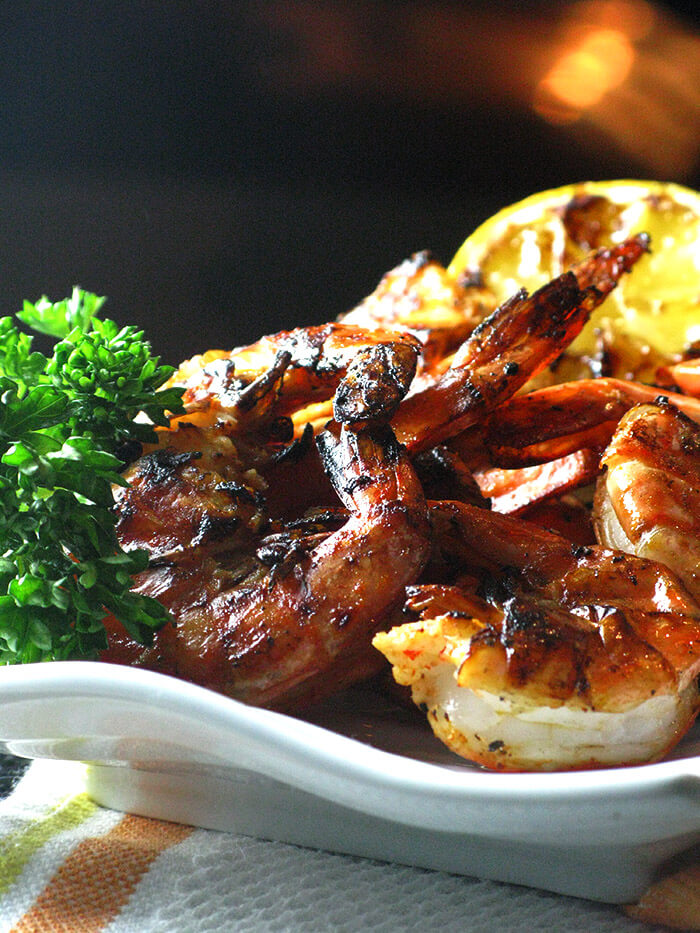
Sriracha & Chipotle Spicy Grilled Shrimp
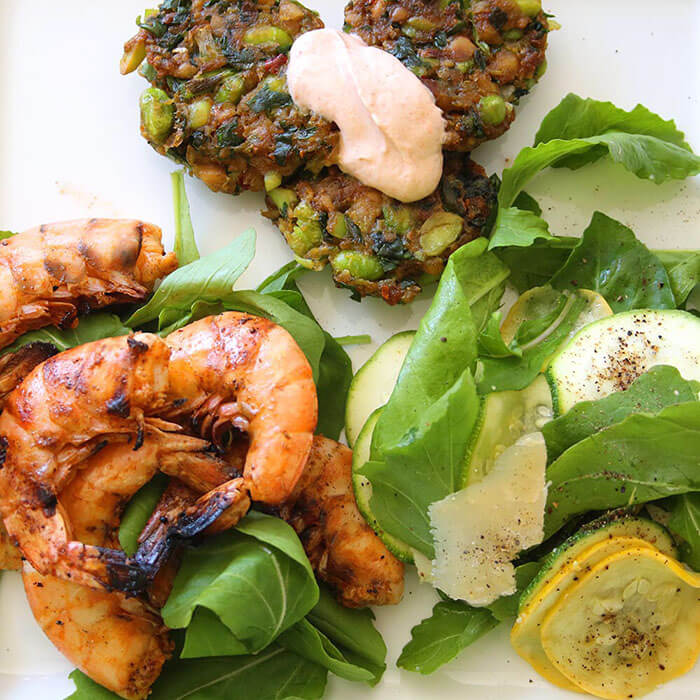
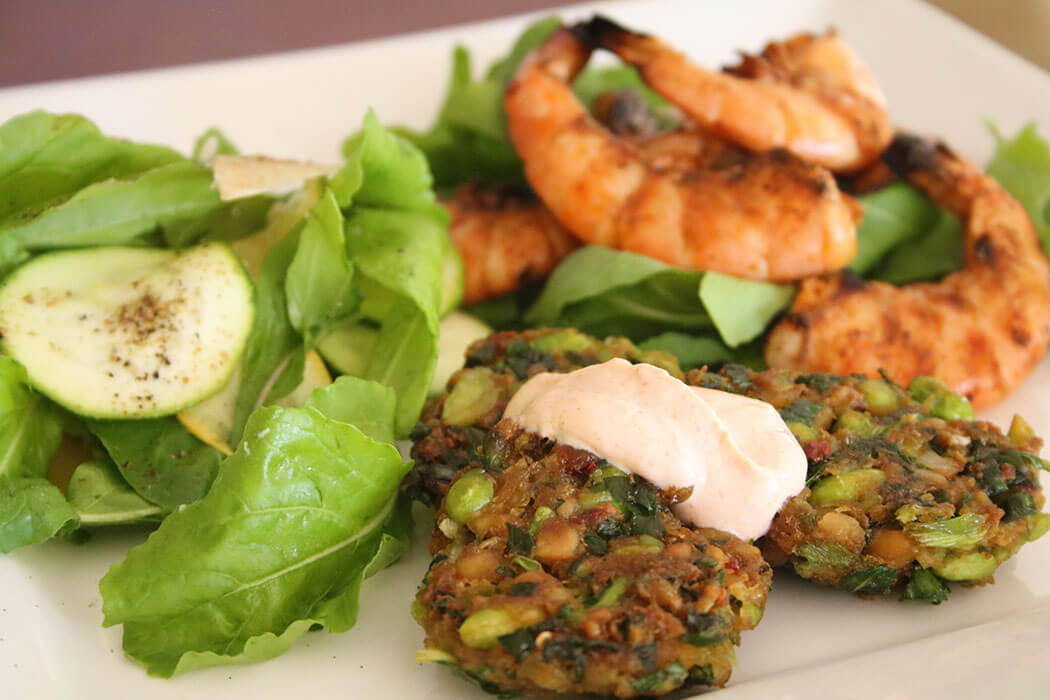
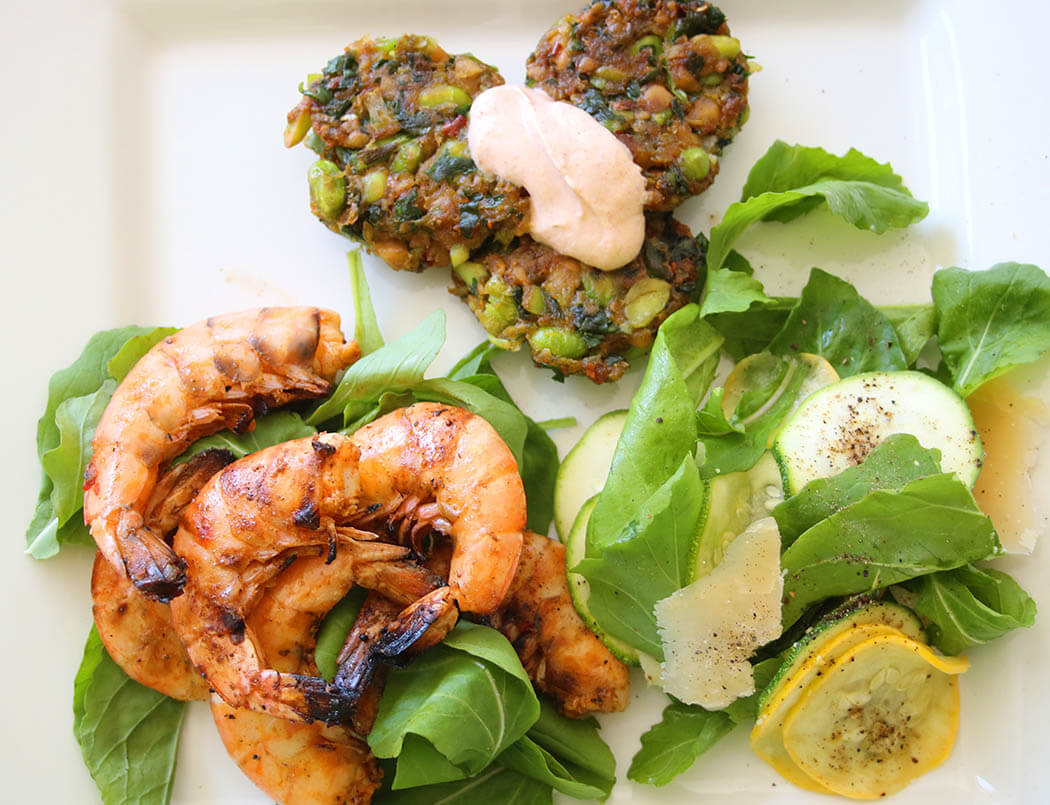
It’s time you rip that cover off the grill and crank up a hot fire. This dish – loosely translated from a visit to the Rhode Island cousins – is great in pretty much any meal category. To paraphrase Bubba, shrimp appetizer, shrimp salad, shrimp entrée, and who doesn’t like shrimp for in lieu of dessert? Especially if it comes with a crisp Pinot Gris!!! Summer wine, I’m coming for you. Serve this with a fresh green salad and, if you’re game, roll back one blog post and whip up a batch of the Edamame and Chickpea Fritters with chili dipping sauce, conveniently linked below. This all simply screams “winter is dead to me!”
I like to keep things simple, especially as the days get longer and the temps heat up. Less time in the kitchen means more time for enjoying the meal. So here we have a classic dump and stir recipe. And like all sea and stream creatures, marinating is kept to a minimum – no more than 30 minutes. If you are building a charcoal fire, the timing is perfect. Start the marinade, then build the fire. When the coals turn white, you are good to go.
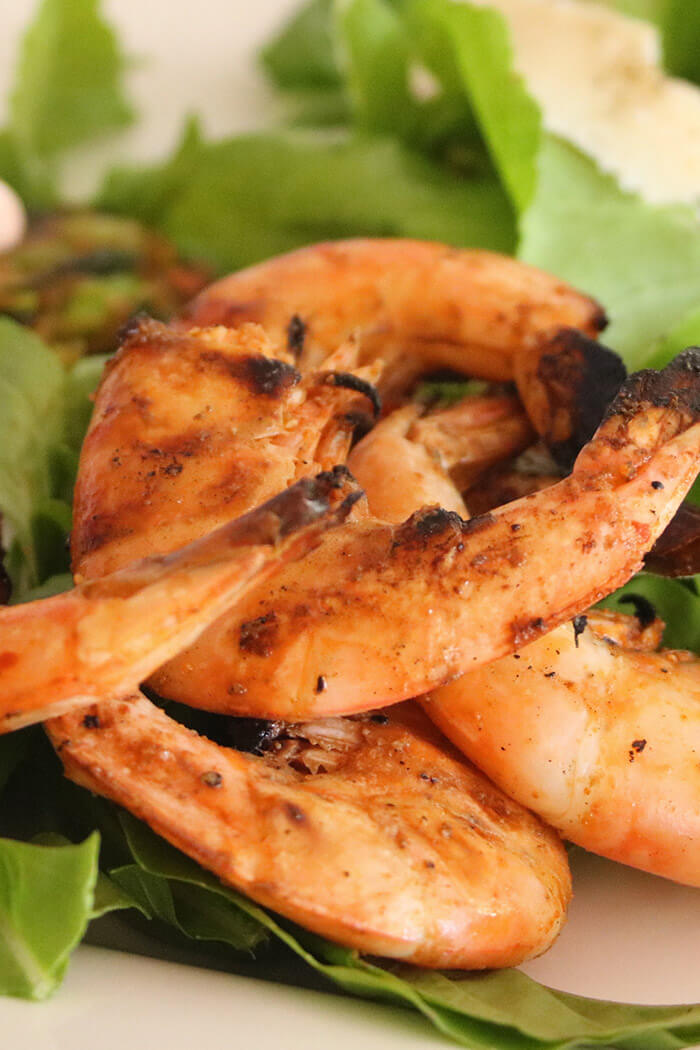
Use whatever size shrimp you prefer, but please leave the shells on. Sriracha & Chipotle Spicy Grilled Shrimp is a lick-your-fingers-while-you-peel-the-shrimp kind of dish. Cooking with the shells on not only helps retain moisture, but it adds depth of flavor. Timing will depend on the size of shrimp and strength of your fire, of course, so keep an eye on them. They cook quite quickly, 3 or so minutes per side.
Crack open a loaf of tangy sourdough and pour another glass of Pinot Gris and you are all set. Enjoy!
You can’t help but lick your fingers as you peel the shrimp and pop them in your mouth. They have that I-want-more-ish quality about them, so make extra.
You say fritters? I say falafel? Whatever you do….do NOT call the whole thing off. Something about these little beauties just screams …”summer, she’s a-coming”. For me it’s the serious dose of herbs and lemon juice, my besties for brightening flavor. In this batch of chickpea fritters, you will find an easy-to-prep side dish that is the perfect date for all kinds of “grilled stuff”, as the sign at my favorite beach café in Anguilla advertises. (Uncle Ernie’s in Shoal Bay, if you are in the area! They also advertise fluffy towels and buoyant rafts. Clearly somebody has a thesaurus and knows how to use it.)
Long before the world had Meatless Mondays and Taco Tuesdays, my family had a bit of a weekly ritual that I think was aimed at giving Mom a light night. Normally the preparer of a real square with veggies AND salad AND meat AND potatoes, this night was more of a toaster oven extravaganza…straight from the freezer. Jimmy Dean sausage patties and apple fritters (which were pancake-shaped). She sometimes rustled up a batch of sausage gravy to go with. Not remotely our normal dining fare, but kind of a treat. That was my first experience with fritters. These bear little resemblance, unless you count shape, and in that case, they are exactly the same.
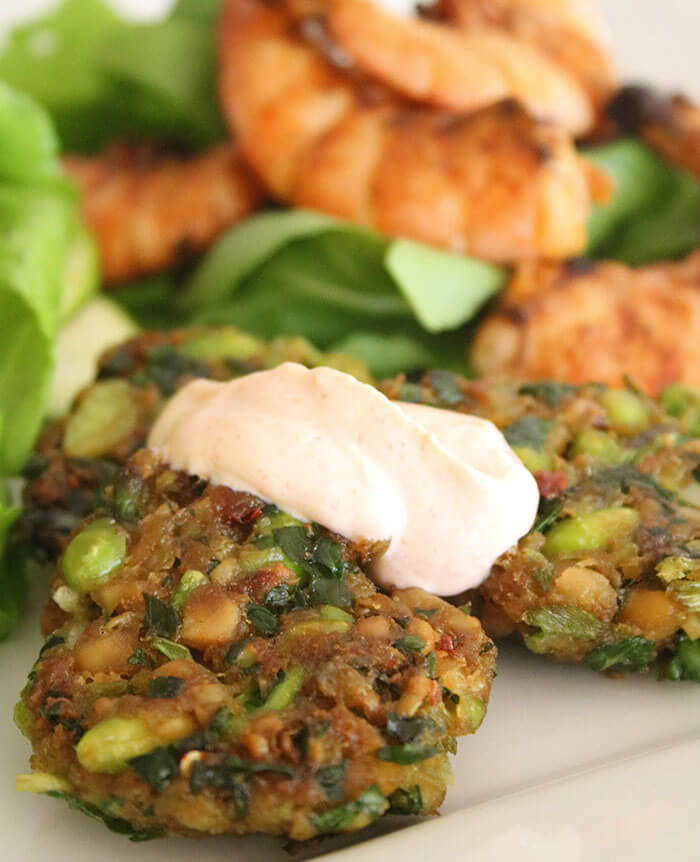
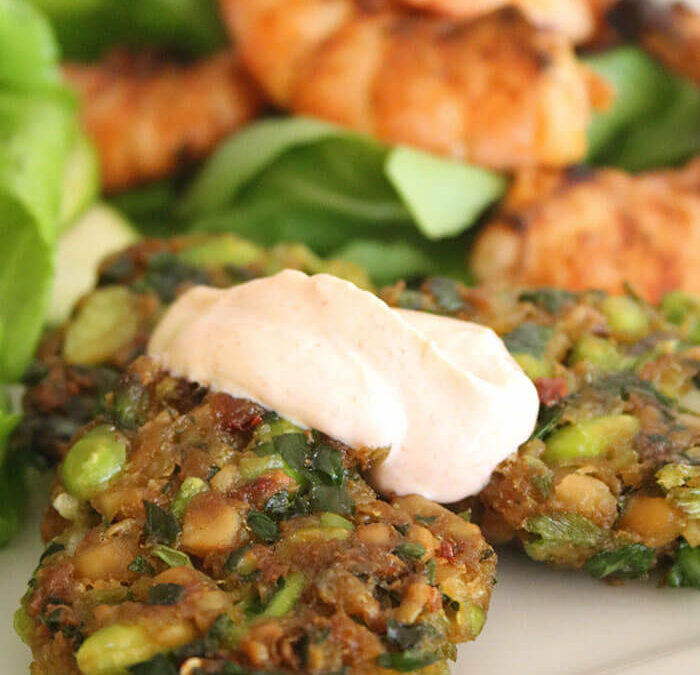
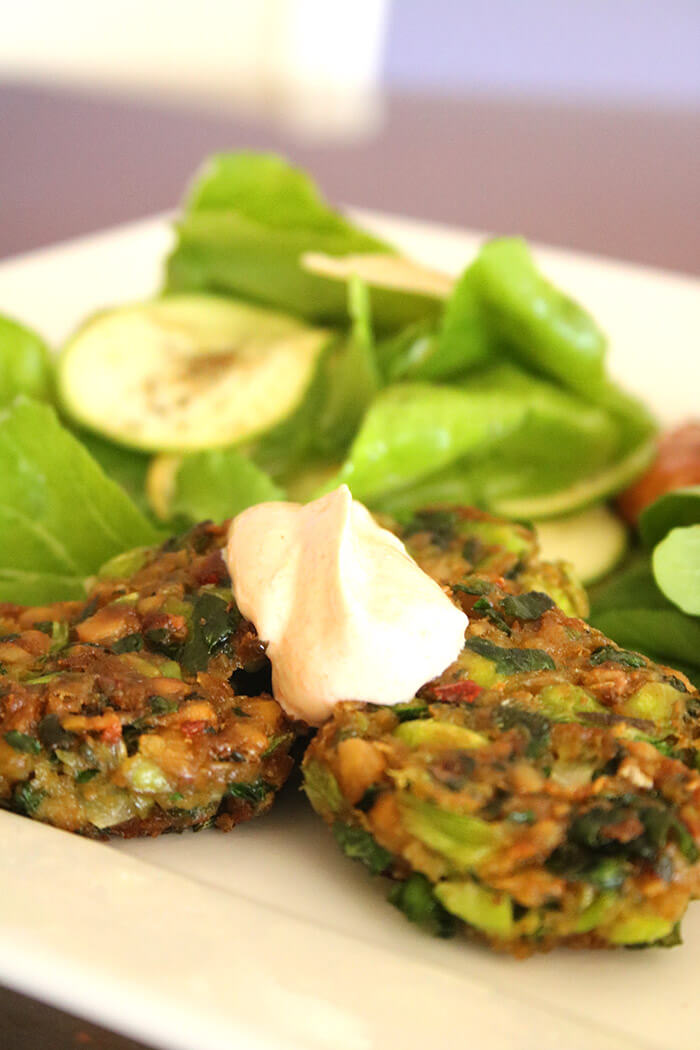
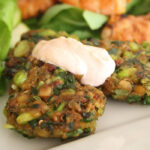
As I debate whether to call these fritters or pancakes, I lean toward fritter despite the absence of a vat of 375o oil (definitely not my style). But, they simply don’t have the flour/milk/egg batter that qualifies them as a pancake. But fear not! While ingredients-wise they are close cousins to the falafel, they are a clear fan-favorite over that deep-fried golf ball. A quick pan-sauté crisps up the tops and bottoms, leaving them moist and flavorful and begging for a serious dollop of Chili Dipping Sauce.
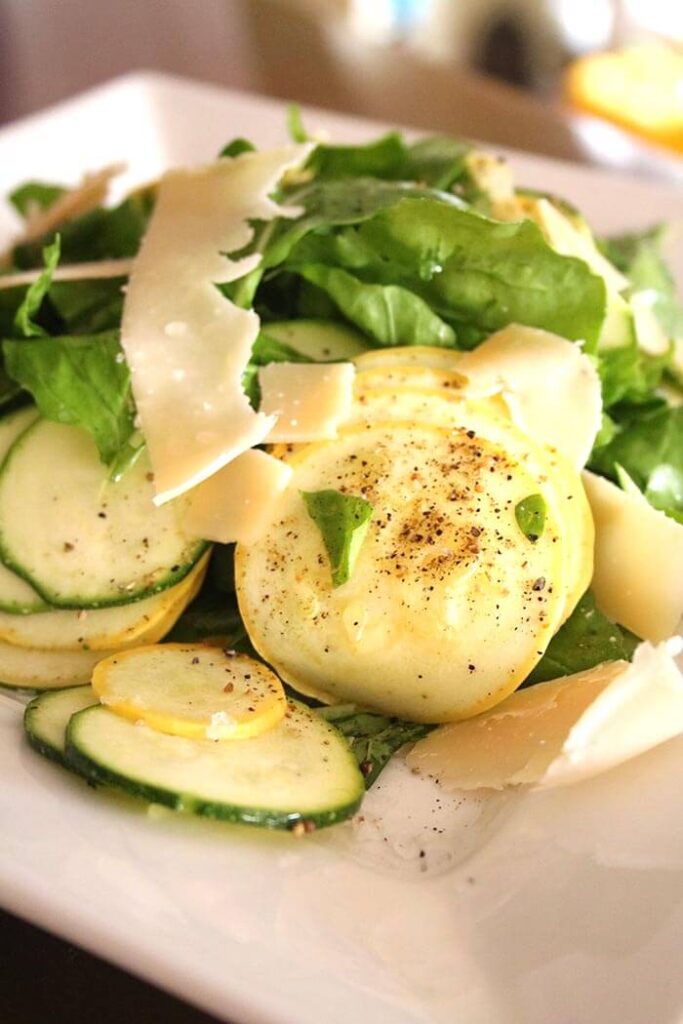
In the next post, I will share a grilled spicy shrimp that appears in some of these photos. But in the meantime, these chickpea fritters also make a great base for breakfast, topped with a couple sunny-side up eggs. And don’t forget the arugula and squash salad. It pairs well with all of the above.
These veggie fritters are chock-full of chickpeas, edamame and a serious handful of herbs. Serve with something right off the grill or top with eggs sunny-side up!
Ingredients
Scale
Edamame and Chickpea Fritters
1 16-ounce can chickpeas, rinsed and drained
3/4 cup edamame, thawed
4 scallions, cut in 1” pieces
3 cloves garlic
3 Tablespoons panko
2 Tablespoons all-purpose flour
1 Tablespoon ground cumin
1 teaspoon salt
1 teaspoon baking soda
1/2 teaspoon red pepper flakes
1 Tablespoon lemon juice
1 egg white
3 Tablespoons finely chopped fresh parsley
3 Tablespoons finely chopped fresh cilantro
Vegetable oil for sautéing
Chili Dipping Sauce
1 cup plain Greek yogurt
1 Tablespoon Sriracha
1 teaspoon ground cumin
1/2 teaspoon ground coriander
1/2 teaspoon lemon juice
1/4 teaspoon salt
Instructions
Make the fritters:
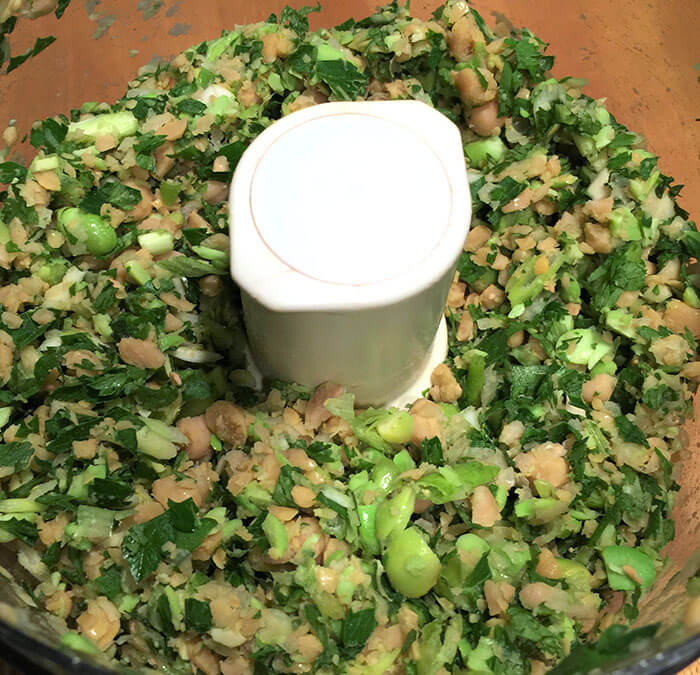
Place the chickpeas, edamame, scallions and garlic in the work bowl of a food processor. Process, pulsing 10-12 times until coarsely chopped. Transfer to a mixing bowl.
In a small bowl, combine the panko, flour, cumin, salt, baking soda, and pepper flakes.
Add the lemon juice, egg white, parsley and cilantro to the chickpea mixture. Stir in the dry mixture until well combined.
Form patties, using 1 Tablespoon measure.
Add enough vegetable oil to a sauté pan to cover the bottom and heat. Cook the patties over medium heat, in batches, turning after 3 1/2 to 4 minutes per side. Do not overcrowd pan. Drain on paper towels. Transfer patties to a sheet pan and hold in a warm oven.
Make the chili dipping sauce:
Whisk together all ingredients. Refrigerate, covered, until serving time.
Dollop atop warm edamame and chickpea fritters.
Notes
The chili dipping sauce makes 1 cup and will keep, refrigerated and covered, for several weeks (not that you will have any left over!)
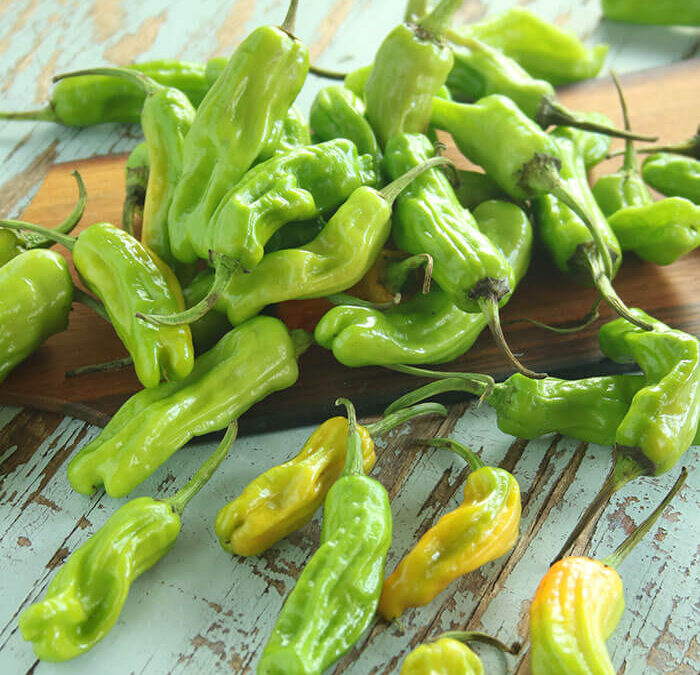
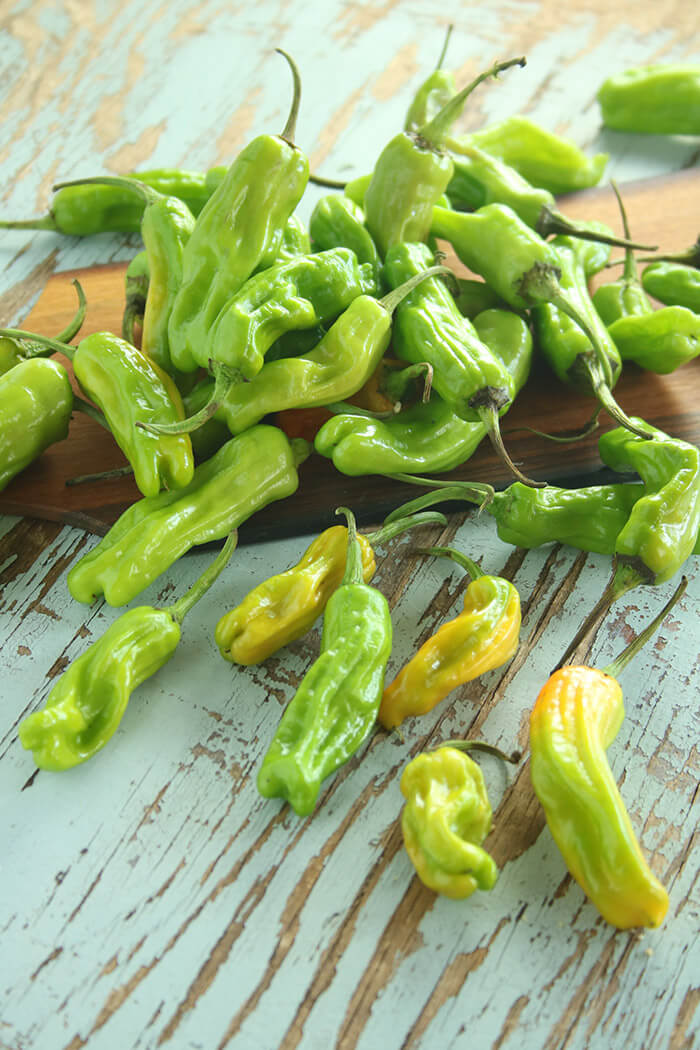
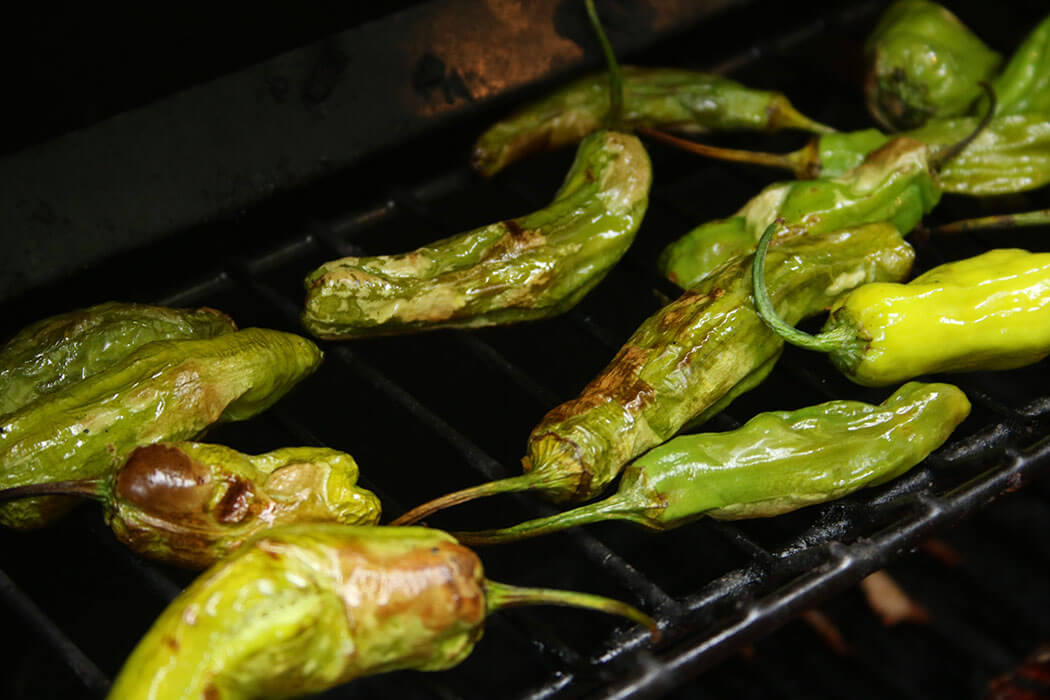
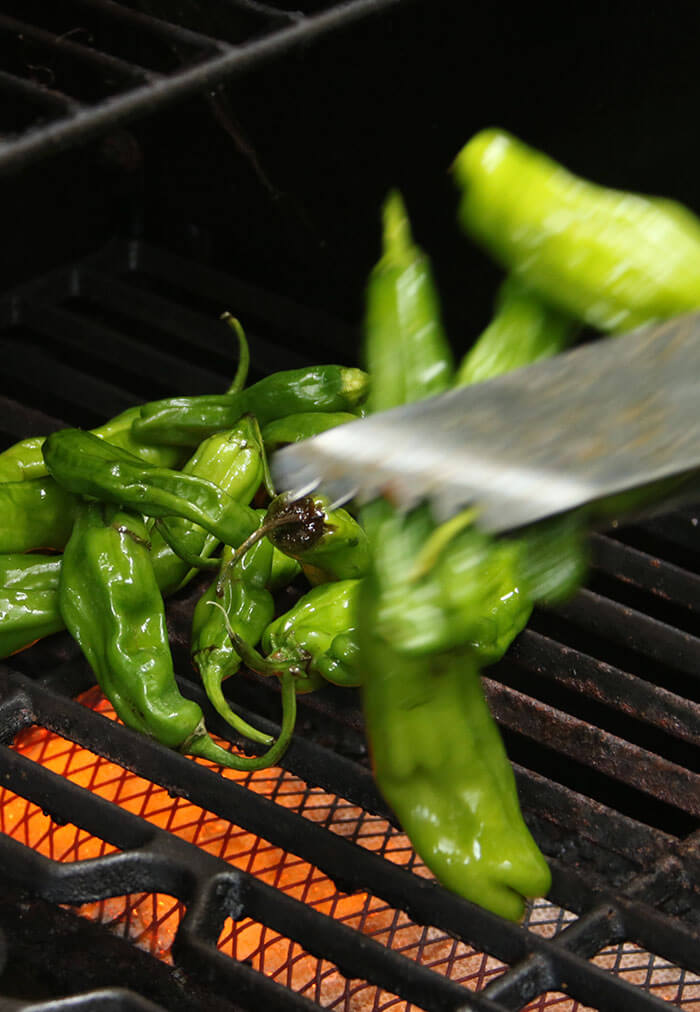
In this impending season of eating too much – and loving every minute of it – here’s an appetizer that is a real crowd pleaser and won’t bust the gut. Roasted shishito peppers! Super-fast to prep, full of flavor with just an occasional touch of heat, shishito peppers have an “I-want-more-ish” quality to them and are pop-able like edamame, though they have the added benefit of being just as good at room temp.
Shishitos are a Japanese pepper, long and slim and a bit twisty, with a tip that allegedly looks like a lion’s head (shishi in Japanese). A bit citrusy and herbal, they are pretty close to the Spanish Padron pepper. Cooking them until blistered brings a smokiness that makes this a veritable party in your mouth.
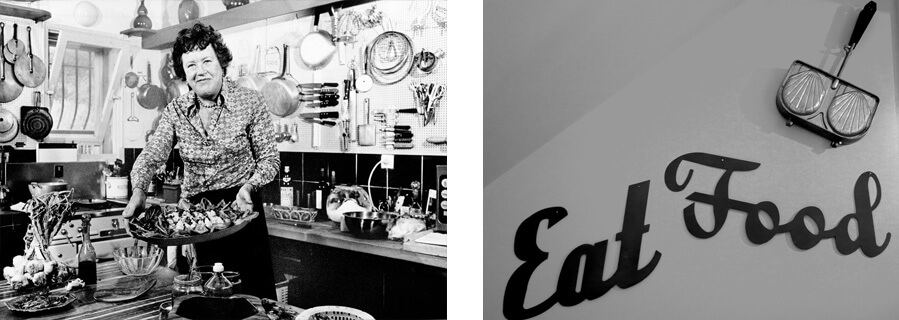
Not long ago shishitos would have been impossible to source outside a fancy greenmarket, but now they are widely available at the grocery, thanks to Melissa’s, the largest distributor of specialty produce in the country. I love the unique items that Melissa’s carries, ranging from tiny coconuts (coquitos) to dried Bhut Jolokia chiles. And I have a special place in my heart for Melissa’s owner Sharon Hernandez who once blessed me with a gift of culinary history – one of Julia Child’s beloved sandwich presses – the very one that almost took me down.
During the run of the Rosie O’Donnell show, I styled cooking segments with Julia Child on many occasions. This particular day Julia was scheduled to appear live and demonstrate a lovely recipe for a toasted Croque Monsieur sandwich. Rosie, who built her shtick on an alleged pedestrian palate, was making her spin on the famous French fancy. Wonder Bread in place of Pepperidge Farm Toasting White, Bologna in lieu of Black Forest Ham. No Gruyere – just Velveeta. And the plan was that Rosie’s sandwich would not be precious and pressed, but 1-foot high. Bigger is funnier, or so was the show’s mantra.
As the foodstylist for the show, I had assembled all the groceries and props, but awaited Julia’s arrival to make the “beauty” sandwich. She was hauling her prized shell-shaped sandwich iron from her Cambridge home, and with that I could create the final dish. She arrived on schedule, and I made several test sandwiches for her approval. Routine as always, we were good to go.
As the show counted down to its live cold open, I fired up the burner and started browning some butter. Through an epic fail on the part of the special effects department (heads rolled that day) and completely unbeknownst to me, the smoke detector in my make-shift kitchen (better known as a hallway) at historic 30 Rock had not been disabled as was our norm. Being a landmark building, working with open flames and having an unventilated kitchen was strictly forbidden. That had never stopped us before.
No sooner did I turn on the flame than NY’s Bravest stormed the building, throwing my pan against the wall and dragging off with the burners. Silent in the hallway, the alarm was blaring on set with a full studio audience. Mere minutes until the show went live… or would they have to throw to rerun? With just seconds to spare, the alarm was silenced, the audience calmed, and the call was made to continue with a live show. And NYFD was interrogating me as an enemy of State. Well, it wasn’t that drastic, but they did take away my flame.
I found myself with few options. I had minutes, not hours; I had no burners or sauté pans. So, by hand, I smashed the cold bread into the iron to shape it shell-like. I hauled out a Preval paint sprayer and mixed up a combo of bitters and browning agent and lightly spray painted/“toasted” the bread. I dipped the cheese in the Propmaster’s hot tea to melt it. It wasn’t half bad. And, yes, it was the full extent of my equipment and tricks.
And then SHE sauntered from her dressing room, oblivious to the surrounding chaos, and passed final judgment on my creation. “Dear girl, it’s awfully pale.” She had no clue – her dressing room, like my hall, had no blaring sirens!! But she kept walking. And the show went on. And it was just another day in live television.
A few years later, long after Julia went to the big Panini Press in the sky, four sandwich irons came up at a culinary auction. Heavy hitters in the biz got into a bidding frenzy and I was left in the dust. My friend Gerry told me I was out of my league: “That’s some tall cotton, girl.” But not long after, thanks to Melissa’s and Sharon’s generosity that shell-shaped sandwich iron appeared on my doorstep. It is mine, all mine. It’s hanging on my wall, just like Julia used to hang it…well, minus the hospital green pegboard with blue magic marker outlines drawn by her husband Paul, indicating the one and only place each gadget was to be stored. I pull it down every once in a while, but mainly it’s retired out of respect to the woman who made it look so easy and laughed all the while.
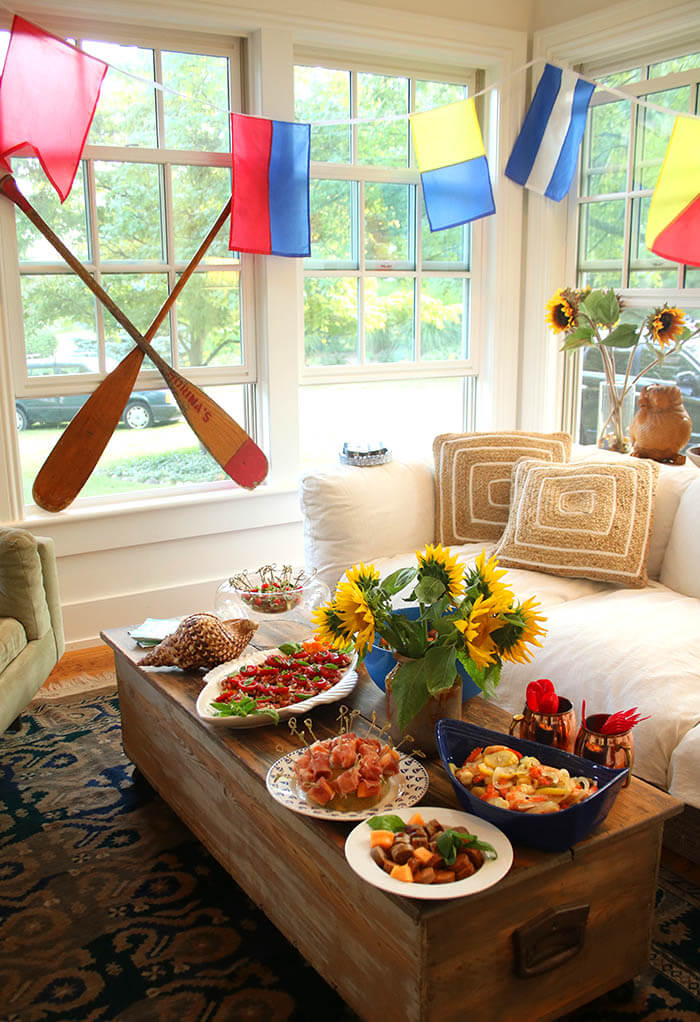
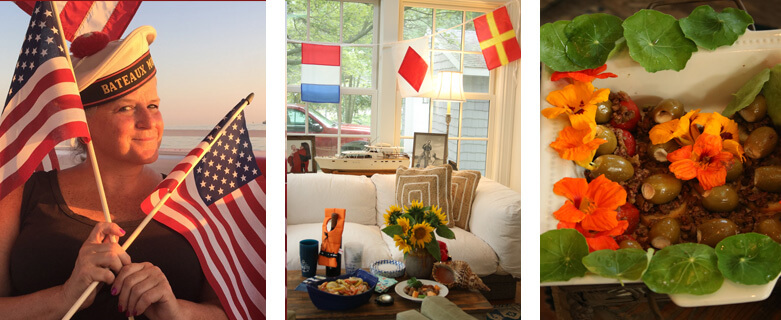
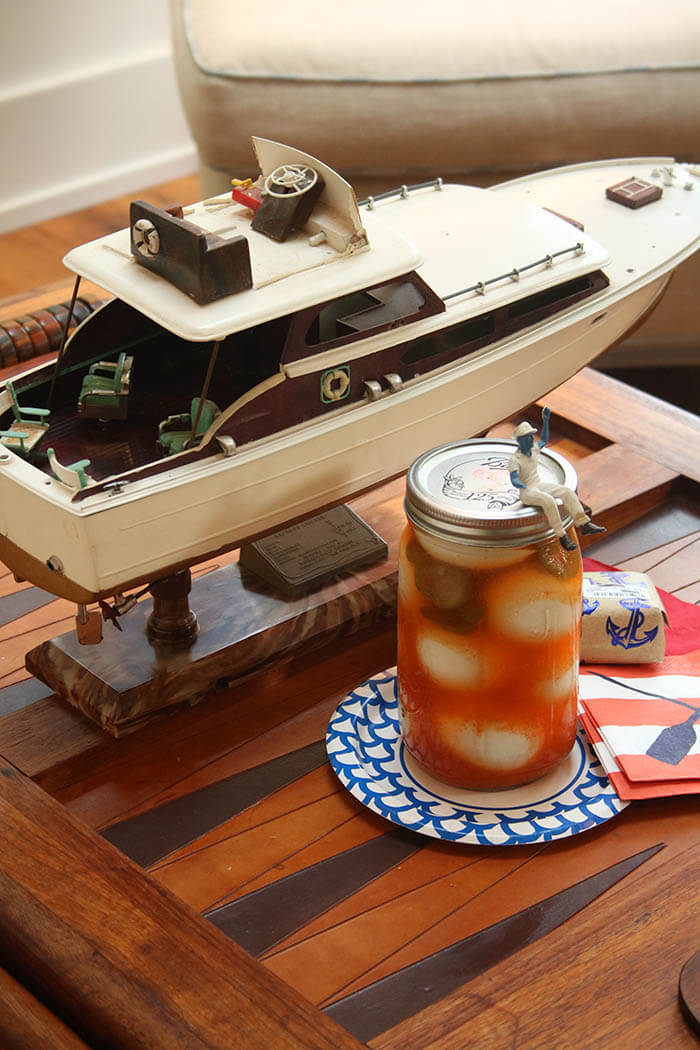
All ashore that’s going ashore. Or so it should have been. But Mother Nature was a fickle mistress (or was she?) and the pot-lucky aboard our intrepid pontoon Scout was not to be. It’s quite possible that Mother Nature did us a solid – the feast that arrived needed to be a moveable feast, else we would have had to have a side car on the boat just to carry the food. The call went out to bring an appetizer that fit a verrrrry loose nautical theme – #puremichigan, #redwhiteandblue, #beach, #getfishy. I really didn’t have much in mind, unlike previous pot-luckys (my curated and themed spin on a typical pot luck), other than my own plan to roll out the pickled shrimp, so asked friends to get creative and creative they got! The food just kept arriving and it took multiple rooms to spread the feast.
Scout goes out on Wednesdays all summer to watch races from the Grand River Sailing Club on the “big lake” (as any respectable west Michigander refers to Lake Michigan). The best racing weather is not the best Scout weather. Glassy nights don’t make for a great race. But fun, food, beverages, music and very deep conversations abound no matter the weather.
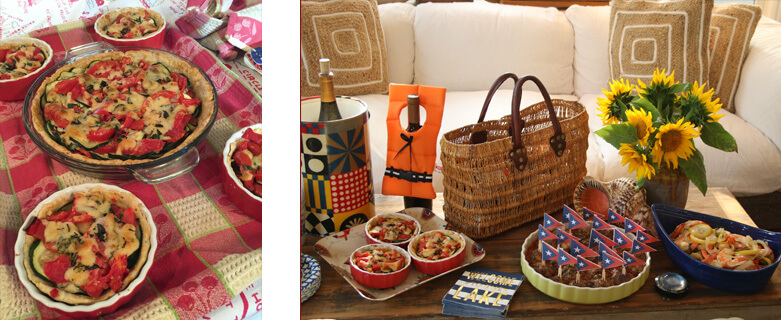
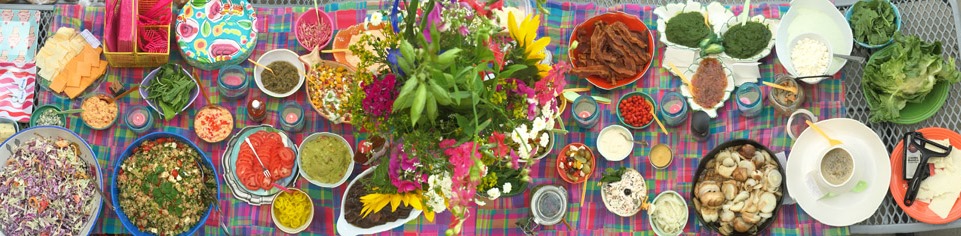
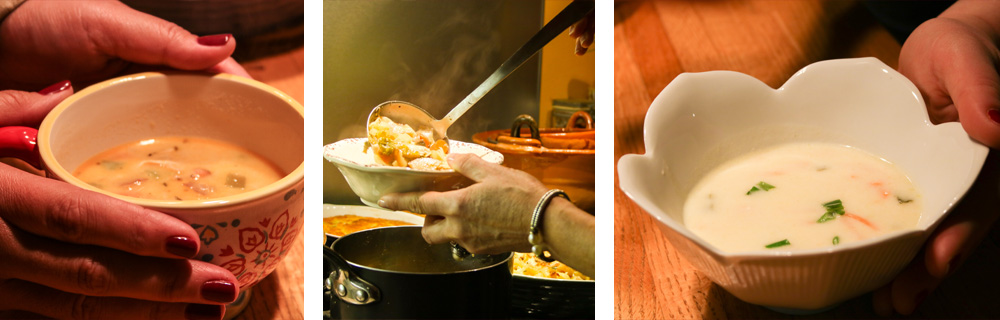
Sadly,3 foot waves and high winds precluded our “Scout”ing on the designated pot-lucky, so we headed inside and pulled out all the stops, tricking out the Captain’s Quarters to make it even more boat-like. Guests arrived with the most amusing and creative sacrifices to the pot-lucky gods. I loved that the theme came through in presentation, as well as ingredient selection. A self-proclaimed non-crafty guest fired up the printer and created picks for the best ever meatballs, adorning them with home-made burgees (flags) representing another local yacht club. And the most wonderful sausage/butter bean/poblano chili was served as if already the winning trophy. Or how about the goldfish, tossed in herbs and put in a fish bowl and served with a net? #Hilarious
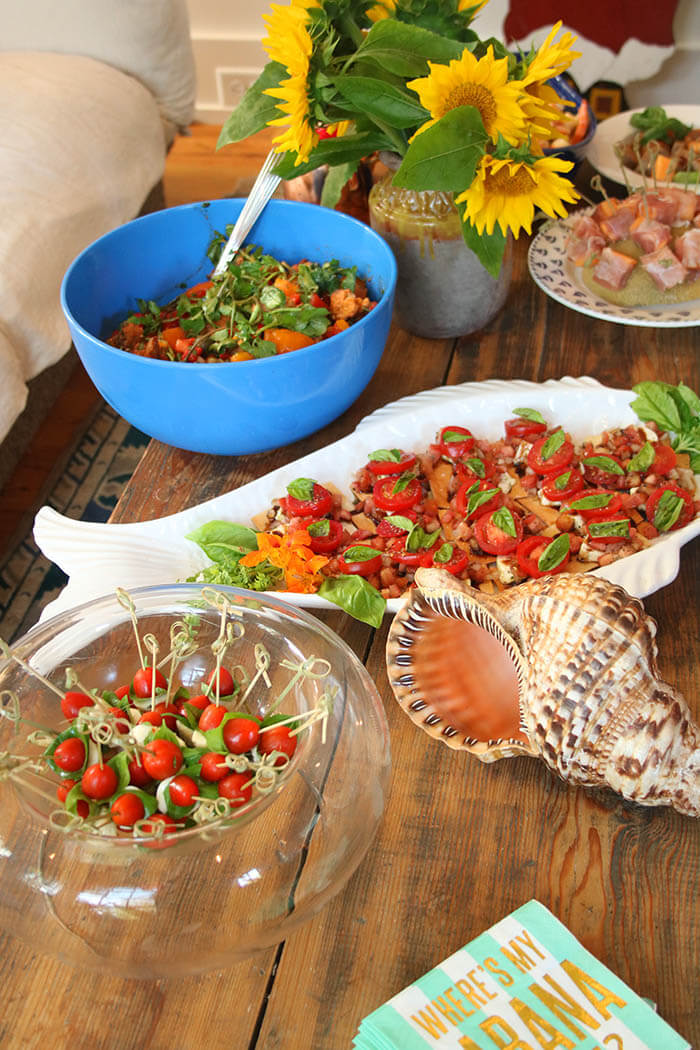
Not just looking good, the ingredients were carefully selected around the theme, as well. Tomatoes are at their peak and they appeared on Caprese skewers, panzanella bread salad, baked with Parm and herbs in a savory crust, and atop lavosh for a yummy mozzarella bruschetta topping. Spicy pickled eggs, already red and white, picked up their blue from a wandering model boat captain. And dessert goes all red, white, and blueberry – with cherries & almonds, white peaches, blueberries & basil. Yum.
In the end, it turned out to be an app exchange of epic proportions, as there were far more treats than even the most intrepid sailor could consume. Everyone went home with sacks to nosh on throughout the week. Note to self: pot-luckys require to-go containers!
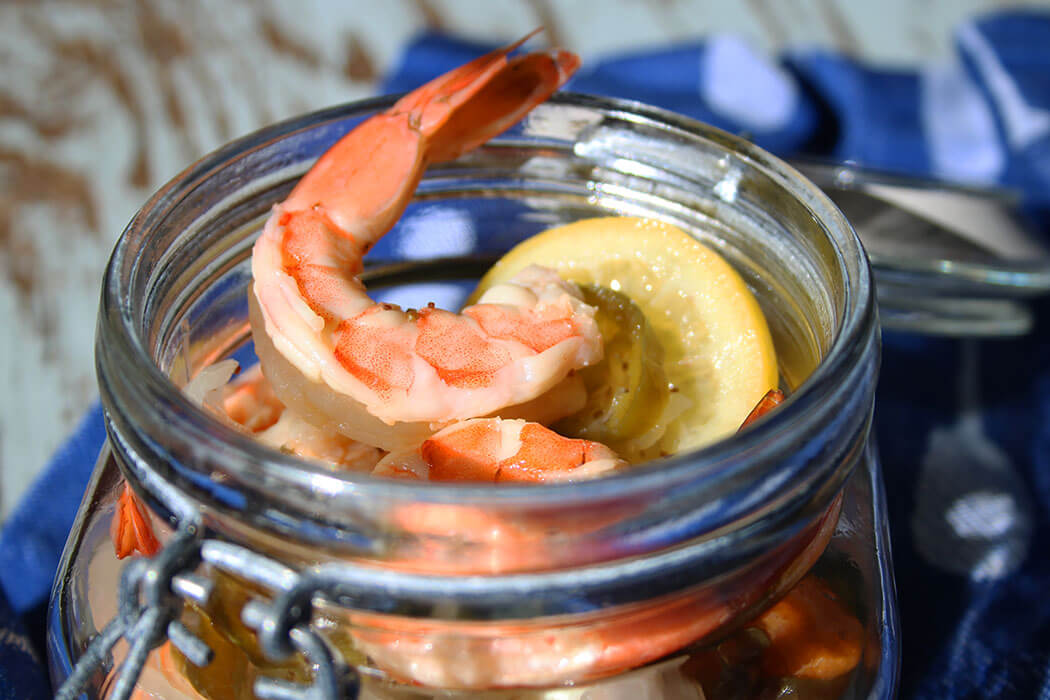
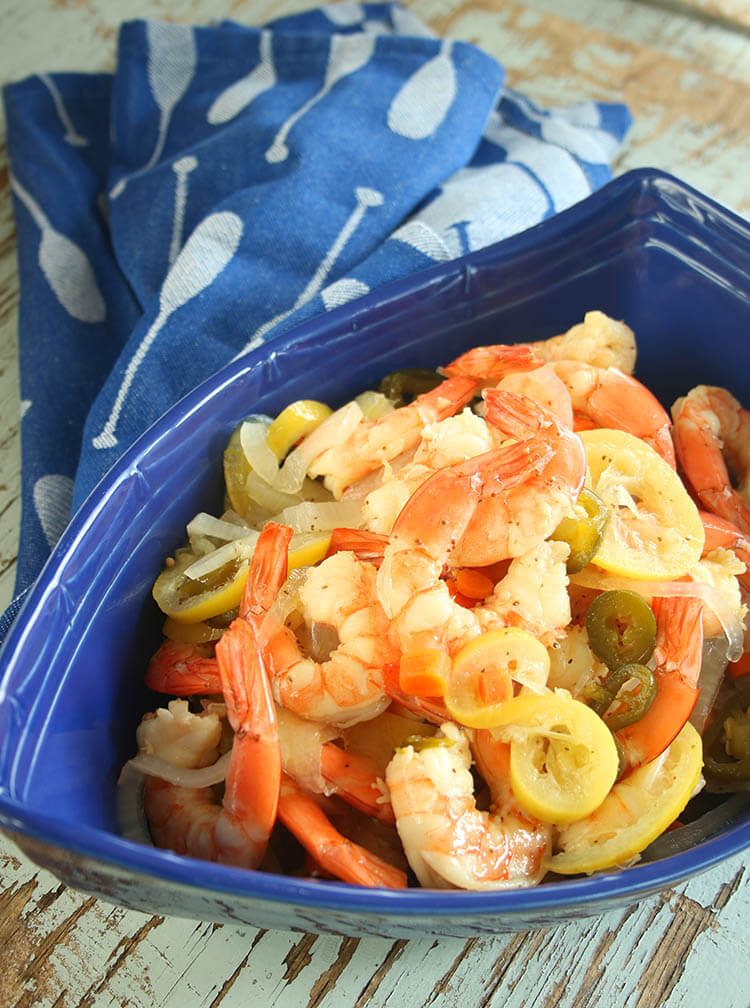
I represented with a pickled shrimp recipe that I first found from a neighbor who was a regular reader of Tasting Table. The recipe was adapted from Butcher & Bee in Charleston and Nashville. Here, it is adapted again. It’s a wonderful dish and a consummate hit and keeps for a week, if in fact you can manage to have leftovers. The original recipe didn’t work for scaling up to bigger quantities, but if you follow my seemingly fussy technique, you will get perfect results and can make as many pounds of shrimp as you want. The recipe below is for two pounds of shrimp. If you only make one pound, scale the remaining ingredients down by one third; for every pound you add over the two called for, scale the remaining ingredients up by 25% over those listed. ish. There is a lot of liquid and you definitely do not need to be linear in your math. Can you do that for me? If your poaching liquid does get too low, just add a little more water so that the shrimp are covered during their one-minute dip in the simmering brine.
Pickled Shrimp a la Butcher & Bee by way of me
4 cups water
2 ½ cups white vinegar
1 ½ cups cider vinegar
1 large onion, thinly sliced (I like Vidalia or other sweet onion)
2 garlic cloves, peeled
4 jalapenos, stemmed and cut into ½” thick rings
20 baby carrots, sliced in ¼” thick slices
4 lemons, thinly sliced
3 cups granulated sugar
1 ½ Tablespoons celery seed
1 teaspoon mustard seeds
2 Tablespoons sea or kosher salt
2 pounds raw shrimp, peeled, deveined, and tail on (I like 16-20 or 21-26)
Fill the sink with cold water and ice.
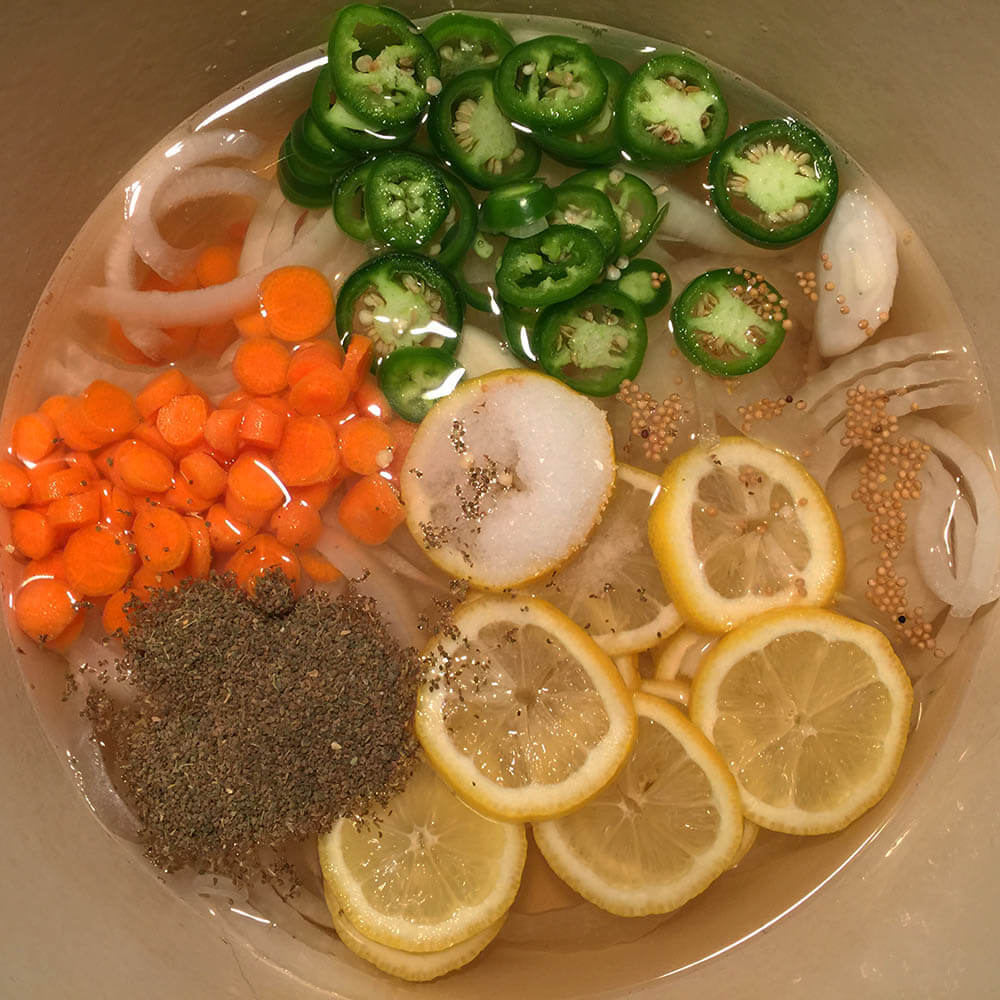
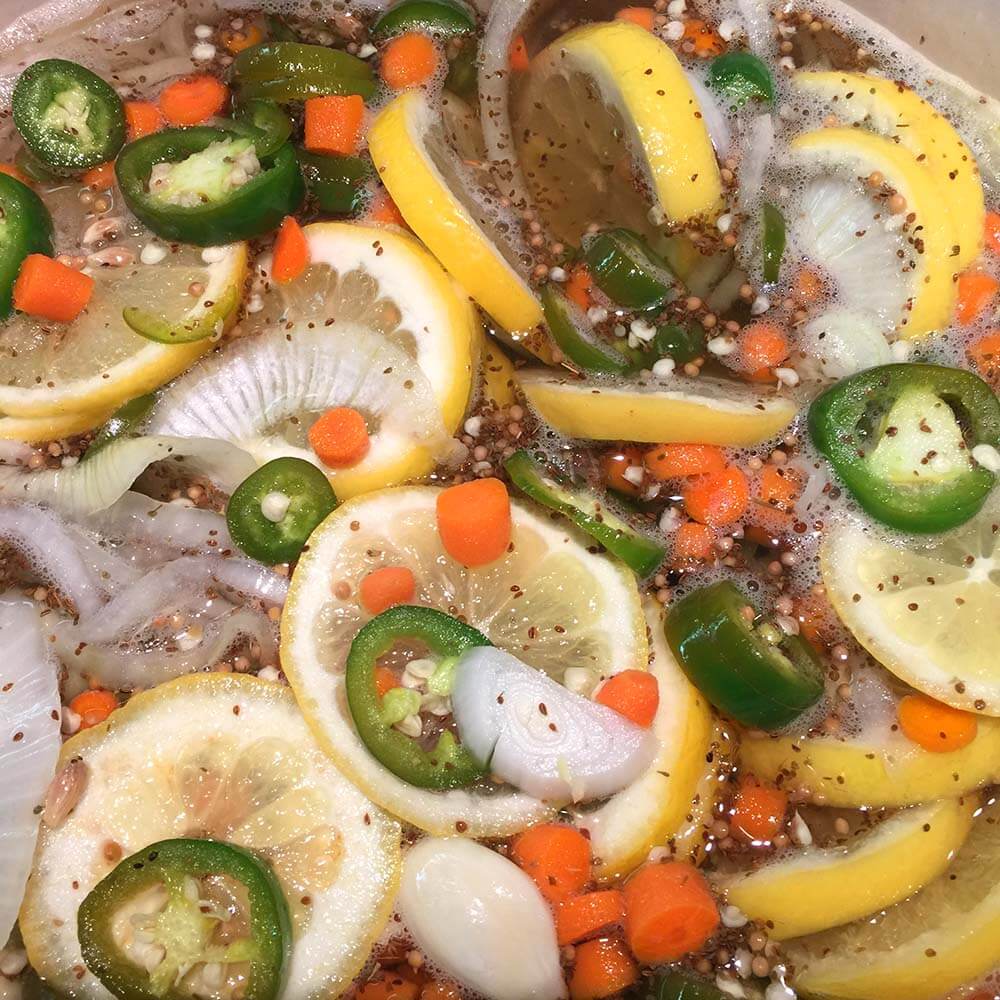
In a large pot, combine all the ingredients, except for shrimp, and bring to a boil.
Using a slotted spoon, remove the chunkies (i.e. everything that is not liquid) to a large bowl, along with 2/3 of the liquid. Be sure to get most of the celery and mustard seeds. (The remaining liquid will eventually be discarded.) Place the bowl in the ice bath and stir periodically to cool. When the brine is cool, refrigerate.
Place the pot back on the stove with what remains of the pickling liquid (about 1/3 of original), and bring back to a low boil Add the first pound of shrimp and when pink, about 30 seconds to a minute, remove with tongs or slotted spoon to a tray and allow to cool. Repeat with remaining shrimp, one pound per batch. The shrimp color should be set and they should be mostly cooked, but they will continue to “cook”, or more accurately cure, as they sit in the brine. When the shrimp are cool, add to the refrigerated brine & vegetables. Cover and refrigerate at least four hours, or preferably overnight. Discard the brine that was used for poaching the shrimp.
To serve, strain off the liquid and serve in mason jars with the pickled vegetables.
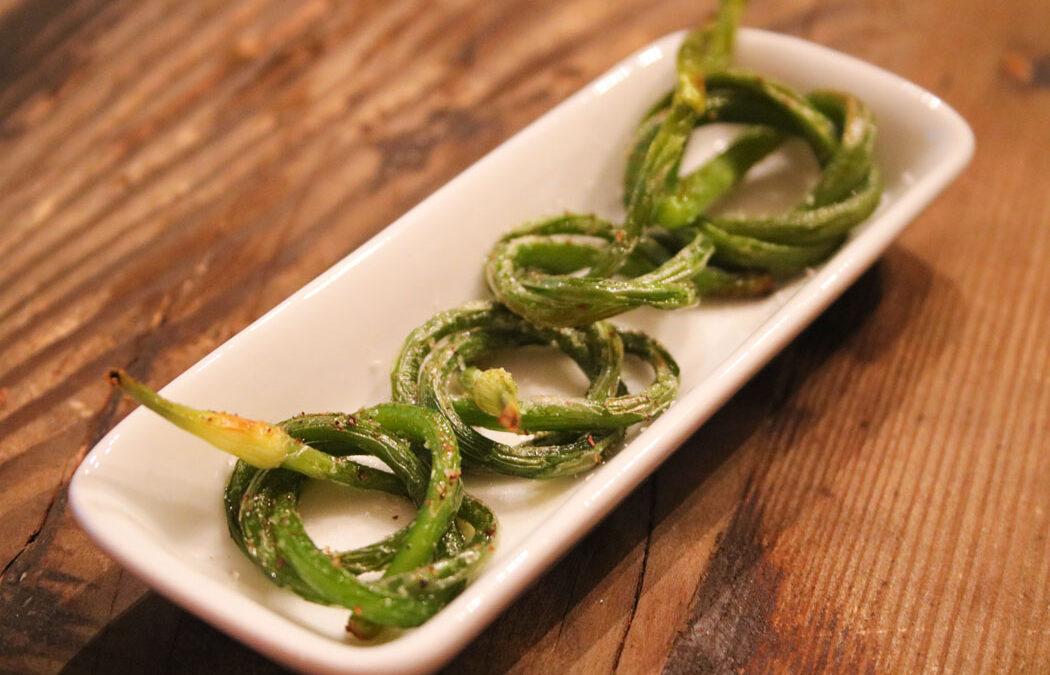
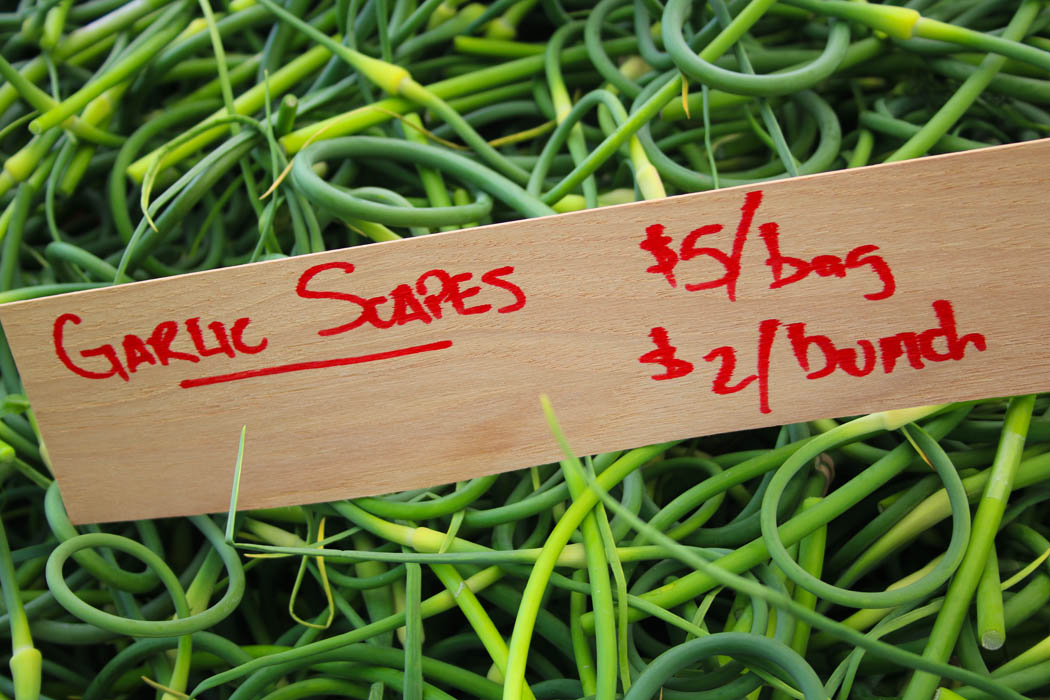
So here’s the full disclosure on Garlic Scapes – you are either going to have to run right now or bookmark this page for next year. I’ve kind of being keeping this secret recipe under wraps so there would be more for me (sorry, not sorry). Depending on your location, you may still be able to get this magical ingredient. #fingerscrossed
Garlic Scapes. While it’s not new to me – I have been going mano a mano with it for years to get the twisty, curly scapes straight enough to chop – it was only last year that I learned about making bundles and roasting them. Scapes are the bud of the garlic plant and are a milder, slightly sweeter version of the bulb. For years, I chopped it – best I could – and threw it raw in salads, especially hearty ones like potato salad. Or sautéed it in brown butter and tossed it with pasta, wilted greens, and some good parm. For a full FAQ on this magical shoot, check out Just Crumbs.
Source (right photo above and below): Maple Achers
It is no coincidence that I fell in love with this recipe at exactly the same time I met the amazing Russ and Linda Hepler-Beaty of Maple Achers Farm. Who doesn’t love a couple that come to farming a bit later in life and change the spelling of acres to better describe the pain of toiling away in their fields. I met them in Leland, Michigan (Thursday markets during season) with their super festive spread of interesting and often heirloom vegetables stylishly presented from their Veggie-mobile – a tricked out vintage (1965) Airstream with a brightly striped yellow canopy. Years of catering, food styling and a more recent foray into photography make me a sucker for a gorgeous spread. Too often farmers line the wooden baskets with plastic bags for grab and go service, which in my mind not only ruins the aesthetic but also the compostable nature of fresh produce.
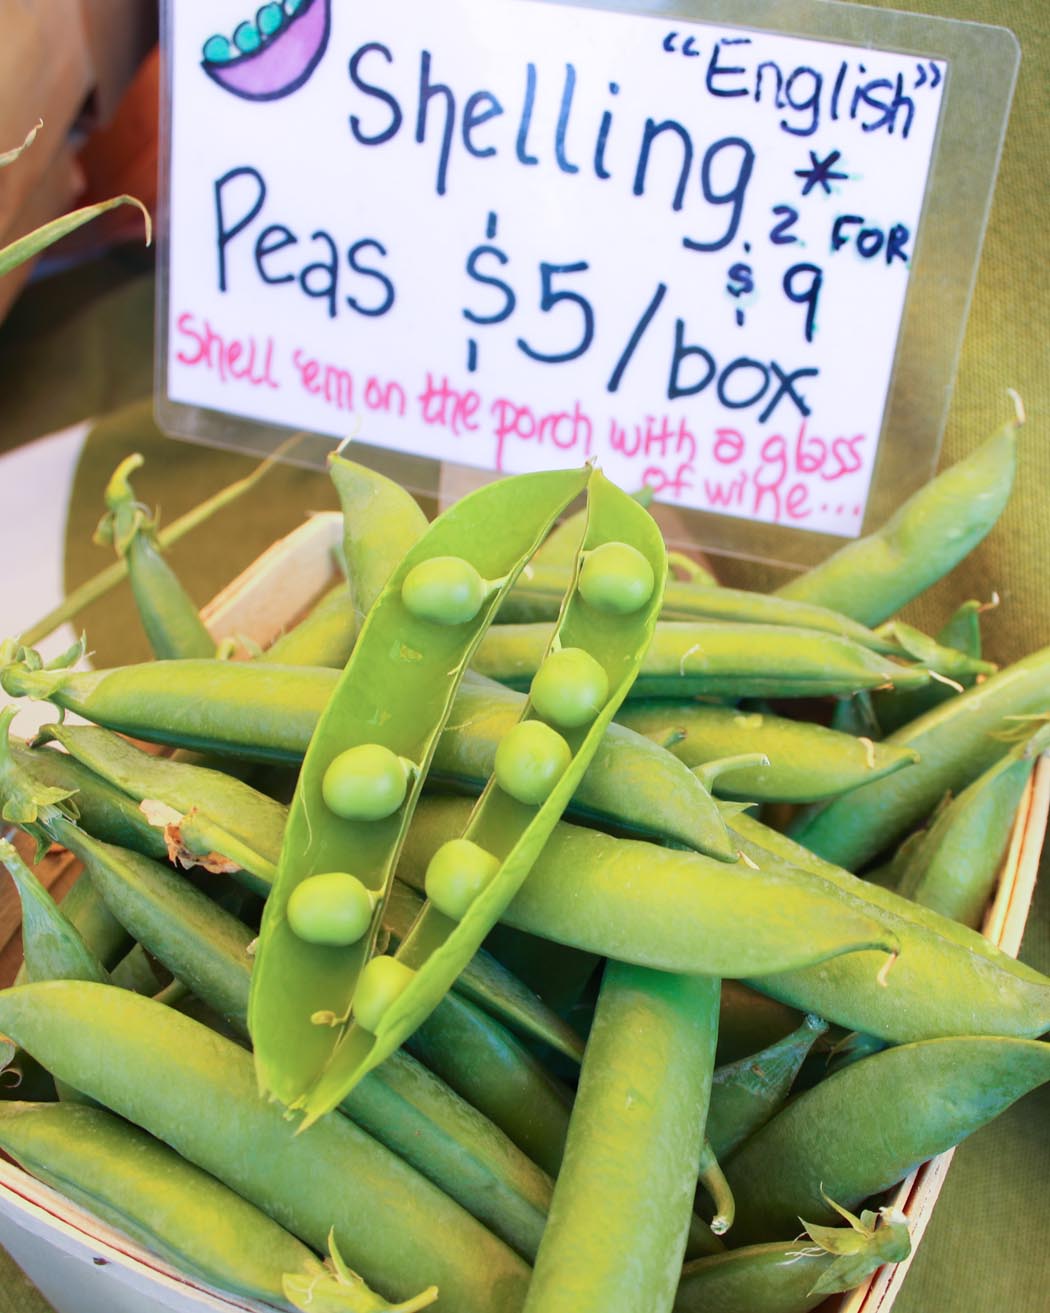
Linda is a genius at using props that scream FARMLAND – maple sap buckets filled to overflowing with Portuguese kale bunches, a 3-tiered galvanized cake stand with bundles of herbs, wooden baskets and colorful fabrics. She and Russ are quick to offer a cooking suggestion – cook the fava beans like edamame – and general advice – drink wine while shelling peas. Hell, yes.
The 10 acre farm in the heart of Leelanau County (Maple City, Michigan) is Certified Naturally Grown. Using plot rotation, nourishing fallow ground with cover crops, along with a strategic release of 300,000 lady bugs over the summer – you CAN get them on Amazon. I checked – they plant about 3+ acres and as foodies-first offer a more unique and interesting veggie line up than most farm stands.
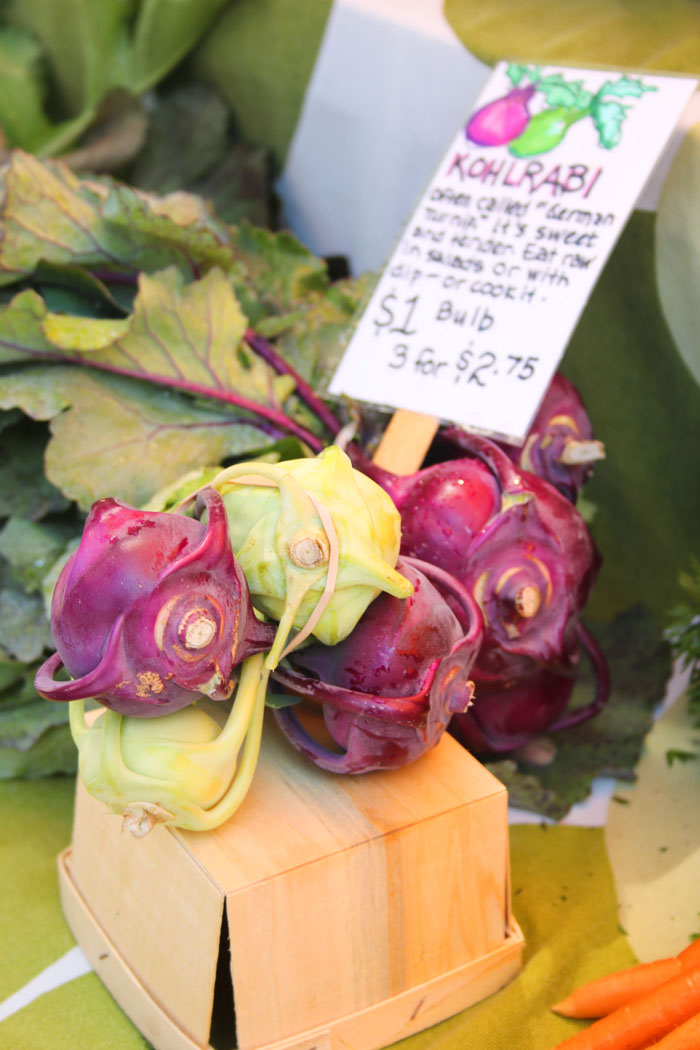
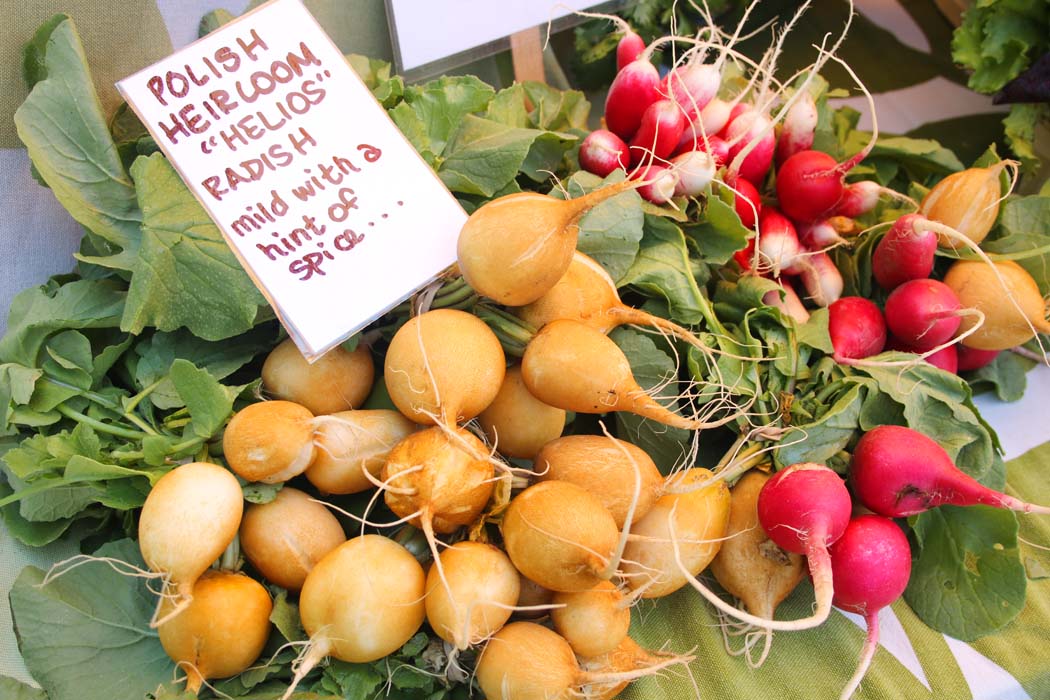
Almost all vegetables come in a variety of colors – beets are garnet, orange and white; potatoes – red, white & blue; cauliflower is lime, white, orange and lavender; even currants are red and pink champagne. Radishes range from yellow Polish Helios to lavender Asian Daikons, with about 6 stops in between. Russ suggested grilling the Bravo daikon, and Linda chimed in with the idea to add grilled escarole, and top with feta and a drizzle of vinaigrette.
Having only a few scapes to test their roasted garlic scapes recipe last year, I waited all winter for the first sign this spring. Apparently used to selling them one by one, I surprised the Grand Haven farmers by scooping up their entire stash. I have since made them a few times and they have that mouth-pop-ability of edamame. Olive oil and salt – what could be bad?
If you are in Leland on a Thursday, check out Maple Achers and try a new veggie. Otherwise, run, run, run to gather up a handful of garlic scapes while you still can! And yes, I’m still holding, so let me know if you are desperate.
Bring a large pot of salted water to a boil. Drop the garlic scapes in the boiling water and cook for about a minute until bright green. Rinse with cold water to stop the cooking.
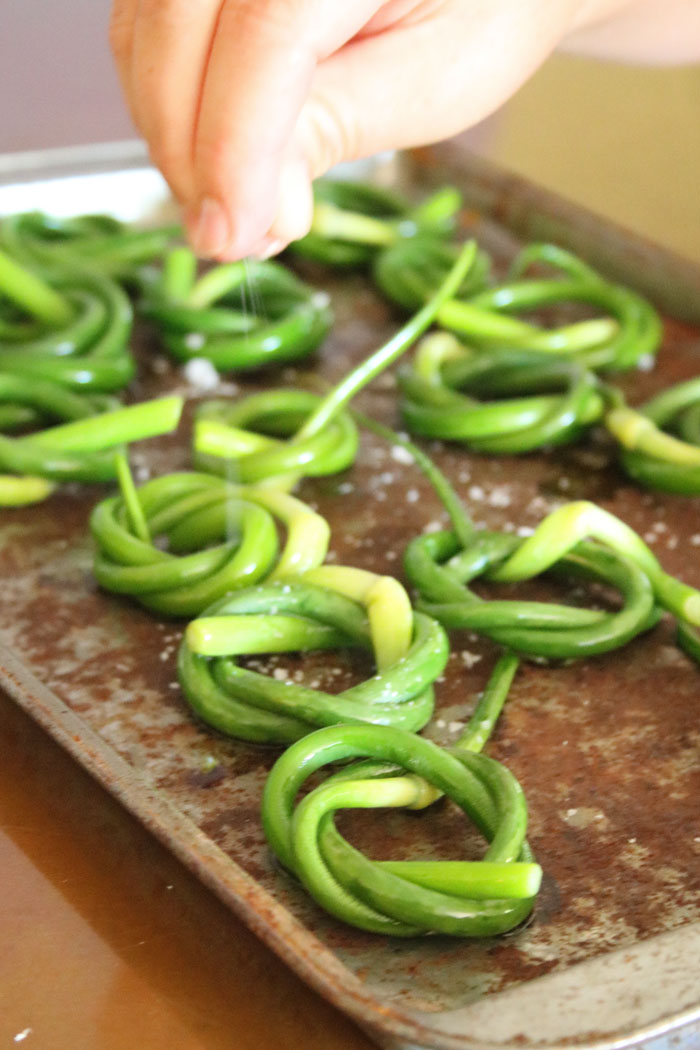
Coil each scape into a circle, following the natural shape, and tucking in the ends in to hold it.
Transfer to a bowl and drizzle with olive oil, tossing to coat.
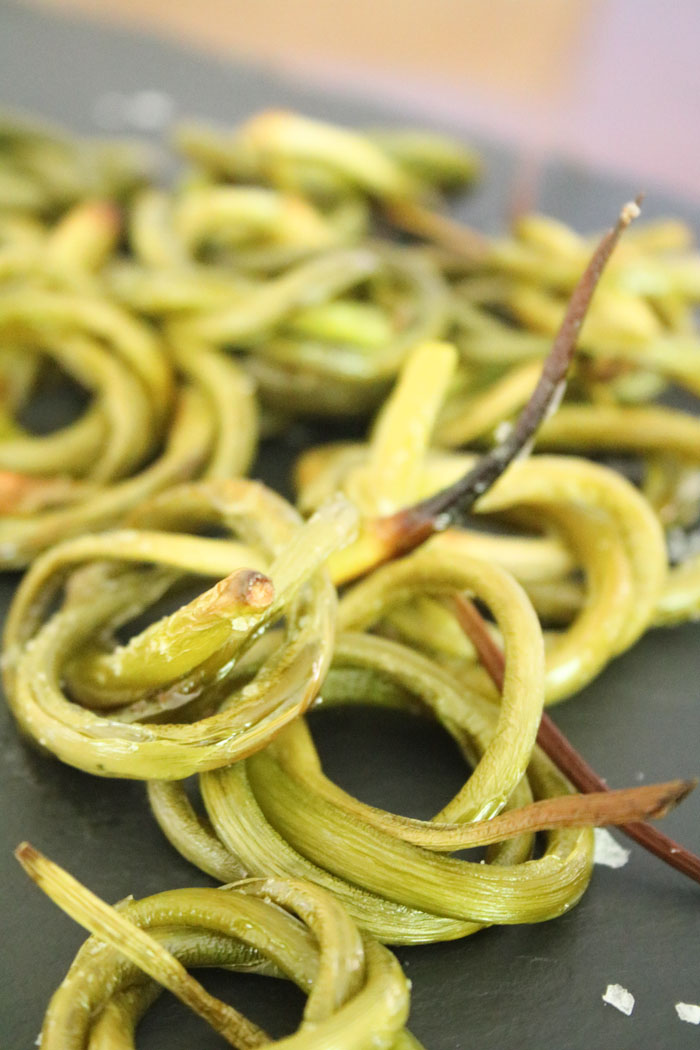
Arrange on a sheet pan, sprinkle with salt, and bake for 12-15 minutes until the ends start to crisp up. Feel free to use a hot grill instead – equally delicious.
Transfer to a serving plate and sprinkle with additional salt, if needed. Best served with a glass o’ vino!
This post contains affiliate links. For more of my must-have faves, check out my shop.
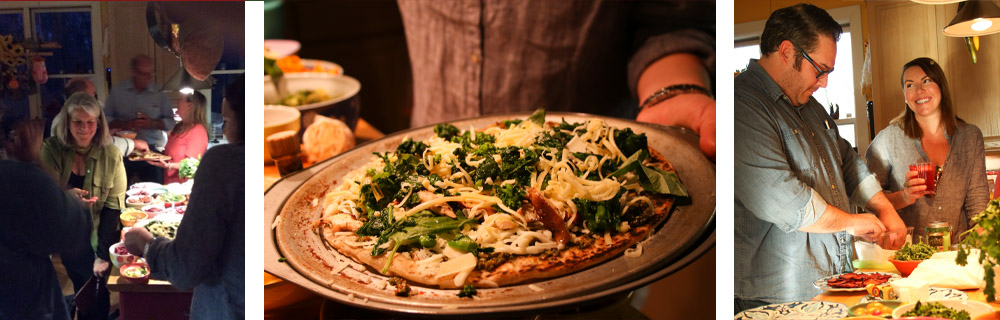
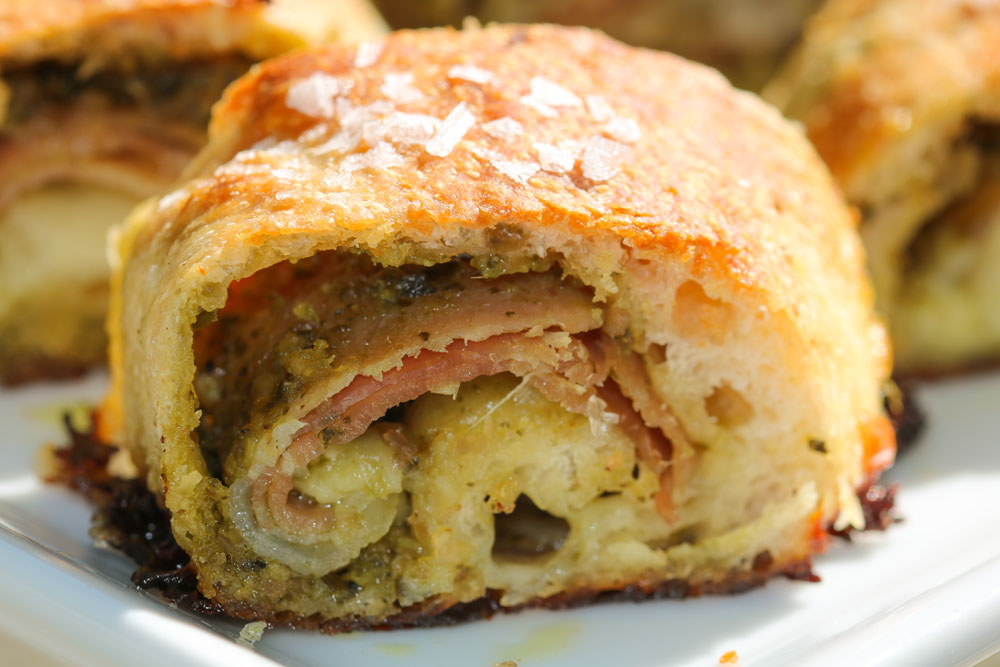
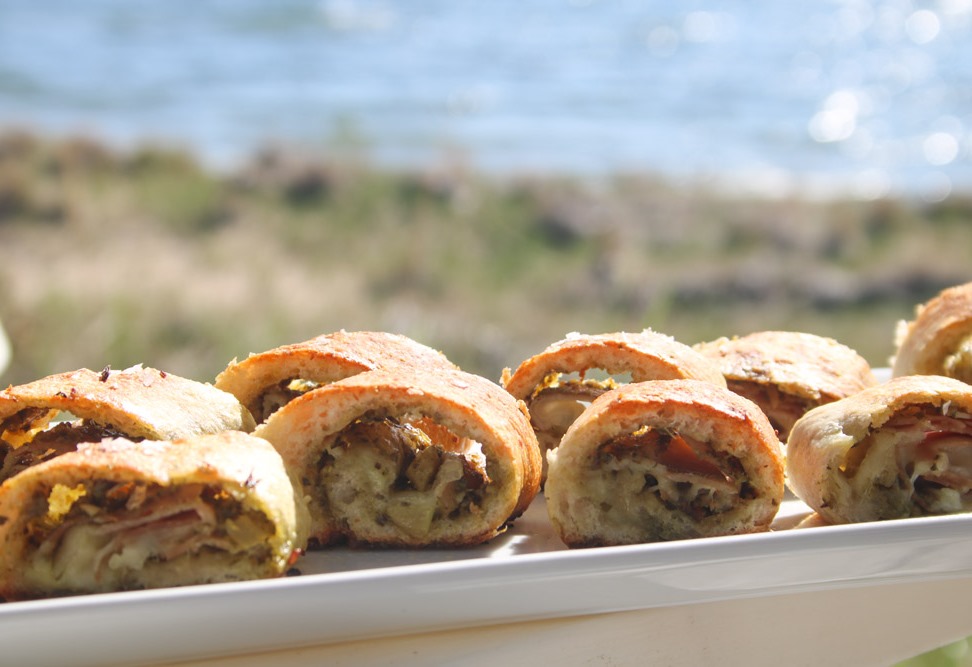
Prosciutto Pesto Puffs!! Prosciutto Pesto Poppers?? Puffs or Poppers? Mmmmmm, I can kind of go either way. In support of Puffs, these tasty little morsels are light and puffy. But, don’t discount Poppers; the journey from cutting board to platter is anything but guaranteed – see Open Wide above. I say you get 3 dozen pieces, but do you??? What if you don’t? Who will know? Most importantly, this quick and easy app includes the four food groups (remember those?) – cheese and dough, pesto and pig. Riiiiiiiiight?? I know I had you at cheese and dough.
Who among you doesn’t have some version of those four things in-house at all times? Don’t make me come over there! I know by now I have cultivated at least some level of pantry-responsibility in you. Personally I am still working through pizza dough from last month’s Pizzapalooza/Bring Your Own Pizza Toppings pot lucky. I was so uber prepped that I ended up with another half dozen crusts in the freezer. But this dish disappears so quickly you can short cut my Trader Joe’s dough short cut and just grab the poppin’ fresh variety. It would be a crime against your calendar to make dough for this from scratch.
And pesto…I’m just about at the end of the stash of Pistachio Lemon Pesto I put away last fall. But for this I used an arugula pepita pesto –Y.U.M. – that was a contribution to the pizza party. Any combo of greens and nuts or seeds will work. Just follow the basic proportions in this recipe. The sassier the better. And, of course, you will get more depth of flavor if you toast the nuts or seeds first. But if you are short-changed on time, supermarket pesto ain’t half bad. We’re on the clock, people! We got PopperPuffs to make.
Then there’s the pig – let’s just go straight for prosciutto and stop there. But of course you could use salami, ham, anything that is cooked or cured. Raw bacon would be a mess. Smoked turkey would be a delish sub, or roasted peppers and thoroughly drained spinach if you are vegetarian.
Vegans however need not apply. This PopperPuff screams for cheese. I met and love-@first-sight’d this dish about 8 years ago when my then 14-year old neighbor Allison whipped up a larger version, stromboli-like, and appeared for a boat ride with a hamper-full. All the adults were stunned. What? Is? This? Cheesy? Goodness? It’s possible I broke a bicep shoveling in the gooey slices. Ever since, we have called this (or any interpretation of) the Ali Roll.
It recently occurred to me it was a tad bit – don’t judge me on what I am about to say – too gooey. I know. I know. But more because the center stays a bit dough-y than that there is too much cheese. Heaven forbid! So for a Memorial Day app exchange – which had nothing to do with technology – I decided to whittle this down to bite-size, and the results were a crowd-pleaser. The pieces were also less daunting than a slice 4+ inches wide which is considered bite-size in fewer and fewer circles these days.
Feel free to swap out all the fillings. This dish is pretty indestructible. I haven’t tried it but am fairly certain you could make the logs and freeze them, then bake frozen. Or you could bake it off, slice and freeze in an airtight container. These are good warm-from-the-oven or at room temperature.
While not gourmet per se, this is squarely in the category my friend Cindy calls “People Love It”.
Enjoy!
Prosciutto Pesto Puffs
13.8 ounce can of classic pizza dough (or equivalent fresh dough)
2/3 cup pesto
½ pound prosciutto, thinly sliced, (includes a bit extra for snacking)
1 ½ cups grated mozzarella*
Good olive oil, salt flakes and crushed red pepper flakes
Preheat oven to 425o.
Roll or stretch dough into a 12” by 14” rectangle.
Cut in thirds lengthwise, creating three 4 x 14 strips.
Divide the pesto between the three strips and spread evenly. Leave a ¾” edge pesto-free along the far (long side) of each strip.
Cover the pesto area on each strip with prosciutto – about 4 slices per strip. It’s okay to overlap a bit.
Divide the grated mozzarella between the three strips and sprinkle on top of the prosciutto.
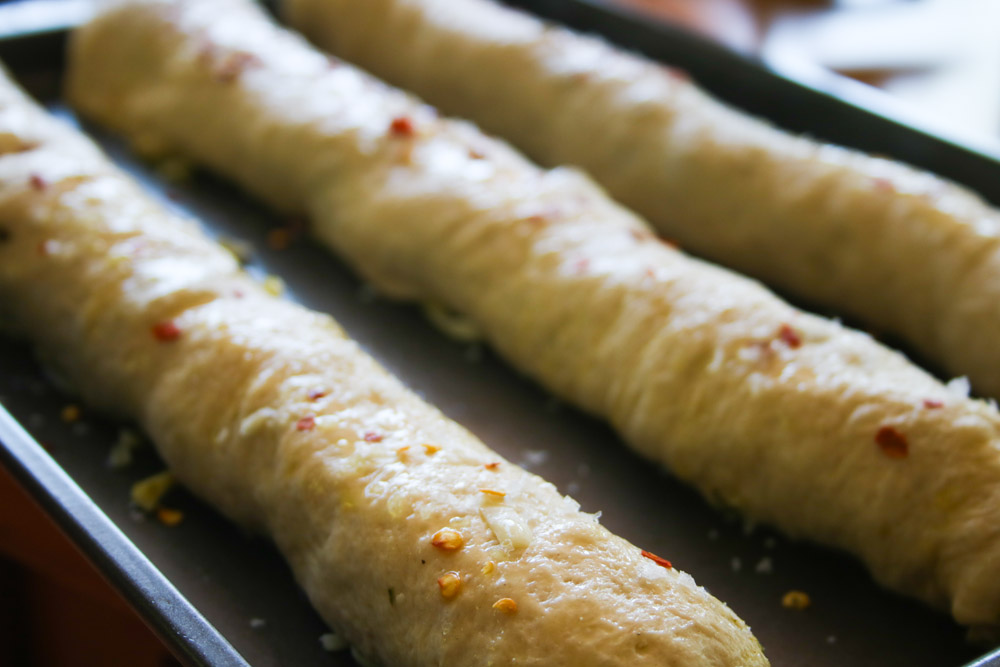
Working with one strip at a time, tightly roll toward the pesto-free zone, creating a 14” long log. Tuck the ends under and place, seam side down, on a baking sheet. Repeat with the other two strips.
Brush the logs with olive oil and sprinkle with salt (I like Maldon Sea Salt Flakes ) and sprinkle with crushed red pepper flakes.
Bake in preheated oven for 10-12 minutes until golden brown, rotating the pan about half way through.
Remove from oven and cool on a wire rack. When cool enough to handle, transfer the logs off the baking sheet onto the wire rack . Let rest 10 minutes all together.
Slice into 12 slices per log. Stand back and relish the high praise.
*When asked on that maiden Ali-Roll voyage, the Ali-Roll Mistress herself instructed me to use “grocery store mozzarella for best melting.” Sure, you could fancy it up with fresh mozz, but you still won’t have leftovers.
Makes 3 dozen PopperPuffs.
This post contains affiliate links. For more of my must-have faves, check out my shop.