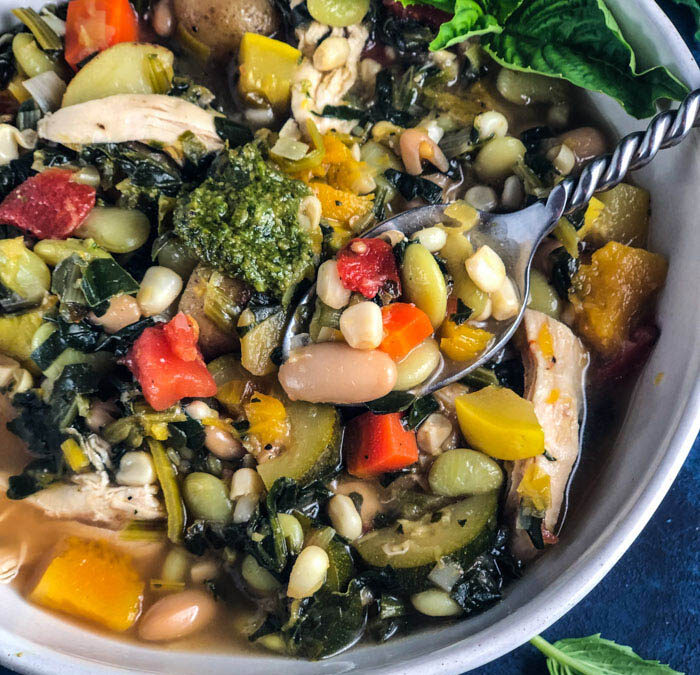
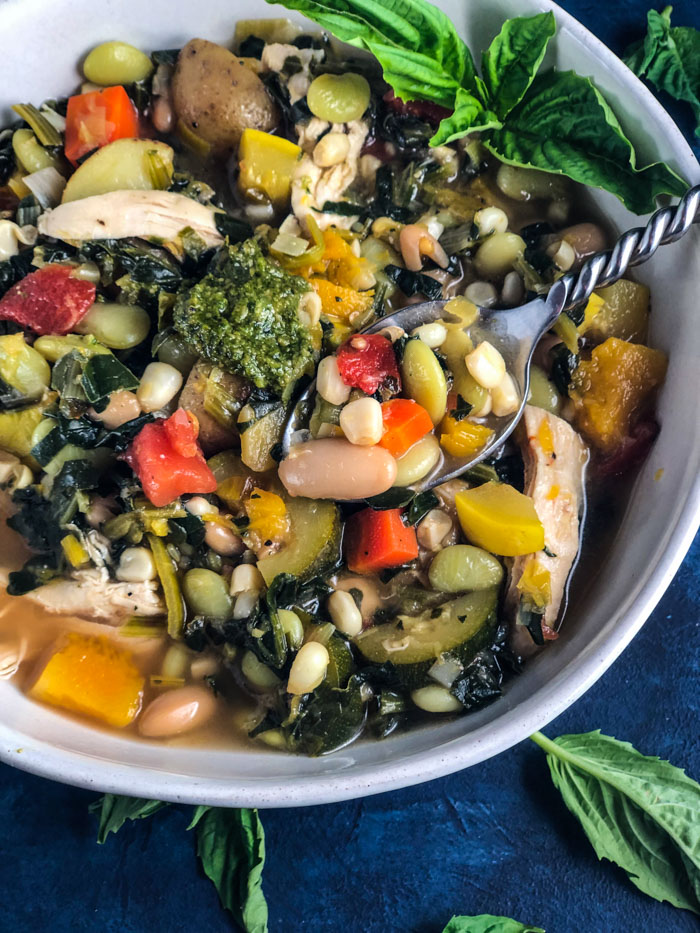
This hearty, healthy vegetable soup will get you through until the farmers’ markets are cranking out peak of the season produce again. A dollop of pesto will brighten the flavors and get you jonesin’ for sweet summer corn and tomatoes.
It probably seems like it’s way past soup season but bear with me. It’s about time that we take a second to think again about food waste and making a difference in the way we take advantage of the bounty of the season. If you have been following me for a while, you know that I am a big fan of taking any produce that you overbought and saving it in the freezer until you can use it. Ziplock it fresh, oven-dry it or sauté it and cover in broth before freezing…all to add to sauces, salads, pastas and soups through out the year. Now that we are looking down the barrel of summer, it’s time to clean the freezer and put all last season’s produce to good use. Healthy vegetable soup to the rescue!
Unfortunately we are still wasting 40% of the products that our hardworking farmers produce every year. Some are deemed too ugly to make it onto our supermarket shelves. Some are past their use by date. I love this campaign by the Ad Council. Best if used. Period. Look closely. $1500. That’s how much a family of four spends on food that goes into the trash every year. How great would that extra cash be?
And landfills filled with rotting food result in higher greenhouse gas emissions than US beef production. All that wasted food AND it is bad for the environment? No bueno!! So think about ways to re-purpose this produce and extend its life.
How to Save Vegetables
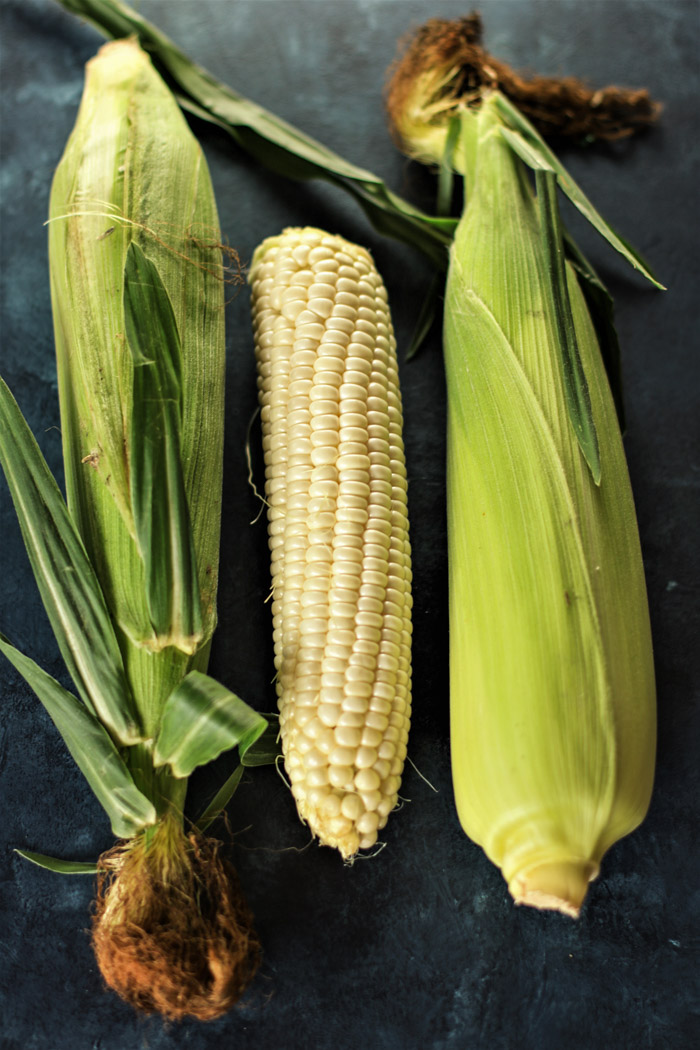
Fresh corn: cut it off the cob and ziplock it to freeze
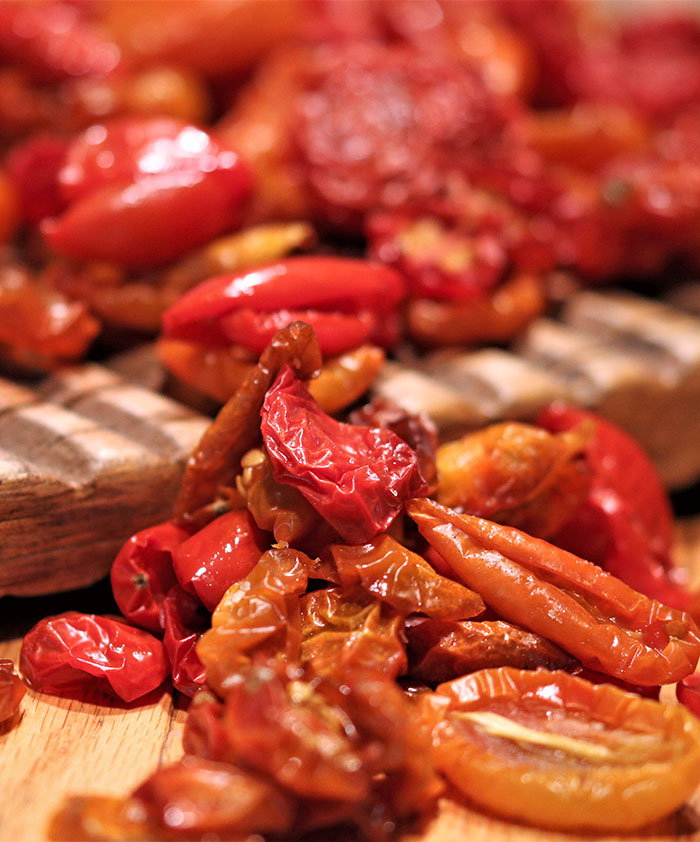
Tomatoes:oven-dry and once cooled, ziplock and freeze
Zucchini, peppers: sauté and cover with broth, then freeze to add to soups and stews
Leafy greens: steam and squeeze out the excess liquid, then ziplock and freeze
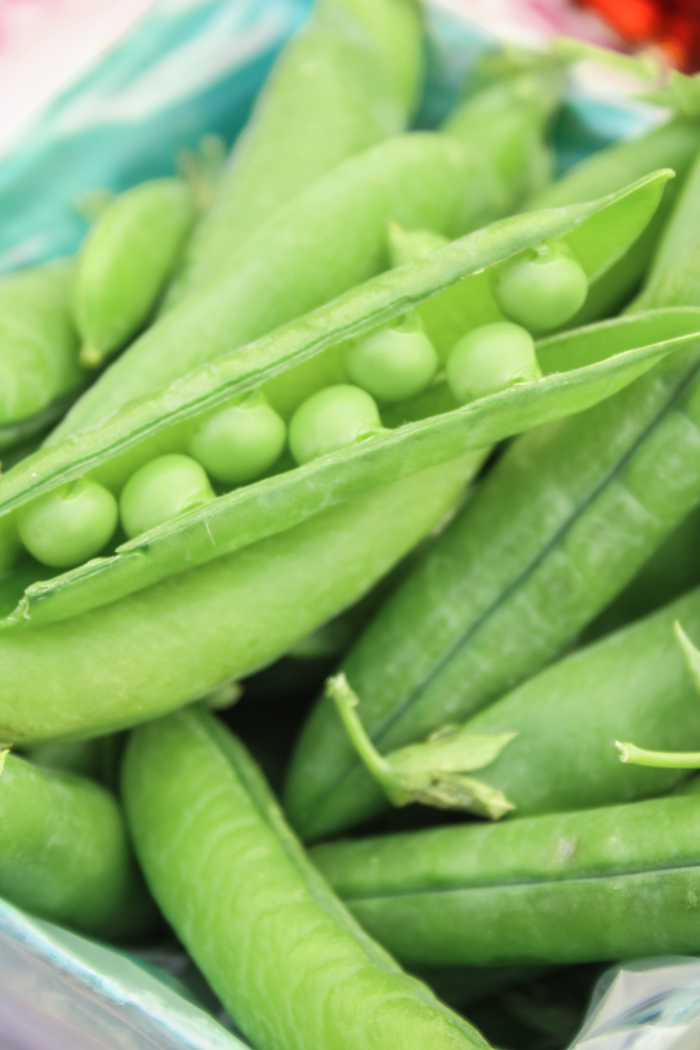
Peas: shell and ziplock raw and freeze
Winter squashes: peel, seed and cube, then ziplock and freeze
Here are some of the things coming your way soon, so start thinking about it now. Of course, try to buy the right amount, but don’t throw out your excess. Respect the food and preserve it. Or if you are like me and know the corn will never be better, do buy extra and save it for the long, cold winter.
Sweet corn and sweet peas.
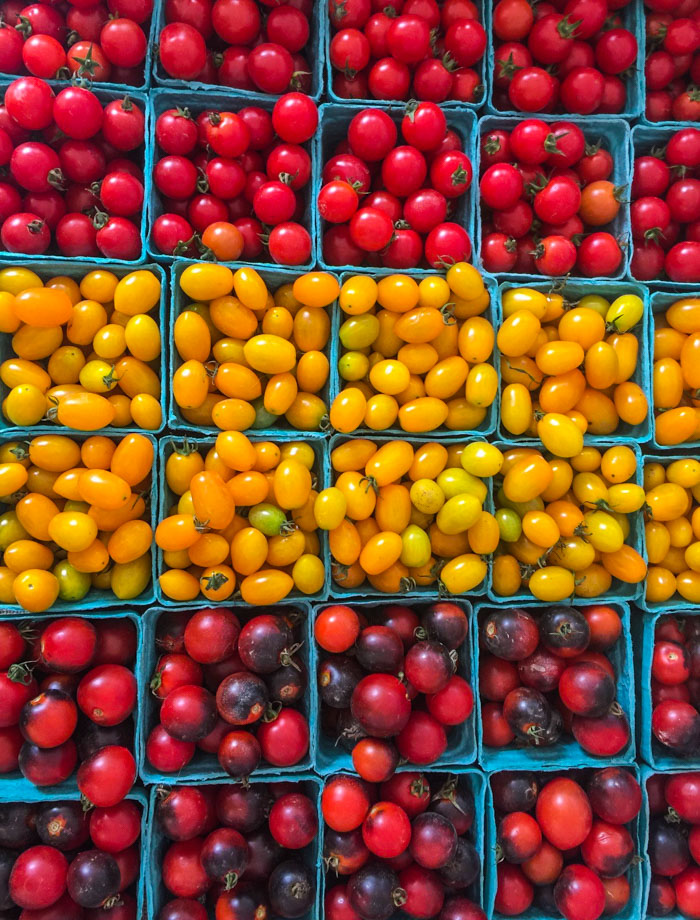
Heirloom cherry tomatoes definitely worthy of oven-drying to preserve for winter.
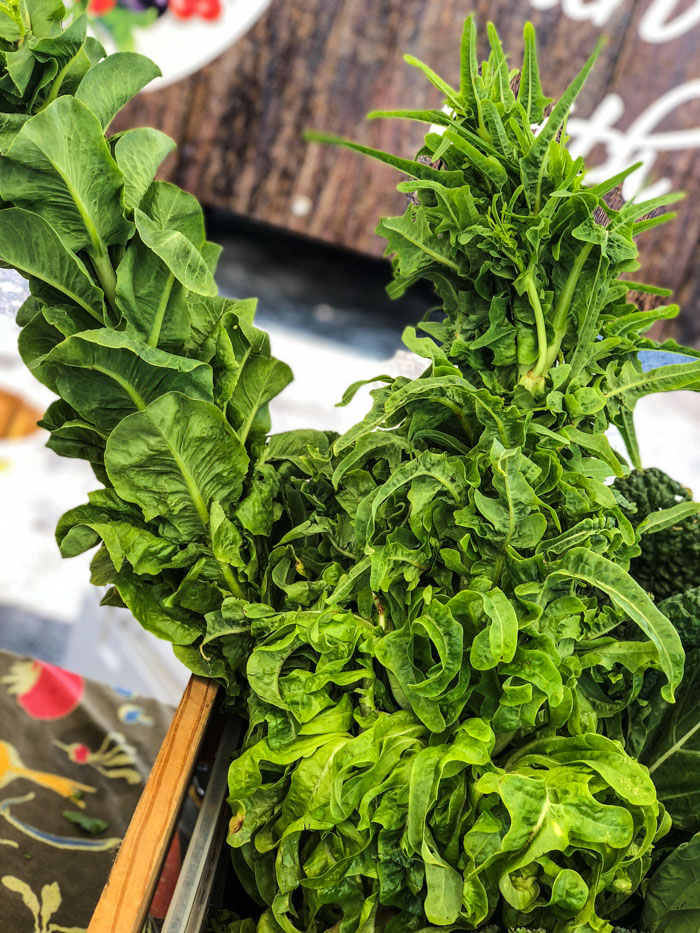
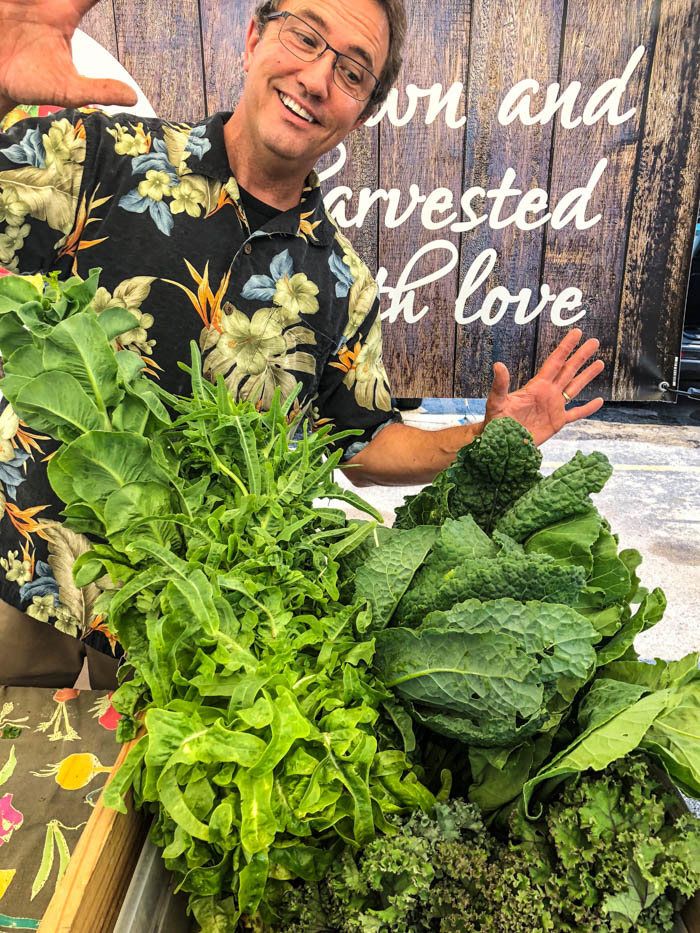
If you think this Kale is Krazy, wait until you see the farmer.
Told ya!
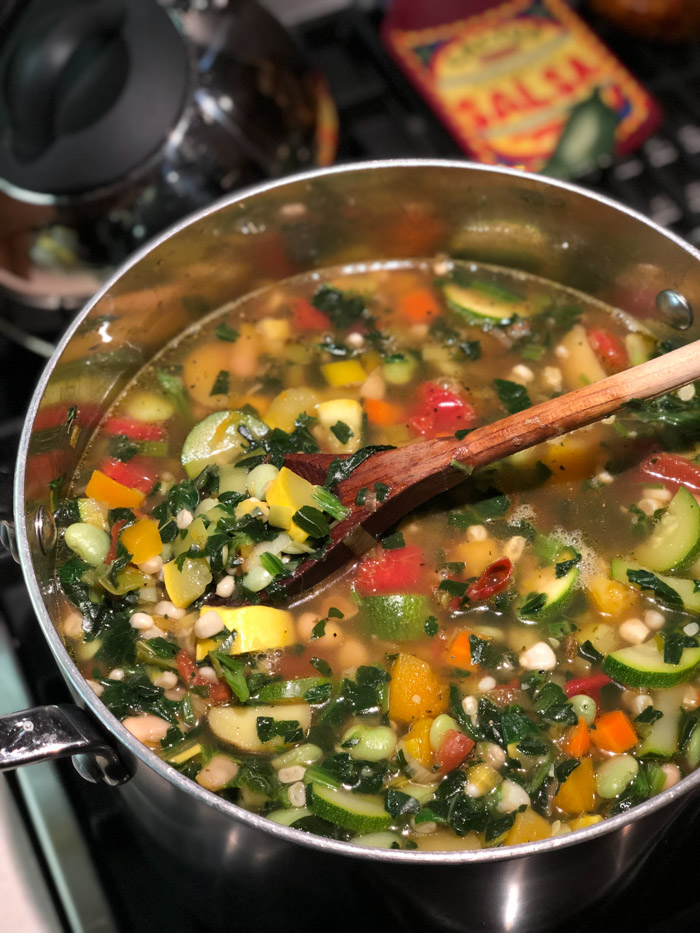
Best Ever Healthy Vegetable Soup
This soup takes advantage of many things I had in my freezer. I just made a big batch this weekend. I will put a few quarts away in the freezer for upcoming long days, but much I will eat this week. Saturday I start eating like a Syrian refugee as part of the Ration Challenge. More on that in the next post, but suffice it to say I am in a full-on panic about no fresh veggies for a week. Whole lotta rice and beans, with a sardine here and there.
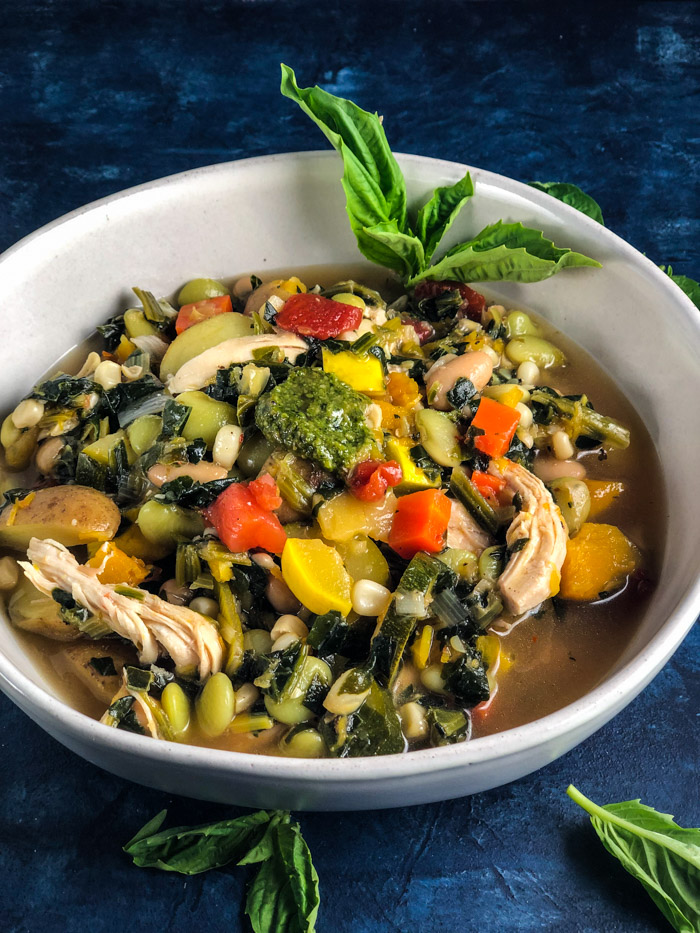
You can customize this yummy, healthy vegetable soup to your own palate, but I found corn, butternut squash, edamame, and spinach all in the freezer. The canned cannellini and diced tomatoes I had in the pantry. And the remaining ingredients consisted of only a few fresh vegetables – leeks, zucchini, summer squash, and potatoes. In fact, this soup started as a leek and potato soup and then became a runaway vegetable extravaganza! You could even go so far as to add some chicken – either leftover roasted, poached or a rotiserrie chicken – to add a little lean protein.
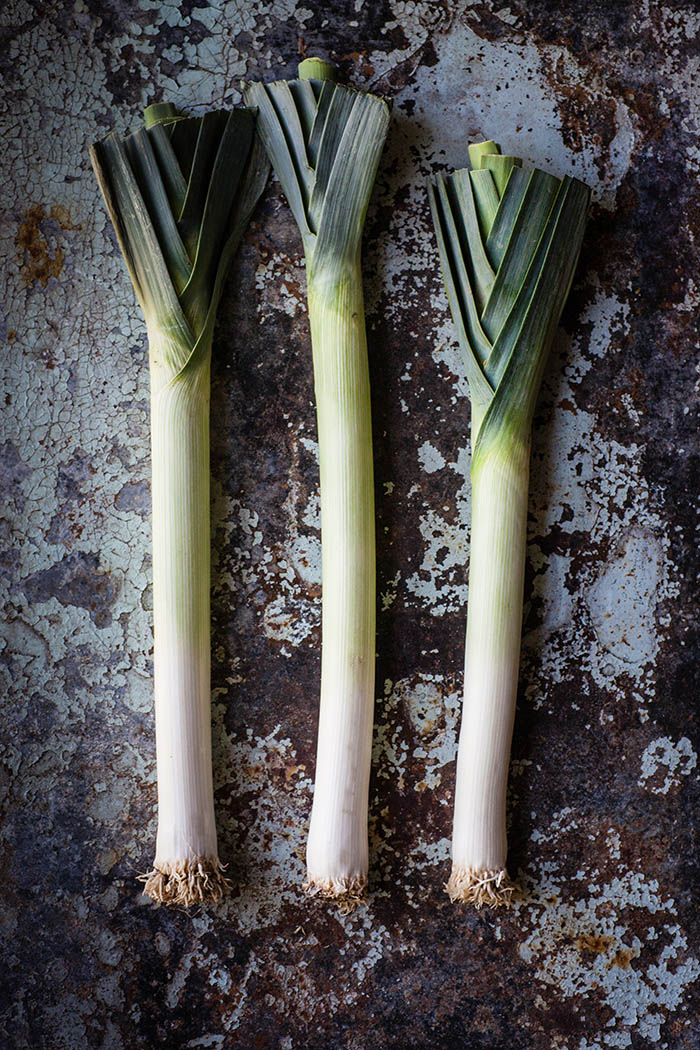
Photo credit: Heather Gill for Unsplash
How to Clean a Leek
Sidebar note on cooking with leeks: LOVE THEM!!! They always seem to be available because they scare people and they get left behind. They add all the depth of flavor of an onion, with none of the bite. And they are really easy to use. However, they retain a lot of dirt, so they need a thorough wash first. Trim off the woody dark green leaves at the top (and save them for a stock pot), but leave the hairy root end intact for now. Once the top is trimmed, slice lengthwise down toward the root (without cutting through), first in half, then in quarters, using two long cuts. Now holding onto the root end, run it under cold water, fanning it out to remove all the grit. It’s a bit like a brush with long bristles. Shake, shake, shake. Once thoroughly cleaned, towel off excess water and cut crosswise in desired slices. Discard the root end when you get there. Some prefer to slice and then clean and here is a quick video on that.
I finish it off with a dollop of pesto – homemade or store-bought. That is how I finished it off on our spring vegetable soup with pistou on the very first menu at New World Grill. The vegetables were very precisely and finely minced. That’s a far cry from the hearty chunky way I cook today. Gone are the tedious and tiny tidbits. Welcome, chunky and hearty veg.
What Vegetables are best?
While I am tempted to say you can’t go wrong, I can actually think of a couple that I might pass on. I love all vegetables that keep their shape and color. With this being a relatively quick cooking time, that would include most. Eggplant probably deserves a pass. It can get bitter and breaks down to a seedy, gummy mess. And I would avoid certain mushrooms that will absorb too much liquid and get squeaky. Know what I mean? Like a portabello. Tiny enoki might be nice in here though. In general, I prefer mushrooms in a more dry sauté dish or when pureed. Lastly, beets are going to bleed and will overly flavor the broth. But you do you, I’ll do me. Give it a whirl and see how you like it.
A Note on Prep Time Listed
In spite of 3 decades of foodstyling for television, where every ingredient is in its ramekin for a dump and stir demo, and despite 15 years as a chef/restaurateur, where all mise en place (prepped ingredients) are ready in the reach-in for cooking during service, I do not cook that way at home, nor should you. It takes a lot more time to get everything ready for dump and stir. I’m not saying you shouldn’t pull all your ingredients together in advance. However, if an onion is going to cook until golden for 12 minutes, I don’t chop the next ingredients until I get that on the burner cooking. I prep as I go. Multi-task anyone? The prep time I give in a recipe is just the minimal prep time required in order to start cooking. Once cooking commences, I start the count-up clock to track how long it takes to finish the recipe. There will be some prep during the cooking time. You may note that the ingredient list calls for the items to be already prepped (e.g., 1 cup diced zucchini). I have detailed it this way simply to space-save on a recipe printout. Don’t think you need to get it all done before you start. The more you know 🙂
This hearty, healthy vegetable soup will get you through until the farmers’ markets are cranking out peak of the season produce again. A dollop of pesto will brighten the flavors and get you jonesin’ for sweet summer corn and tomatoes.
Ingredients
Scale
3 Tablespoons olive oil, divided per below
2 leeks, cleaned and sliced
3/4 pounds mini potatoes, such as Boomer Gold, cut in half or quarters depending on size
2 medium carrots, peeled and diced
1 pounded winter squash, such as butternut or acorn, peeled and diced
2 32-ounce chicken or vegetable stock
1 medium zucchini, trimmed and diced
1 medium yellow squash, trimmed and diced
1 15.5-ounce can cannelini beans, rinsed and drained
1 14.5-ounce can diced tomatoes
1 pound shelled edamame, lima beans, or peas
1 pound frozen, chopped spinach
1 pound sweet corn
1 teaspoon pink Himalayan salt
1/2 teaspoon freshly ground black pepper
1/2 teaspoon red pepper flakes
Optional Garnish: Dollop with pesto
Instructions
In an 8-quart stock pot, heat two Tablespoons olive oil over high heat. Add the leeks and cook until wilted and starting to brown, about 5 minutes. Push to the side and add the remaining Tablespoon of olive oil. Add the potatoes and cook for 5 minutes. Stir potatoes and leeks to combine.
Add the carrots and winter squash. Stir to combine.
Add about one cup of the stock, to deglaze the pan, scraping up the brown bits. Add the zucchini and yellow squash and remaining stock. Bring to a simmer and reduce the heat. Simmer for 30 minutes. Check the doneness, especially for potatoes and squash.
Add the cannellini beans, tomatoes, edamame (or lima or peas), spinach and corn. Simmer for 10 minutes.
Season with salt, pepper and red pepper flakes. Adjust seasonings to taste.
Top with a dollop of pesto (recipes linked below).
Notes
Optional: add 1 pound cooked chopped chicken, about 2 cups. Yield will be higher, if chicken is added.
If any of the vegetables you are using are commercially frozen, check to see if they are par-cooked. If so, you may want to add them toward the end with the quick cooking ingredients like corn and spinach.
If freezing, I like to wait to add seasoning until later when I serve it. I also find I may need to add a bit more stock if it’s been frozen.
Prep time in the recipe includes only the time needed to get cooking. You can continue prepping while the first step is cooking. While total time accurately reflects the total time required, the prep time is the shortest time til you fire up the stove, not the time required to prep all ingredients to their ready-to-use state.
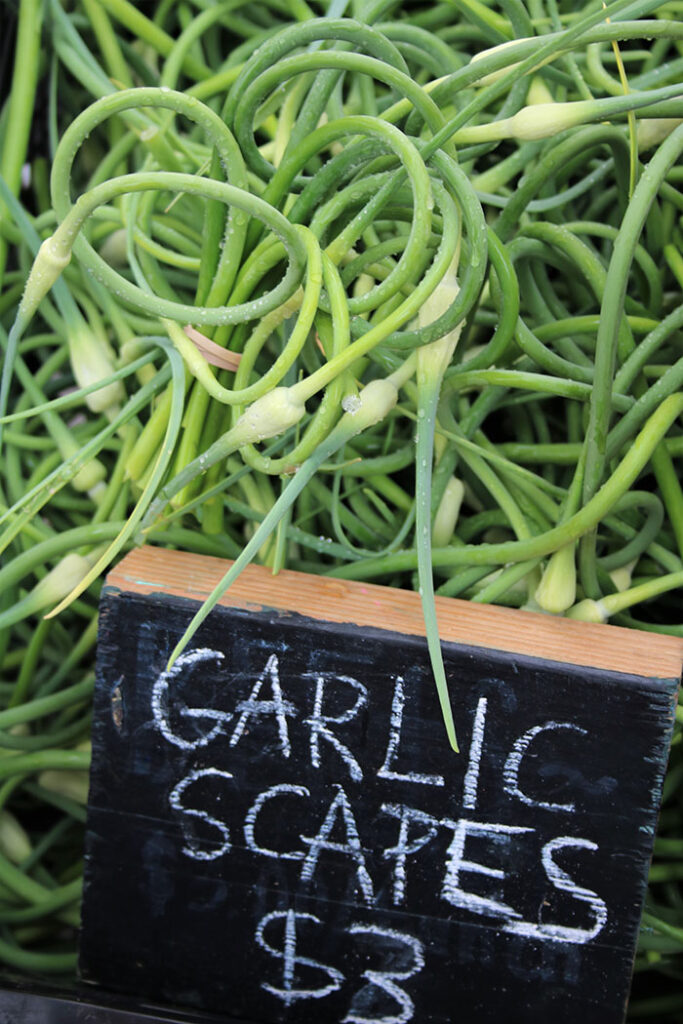
Finally! Ermahgerd!!!! Did you think that winter would ever end?? I for one did not. Today in NYC it was 90 and stickeeeeeeeeeeeeeeeeeeeee! But that means not only are the farmers’ markets in full spring swing, they are pushing out the bounty that Mother Earth shares this time of year. Garlic scapes! Remember them? I am scooping them up to dose plain ole pesto with these fresh shoots and flowering stems of the garlic bulb, while also jam-packing the processor with not only basil, but also arugula and parsley. Arugula and Garlic Scape Pesto! Oh yeah!!
Those growing garlic will be familiar with this curlicue that shoots up from the buried bulb. I’m sending out this scape pesto recipe now because my readers are scattered across the globe, and it is found from May through July, depending on where you are. It usually starts shooting up about a month after the bulb’s first leaves, and many will cut it back and compost to stop diverting energy so the bulb itself can fatten up. Resist! Just say no! Cut back, but don’t compost. There are many things you can do with these stems, from chopping and adding to a potato salad, to making sauces like this scape pesto, to making those cute bundles below. They can be eaten raw, blanched, roasted or grilled. For a deep dive on all things you can do with these divine shoots, check out (and follow) Suzie Durigon at Just Crumbs. She has a wonderful post on everything you always wanted to know about scapes.
Try to find a farmer that will sell you a big bag. They last a month or so in a plastic bag in the fridge, and buying them by the piece can get pricey. I have seen them for a quarter each, but I shop at the end of the day and dazzle farmers with my true appreciation for this shoot. I can usually make off with a 2-gallon ziplock filled for just $10. As long as you are successful in your hunt, why don’t you whip up a batch of Roasted Garlic Scapes? You won’t be sorry. They have that I-want-more-ish quality like salted edamame, with a big dose of robust flavor. Plus they are easy-peasy and are a bit of a show stopper.
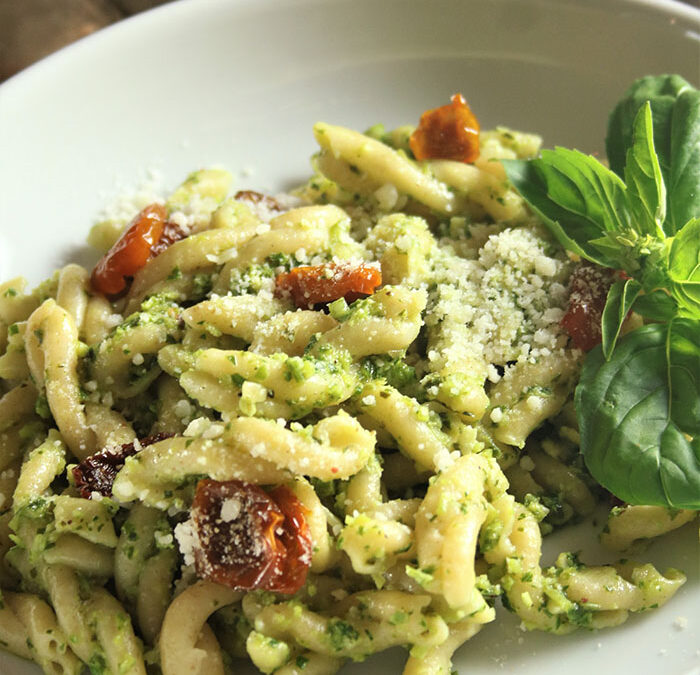
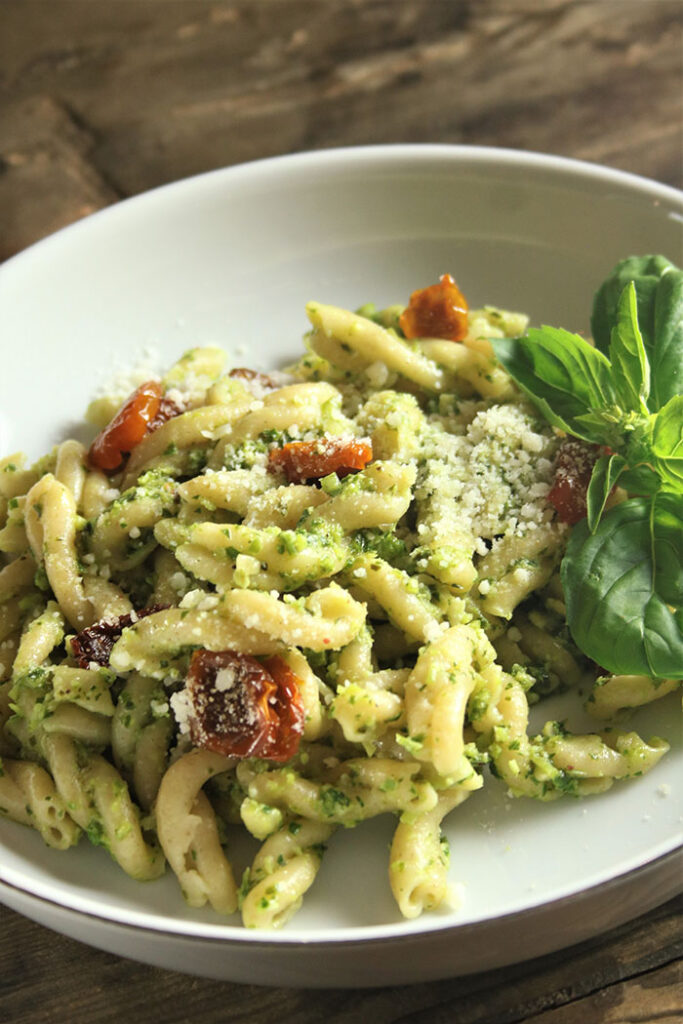
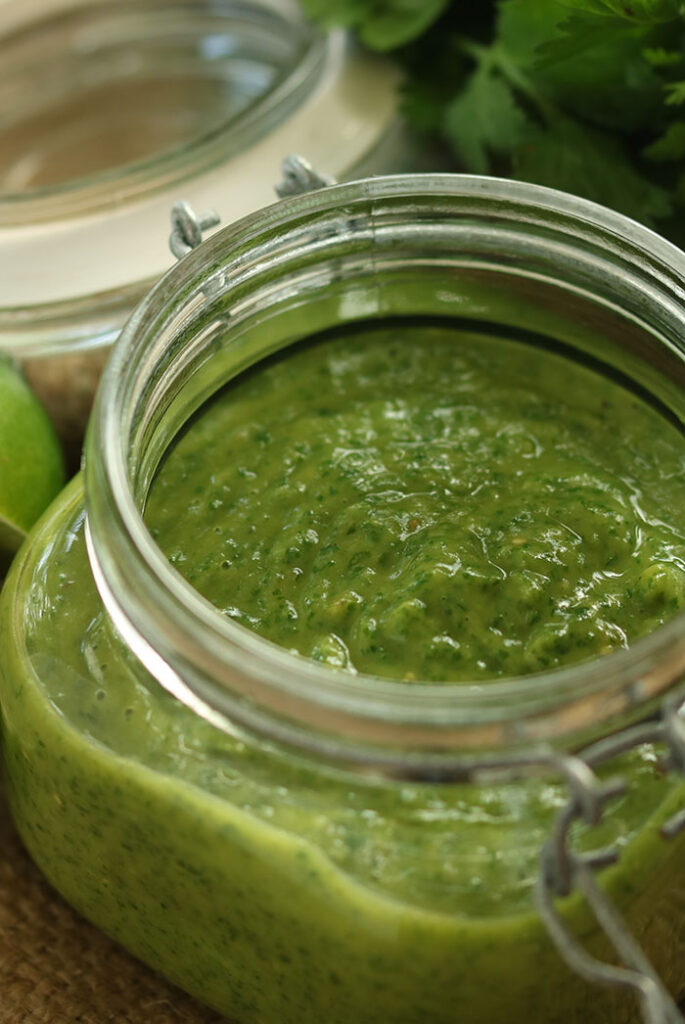
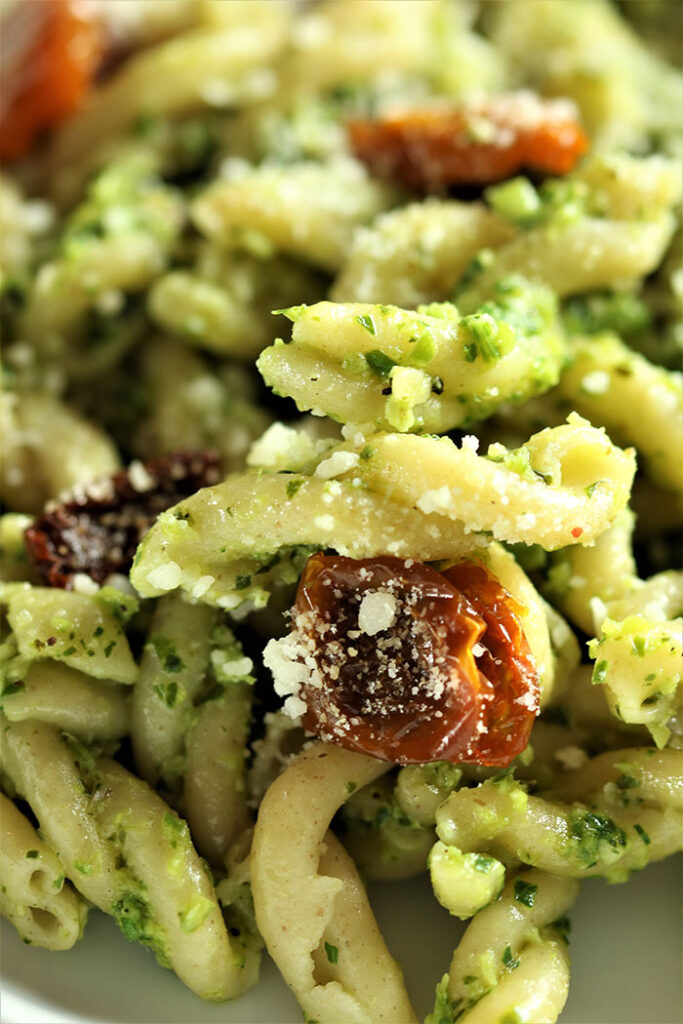
Arugula & Scape Pesto
The ingredients, ratios and directions are detailed below, but rest easy that this is a 5 minute processor recipe. The scapes, arugula, parsley, and basil give it a jewel-like green color and the Parmesan and sunflower seeds (so much cheaper and flavorful than pine nuts) give it some body. I am serving it here atop a fresh gemelli (did you know that is Italian for twins, as the pasta is doubled over and twisted together?) and oven-dried tomatoes. The tomatoes are from the freezer and were dried at the end of last season when they were at their peak. I linked the recipe below so you can keep it in mind for later this year. You could also add some of the other spring veggies, like peas or asparagus tossed in at the end of the pasta’s cooking, or even some sauteed morels or other spring mushrooms. This flavorful pesto is not limited to pasta: drizzle it on a Caprese, marinate vegetables for the grill, or spoon it on a grilled steak or chicken breast. It’s so universal you can also slather it on a panini.
Swapping out more mature bulb garlic with just-in-season garlic shoots, while supplementing the basil with arugula and parsley, gives this scape pesto a bright and spring-like freshness that is great on anything from pasta to grilled fare to tomatoes and fresh mozzarella.
Ingredients
Scale
10 – 12 garlic scapes, trimmed and sliced crosswise
1 cup tightly packed basil
1/2 cup tightly packed Italian parsley
1/2 cup tightly packed arugula
1/2 cup grated Parmesan cheese
1/4 cup raw sunflower seeds
Juice of one lemon
1 teaspoon salt
1/2 teaspoon ground black pepper
3/4 cup extra virgin olive oil
Instructions
Place the scape, basil, parsley and arugula in the work bowl of a food processor and pulse 8 – 10 times until coarsely chopped.
Add the remaining ingredients, except the olive oil, and pulse again to combine. With the motor running, add the olive oil in a thin stream until combined and desired texture is reached, scraping down the side of the workbowl as necessary.
Store in the refrigerator in an airtight container.
Notes
The salt in this recipe is based on using it with pasta. If you plan to use it in a non-carby way like a fresh mozzarella drizzle, then you may want to cut back on the salt.
Serving suggestion:
Serve on pasta – hot or cold; top a tomato and fresh mozzarella Caprese; spoon onto grilled chicken, steaks, fish or vegetables; or slather on a sammy.
Prep Time:5 minutes
Category:Sauce
Method:Blender/Processor
Cuisine:Italian
When you give this spring arugula and scape pesto a whirl, tag me on Instagram and as always, I LOVE to see your comments below.
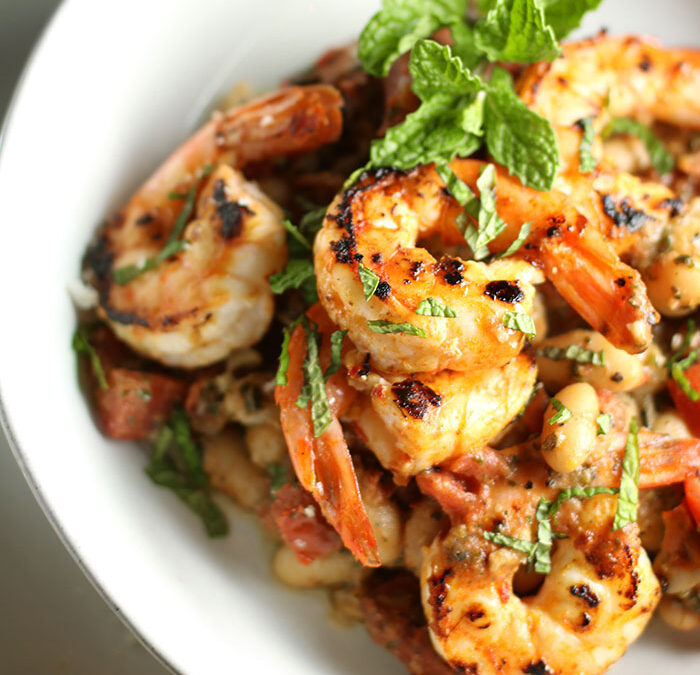
Winter Winds into Spring? Is that winds like a pathway or winds like gale-force nor’easter…AGAIN? It’s the first day of spring and NYC is getting hit with the fourth nor’easter in three weeks. This one is coming with perhaps 16″ of snow. My stomach says “winter be gone”. But the howling winds outside say “in due time.” So let’s agree to disagree. This shrimp & white bean dish with a flavor-packed pesto is a compromise. We CAN all get along. The beans and tomatoes cooked down to a hearty stew, but the pesto is tricked out with mint and parsley. I see you, spring.
Upgrade the Pesto
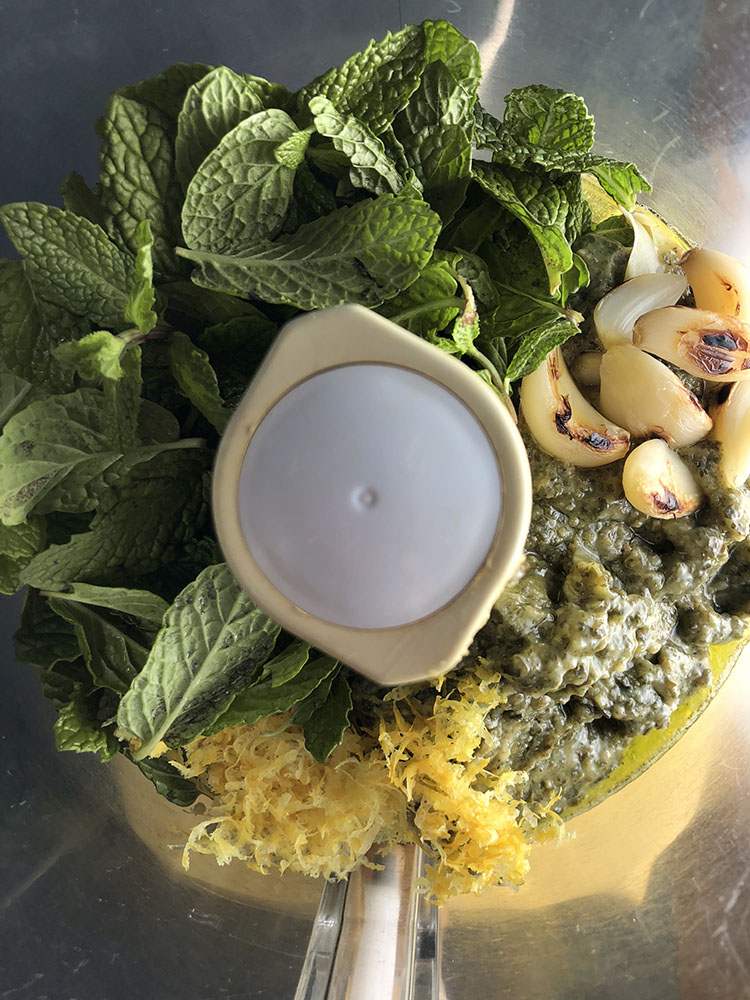
I know how you roll and I got you covered. Shortcut cooking. And before I digress on why I am not a fan of the term “hack”, let’s just acknowledge that shortcuts are what the pros do. Know when you can use a convenience product, like store-bought pesto, and when you need to put on the apron. I am right there with you on not re-inventing the wheel when it comes to already made products. But let’s face it, the pesto can be a little one-note samba-ish. No real depth of flavor. So with only about ten minutes of pan roasting garlic, while picking mint and parsley off the stem, and zesting a lemon, we can add real layered flavor and bring some zip to this dish.
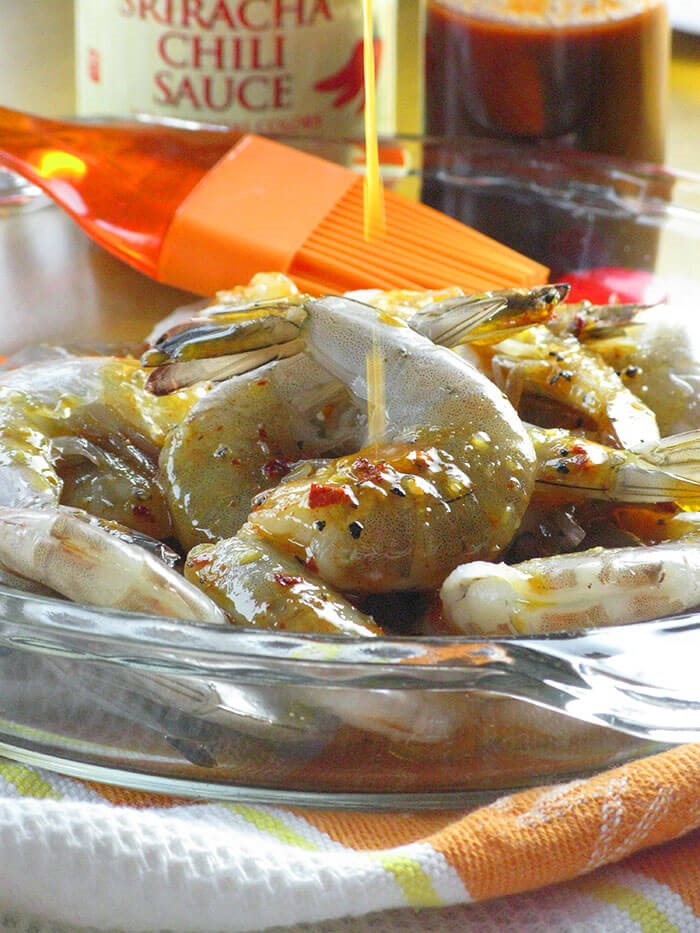
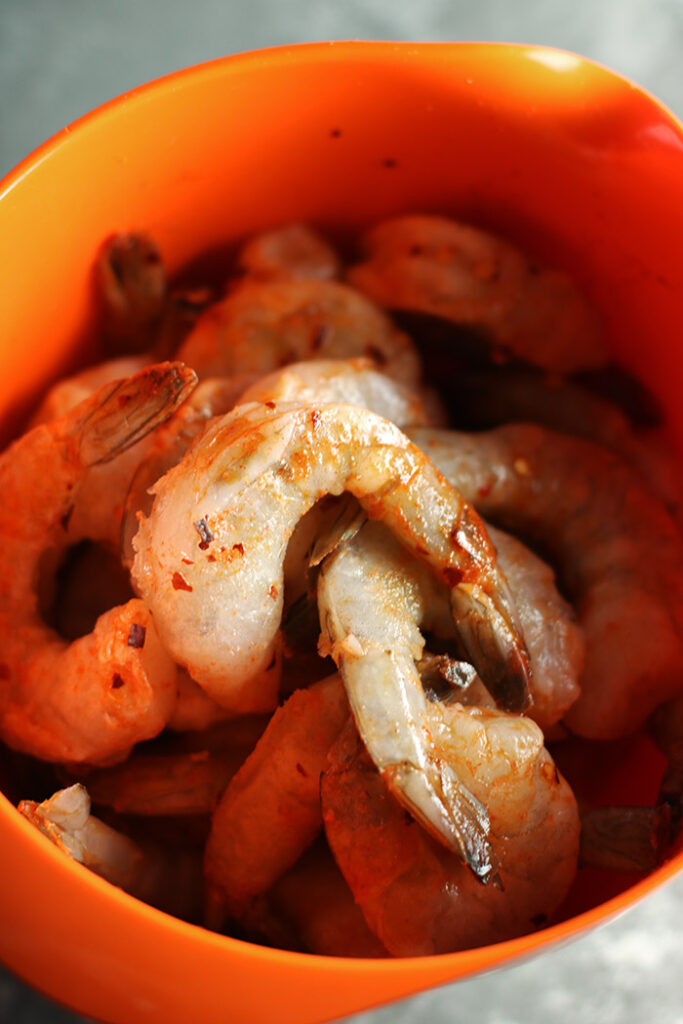
Kick Up the Shrimp
The spice in the shrimp is just enough to make you notice and pay attention. Hellllllo, shrimp. Welcome. You need to give it at least a little kick to soar above the tomatoes and beans which can be bland left to their own devices. It’s all about building the flavors. This only needs a 15 minute marinade while you move on with the rest, then a quick sauté of two minutes per side and you are done.
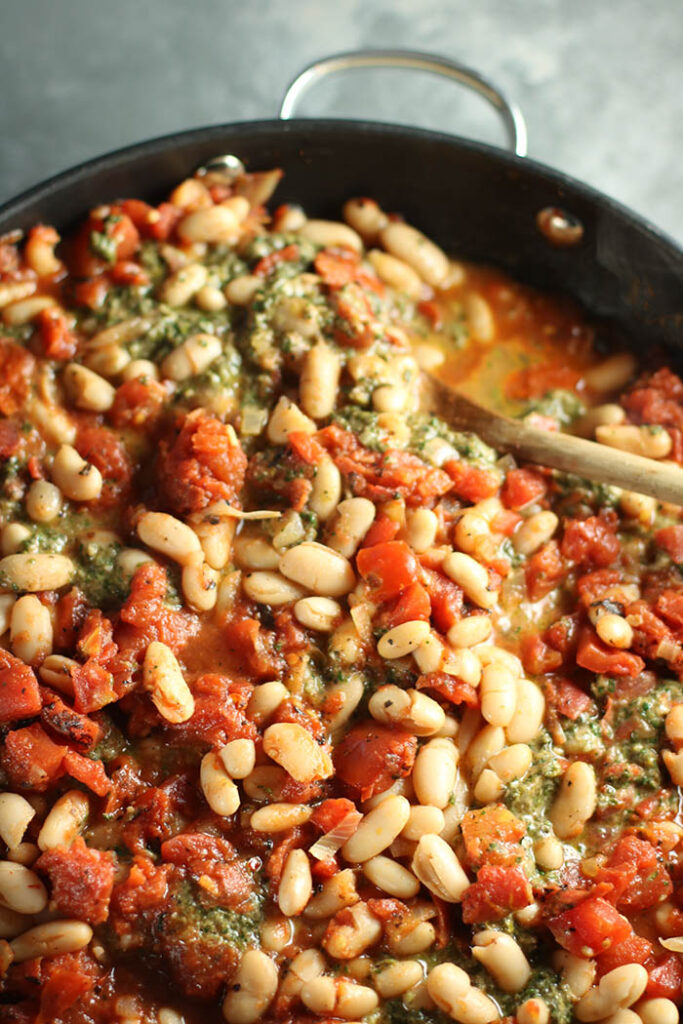
Prepare the Beans
Nothing goes better together than shrimp & white beans. And nothing makes me happier than opening up cans and dumping into a pan. Okay, okay, it’s best to rinse the white beans, but come on!! I practically pioneered the dump & stir technique and I bring it to you on the reg. Throw the remaining ingredients in a large sauté pan and let ‘er rip. You’ll want to add the pesto last to maintain some green. Show of hands: how many knew that cannellini beans are white kidneys?
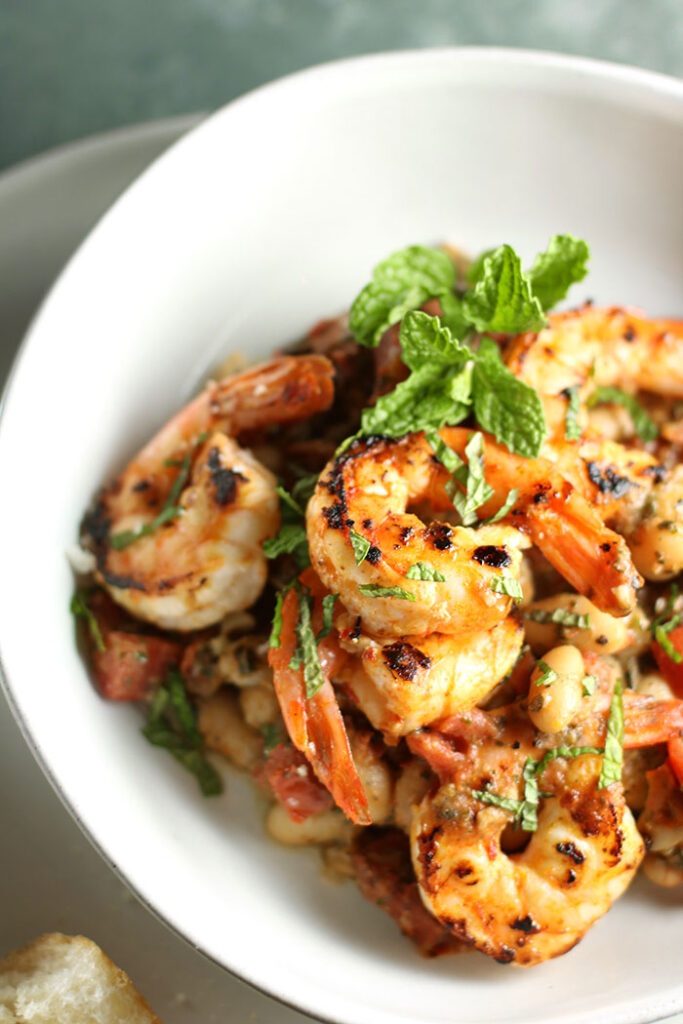
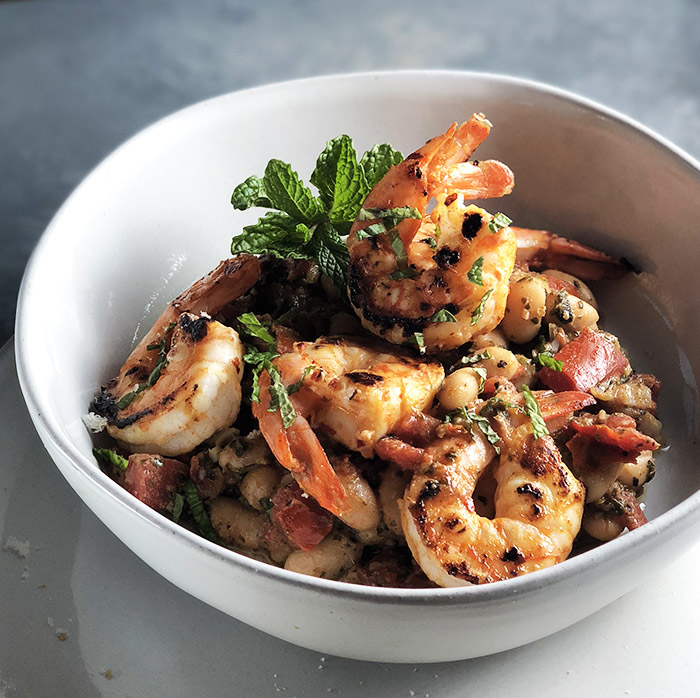
Garlic, shallots, lemon, mint plus shrimp & white beans and tomatoes. What’s not to like? Take that pan above and divvy it into bowls, then top with the sautéed shrimp, a sprinkle of fresh mint and a crisp white wine and you are all set. Oh, did I forget? A big crusty loaf of sourdough is mandatory. So many carbs, so little time.
You could really serve shrimp & white beans almost anytime of year, except perhaps the dead of summer (unless cold), but this dish is a polite nod to the arrival of spring. Comfy and cozy, the robust stew of beans and tomatoes, topped with spicy shrimp is lifted up by a pesto that has been doctored with mint and lemon. Yum!
Ingredients
Scale
8 cloves of garlic, not peeled
7 ounces prepared pesto
1 cup tightly packed mint leaves
1 cup tightly packed parsley leaves
Zest of one lemon
3 Tablespoons extra virgin olive oil, divided per below
2 or 3 15.5-ounce cans cannellini beans, rinsed and drained
Garnish with fresh mint, cut into chiffonade (thin strips)
Instructions
Prepare the pesto:
In a large sauté pan over medium-high heat, roast the garlic, stirring from time to time, until the skins have charred evenly, about 8 – 10 minutes. Cool and peel.
Transfer the pesto to a blender or food processor and add the garlic, mint, parsley, and lemon zest. Blend until well-combined.
Marinate the shrimp:
In a mixing bowl, combine two Tablespoons extra virgin olive oil, lemon juice, Sriracha, and 1/2 teaspoon red pepper flakes. Add the shrimp and set aside for 15 minutes.
Prepare the beans:
Add the remaining Tablespoon of olive oil to the large sauté pan. Heat over medium heat and add the shallots, sautéing until soft and lightly golden, about 4 minutes.
Add tomatoes and their juices, salt and remaining 1/2 teaspoon red pepper flakes. Bring to a simmer, cooking until liquid is reduced and slightly thickened, about 5 minutes. Add beans and pesto and warm through, about 5 minutes. Remove from heat and keep warm.
Cook the shrimp:
In another sauté pan, cook the shrimp over medium-high heat until cooked through, about 2 minutes per side, being careful not to overcrowd the pan. You may need to do this in batches.
Serve:
Divide the bean-tomato mixture among 6 bowls. Top with the shrimp and garnish with fresh mint.
Notes
Shrimp is sold in one-pound bags, by size. A one-pound bag marked 16 – 20 contains between 16 and 20 shrimp. The higher the number, the smaller the shrimp.
This can easily stretch to 8 servings with the addition of the third cans of beans and of tomatoes, especially if you are using the smaller size shrimp (and therefore have more per pound).
Makes great leftovers, but you may want to add a little liquid if the beans have soaked it all up. Broth, tomato juice, white wine, or even a little water. Whatever you have on hand will work.
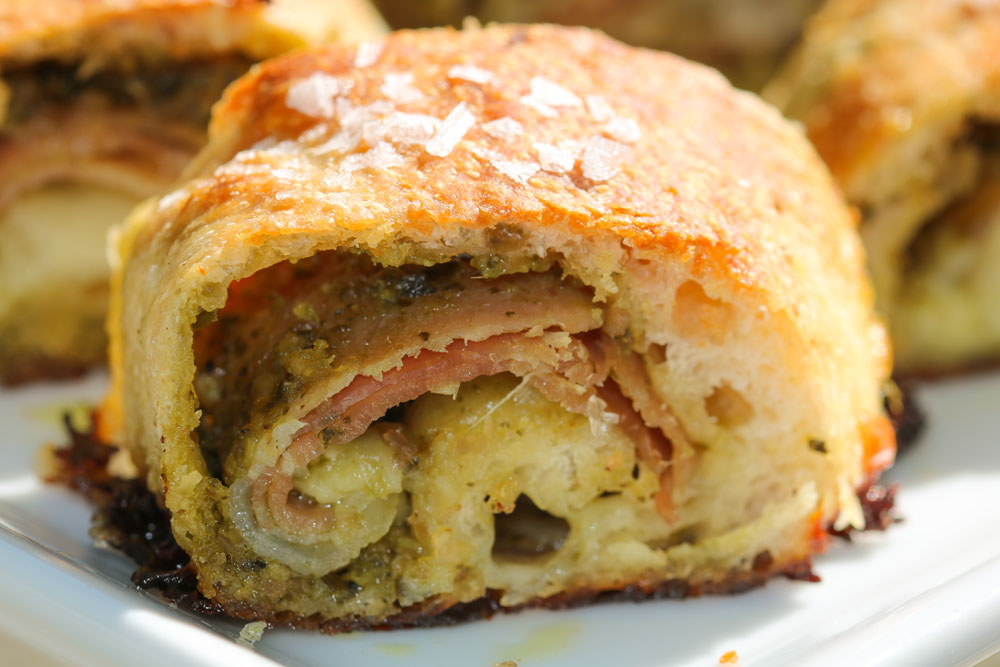
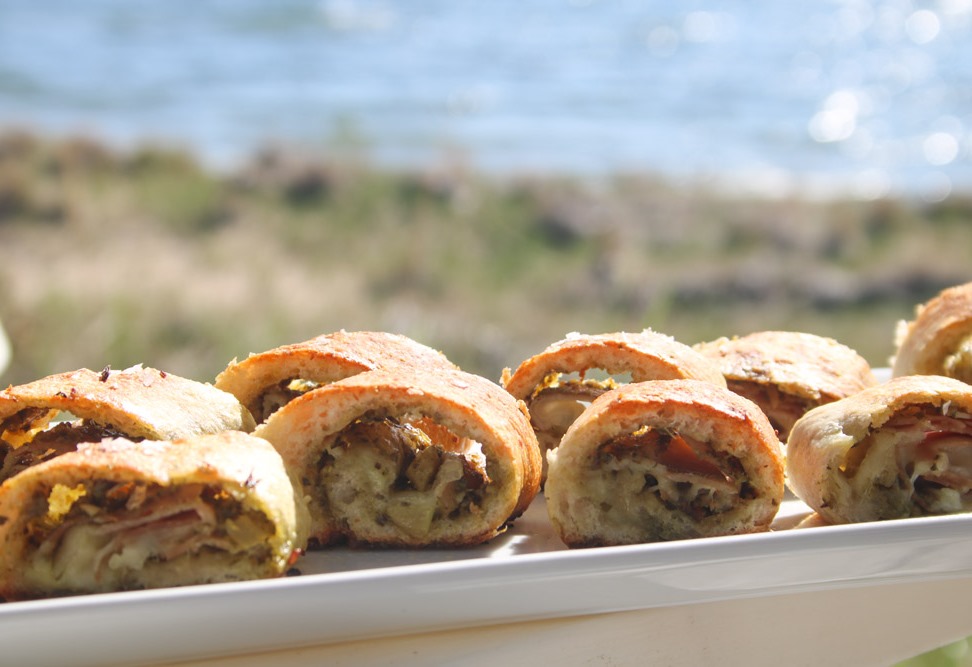
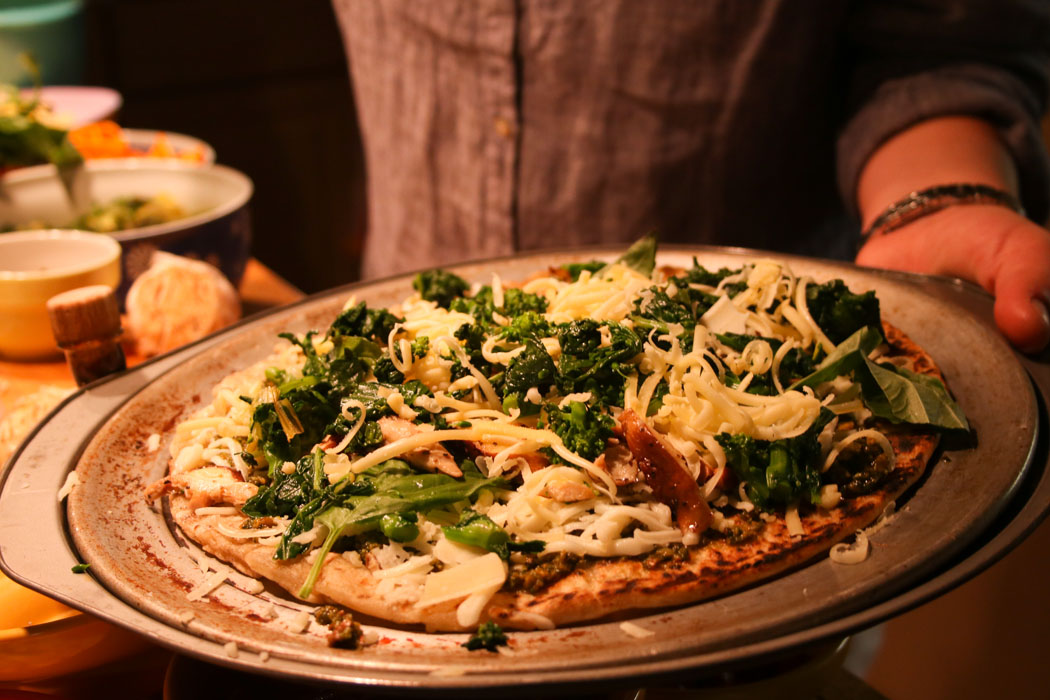
Prosciutto Pesto Puffs!! Prosciutto Pesto Poppers?? Puffs or Poppers? Mmmmmm, I can kind of go either way. In support of Puffs, these tasty little morsels are light and puffy. But, don’t discount Poppers; the journey from cutting board to platter is anything but guaranteed – see Open Wide above. I say you get 3 dozen pieces, but do you??? What if you don’t? Who will know? Most importantly, this quick and easy app includes the four food groups (remember those?) – cheese and dough, pesto and pig. Riiiiiiiiight?? I know I had you at cheese and dough.
Who among you doesn’t have some version of those four things in-house at all times? Don’t make me come over there! I know by now I have cultivated at least some level of pantry-responsibility in you. Personally I am still working through pizza dough from last month’s Pizzapalooza/Bring Your Own Pizza Toppings pot lucky. I was so uber prepped that I ended up with another half dozen crusts in the freezer. But this dish disappears so quickly you can short cut my Trader Joe’s dough short cut and just grab the poppin’ fresh variety. It would be a crime against your calendar to make dough for this from scratch.
And pesto…I’m just about at the end of the stash of Pistachio Lemon Pesto I put away last fall. But for this I used an arugula pepita pesto –Y.U.M. – that was a contribution to the pizza party. Any combo of greens and nuts or seeds will work. Just follow the basic proportions in this recipe. The sassier the better. And, of course, you will get more depth of flavor if you toast the nuts or seeds first. But if you are short-changed on time, supermarket pesto ain’t half bad. We’re on the clock, people! We got PopperPuffs to make.
Then there’s the pig – let’s just go straight for prosciutto and stop there. But of course you could use salami, ham, anything that is cooked or cured. Raw bacon would be a mess. Smoked turkey would be a delish sub, or roasted peppers and thoroughly drained spinach if you are vegetarian.
Vegans however need not apply. This PopperPuff screams for cheese. I met and love-@first-sight’d this dish about 8 years ago when my then 14-year old neighbor Allison whipped up a larger version, stromboli-like, and appeared for a boat ride with a hamper-full. All the adults were stunned. What? Is? This? Cheesy? Goodness? It’s possible I broke a bicep shoveling in the gooey slices. Ever since, we have called this (or any interpretation of) the Ali Roll.
It recently occurred to me it was a tad bit – don’t judge me on what I am about to say – too gooey. I know. I know. But more because the center stays a bit dough-y than that there is too much cheese. Heaven forbid! So for a Memorial Day app exchange – which had nothing to do with technology – I decided to whittle this down to bite-size, and the results were a crowd-pleaser. The pieces were also less daunting than a slice 4+ inches wide which is considered bite-size in fewer and fewer circles these days.
Feel free to swap out all the fillings. This dish is pretty indestructible. I haven’t tried it but am fairly certain you could make the logs and freeze them, then bake frozen. Or you could bake it off, slice and freeze in an airtight container. These are good warm-from-the-oven or at room temperature.
While not gourmet per se, this is squarely in the category my friend Cindy calls “People Love It”.
Enjoy!
Prosciutto Pesto Puffs
13.8 ounce can of classic pizza dough (or equivalent fresh dough)
2/3 cup pesto
½ pound prosciutto, thinly sliced, (includes a bit extra for snacking)
1 ½ cups grated mozzarella*
Good olive oil, salt flakes and crushed red pepper flakes
Preheat oven to 425o.
Roll or stretch dough into a 12” by 14” rectangle.
Cut in thirds lengthwise, creating three 4 x 14 strips.
Divide the pesto between the three strips and spread evenly. Leave a ¾” edge pesto-free along the far (long side) of each strip.
Cover the pesto area on each strip with prosciutto – about 4 slices per strip. It’s okay to overlap a bit.
Divide the grated mozzarella between the three strips and sprinkle on top of the prosciutto.
Working with one strip at a time, tightly roll toward the pesto-free zone, creating a 14” long log. Tuck the ends under and place, seam side down, on a baking sheet. Repeat with the other two strips.
Brush the logs with olive oil and sprinkle with salt (I like Maldon Sea Salt Flakes ) and sprinkle with crushed red pepper flakes.
Bake in preheated oven for 10-12 minutes until golden brown, rotating the pan about half way through.
Remove from oven and cool on a wire rack. When cool enough to handle, transfer the logs off the baking sheet onto the wire rack . Let rest 10 minutes all together.
Slice into 12 slices per log. Stand back and relish the high praise.
*When asked on that maiden Ali-Roll voyage, the Ali-Roll Mistress herself instructed me to use “grocery store mozzarella for best melting.” Sure, you could fancy it up with fresh mozz, but you still won’t have leftovers.
Makes 3 dozen PopperPuffs.
This post contains affiliate links. For more of my must-have faves, check out my shop.
Bring your own pizza toppings. Pizza Party extraordinaire.
In case you haven’t guessed, these newfangled pot lucks (emphasis on the LUCKY, not the pot) are a big hit. Perhaps the reason typical pot lucks scare me just a wee bit is their origin. Historically, pot lucks date back to the European middle ages when nothing, but nothing, was thrown away. (Maybe we could take a tiny page from that lifestyle – I’m looking at you 40% food waste). Rather, leftovers were thrown into a pot and kept warm kind of indefinitely, available to any unplanned arrivals on short notice. This practice was especially prevalent in taverns and inns in medieval times, so no matter when you arrived, you could be treated to the “luck of the pot.” It’s entirely possible, to me at least, that modern day pot lucks could be of equally suspect food safety, never mind random items. But the Pot Lucky aims to change all that!
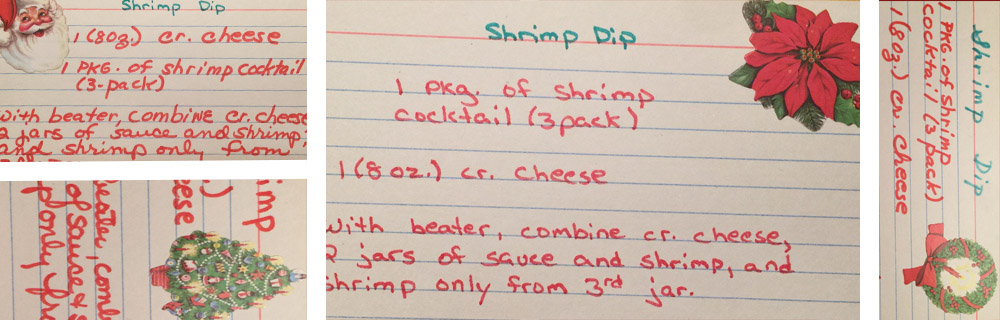
While on the subject of random items, who can forget the famous shrimp dip? My hosts, the charming Bob and Sally Oyler, were no doubt surprised when not only did a guest plop down a somewhat lame-ass (editorial comment mine, certainly not that of the gracious hosts) hors d’oeuvre smack dab in the middle of their fabulous holiday buffet, but said hors d’ was accompanied by kitschy recipe cards to take away. By the end of the party, pretty much every card remained – apparently not a dish that you really need (nor want, for that matter) a recipe for. And now, for more than 35 years, they have appeared in my mail, tucked inside Christmas cards from Sally, their daughter Barb, and most recently hand-delivered by a grandson, something of a recipe card mule, given he had no idea what was in the envelope he bore. I have gotten the last card from Sally, but trust, hope they will keep coming. Anybody want that recipe? I might have a few to share.
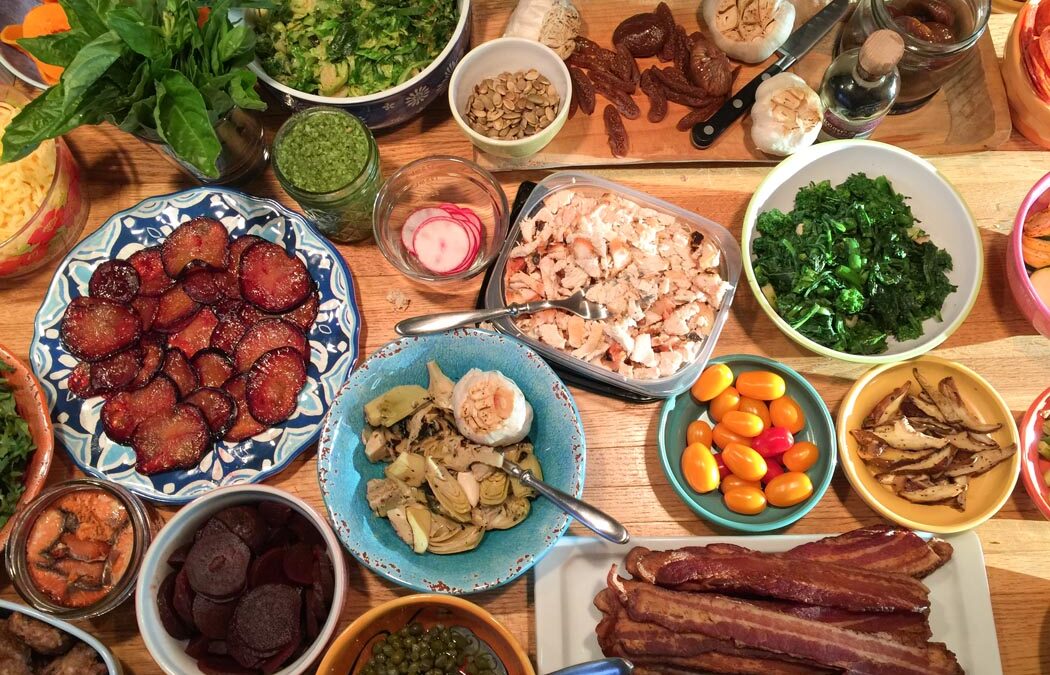
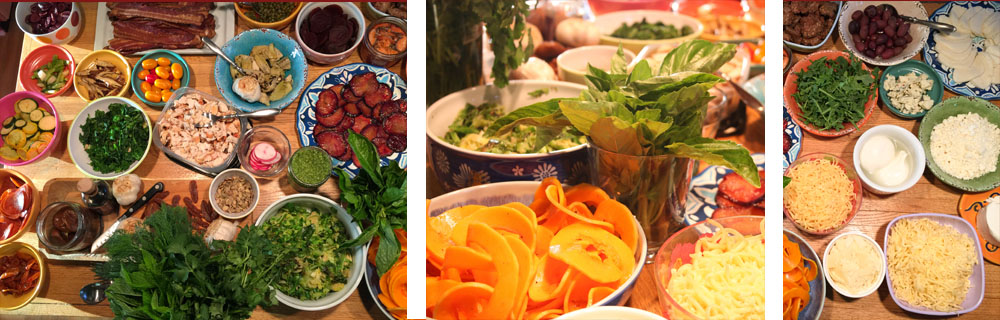
Like everything, pot lucks have a silver lining. The beauty of the pot luck is that it spreads both the effort and the expense and makes entertaining a you-don’t-have-to-be-Martha-Stewart snap. After the sausage making party and the soup swap, both definite fan faves, I landed on BYOPT – bring your own pizza toppings. A Pizza Party. “Best Party Ever”, according to one guest. I think part of the fun was that everyone got a quick turn at playing chef – drawing from the 40 some toppings, sauces, and cheeses that found their way to the kitchen island. And by playing chef, I mean this in the truest sense of the word – all the items were prepped (mise en place) and assembly is both the easy and the creative part. I committed to providing the dough (Trader’s Joe has fresh flour, whole wheat and herbed dough, as well as a frozen organic dough). Then I threw out some ideas for both pizza combos and individual toppings, organized by sauce/base, oils, toppings (veg and meat), and cheeses. You can plan it two ways – have people chose from a list of toppings and mix and match at the party, or have them bring enough for their own concoction and they are responsible for everything but the dough on that pie. We got a bit of both. Just a little coordination will keep you from having a lot of dupes.
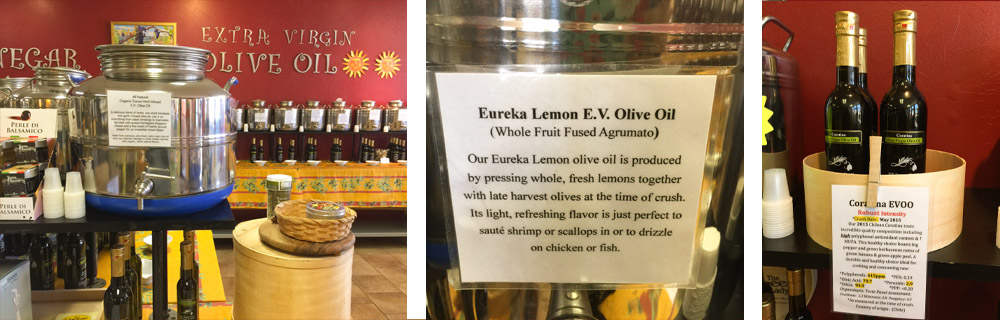
I of course had to make a run to the Cheese Lady, not just for the fabulous ooey-gooey meltable cheeses, but also for her fine collection of oils and vinegars. I settled on a lemon oil (fabulous to drizzle with my lemon pistachio pesto) and a white truffle oil. Super aromatic oils like truffle need to be drizzled after the bake. They are too good to go on before the oven. Good news guys – a phone call to the Cheese Lady and these puppies can be on their way to you. They don’t ship cheeses, but do take phone orders on the wonderful assortment of oils and vinegars. There is a divine maple balsamic that makes a killer vinaigrette with the lemon oil, and the raspberry balsamic is wonderful drizzled into a seltzer. Super refreshing!
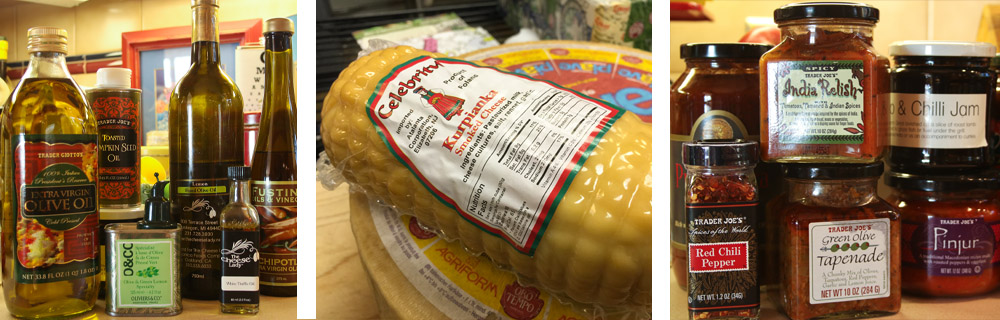
I had to get a couple cheeses that weren’t on my radar – one was meadowkaas which I did know about but didn’t expect to see til June. This is a special (aren’t they all?) style cheese that is made from the first milk from the cows that wander into North Holland’s (the Netherlands, not Michigan!!!) first grasses each spring. An importer found some 65 wheels from 2015 and upon Cheese Lady deeming it delish, they found their way to her. Yahoo! However, the other cheese I bought I had never heard – Kurpianka smoked cheese from Poland. Its touch of garlic and springy texture make it a perfect melting pizza cheese. Yum. Oh and it looks like a cheese grenade. I love that!
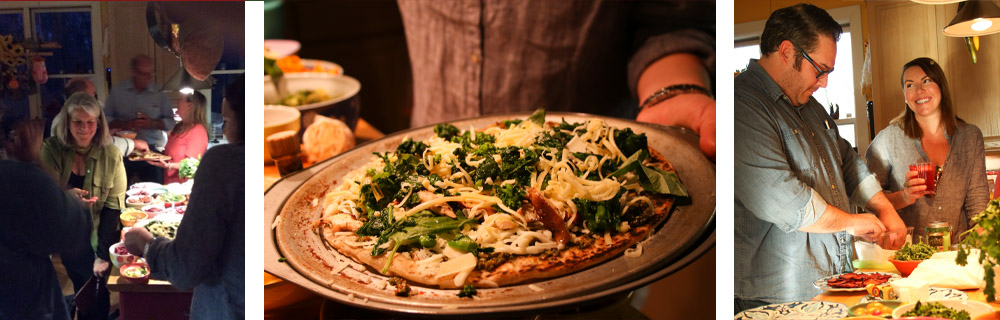
The most important detail you can tell your guests is to make sure the ingredients are “pizza-ready.” That means olives are pitted, zucchini and shiitake-types are quickly sautéed, and bacon is at least par-cooked. Otherwise you will get both a free for all with your limited space and a real mess. I considered a change of address halfway through the party. But a little organization goes a long way. I had a building station with sauces and oils, a topping station, a cutting station, a bar area, and a plates & salad serving area. My kitchen isn’t nearly as big as it sounds. But it worked – just barely. We had about 18 people and made about 13 pies. I find that so hard to believe because I swear I made 15 myself and ate at least 20. #CarbFreeMay
It helps to have some basic equipment – a Pizza Peel to transfer the prepped pizzas, a Pizza Stone or two (or three) always hot in the oven, pizza pans, and plenty of cutting boards and pizza wheels. Everyone brought what they had. I think there may have been six pies in the oven and two on the grill at one point. For the grilled pizza, we used the frozen dough. If you make your own or use fresh dough, it is best to roll it as thinly as you can and then freeze it to make a smooth transfer to the grill. Oil the grill and cook the dough on both sides to color and get grill marks. Then transfer to the building area where you can add toppings. Slide back on the grill and close the lid to melt the toppings. This will only take a few minutes. The oven (400-425oF) pizzas work well if you dust the peel with corn meal or make sure the dough is well floured and not sticky. Build the pie and slide onto the hot stones. All in all, it’s pretty neck-down in the execution, once you do a couple test pies to get down the technique.
We had some pretty fantastic Pizza Party toppings – here is a select list (email if you want my master list):
Sauces: red sauce, lemon ricotta, lemon pistachio pesto, fruit chutney, kale pesto, green olive tapenade, horseradish dill drizzle
Oils: EVOO, lemon oil, white truffle oil, Toasted Pumpkin Seed Oil (divine on the butternut squash ribbon pie), chipotle oil, fig balsamic
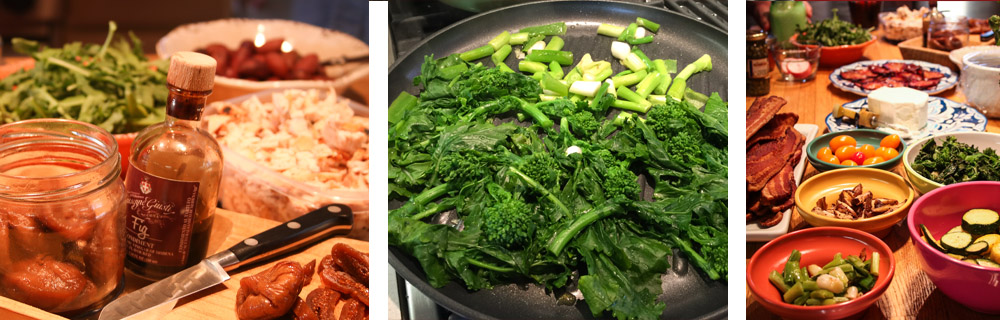
Arugula, charred scallions, roasted garlic, sautéed shiitakes, grilled zucchini and yellow squash, you’ll thank me in the winter oven dried tomatoes, sautéed broccoli rabe, fresh basil, Kalamata olives, artichoke hearts, spinach, roasted beets, dried figs, butternut squash ribbons (the Paderno Spiral Vegetable Slicer worked perfectly), Brussels sprouts, smoked salmon, capers, roasted plums, radishes – wait…..seriously??? A partial list????
Pepperoni, prosciutto, shredded chicken, ham, bacon, sausage