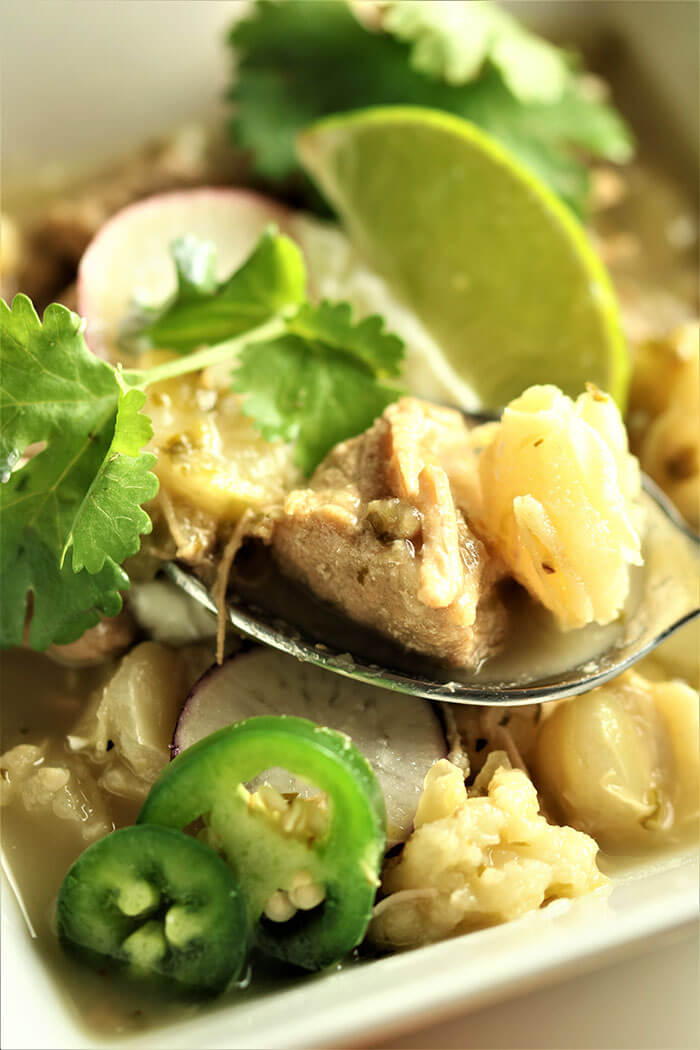
It barely feels like winter has kicked in, but here we are waving goodbye to another National Soup Month. Lucky for us, Super Bowl is just a few days away so we can keep rocking the soup vibe without shame. This Posole Verde is so much more than a soup, perhaps a stew, and has all the personal choice condiments that are mandatory for serving a crowd. You could make this vegan by leaving out the pork (must you?) and swapping the stock. But the slow cooking required to pop the posole begs for pork to be front and center and turning into delicate strands, filling every bite.
Posole or Pozole?
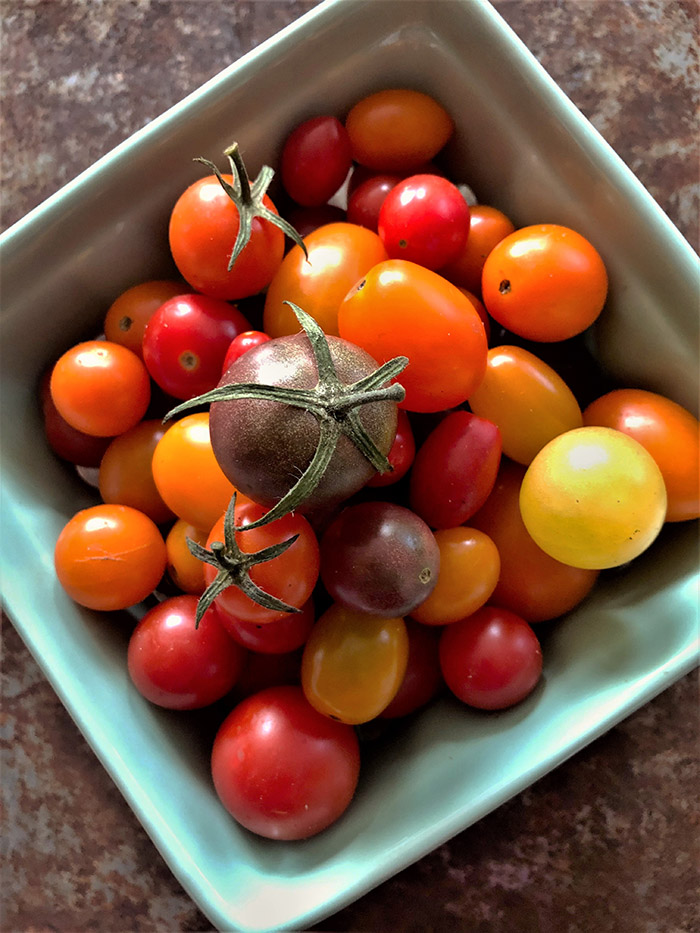
I’m talking POSOLE, people!! Or is it POZOLE? It’s hominy or giant puffed-up corn. I first ran into posole while foodstyling a Today Show segment for Williams-Sonoma. Interesting that it was a first, because I grew up just down the street from Fuhrer Ford Mills, a hominy processing plant. As a result, our house always smelled of popped corn (kind of yummy), and there was a constant coat of silt on every surface (kind of crummy). But despite formative years in corn country, this most definitely was never ever on our table.
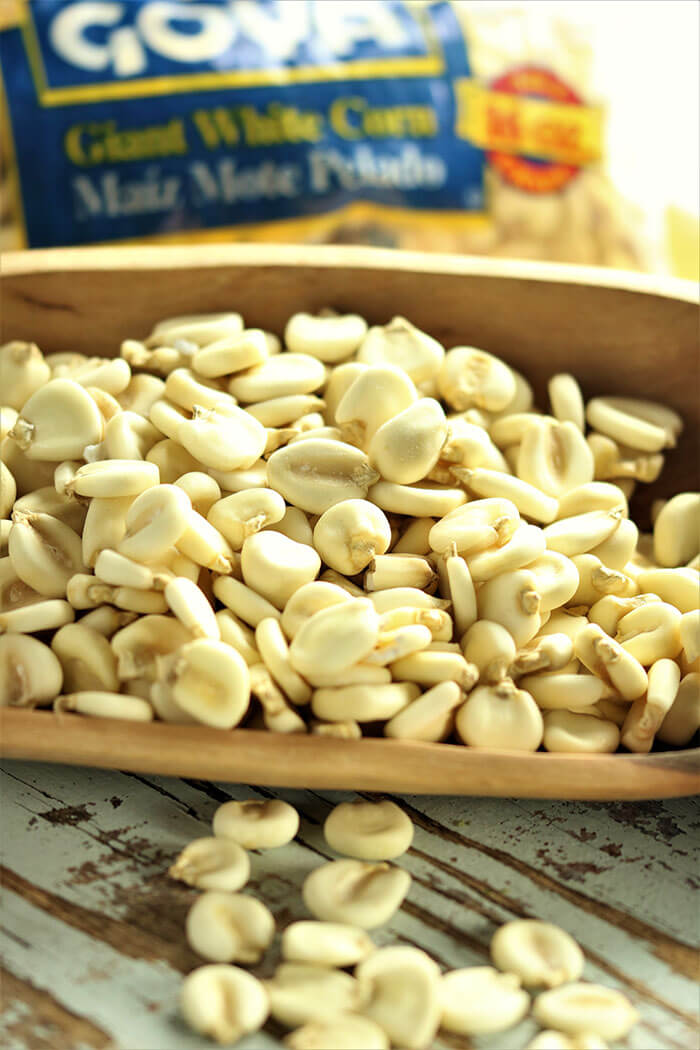
Pozole is the traditional Mexican spelling, though more commonly spelled posole here north of the border. Maize (maíz) was a sacred plant for the Aztecs and it was often a part of celebrations. To get from maize, to hominy or posole, the dried corn must be slaked with lime to create an alkali solution, called nixtamalization. This process loosens the hulls, makes them soft like beans, and then “pumps you up!” Remember Hans and Franz on SNL??? The lime used here is not from fresh citrus; rather, it is a food-grade calcium hydroxide. If you have ever turned cucumbers to pickles, perhaps you used “pickling lime” to crisp up the vegetables before canning. Luckily for us, by the time you find dried white corn on the shelves (in the dried bean section), this has already been done and is ready for use in soups and stews.
Another benefit of cooking or soaking in slaked lime and ash (an alkaline process) is that the nutritional value is bumped up (making it niacin-rich), it becomes easier to grind (resulting in masa, the main ingredient in tamales), and flavor and aroma are improved. In addition to dried posole – sometimes labeled as Giant White Corn or Maíz Mote Pelado – you might see canned hominy at your store. It’s a much faster solution, but to my taste NOT nearly the no-brainer substitution as canned-for-dried beans. The texture of posole prepared from dried kernels is unlike anything else – chewy, toothy, satisfying – and is totally lost in the canning process. Canned hominy is much like the soft texture of a canned bean and tastes like disappointment. It’s slightly metallic and oh so mushy. I’m so keen on dried posole texture that I have never made the substitution since I once sadly tried canned.
Posole Verde
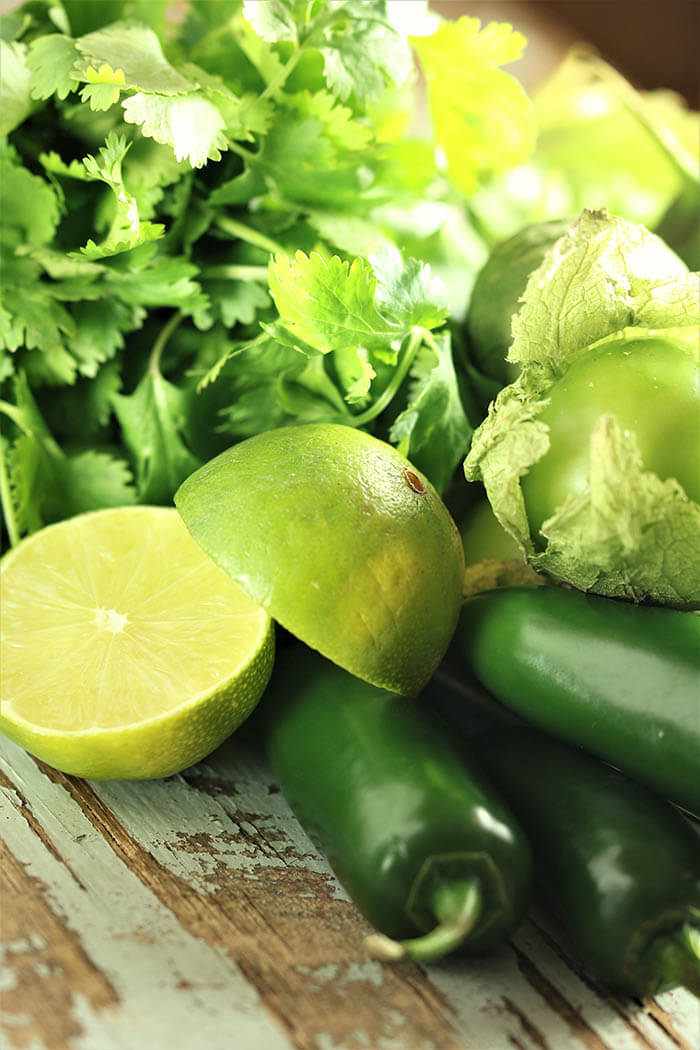
The traditional Mexican preparations for posole are blanco, rojo or verde. The first (blanco) is unadorned and has no green or red ingredients added, and the latter two rely on chilis (rojo), such as Guajillo or Ancho, or tomatillos, lime, cilantro and jalapenos (verde), as I am sharing here. Adding the green things at the very end of your simmering keeps them from overcooking, leaving the flavor bright and a bit spicy.
Preparing the Posole
If I have the time, I like to prepare the posole the same way I would prepare dried beans. Rinse the posole under cold water, and transfer to a stockpot. Cover with 1-inch of water, bring to boil, and turn off the heat. Let the posole soak overnight. When ready to use, drain and rinse again. If you are pressed for time, you can skip this step or just shorten it to the time you prep the remaining ingredients.
The verde recipe I share here calls for a late stage addition of a puree of lime juice, jalapenos, cilantro (stems and all) and tomatillos. It kicks up the flavor profile like 100000%. This is the kind of dish you can just plop on a back burner and walk away, passing every hour or so to check on the liquid level and adding more stock, as needed. I am not an instant pot or slow cooker “cooker”, but I bet/know in my heart they would drastically reduce the time. I happen to have a few followers who are, and I’m counting on you to comment below. The big reveal comes when the posole starts to pop and look like a flower or popcorn, depending on your vision. I’ll admit it – it can take from 3 to 5 hours to pop (longer if the dried corn has been around for years and if you skip the soaking step), but it’s very low maintenance and for me a bit satisfying to have something cooking for the afternoon that really doesn’t cry out for attention. It’s like I’m cooking, and I’m not. Once it’s getting close, just toss the lime juice et al. in the processor, and give it a whirl. Add this to the pot and cook a few minutes more.
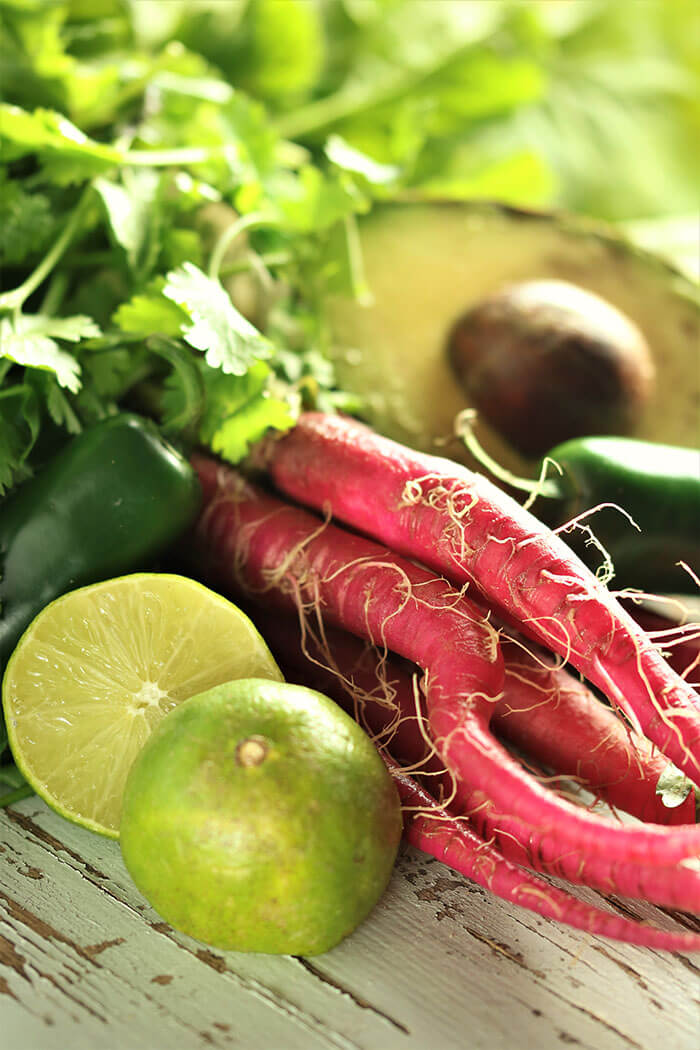
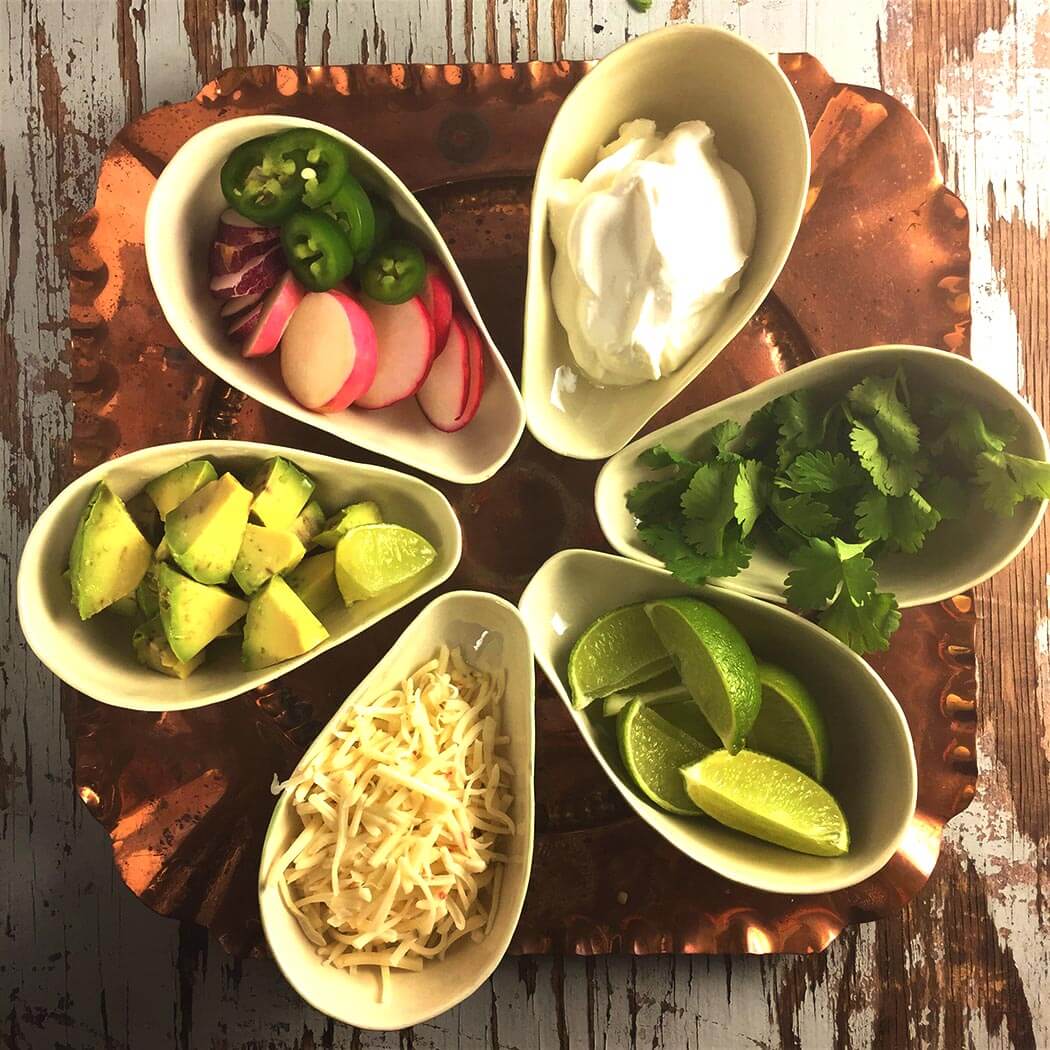
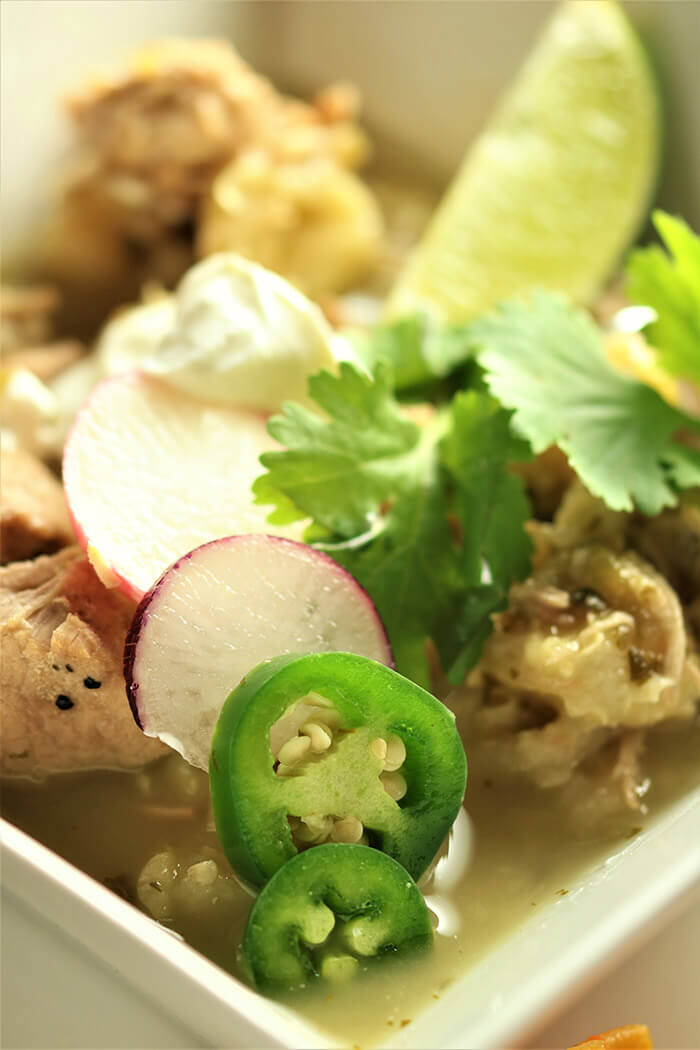
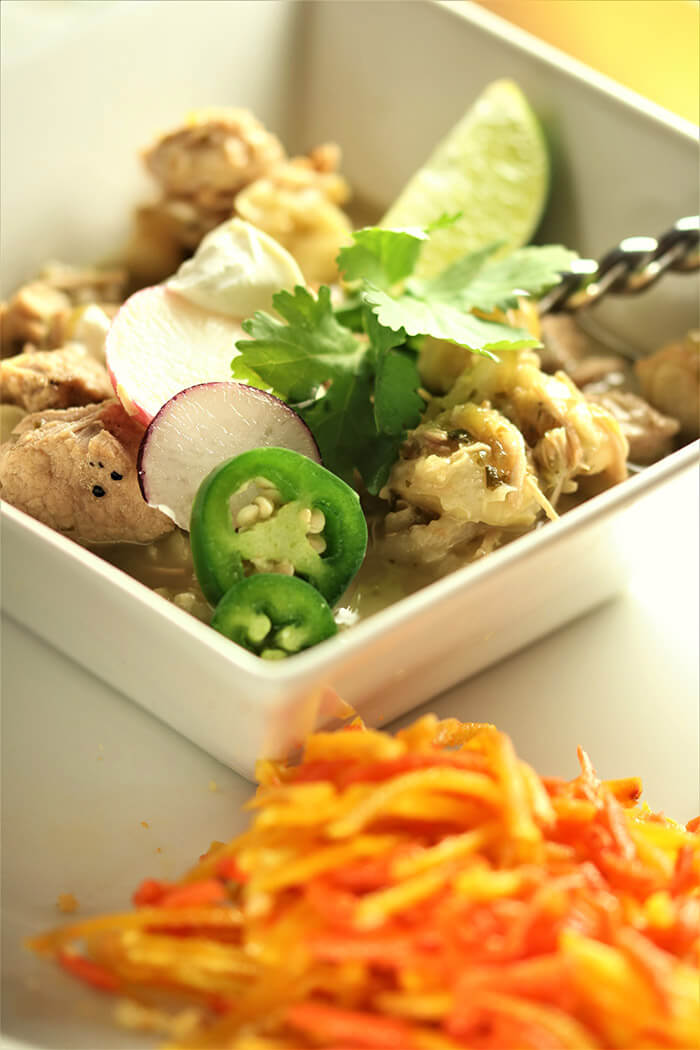
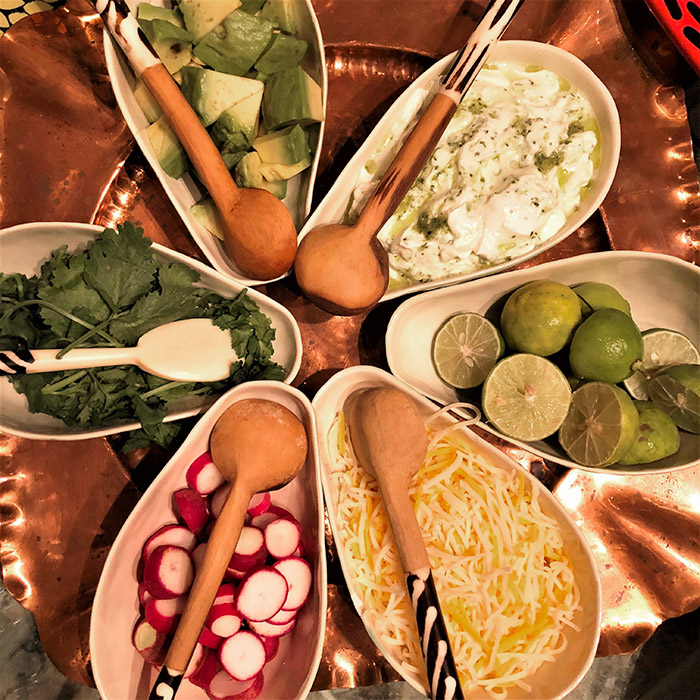
In Mexico, this dish is usually served with an array of toppings, including limes, cheese, sour cream, avocados, and radishes. Who doesn’t love to dose their own dinner? All those garnishes make it the perfect football afternoon kind of centerpiece. Add a few chips or warm tortillas, maybe a big salad or some cornbread….. and a nice frosty beer. You will not be sorry!
If you have a big enough pot – or want to use two – double up on the recipe. It freezes really well and then you will have a souvenir of the day you turned your kitchen into the most fragrant cantina in town. I added some notes below on how best to freeze. And while you are scrolling down, check the bottom of the post for some delicious additions to your soup repertoire.
Super Bowl is just a few days away so we can keep rocking the soup vibe without shame. This Posole Verde is so much more than a soup, perhaps a stew, and has all the personal choice condiments that are mandatory for serving a crowd. Put down a feast of toppings, a crunchy salad, and some cornbread, and sit back and watch the half-time show!
Ingredients
Scale
1 pound dried posole, soaked overnight, drained and rinsed
1 Tablespoon olive oil
2 1/2 pounds pork loin, trimmed of fat and cut into 1″ cubes (about 3 1/4 pounds pre-trim)
1 Tablespoon ground cumin
1 teaspoon salt
1 teaspoon ground black pepper
1 onion, chopped
4 cloves garlic, minced
4–5 quarts chicken broth
1 pound tomatillos, husked removed and rinsed (about 10 medium)
2 jalapenos, stems removed and sliced in half
1 bunch cilantro, stems and leaves (reserve a few sprigs for toppings)
Juice of 2–3 limes
Toppings:
Sour cream
Lime wedges
Grated Monterrey Jack
Sliced jalapeno
Avocado
Sliced radishes
Cilantro sprigs
Instructions
The night before, prep the posole:
Rinse the posole and transfer to a stockpot, covering with 1-inch of water. Bring to boil and turn off the heat. Let the posole soak overnight. When ready to use, drain and rinse again.
To make posole:
Heat oil over high heat in an 8-quart stockpot. Add pork, cumin, salt, and pepper. Sauté until pork is browned, about 10 minutes.
Add onion and garlic, and cook until softened and excess liquid has cooked off, about 6–8 minutes. Add soaked posole and stir to combine. Add 2 quarts of chicken broth and bring to a boil. Reduce heat to a simmer and cook for 90 minutes, stirring occasionally. Check the liquid and when getting low, add another quart of stock. I tend to add the third quart around 90 minutes and the 4th quart around 3 hours. Altogether, this will simmer a total of 3, 4 or maybe even 5 hours. It will depend in part on the age and dryness of the dried product. To be safe, give yourself enough time for a 5-hour simmer.
The pork will fall apart and shred, and you will know the posole is done when the posole kernels have popped. The kernels will puff and pop, and look a bit like a flower (if you squint and have been hitting the cerveza during the last five hours). They burst open joyfully as if they want to become popcorn! Taste them periodically for doneness. Before they “blossom”, they will be quite starchy, fiber-full, and too chewy. Once sufficiently stewed, they will remain a bit chewy and toothy, but not woody.
Thirty minutes before the end:
When the kernels are starting to pop and getting close to the desired texture, toss the tomatillos, jalapenos, cilantro and lime juice into a food processor and puree. Add to stockpot and simmer for the final 30 minutes until the posole is tender. 30 minutes is plenty of time to simmer for this last step, but see note below.
Notes
Pressed for time? You can skip the soaking stage, or reduce it to the prep time for the rest of your chopping. That will likely lengthen the cooking time however.
Never add an acidic ingredient when cooking beans, or in this case, posole until the end. The acid binds with the outer structure and toughen it ups. No amount of additional cooking time will allow it to break down. Additionally, you want the fresh vibrant flavor from the green ingredients, which will dissipate if added too early in the cooking process.
If you are serving the posole later: Add the green mixture as you take the stew off the heat. The hot stew will cook sufficient “heat” out of these spicy and tart ingredients. To reheat, I also use some of that 5th quart to add to the pan. The posole will have continued to soak up broth as it sits in the refrigerator overnight, and you will need to loosen it a little with more stock.
Serve with bowls of the toppings, a crunchy salad and some cornbread!
Freezing? This stew is a fantastic freezer staple, but make sure to cool completely before transferring to freezer containers. I called for a 5th quart of stock so that you can top off the stew with liquid. Since there are a lot of chunky pieces, you want to make sure that they are all submerged in liquid before freezing.
Prep Time:30 minutes
Cook Time:4 hours
Category:soup
Method:stovetop
Cuisine:Mexican
It’s #NationalSoupMonth – so shout it out!
Here are some other ab-del (absolutely delicious) soups for your winter blues.
Listen to the applause circle the globe as I am FINALLY posting the recipe for the Green Machine Salsa Verde. This recipe starting making the rounds with the Fajita Pot Lucky two years ago and has appeared in various iterations ever since, most recently at the All American BBQ Pot Lucky. Requested on the reg, I found when trying to share the recipe that I had continually been reinventing the ratios and ingredients. This is finally the definitive formula which I tested again just this week for another Pot Lucky, to be posted very soon.
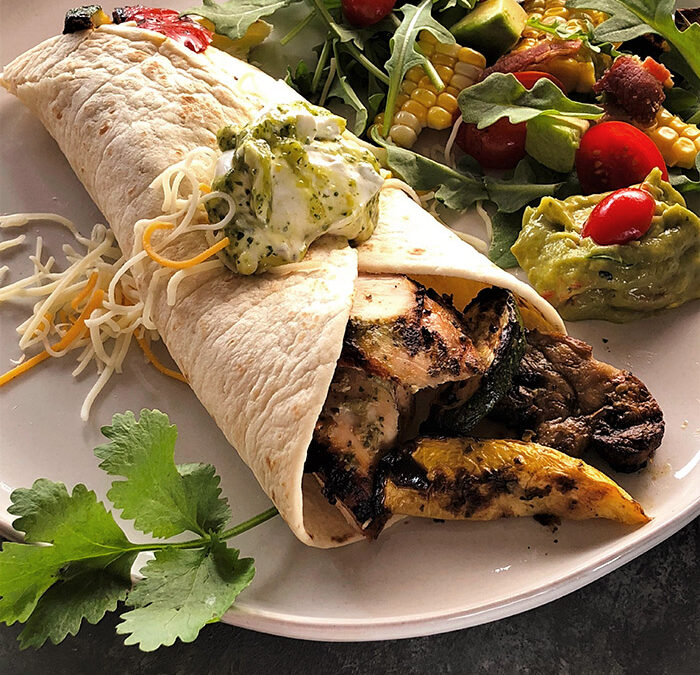
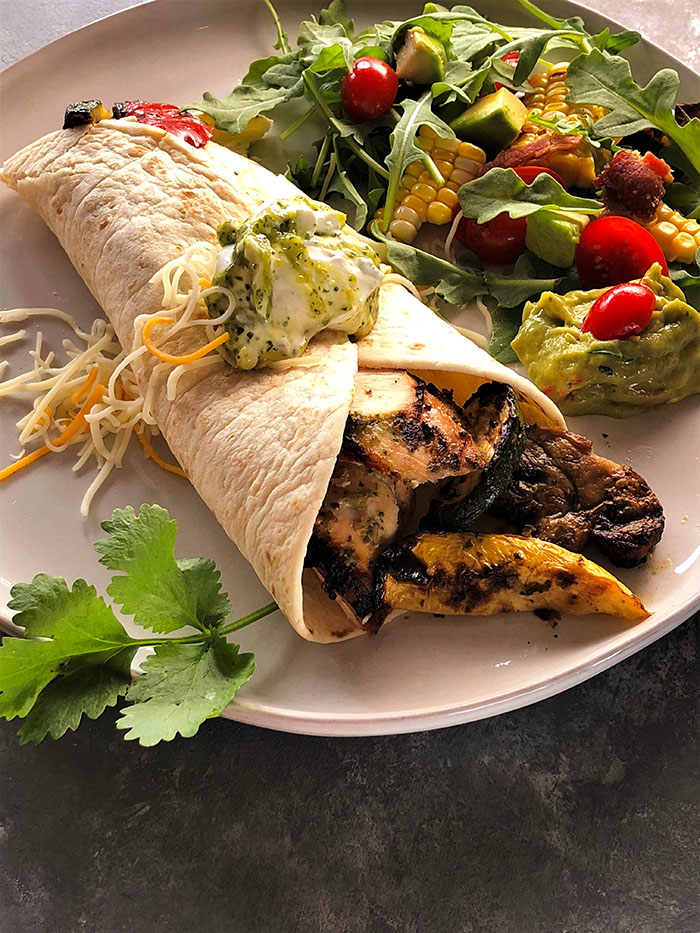
The Green Machine, while technically a Salsa Verde that can be used on its own in the traditional green sauce way, is so named because it’s a workhorse. Check out the laundry list of possibilities below. I’m not suggesting you try all these things at once – that’s for professionals, kids! – but this fajita above has the Salsa Verde as a marinade for both chicken and veg; it’s mixed with sour cream for the grand dollop, and it’s kicking up the guacamole. Try any one or two at a time, but pace it out.
What is Salsa Verde?
Unless you are living under a rock, you have no doubt come across this delicious dazzler. Every country has its own version: Italy has pesto, but also a parsley-based verde with capers and anchovies; Mexico’s includes cilantro and chilis; in various Asian countries you will find green curries; and of course, Argentina’s famous chimichurri is chockablock with parsley. The name chimichurri came with the arrival of the Basques in the late 19th century and their word tximitxurri, meaning a mixture of things in no particular order. This, too, is a sort of no rules recipe!
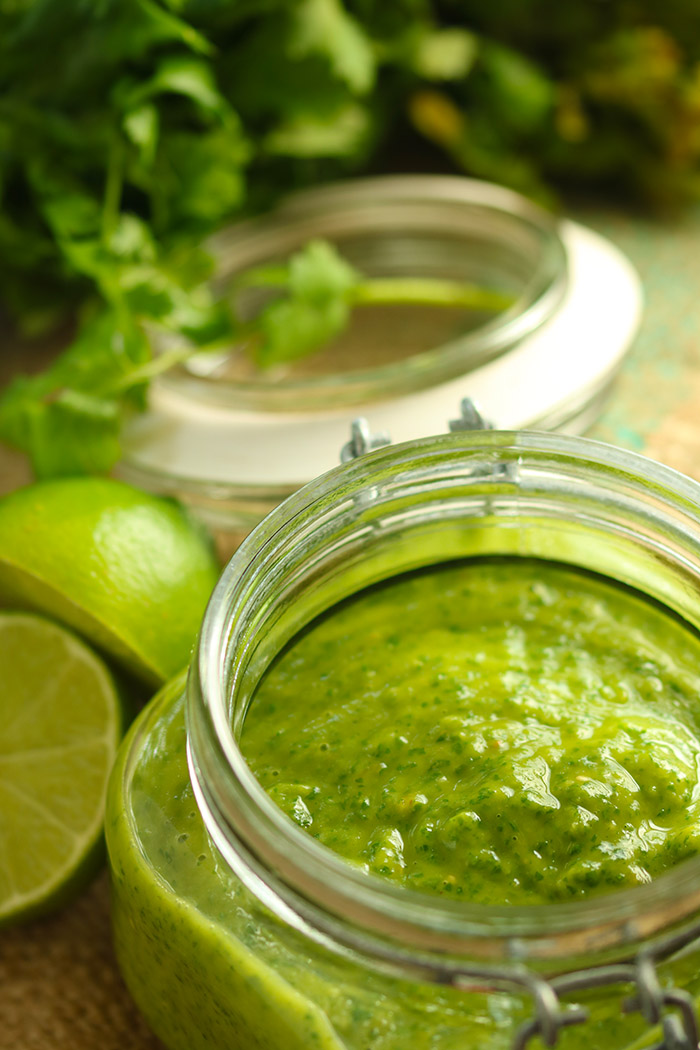
The recipe featured here is Mexican-based. Lots of cilantro, roasted chilis, tomatillos and lime juice. I used Hatch chilis, which are just starting to come into the market right now. They are exclusive to the Hatch Valley in New Mexico, and if you are lucky enough, your local store may have a few days or a week of offering them, most likely from the good people at Melissa’s Produce. Check their site to see if there are any stores near you. (They are at D&W in Grand Haven today!) The chilis, which have an earthy taste and varying degrees of heat, mature in a very short window in late August and September. My store roasts them for me, but I clean off the char and pull out the seeds and stems before zipping to freeze. It makes it infinitely easier to just pull out a few at a time all winter to throw into soups and stews, and, yes, more Salsa Verde, should I run out.
If you don’t get them, feel free to roast some poblanos or even use fresh jalapenos should you be grill-averse after a summer of BBQs.
How do you thicken Salsa Verde?
Some versions of this yummy sauce may have you reducing down the mixture on the stove to thicken. Me: “Just say no!” I feel that kills all those bright and beautiful greens and turns it to a dull olive drab. I have two hacks to help with this. First I add a ripe avocado to thicken things up, and second I add a slow drizzle of olive oil with the processor running to emulsify the sauce. The avo may shorten the life a skosh, but you will go through it quickly so that’s never been a problem. You can also divvy it up into smaller containers and freeze small batches of it. You might even consider an ice cube tray to create portioned cubes of the saucy wonder. I have some in my shop that make large cubes and are covered for both easy stacking and keeping the freezer burn at bay.
Salsa Verde Uses
Here are just a few of the many ways you can mix this green goodness into your daily life:
On the table as a condiment (photo below) – amazing with grilled meats
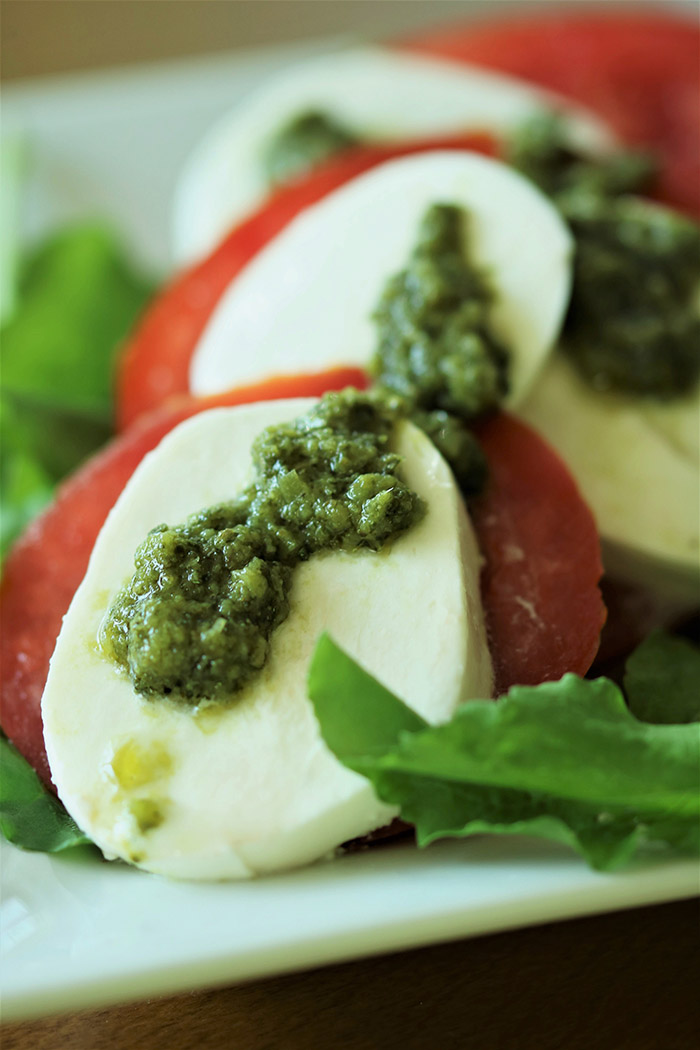
As a drizzle on cheeses (above on a Caprese) How about a burrata drizzle?
Mixed with sour cream for a dip or dollop (Mexican condiment tray at bottom)
Stirred into guacamole for a kick up
Mixed with yogurt as a spread (I just used it on steak sliders)
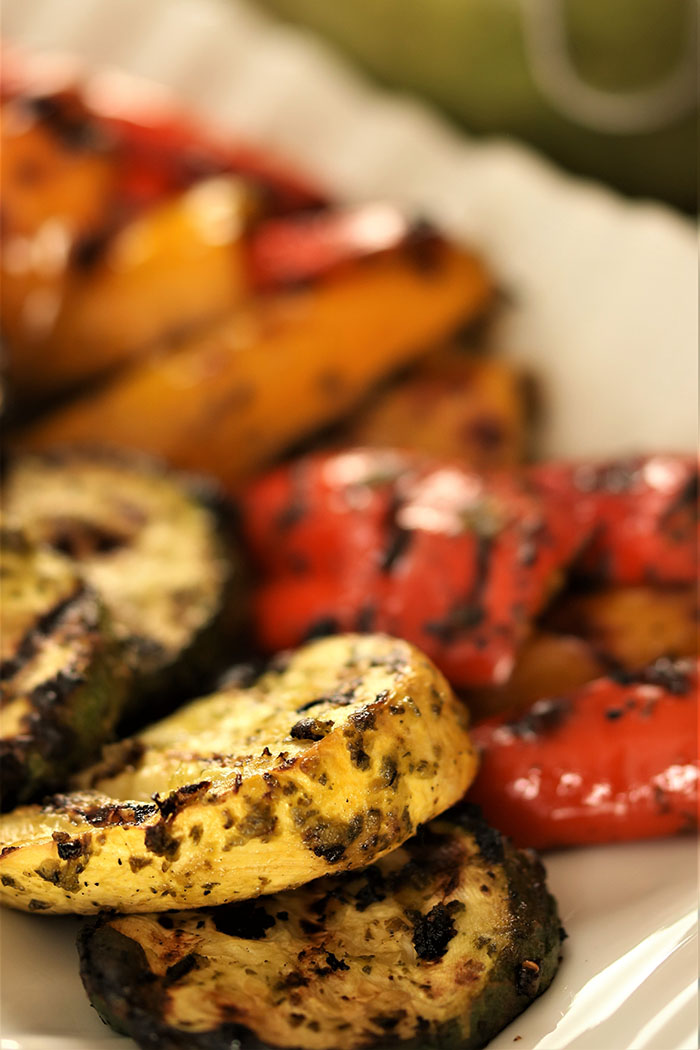
Marinade for vegetables, chicken, fish, or meats (vegetables below)
Glaze to brush on dishes just before they come off the grill
Pizza sauce
Spice up a tortilla soup …..or any other soup or stew
Eggs, hell yaas! How about that Mexican egg layered number, the chilaquiles?
Salad dressing – mix with buttermilk and make it creamy
Drizzle on a citrus salad? Grilled fish! Sauteed scallops! Steaks!
Anything tortilla based – Tacos, burritos, quesadillas, enchiladas, y mas!
Cocktails! Shake it up with some lime juice and tequila! How about adding an oyster shooter to that combo? Oh yeah!
However you chose to use it, please report back. Comments and shares keep this blog going. I know you are going to love this and can’t wait to hear how you put this to use. Enjoy!
The Green Machine, while technically a Salsa Verde that can be used on its own in the traditional green sauce way, is so-named because it’s a workhorse. Check out the laundry list of possible ideas from marinade, to dip, to dressing, to cocktails.
Ingredients
Scale
2 cloves garlic
2 roasted Hatch or poblanos chilis, seeds and ribs removed
3 cups arugula, tightly packed
1 bunch of Italian parsley, bottom stems discarded
1 bunch cilantro, bottom stems discarded
juice of 4 limes (1/2 cup)
3 medium tomatillos, husks removed and quartered
1 avocado, scooped from the skin
1 teaspoon salt
3/4 cup olive oil plus 1/4 cup water
Instructions
With the motor running, drop the garlic in the work bowl of a food processor until minced.
Add the chilis, arugula, parsley and cilantro in batches, pulsing as you add to create enough room and to chop finely.
Add the lime juice, tomatillos, avocado and salt. Pulse all ingredients until pureed.
With the motor running, slowly add the olive oil and water. Scrape down the sides as needed.
Taste to adjust seasonings, adding salt and pepper, lime juice or olive oil to balance the flavor. Final seasoning will depend on the chilis used and the “flavorfulness” of your herbs and arugula.
Notes
If you don’t have roasted Hatch chilis in your freezer (autumn is the time to buy them fresh, possibly already roasted by your local store, and stock your freezer for the coming months) nor feel like firing up the grill to roast poblanos, substitute 1-2 fresh jalapeños, ribs and seeds removed
Serve as a dressing, marinade, salsa or sauce. If needed, you can thin with additional lime juice or water. Mix with sour cream or Greek yogurt to make a sauce or dip. Add to guacamole to kick up the guac heat. If using as a marinade, use 1 1/2 Tablespoons per chicken breast or per half-pound of meat.
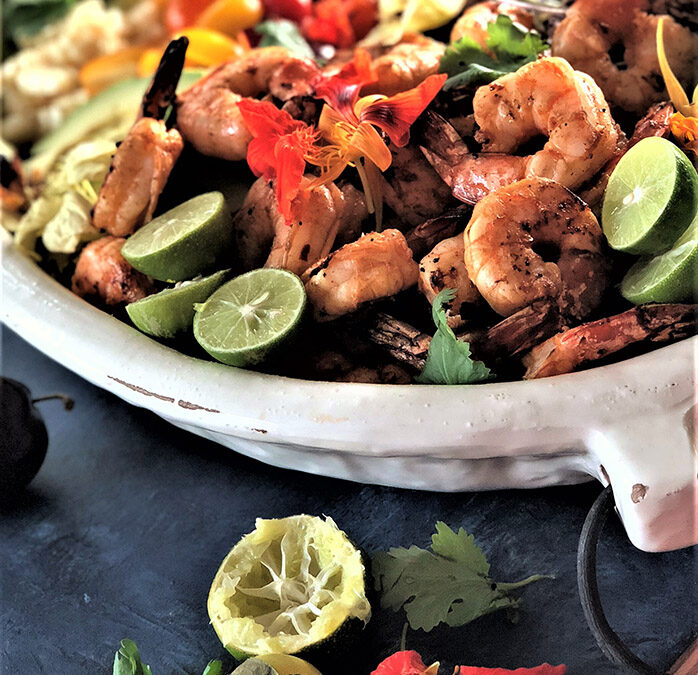
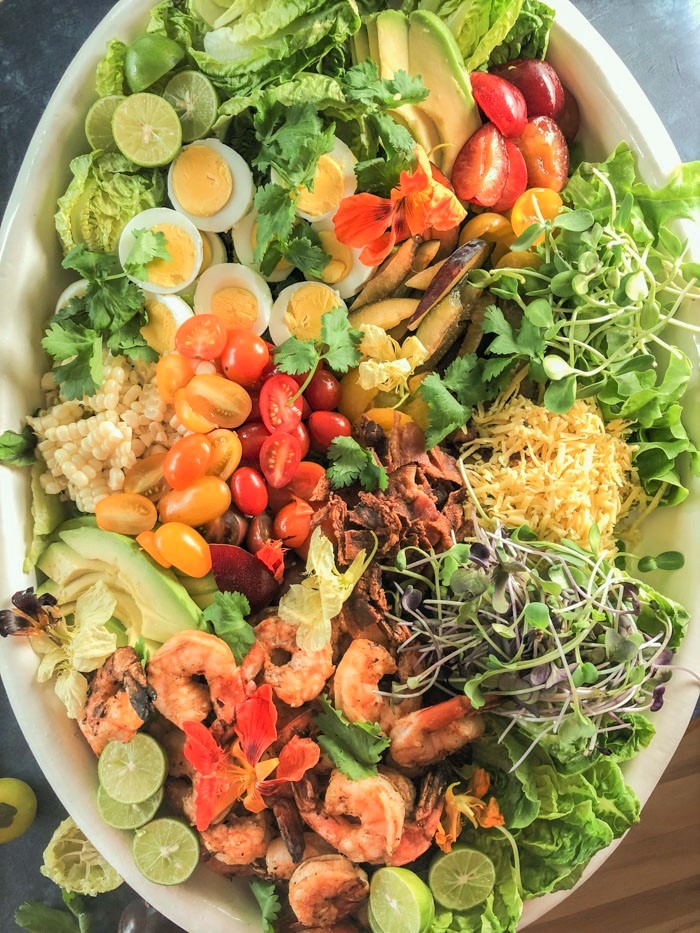
It’s no secret that Cobb Salad is a personal fave. But how to turn up the flavors, yet keep the bacon, egg, and cheese goodness? Enter Sriracha Grilled Shrimp and Buttermilk Chipotle Dressing. Say hello to your new best friend – the Southwestern Grilled Shrimp Cobb Salad. Perfection!
If you only need to know one thing about me, know this. I am mad for late summer farmers’ markets. I will probably go to five this week. Okay, I agree…..a little obsessive. But, I have a favorite farmer (plus The Cheese Lady) for every ingredient in this salad. I’m not saying you have to do the same – or that you can’t just go to the supermarket for all this – but I AM SAYING you have to make this NOW. Southwestern Grilled Shrimp Cobb Salad is all about the season at hand! Fresh sweet corn. Heirloom tomatoes. Sprouts. Flowers. Herbs. Oh my!
The Classic Cobb Salad
Instead of debating where this salad came from and why it is so called (almost certainly a 20s- or 30s-era salad from Hollywood’s Brown Derby, owned by Robert Cobb), what do you say we just dive in? The classic has greens – often iceberg or romaine, chicken, tomatoes, avocado, hard boiled egg, Roquefort and bacon. In other words, what could be bad? You may find it already tossed, as well as deconstructed with tidy little rows of ingredients. While it barely needs a dressing, the rich cheese and bacon beg for a quiet whisper of shallot vinaigrette.
The Shrimp Cobb Salad
I’m not gonna lie. I am a bit conflicted here. I have a passion for spins and tweaks and making the old new again. But the Classic Cobb is pretty much as good as it gets. I was having a party and wanted a make-ahead all-in-one salad-entree and I thought this would fit the bill….a real crowd-pleaser. But I decided as long as I keep all the favorite components, I could give it a global palate spin. Enter shrimp, corn, and chipotle. Some of the ingredients were direct swaps – chicken for shrimp, roasted for marinated and grilled, Roquefort for Hatch Gouda, and shallot vinaigrette for Buttermilk Chipotle Dressing. Others were too good to mess with – bacon, eggs, tomatoes, and avocado. Then there were a few things I decided to slide in because I could.
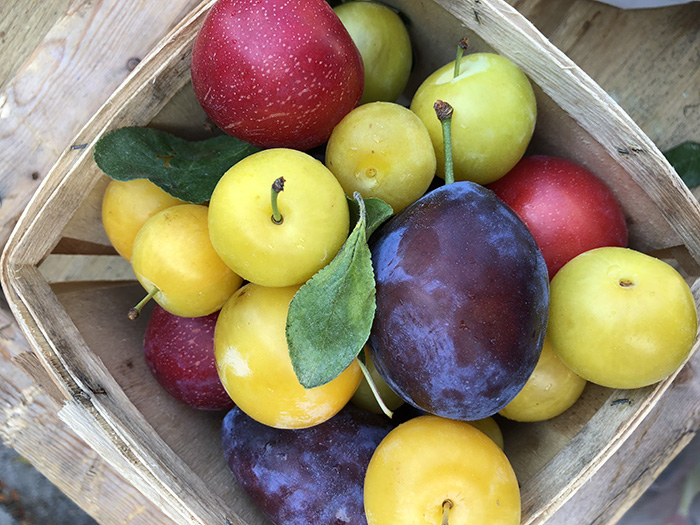
Look at these stunningly gorgeous plums. What a perfect sweet and juicy foil to all that buttermilk tang and chipotle smoke! Michigan produces a wide range of both Japanese and European varieties. Those yellow/green beauties are Shiros; the golden/orange-ish rounds are Bubblegum; the small red orbs are Methley; and the violet-blue ovals are Vibrants. I also added some corn which brought some more lovely sweetness, but bonus……….a nice crunch and texture contrast, as well.
I think deconstructed salads are among the few places where more is more. Most often in food, less is more. But if you are going to let people decide what to add to their plate, why not give them a variety to chose from?
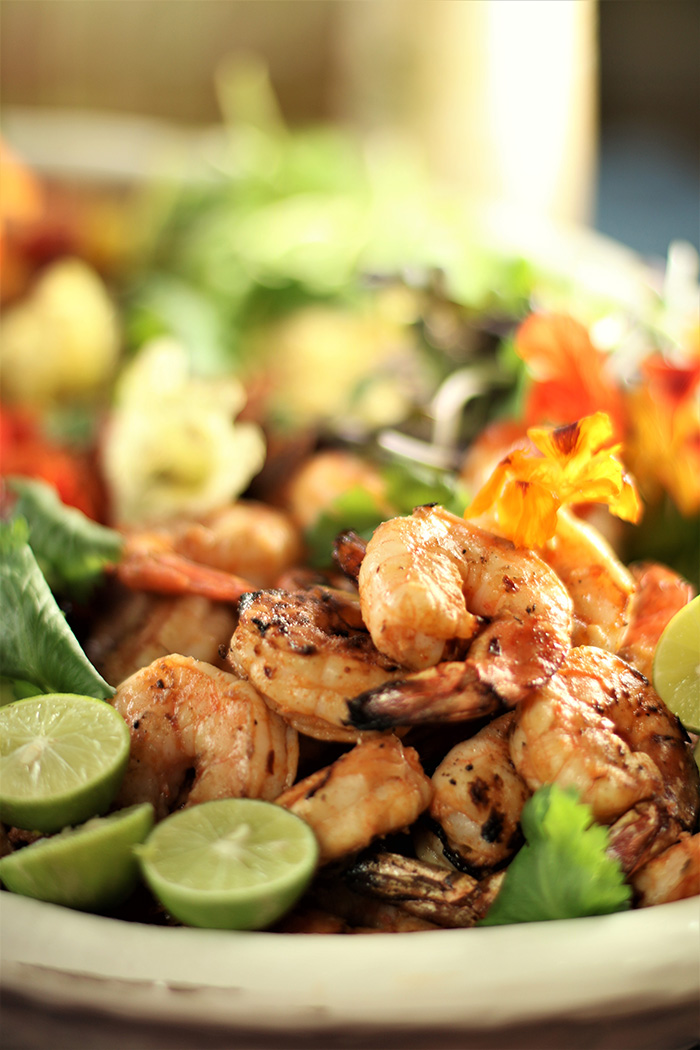
Marinating the Shrimp
Shrimp is an-oh-so simple thing to throw on the grill, and of course is good grilled and chilled, making this the perfect make-ahead entree. The marinade is dead easy – lime juice, olive oil, Sriracha, Tabasco and some spices. If you haven’t tried the Chipotle Tabasco, give it a whirl. It adds a nice smokiness to the marinade. I never like to marinate any seafood or fish for too long, because the acid will start to “cook” it. If you prep the marinade first, and add the shrimp while prepping the rest of the salad and getting the grill ready, you will time it just right. Then only a few minutes on the fire for each side, and you and your shrimp will be ready to chill.
Composing the Salad
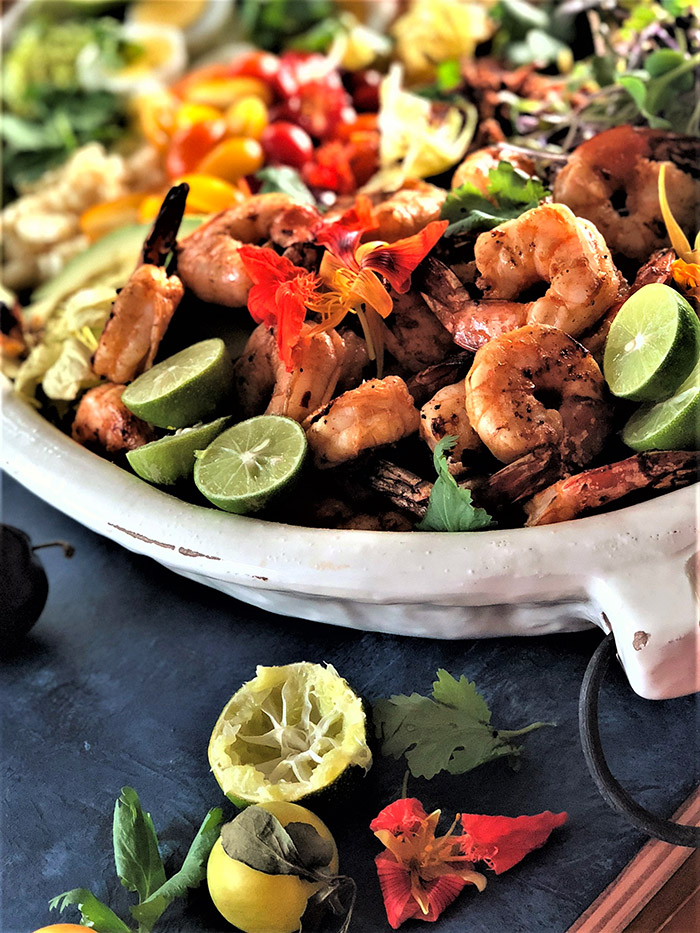
The directions for the marinade and creamy dressing are sufficiently detailed, but I am leaving the quantities for the fixin’s – or even whether or not to add them at all – up to you. How big is your platter? How many are you serving? How much do you love/hate sprouts?
Just keep in mind colors and textures as you go to arrange your platter. It’s a bounty of beautiful ingredients so this should be the fun part once your chopping is done. If you need to prep things further ahead than when you want to compose it, just bag each ingredient separately and arrange closer to serving time. Your guests will be dazzled! Enjoy!!
This Southwestern Grilled Shrimp Cobb Salad is a kicked up spin on an old classic. A few simple ingredient swaps, along with a zesty marinade for the shrimp and a creamy Buttermilk Chipotle Dressing, and this one-platter-is-a-meal comes together quickly. What a great way to celebrate with the bounty of late summer!
Ingredients
Scale
Marinade (makes enough for two pounds of shrimp):
1/4 cup olive oil
2 Tablespoons fresh lime juice
1 Tablespoon Sriracha
1 teaspoon Chipotle Tabasco
1 teaspoon ground cumin
1/2 teaspoon salt
1/4 teaspoon red pepper flakes
Buttermilk Chipotle Dressing (makes 2 1/2 cups):
1 cup Greek non-fat plain yogurt
3/4 cup buttermilk
1/4 cup fresh lime juice
1/4 cup extra virgin olive oil
chipotles in adobo – one big and one small, more or less to taste
1 clove garlic
2 teaspoons ground cumin
1 teaspoon salt
1/2 cup tightly packed cilantro leaves
Salad fixin’s (mains):
shrimp, raw, deveined, peeled and tail on
Little Gems, baby Romaine lettuce, trimmed and halved
heirloom cherry and grape tomatoes, halved
eggs, hard-boiled, peeled, and halved
bacon, crispy and crumbled
avocado, peeled and chopped
Southwestern cheese, grated (I found Hatch Chili Gouda)
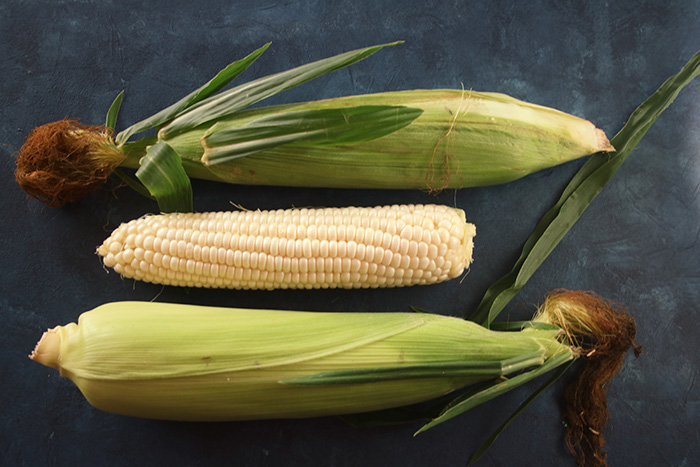
corn, shucked, boiled, and cut from the cob
plums (or other stone fruit), pitted and sliced
Salad fixin’s (garnishes):
cilantro leaves
limes, cut in wedges or halved, if small
edible flowers, like Nasturtium
fresh sprouts, like radish, watercress and sunflower
crunchy topper (see note)
Instructions
Prepare the marinade: Combine all ingredients in a mixing bowl. Add shrimp and toss to coat. Cover and refrigerate, up to one hour, while you prepare the other ingredients.
Prepare the Buttermilk Chipotle Dressing: Place all ingredients except the cilantro in the bowl of a food processor. Pulse to chop, then process until creamy. Add the cilantro and pulse several times to chop roughly. Transfer to a glass jar with a lid and refrigerate until you are ready to serve.
Grill the shrimp: Drain any excess marinade from the shrimp and grill over high heat for 2 – 3 minutes per side. Transfer to a plate and reserve until cooled.
Assemble the salad: Once the shrimp is cool enough to not wilt your salad, compose the salad using all the main ingredients, with an eye toward color and textures. Arrange the garnishes on top. If you are serving later, reserve the bacon and crispy topping until serving time. Cover and refrigerate.
To serve: Add the bacon and crispy topping and serve with the Buttermilk Chipotle Dressing.
Notes
Crunchy toppers: there are a lot of different crunchy toppers available in the crouton section these days. I used the fried jalapeno slices, but you will also find the basic fried onion rings, as well as red peppers, tortillas and more. Chef’s choice.
Marinade is enough for two pounds of shrimp and Buttermilk Chipotle Dressing makes 2 1/2 cups.
Prep Time:1 hour
Cook Time:30 minutes
Category:Salad
Method:Grill
Cuisine:American
An Update:
I want to take a moment to send a heartfelt note of gratitude for all those that supported me spiritually, morally and physically in my Ration Challenge journey earlier this summer. Your generous financial support of this campaign put us at the very top of the fundraising leaderboard among the 40,000 challengers from around the world. Together we raised enough to feed 35 refugees for an entire year. Globally, that number is 16,829! Way to go!! With deep gratitude. xoxo, kk
You say fritters? I say falafel? Whatever you do….do NOT call the whole thing off. Something about these little beauties just screams …”summer, she’s a-coming”. For me it’s the serious dose of herbs and lemon juice, my besties for brightening flavor. In this batch of chickpea fritters, you will find an easy-to-prep side dish that is the perfect date for all kinds of “grilled stuff”, as the sign at my favorite beach café in Anguilla advertises. (Uncle Ernie’s in Shoal Bay, if you are in the area! They also advertise fluffy towels and buoyant rafts. Clearly somebody has a thesaurus and knows how to use it.)
Long before the world had Meatless Mondays and Taco Tuesdays, my family had a bit of a weekly ritual that I think was aimed at giving Mom a light night. Normally the preparer of a real square with veggies AND salad AND meat AND potatoes, this night was more of a toaster oven extravaganza…straight from the freezer. Jimmy Dean sausage patties and apple fritters (which were pancake-shaped). She sometimes rustled up a batch of sausage gravy to go with. Not remotely our normal dining fare, but kind of a treat. That was my first experience with fritters. These bear little resemblance, unless you count shape, and in that case, they are exactly the same.
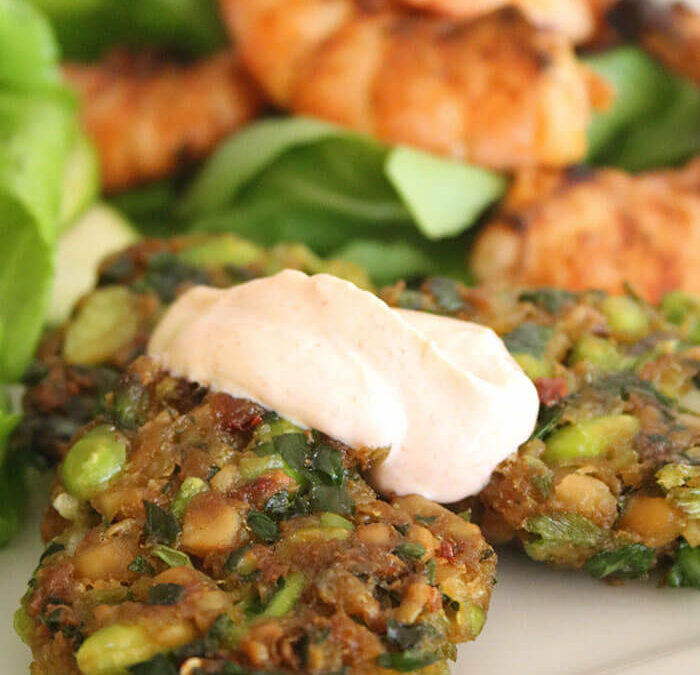
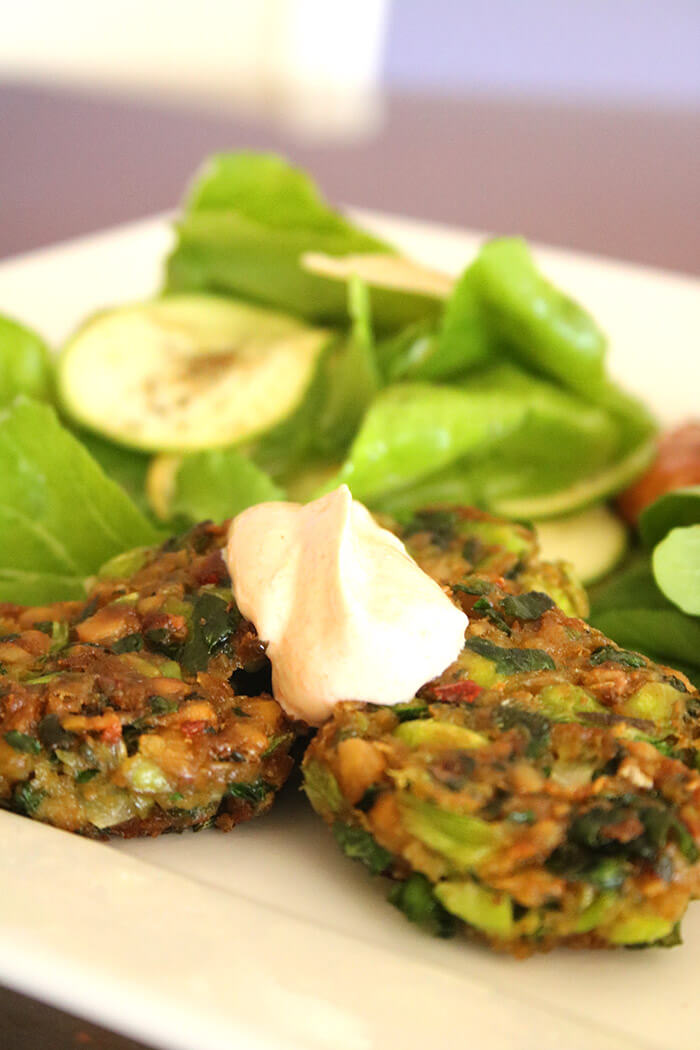
As I debate whether to call these fritters or pancakes, I lean toward fritter despite the absence of a vat of 375o oil (definitely not my style). But, they simply don’t have the flour/milk/egg batter that qualifies them as a pancake. But fear not! While ingredients-wise they are close cousins to the falafel, they are a clear fan-favorite over that deep-fried golf ball. A quick pan-sauté crisps up the tops and bottoms, leaving them moist and flavorful and begging for a serious dollop of Chili Dipping Sauce.
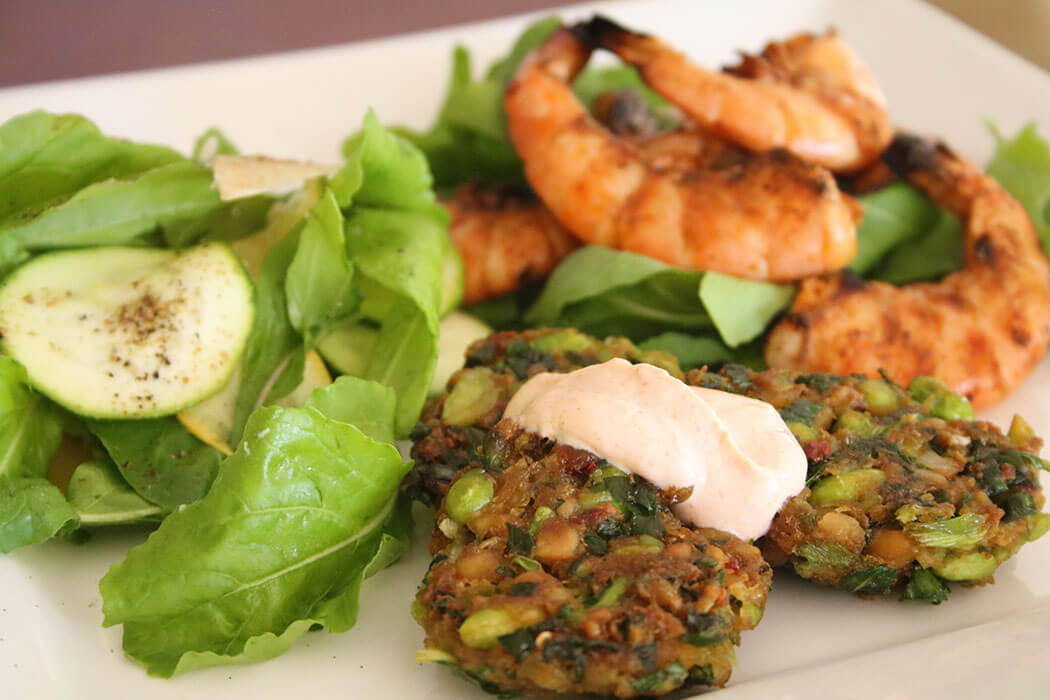
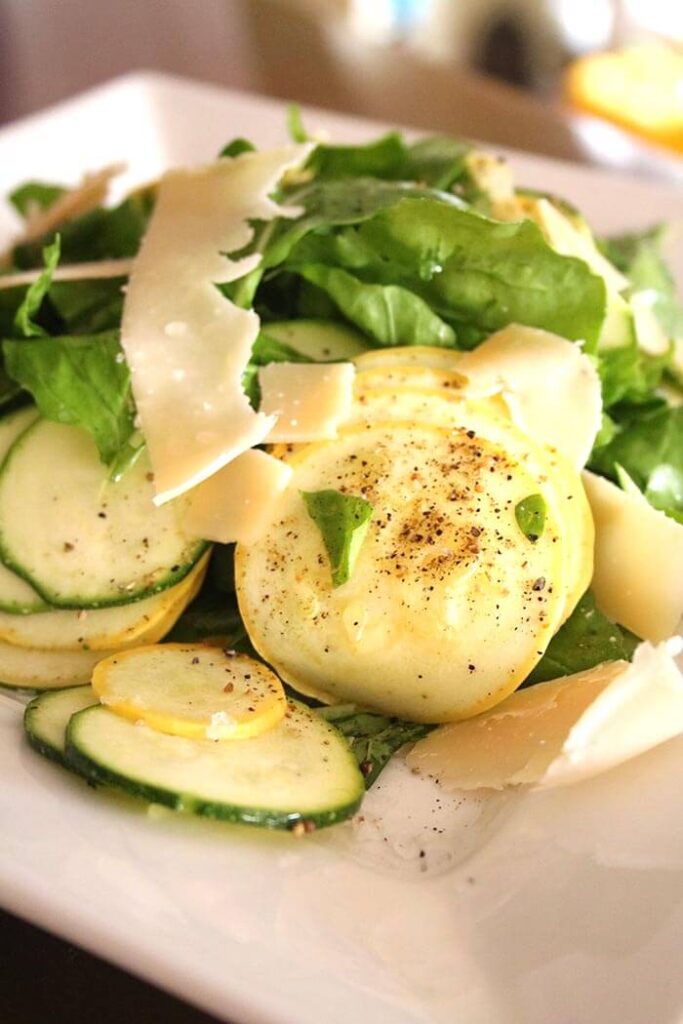
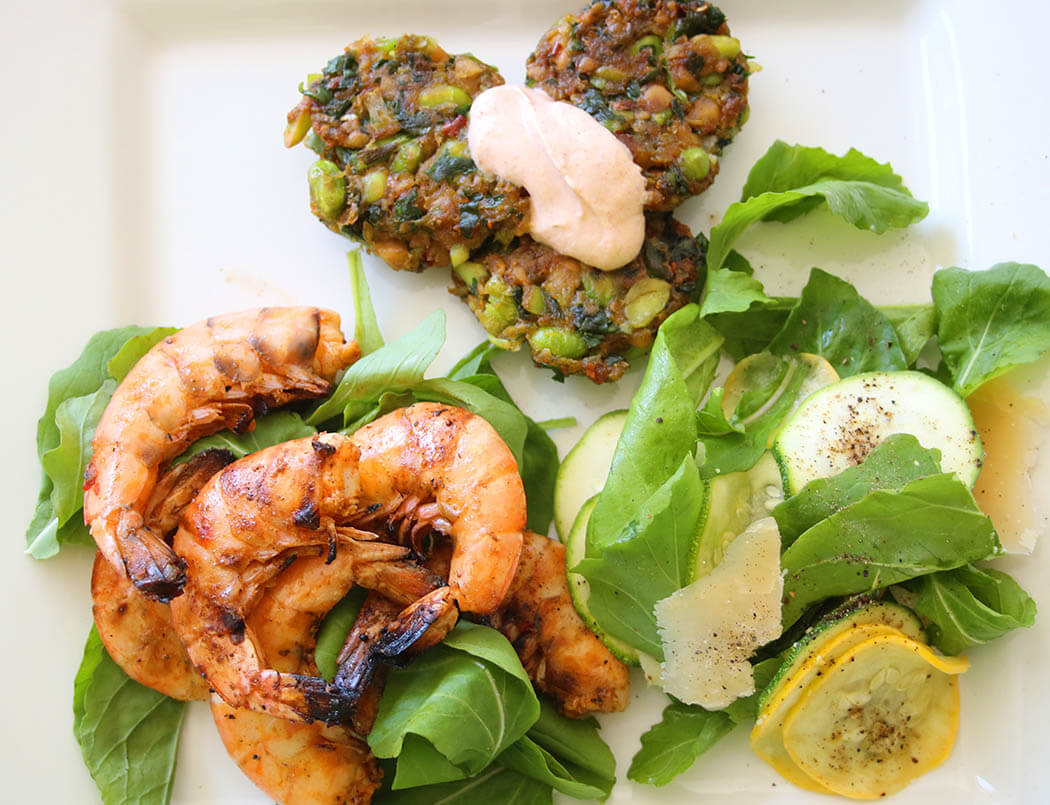
In the next post, I will share a grilled spicy shrimp that appears in some of these photos. But in the meantime, these chickpea fritters also make a great base for breakfast, topped with a couple sunny-side up eggs. And don’t forget the arugula and squash salad. It pairs well with all of the above.
These veggie fritters are chock-full of chickpeas, edamame and a serious handful of herbs. Serve with something right off the grill or top with eggs sunny-side up!
Ingredients
Scale
Edamame and Chickpea Fritters
1 16-ounce can chickpeas, rinsed and drained
3/4 cup edamame, thawed
4 scallions, cut in 1” pieces
3 cloves garlic
3 Tablespoons panko
2 Tablespoons all-purpose flour
1 Tablespoon ground cumin
1 teaspoon salt
1 teaspoon baking soda
1/2 teaspoon red pepper flakes
1 Tablespoon lemon juice
1 egg white
3 Tablespoons finely chopped fresh parsley
3 Tablespoons finely chopped fresh cilantro
Vegetable oil for sautéing
Chili Dipping Sauce
1 cup plain Greek yogurt
1 Tablespoon Sriracha
1 teaspoon ground cumin
1/2 teaspoon ground coriander
1/2 teaspoon lemon juice
1/4 teaspoon salt
Instructions
Make the fritters:
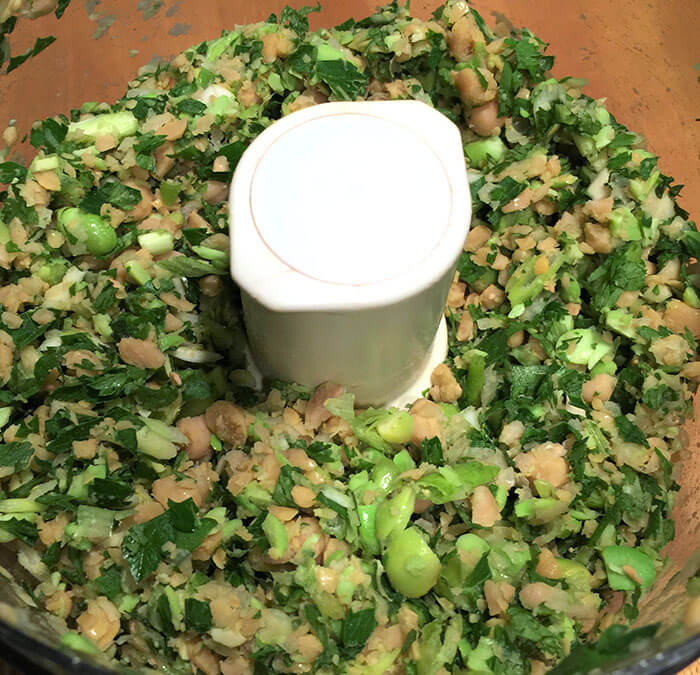
Place the chickpeas, edamame, scallions and garlic in the work bowl of a food processor. Process, pulsing 10-12 times until coarsely chopped. Transfer to a mixing bowl.
In a small bowl, combine the panko, flour, cumin, salt, baking soda, and pepper flakes.
Add the lemon juice, egg white, parsley and cilantro to the chickpea mixture. Stir in the dry mixture until well combined.
Form patties, using 1 Tablespoon measure.
Add enough vegetable oil to a sauté pan to cover the bottom and heat. Cook the patties over medium heat, in batches, turning after 3 1/2 to 4 minutes per side. Do not overcrowd pan. Drain on paper towels. Transfer patties to a sheet pan and hold in a warm oven.
Make the chili dipping sauce:
Whisk together all ingredients. Refrigerate, covered, until serving time.
Dollop atop warm edamame and chickpea fritters.
Notes
The chili dipping sauce makes 1 cup and will keep, refrigerated and covered, for several weeks (not that you will have any left over!)
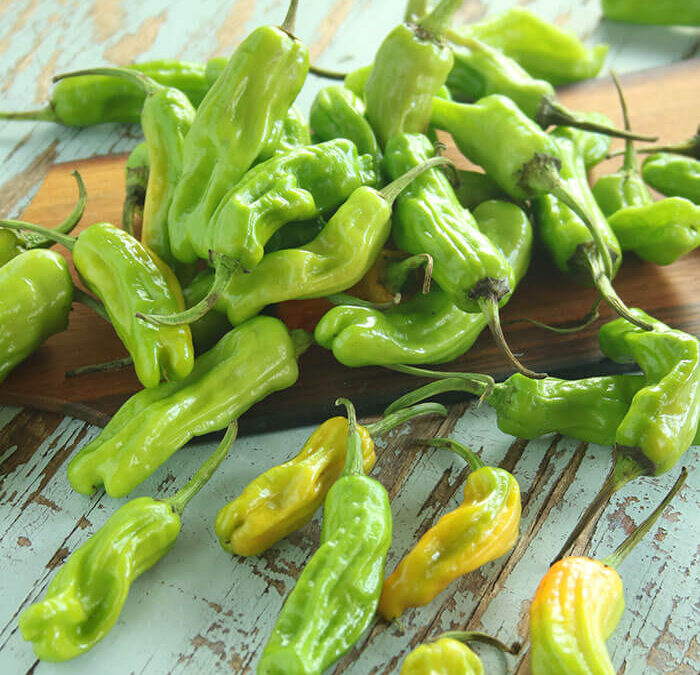
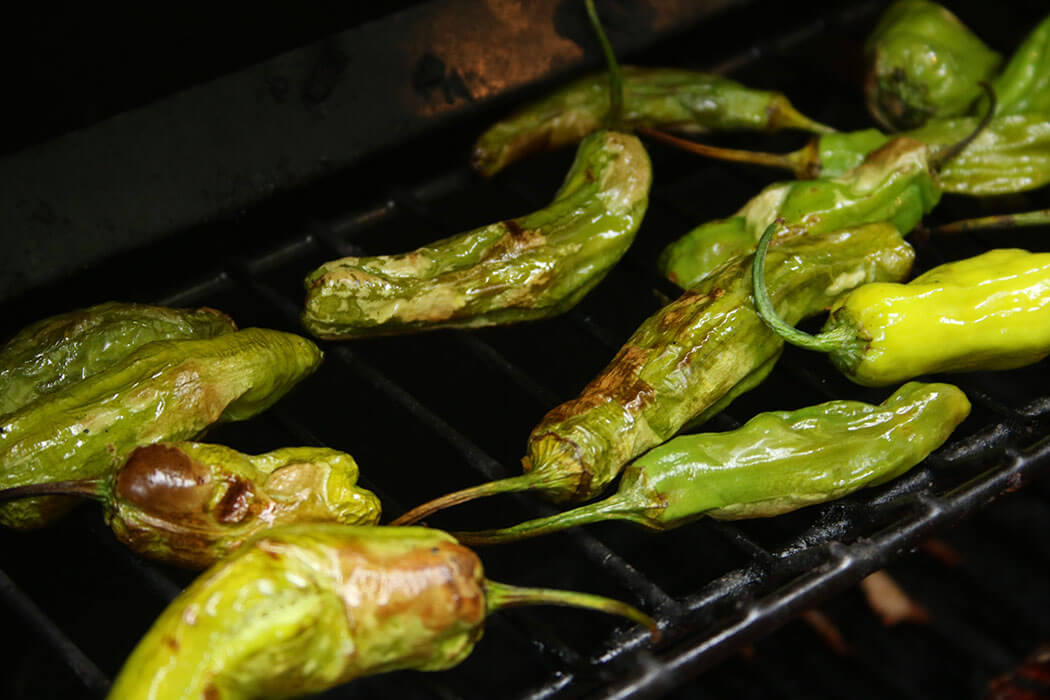
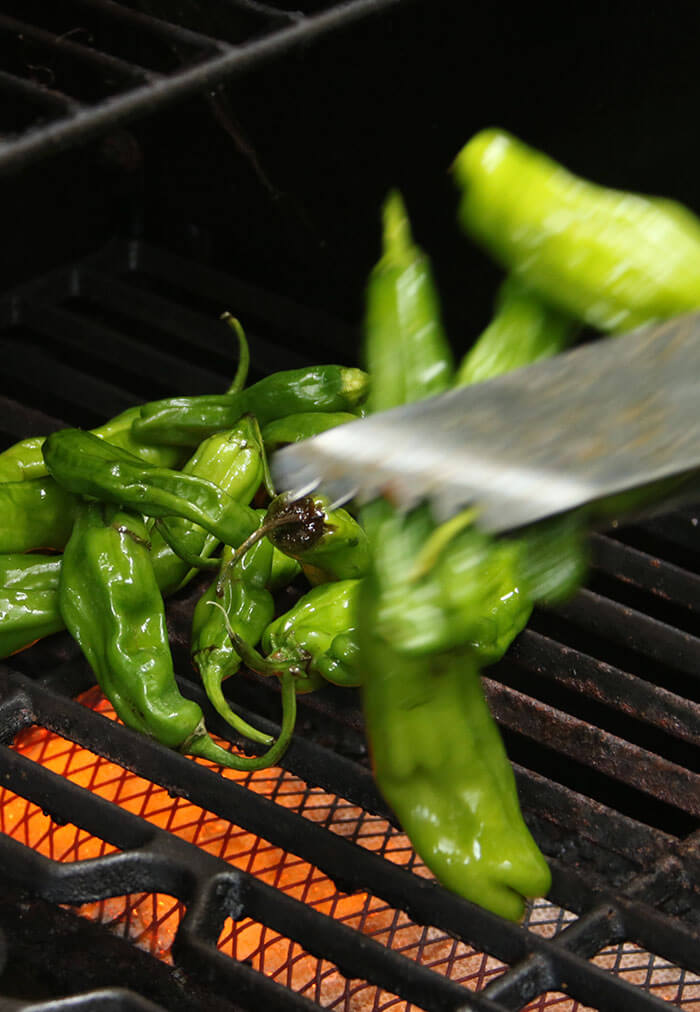
In this impending season of eating too much – and loving every minute of it – here’s an appetizer that is a real crowd pleaser and won’t bust the gut. Roasted shishito peppers! Super-fast to prep, full of flavor with just an occasional touch of heat, shishito peppers have an “I-want-more-ish” quality to them and are pop-able like edamame, though they have the added benefit of being just as good at room temp.
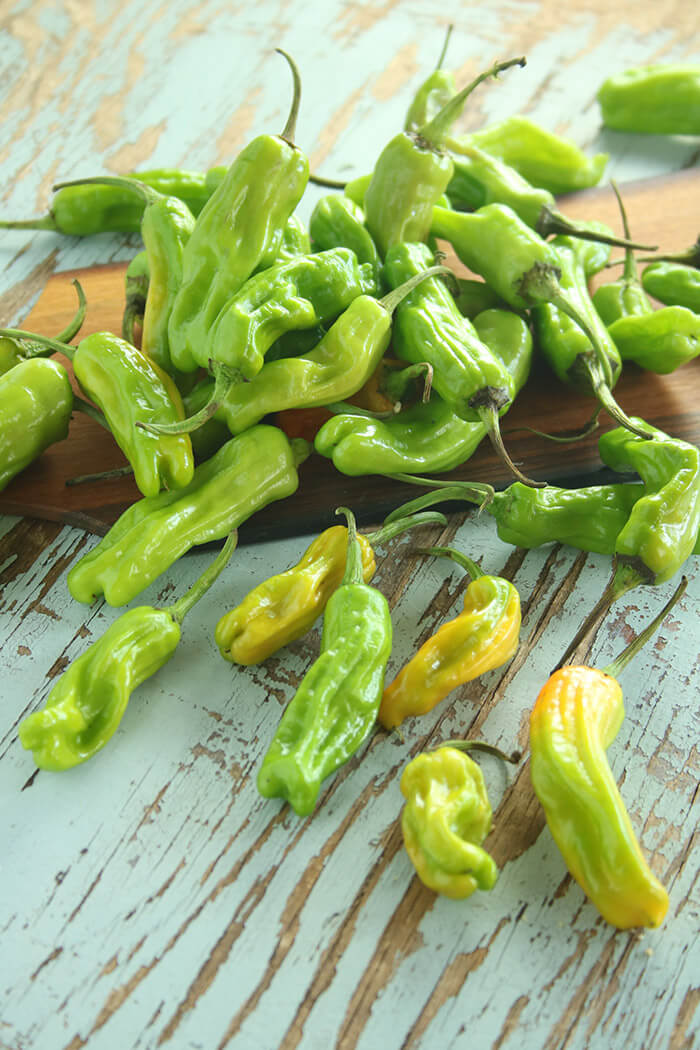
Shishitos are a Japanese pepper, long and slim and a bit twisty, with a tip that allegedly looks like a lion’s head (shishi in Japanese). A bit citrusy and herbal, they are pretty close to the Spanish Padron pepper. Cooking them until blistered brings a smokiness that makes this a veritable party in your mouth.
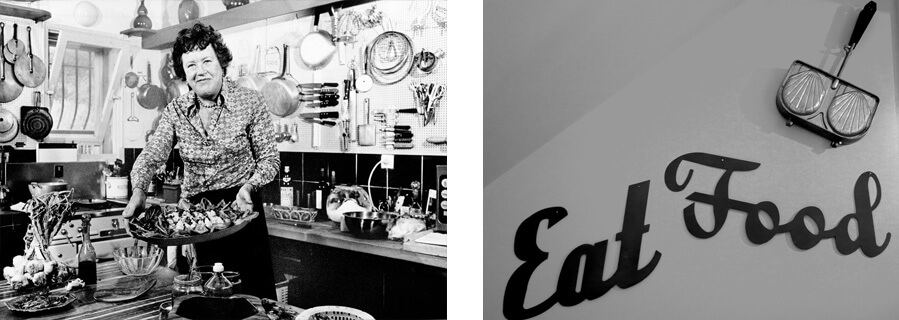
Not long ago shishitos would have been impossible to source outside a fancy greenmarket, but now they are widely available at the grocery, thanks to Melissa’s, the largest distributor of specialty produce in the country. I love the unique items that Melissa’s carries, ranging from tiny coconuts (coquitos) to dried Bhut Jolokia chiles. And I have a special place in my heart for Melissa’s owner Sharon Hernandez who once blessed me with a gift of culinary history – one of Julia Child’s beloved sandwich presses – the very one that almost took me down.
During the run of the Rosie O’Donnell show, I styled cooking segments with Julia Child on many occasions. This particular day Julia was scheduled to appear live and demonstrate a lovely recipe for a toasted Croque Monsieur sandwich. Rosie, who built her shtick on an alleged pedestrian palate, was making her spin on the famous French fancy. Wonder Bread in place of Pepperidge Farm Toasting White, Bologna in lieu of Black Forest Ham. No Gruyere – just Velveeta. And the plan was that Rosie’s sandwich would not be precious and pressed, but 1-foot high. Bigger is funnier, or so was the show’s mantra.
As the foodstylist for the show, I had assembled all the groceries and props, but awaited Julia’s arrival to make the “beauty” sandwich. She was hauling her prized shell-shaped sandwich iron from her Cambridge home, and with that I could create the final dish. She arrived on schedule, and I made several test sandwiches for her approval. Routine as always, we were good to go.
As the show counted down to its live cold open, I fired up the burner and started browning some butter. Through an epic fail on the part of the special effects department (heads rolled that day) and completely unbeknownst to me, the smoke detector in my make-shift kitchen (better known as a hallway) at historic 30 Rock had not been disabled as was our norm. Being a landmark building, working with open flames and having an unventilated kitchen was strictly forbidden. That had never stopped us before.
No sooner did I turn on the flame than NY’s Bravest stormed the building, throwing my pan against the wall and dragging off with the burners. Silent in the hallway, the alarm was blaring on set with a full studio audience. Mere minutes until the show went live… or would they have to throw to rerun? With just seconds to spare, the alarm was silenced, the audience calmed, and the call was made to continue with a live show. And NYFD was interrogating me as an enemy of State. Well, it wasn’t that drastic, but they did take away my flame.
I found myself with few options. I had minutes, not hours; I had no burners or sauté pans. So, by hand, I smashed the cold bread into the iron to shape it shell-like. I hauled out a Preval paint sprayer and mixed up a combo of bitters and browning agent and lightly spray painted/“toasted” the bread. I dipped the cheese in the Propmaster’s hot tea to melt it. It wasn’t half bad. And, yes, it was the full extent of my equipment and tricks.
And then SHE sauntered from her dressing room, oblivious to the surrounding chaos, and passed final judgment on my creation. “Dear girl, it’s awfully pale.” She had no clue – her dressing room, like my hall, had no blaring sirens!! But she kept walking. And the show went on. And it was just another day in live television.
A few years later, long after Julia went to the big Panini Press in the sky, four sandwich irons came up at a culinary auction. Heavy hitters in the biz got into a bidding frenzy and I was left in the dust. My friend Gerry told me I was out of my league: “That’s some tall cotton, girl.” But not long after, thanks to Melissa’s and Sharon’s generosity that shell-shaped sandwich iron appeared on my doorstep. It is mine, all mine. It’s hanging on my wall, just like Julia used to hang it…well, minus the hospital green pegboard with blue magic marker outlines drawn by her husband Paul, indicating the one and only place each gadget was to be stored. I pull it down every once in a while, but mainly it’s retired out of respect to the woman who made it look so easy and laughed all the while.