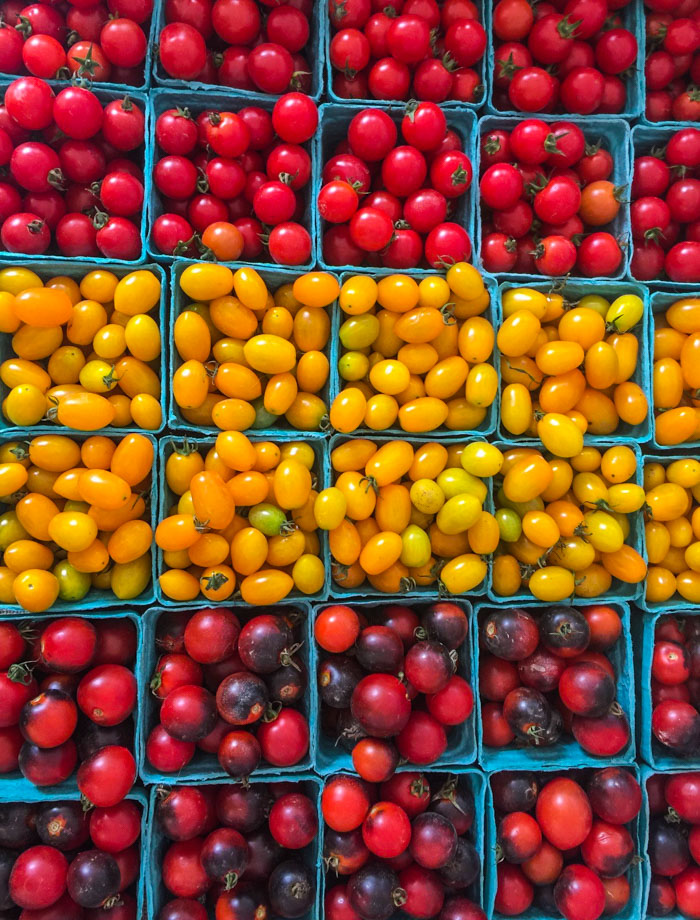
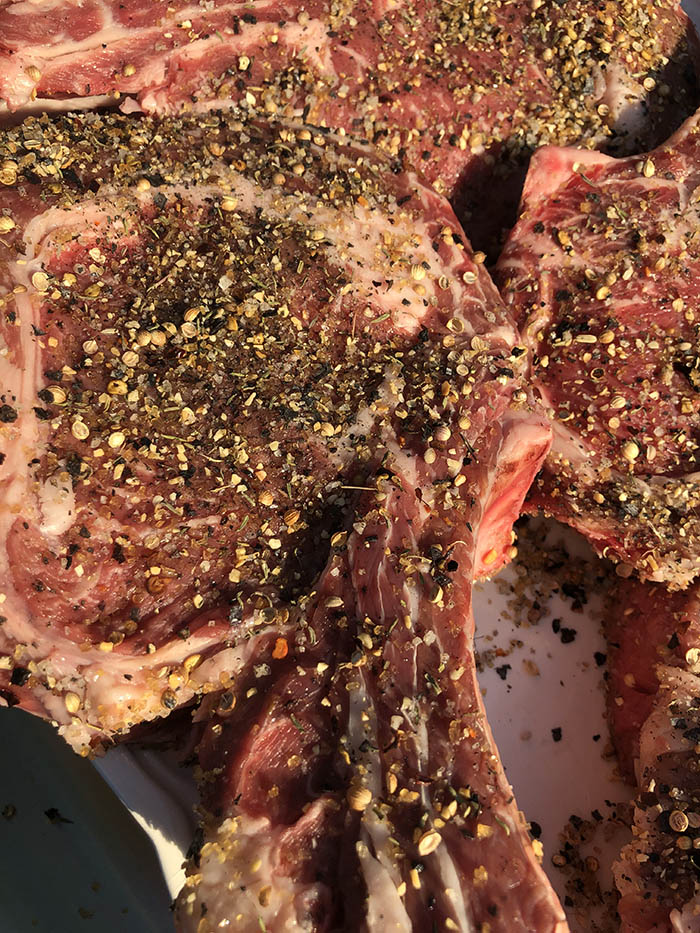
Summer is most certainly winding down and there is a little nip in the air. But fear not! The farmers’ market is still humming. And while you might see an apple or pear starting to make an appearance, corn, tomatoes and stone fruit are still holding court. I have been jonesing for a menu that highlights all that and more, where more equals a big honking tomahawk steak, rubbed to an inch of its life with a killer zesty spice rub. Do you feel me?
I guess you could call this a Pot Lucky because I had help. Lots and lots of help. But it was a pint-sized party compared to others in the past. It was dinner-party sized, to be exact. It was also a Pot Lucky in its most basic form because the menu was curated around a theme. The theme: Farmers’ Market Summer Harvest Bounty! I love the creativity that my guests bring to the table. A quick stroll through a farmers’ market or two and they all raised the bar on imaginative recipes and colorful culinary creations. I have to say – and they all agreed – it was a top ten (five?) meal of my life. Every damn delicious morsel. If I could, I’d eat it all over again. Right! Now!!
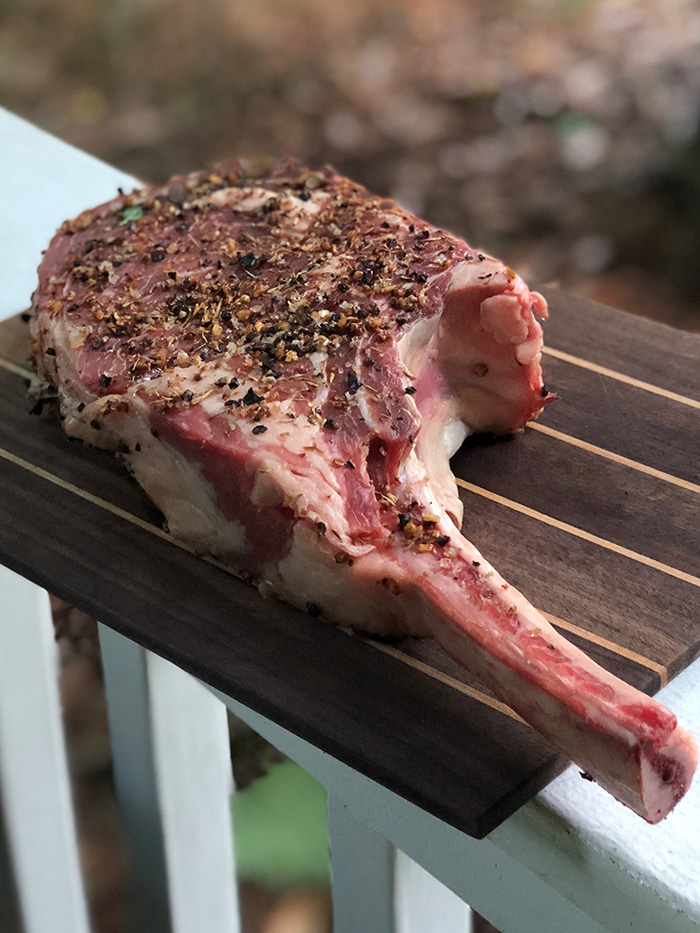
What’s a Tomahawk Steak?
I thought you’d never ask. Before I drill down on the deliciousness that was this menu, I wanted to throw a little 411 on you about the famous TomahawkSteak. Also sometimes known as a Cowboy Steak, a Tomahawk is a bone-in ribeye. And by bone-in, I mean all the way in. The steak is usually cut with 5 – 15” inches of rib bone hanging off the chop. The longer the bone, the more tomahawk-looking and all the more dramatic its presentation. It’s a bit fashionable at the moment because of its oh-so-eye-popping presentation. A Tomahawk also varies from a boned ribeye in thickness and weight. Because each rib gets its own serious slab of meat (a boned ribeye can be cut to any thickness), they tend to be about 2” thick and weigh upwards of three pounds, depending on the butcher and size of the cow. This section of the cow is also where T-bones and Porterhouses come from.
Once cut, a butcher will clean the bone by scraping off meat, fat and sinew, a technique called “Frenching”. Think of a rack of lamb with those pristine gleaming racks (bones). You’ve likely heard that cooking meat on the bone adds flavor, but since most of the bone extends beyond the meat it won’t likely add much. True, bones are full of collagen and vitamins, and that is why they are turned into stock and cooked down for demi-glace. But to get at any residual marrow, you need a wet cooking technique like braising, not a high temp grilling technique that chars the bone.
And in case you are wondering, Tomahawks are not limited to beef. Any large rib-cage animal can produce a Tomahawk. In a fancy steakhouse – or at your local butcher – you might find bison, pork or even venison Tomahawks. For the summer harvest dinner, I went with beef.
How to Cook a Tomahawk Steak
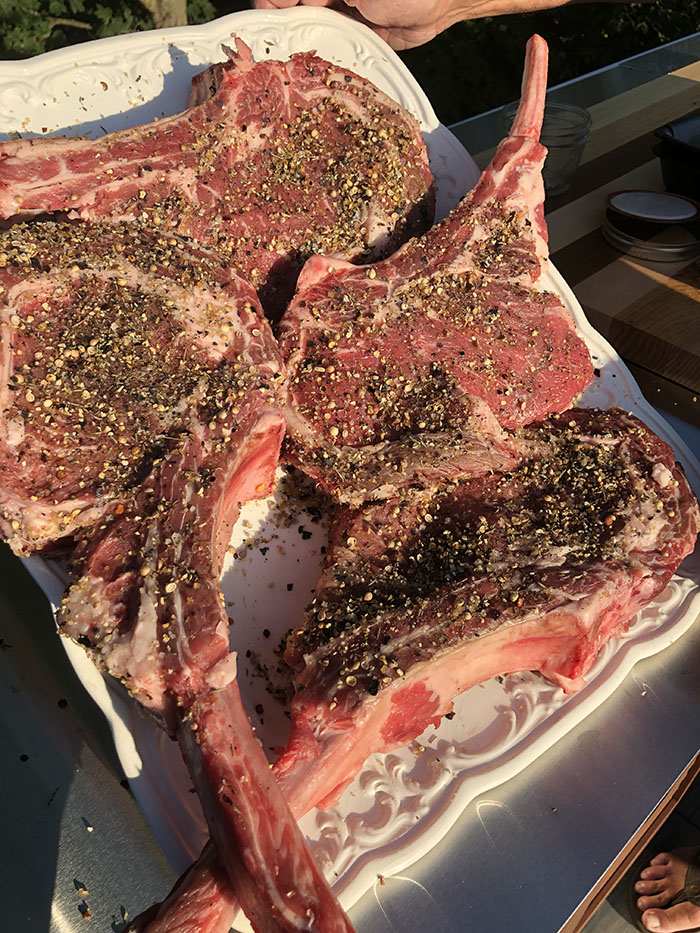
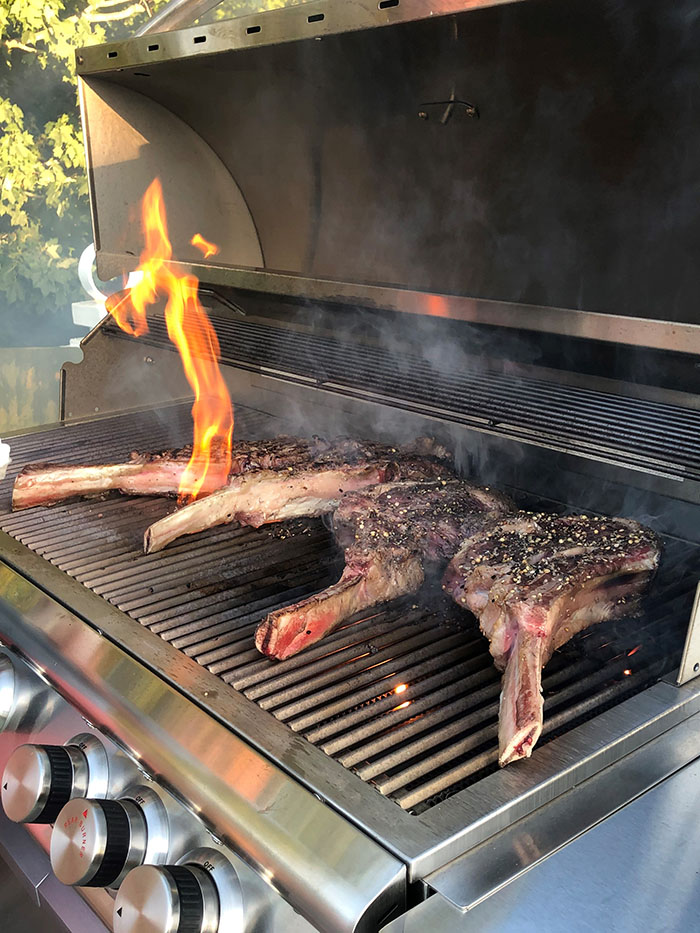
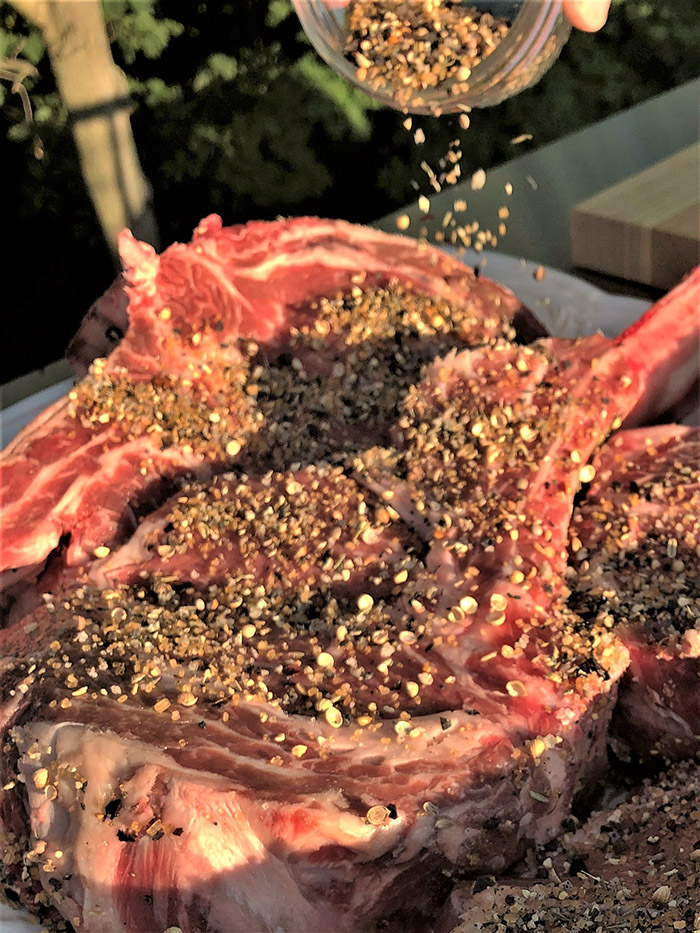
I think the ultimate in Tomahawk Steak preparation is a rip-snorting fire. I mean if we are going to eat like a caveman, let’s cook like one, too. It’s pretty foolproof, but if you are at all unclear about doneness, invest in an instant read thermometer, like the one in my shop. Make sure the meat is at room temperature and pat it dry. I have included a spice rub below, but feel free to use any spice rub that you love. If it contains salt, as does mine, rub it on just before grilling. The salt will pull the moisture out if you let it sit too long. Apply the spice rub generously to both sides of the meat and rub it in to minimize fallout (falloff?). It’s called rub for a reason!
There are two schools of thought on high-temp cooking for lean cuts of meat: sear and move to the cooler side or cook on the cooler side, then move to the hot side, ending with a sear, known as a reverse-sear. I have done it both ways and it’s a matter of personal preference, though the reverse-sear will look less charred. Either way, your gas or charcoal grill will need a hot side, as well as a cooler side where you will cook with the lid closed, using the convection created by the grill’s lid. If you opt for the reverse-sear, cook until your meat is about 20 degrees below your desired temperature (goal of 130oF for medium rare), turning periodically. When the meat reaches 110oF, move it to the hot side where you can get your perfect grill marks, or at least a nice, dark, caramel-colored finish. This reverse-sear technique has the added benefit of giving you some crust but without a full-on carcinogenic char. ?
The most important thing EVER for meat is to let it rest before carving – for a big slamming hunk like this, at least 10, more like 15, minutes. This allows the juices to retract back into the muscle, resulting in pink juicy meat. I want to cry every time I see someone pull a $100 tenderloin from the oven and cut immediately as the juices run rampant, leaving a grey blob back on the board. Just say no! And don’t forget to cut across the grain as you would with any piece of meat.
What’s in that spice rub?
I love to play around with spices in the pantry to come up with some unique combos that are easy to grab when headed to the grill. I do have a robust collection of components from which to mix, but truthfully you could make the spice rub below without all the bits and pieces. There are two salts – one would do. There are two peppers – ditto. I like a bit of sugar (remember the sugar steak?) to help with creating a crust on the steak, but you could use brown sugar if you don’t have turbinado. The main marker of this spice rub is that everything is chunky. That’s a good sign of a rub. If you just used iodized or fine sea salt, it would over-absorb into the meat. The chunkiness has the added benefit of providing pops of flavor, a concept that may be my life’s mantra.
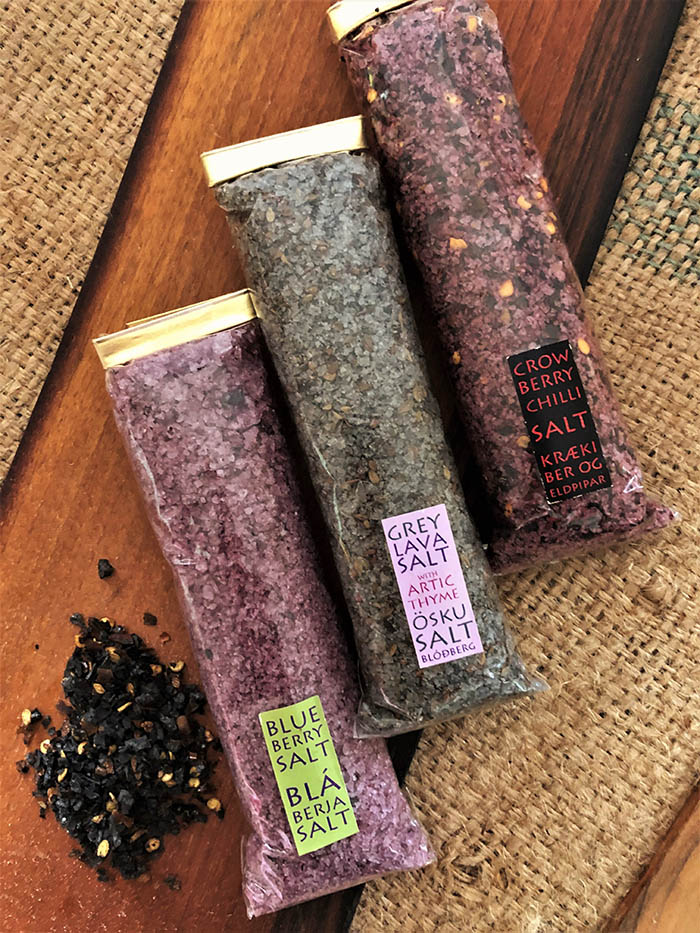
I’m using a black sea salt from Iceland in this mix. (There’s one in my shop if you are curious). It’s no surprise that the island is full of salt options, but I was dazzled by the endless assortment of flavors, many of which start with a black lava salt. I came home loaded with blueberry, grey lava, crowberry with chili, black lava and about 10 more. The one in my shop is not Icelandic, but it’s also not the one that promises to be anti-Wiccan and claims to reverse spells, remove jinxes and keep away bad neighbors. Buy that at your own risk. 🙂
This spice rub is great for so much more than just the Tomahawk. I hope you will make up a batch and let me know how you plan to use it.
Summer Harvest Bounty Menu
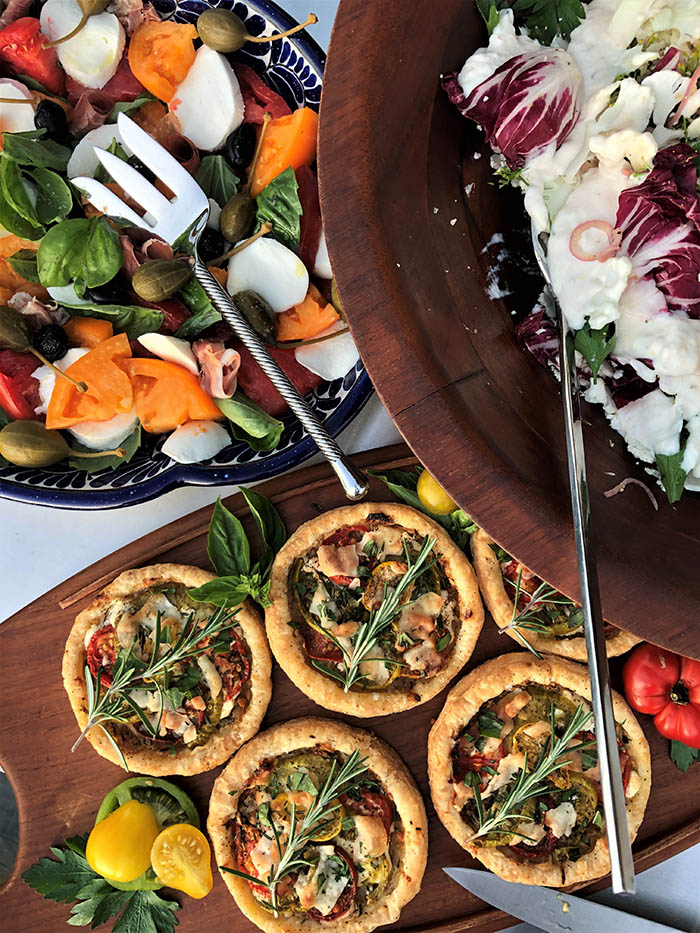
Now that we are set on the main, what else sounds good? As a petitPot Lucky, my fearless guests hit the market and came out swinging. We started with these yummy Goat Cheese Tarts with Fresh Herbs and Heirloom Tomatoes.
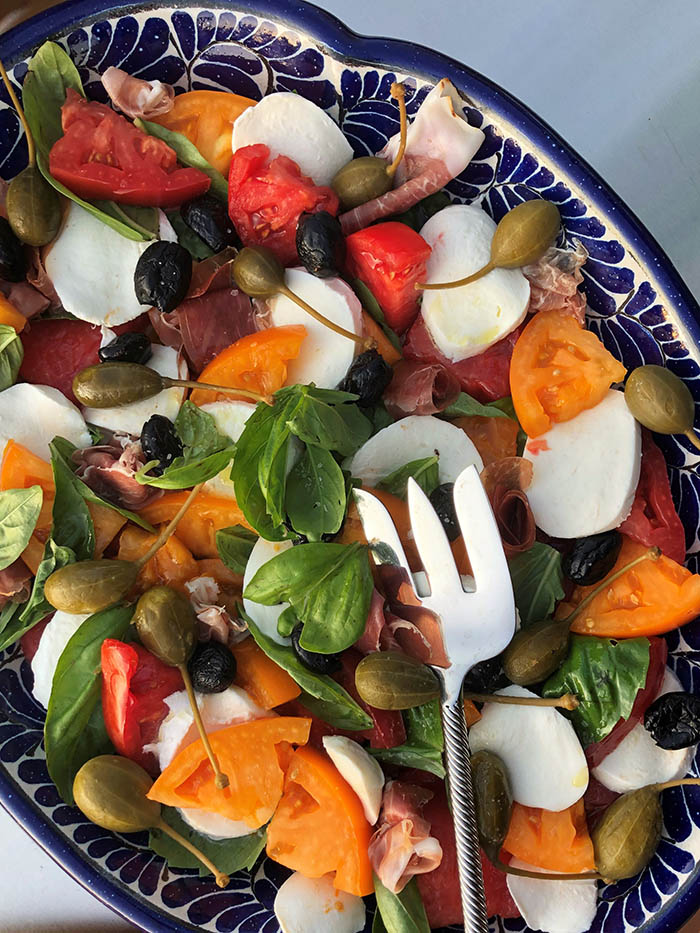
And speaking of tomatoes, how about this Caprese Antipasti? Caperberries can be a challenge to source, but fear not, they too are in my shop.
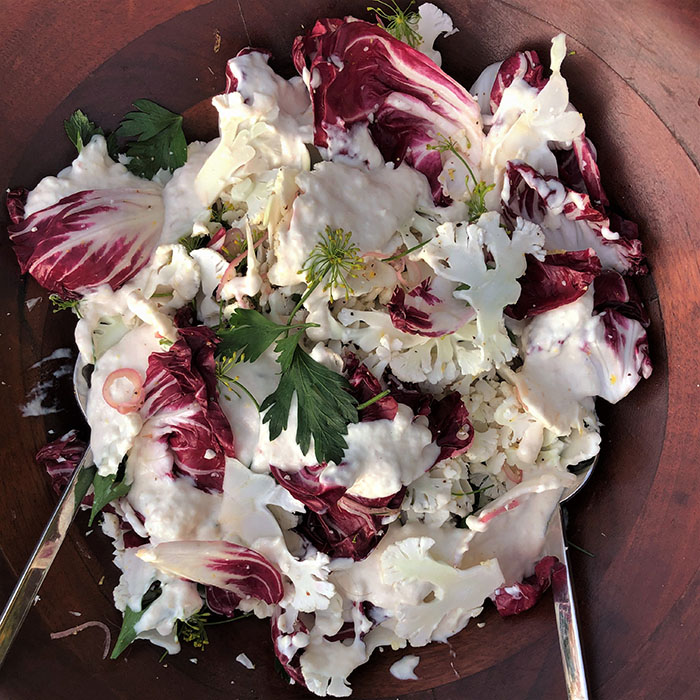
And how about this wonderful combo of shaved cauliflower and radicchio? It’s packed with fresh herbs and doused with a smoked whitefish mayo. Look for the recipe in a wonderful new A to Z vegetable cookbook Ruffage, penned by a southwest Michigan chef and farmer Abra Berens. It’s all about farm to table – to be exact, Granor Farm to table, a journey of a mere 50 feet.
Shaved cauliflower salad with smoked whitefish mayo, lemon, radicchio and herbs (Recipe from Ruffage).
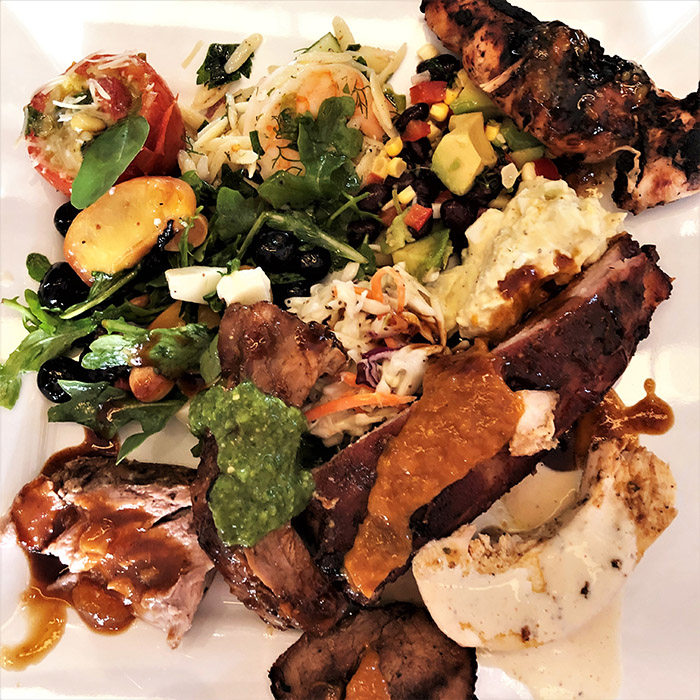
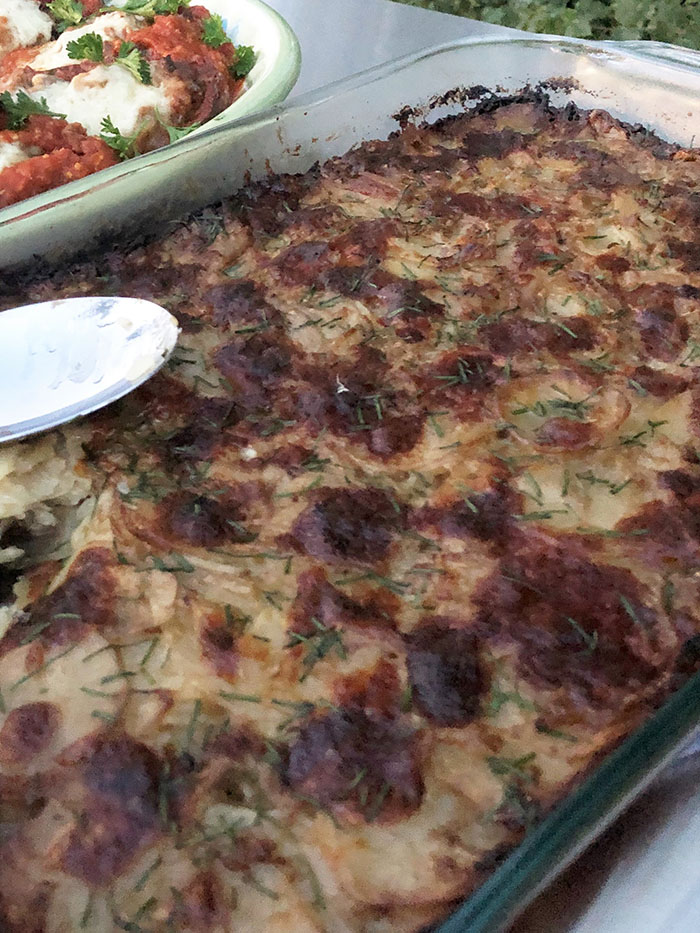
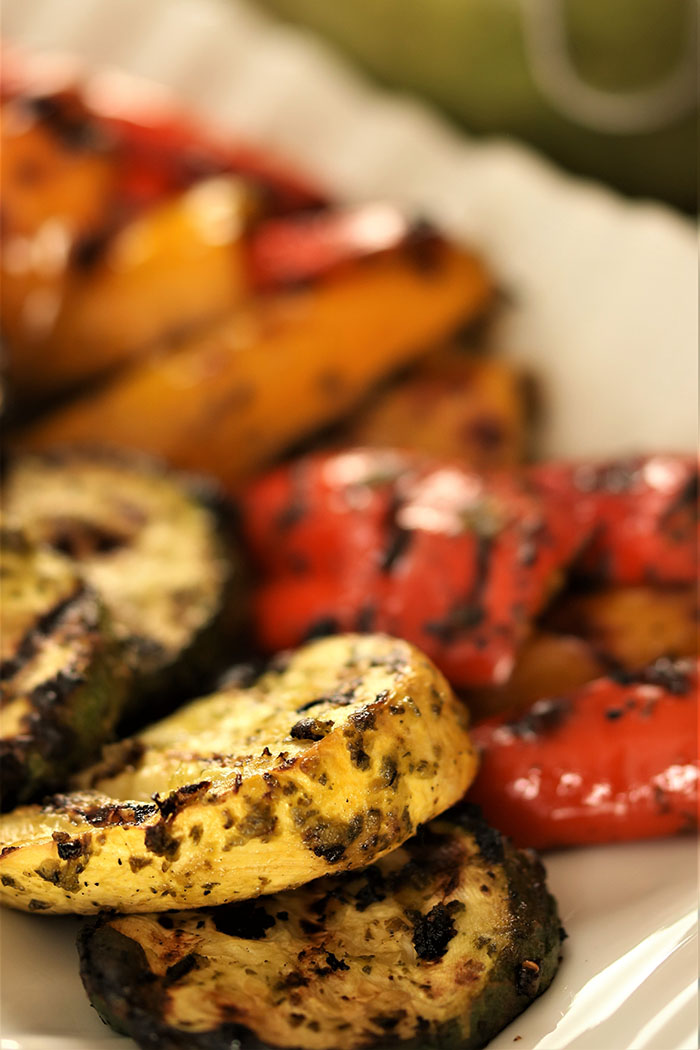
While the meat rested, we started with that trio, then moved on to the Tomahawk with the Green Machine Salsa Verde and Ina Garten’s Potato Fennel Gratin. Luckily that woman is not afraid of heavy cream and Gruyere. It was wonderful to have such a decadent side and yes, happily, there were some leftovers. Yahoo! There was plenty of yummy pinot to go around and I pulled out a couple bottles of Cherry Pie, a California favorite. Yum.
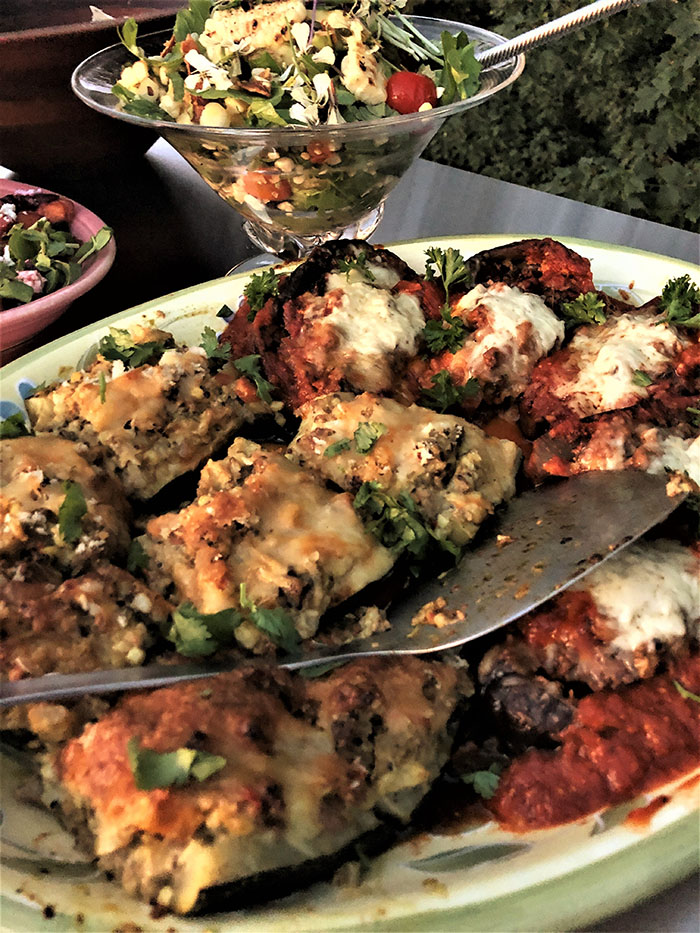
One of my favorites on the table was a duo of stuffed vegetables – zucchini and eggplants, one stuffed with ground bison and the other with ground lamb. Both were filled to overflowing with delicious grains, tomatoes, corn, plenty of herbs, and smothered with zesty tomato sauce and shredded cheese. Heaven on a platter!!
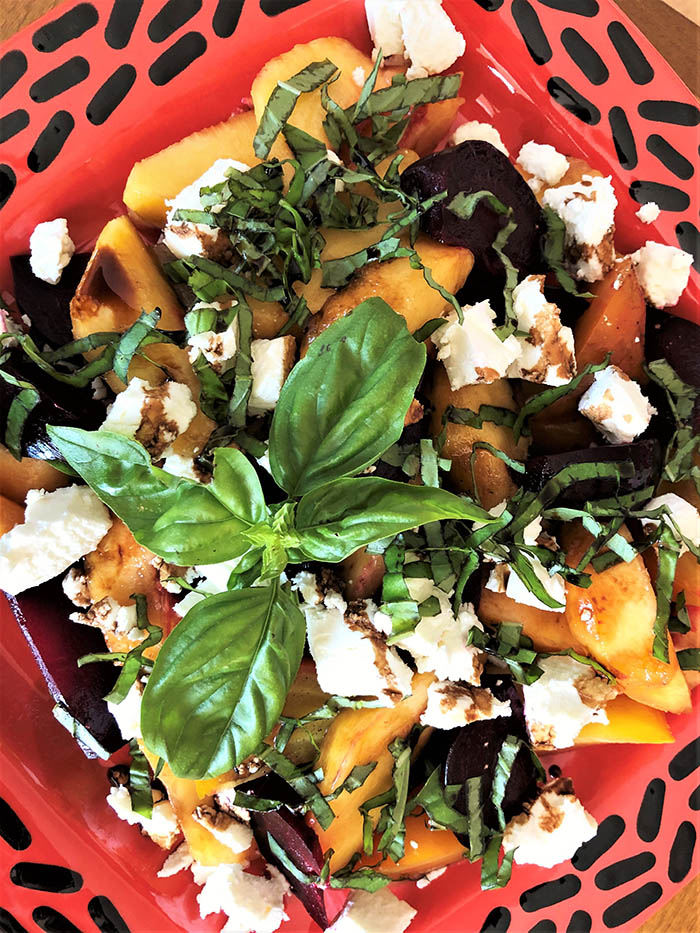
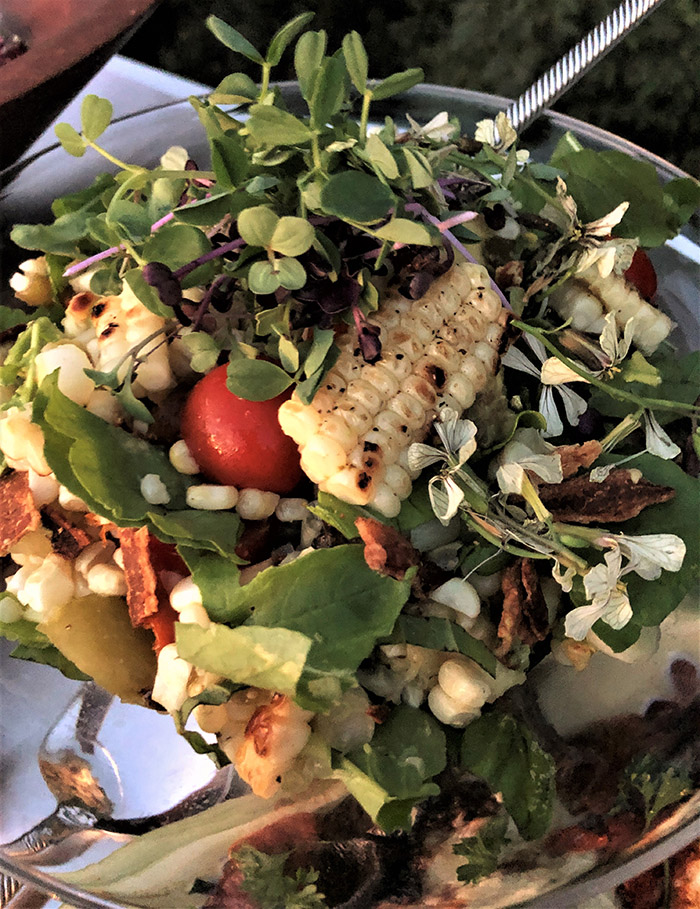
I know – the mind reels that there could be more, but nobody was going away hungry. Two salads crowned the buffet. Both have been here on the blog before and are about to come out with a fresh face very soon. The Everything but the Farmer Farmers’ Market Salad – a perfect summer harvest chopped salad of corn, so tender it took only a minute or two on the grill, grilled tomatillos, tomatoes, arugula, sprouts, arugula flowers, bacon and avo. And Roasted Yellow and Garnet Beets with Peaches and Goat Cheese and topped with a cascade of fresh basil. Sometimes I use nectarines. Sometimes I use fresh mint. But choose whatever is available locally and plenty ripe. I love to give it a drizzle with a fruity balsamic like raspberry, but an aged Balsamico is also delish.
And for the crowning glory – drum roll please – a peach and blueberry tart. I mean, could you die?? The sun was setting fast………on the evening, the season and the markets, fading with every last bite. But with the end of one season, a new one begins. And so, it goes. Circle of life.
I hope you too will circle up the friends and family, and pull together a meal as epic as this feast. Every morsel was perfectly seasoned, and every crumb gobbled up. I can’t think of a more respectable way to pay homage to the bounty that summer brings. Breaking bread with those you love is indeed a privilege. Amen to that!
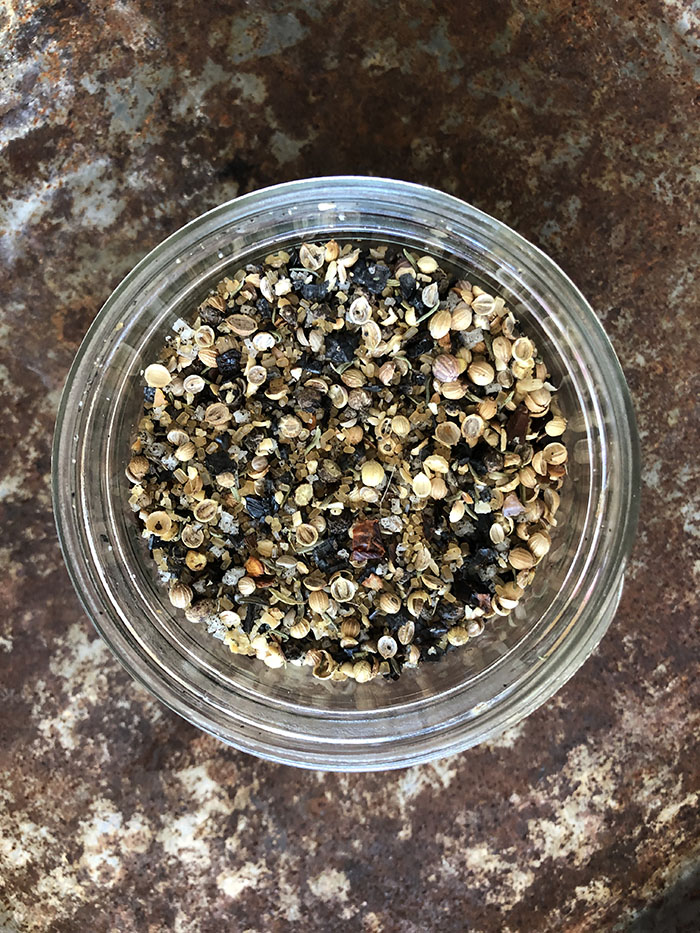
All you need to know about Tomahawk Steaks and how to cook them, plus a zesty spice rub good for so much more. This chunky rub has the added benefit of providing pops of flavor, and its black lava salt helps keep jinxes at bay.
Place the coriander seeds in a mini chopper or spice grinder and pulse until coarsely ground. Transfer to a mixing bowl. Repeat with the Tellicherry peppercorns.
Add the remaining ingredients to the bowl and stir to combine.
Store in an airtight container.
Notes
1/2 cup makes enough for 4 Tomahawk Steaks or 12 single portion steaks.
Also good on other cuts of beef, lamb, poultry and more.
See post for details on how to cook Tomahawk Steaks!
Prep Time:5 minutes
Category:Spice Blend
Method:Dump & Stir
Cuisine:American
Keywords: spice rub, Tomahawk Steaks
Thanks to all my Pot Lucky-ers for continuing on this journey and being intrepid voyagers. Are you game to try your hand at a Pot Lucky? Let me know how it goes. Tag me with #PotLucky & #PalatePassionPurpose. And as always, I love to get your comments below.
Items mentioned in this post are available in my shop. Most items are linked to an amazon page and are available for Prime shipping. We make a tiny commission on each purchase which helps keep the larder full and allows for more free content for you! Thanks for supporting Palate. Passion. Purpose.
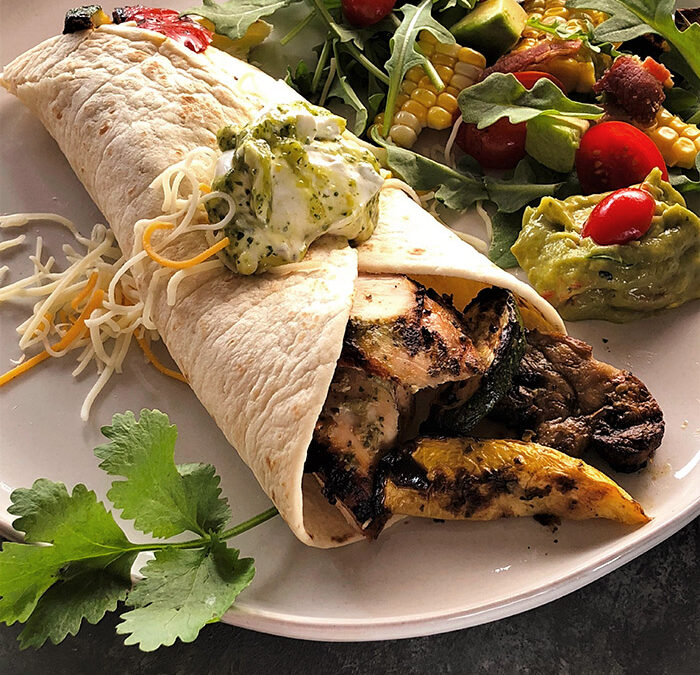
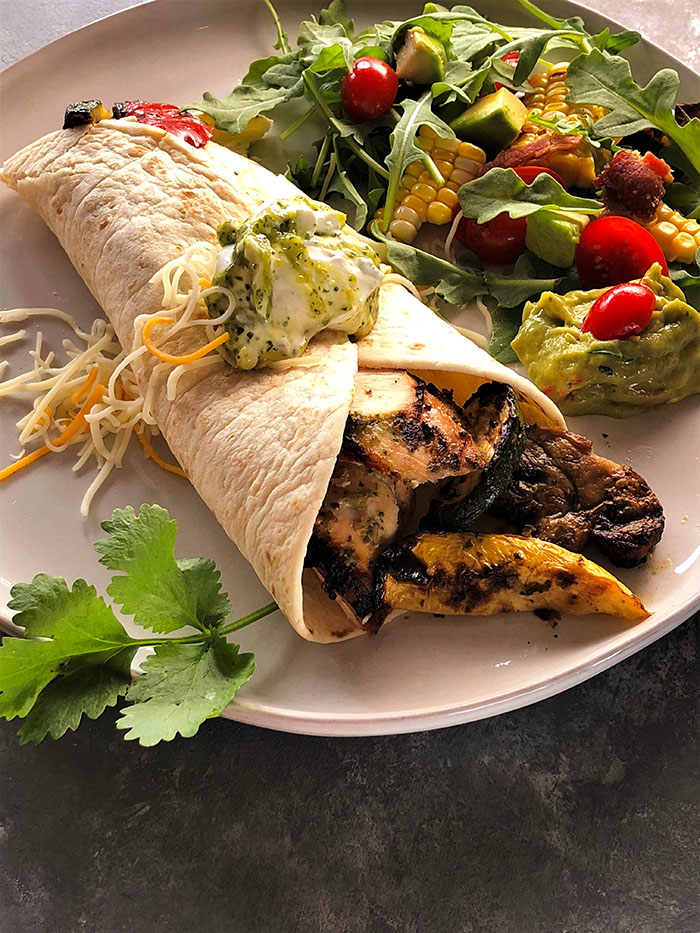
Listen to the applause circle the globe as I am FINALLY posting the recipe for the Green Machine Salsa Verde. This recipe starting making the rounds with the Fajita Pot Lucky two years ago and has appeared in various iterations ever since, most recently at the All American BBQ Pot Lucky. Requested on the reg, I found when trying to share the recipe that I had continually been reinventing the ratios and ingredients. This is finally the definitive formula which I tested again just this week for another Pot Lucky, to be posted very soon.
The Green Machine, while technically a Salsa Verde that can be used on its own in the traditional green sauce way, is so named because it’s a workhorse. Check out the laundry list of possibilities below. I’m not suggesting you try all these things at once – that’s for professionals, kids! – but this fajita above has the Salsa Verde as a marinade for both chicken and veg; it’s mixed with sour cream for the grand dollop, and it’s kicking up the guacamole. Try any one or two at a time, but pace it out.
What is Salsa Verde?
Unless you are living under a rock, you have no doubt come across this delicious dazzler. Every country has its own version: Italy has pesto, but also a parsley-based verde with capers and anchovies; Mexico’s includes cilantro and chilis; in various Asian countries you will find green curries; and of course, Argentina’s famous chimichurri is chockablock with parsley. The name chimichurri came with the arrival of the Basques in the late 19th century and their word tximitxurri, meaning a mixture of things in no particular order. This, too, is a sort of no rules recipe!
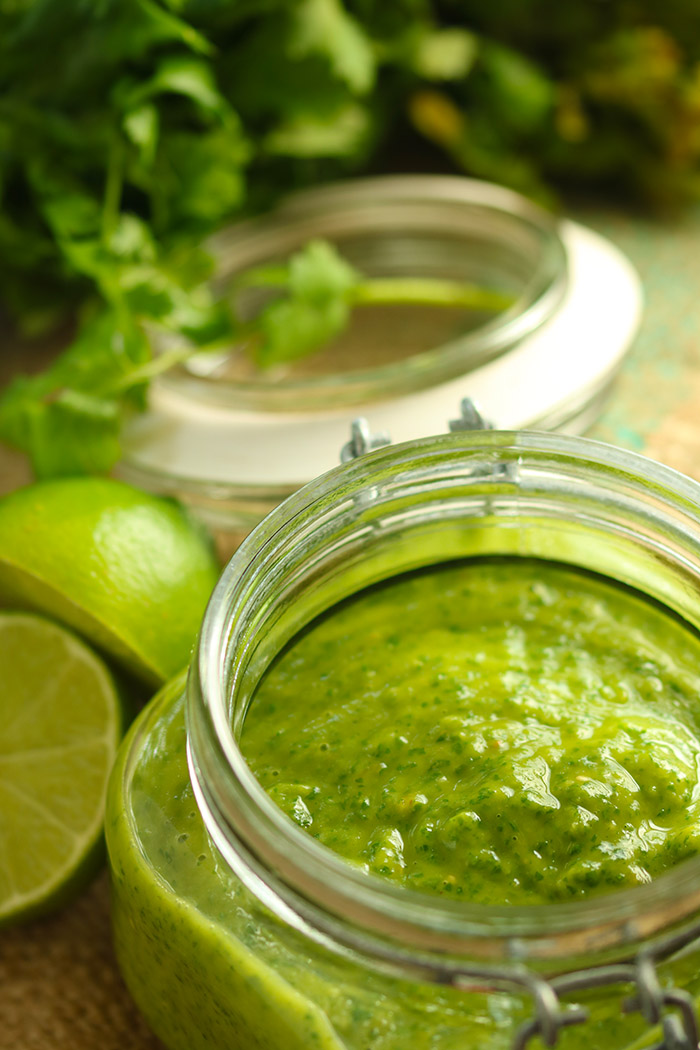
The recipe featured here is Mexican-based. Lots of cilantro, roasted chilis, tomatillos and lime juice. I used Hatch chilis, which are just starting to come into the market right now. They are exclusive to the Hatch Valley in New Mexico, and if you are lucky enough, your local store may have a few days or a week of offering them, most likely from the good people at Melissa’s Produce. Check their site to see if there are any stores near you. (They are at D&W in Grand Haven today!) The chilis, which have an earthy taste and varying degrees of heat, mature in a very short window in late August and September. My store roasts them for me, but I clean off the char and pull out the seeds and stems before zipping to freeze. It makes it infinitely easier to just pull out a few at a time all winter to throw into soups and stews, and, yes, more Salsa Verde, should I run out.
If you don’t get them, feel free to roast some poblanos or even use fresh jalapenos should you be grill-averse after a summer of BBQs.
How do you thicken Salsa Verde?
Some versions of this yummy sauce may have you reducing down the mixture on the stove to thicken. Me: “Just say no!” I feel that kills all those bright and beautiful greens and turns it to a dull olive drab. I have two hacks to help with this. First I add a ripe avocado to thicken things up, and second I add a slow drizzle of olive oil with the processor running to emulsify the sauce. The avo may shorten the life a skosh, but you will go through it quickly so that’s never been a problem. You can also divvy it up into smaller containers and freeze small batches of it. You might even consider an ice cube tray to create portioned cubes of the saucy wonder. I have some in my shop that make large cubes and are covered for both easy stacking and keeping the freezer burn at bay.
Salsa Verde Uses
Here are just a few of the many ways you can mix this green goodness into your daily life:
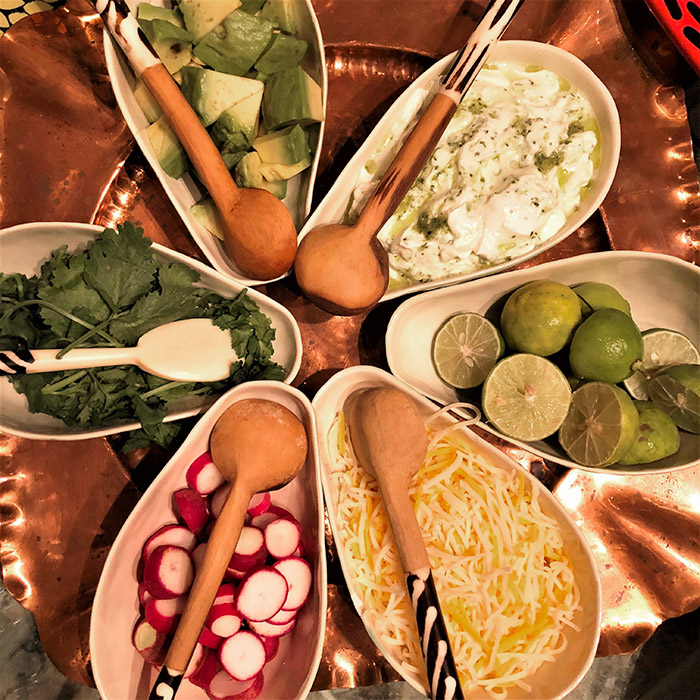
On the table as a condiment (photo below) – amazing with grilled meats
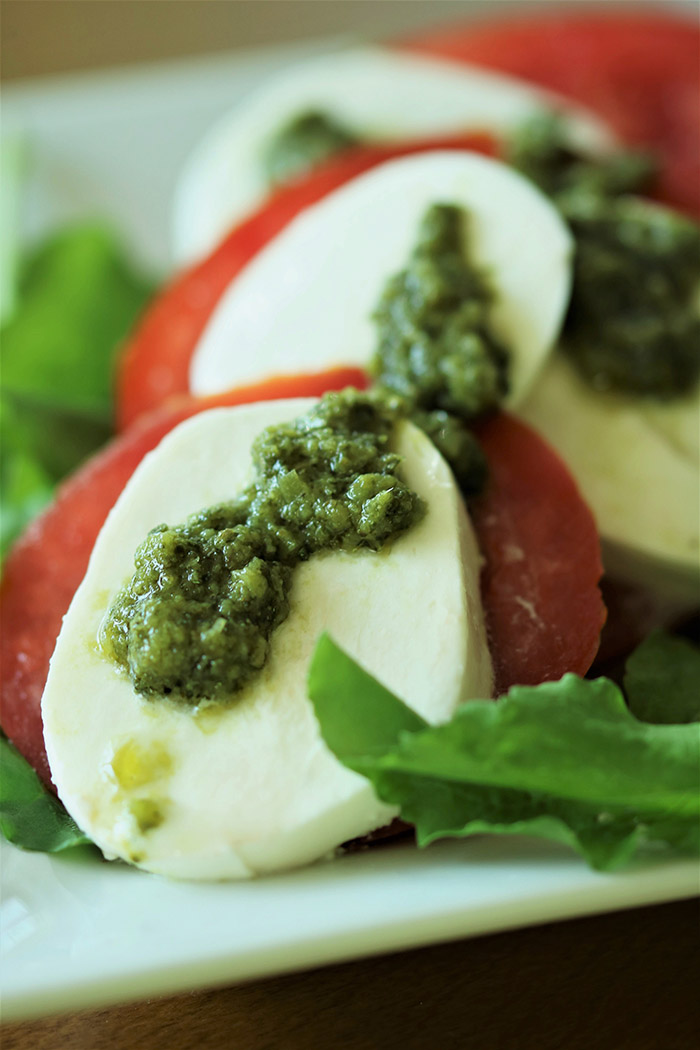
As a drizzle on cheeses (above on a Caprese) How about a burrata drizzle?
Mixed with sour cream for a dip or dollop (Mexican condiment tray at bottom)
Stirred into guacamole for a kick up
Mixed with yogurt as a spread (I just used it on steak sliders)
Marinade for vegetables, chicken, fish, or meats (vegetables below)
Glaze to brush on dishes just before they come off the grill
Pizza sauce
Spice up a tortilla soup …..or any other soup or stew
Eggs, hell yaas! How about that Mexican egg layered number, the chilaquiles?
Salad dressing – mix with buttermilk and make it creamy
Drizzle on a citrus salad? Grilled fish! Sauteed scallops! Steaks!
Anything tortilla based – Tacos, burritos, quesadillas, enchiladas, y mas!
Cocktails! Shake it up with some lime juice and tequila! How about adding an oyster shooter to that combo? Oh yeah!
However you chose to use it, please report back. Comments and shares keep this blog going. I know you are going to love this and can’t wait to hear how you put this to use. Enjoy!
The Green Machine, while technically a Salsa Verde that can be used on its own in the traditional green sauce way, is so-named because it’s a workhorse. Check out the laundry list of possible ideas from marinade, to dip, to dressing, to cocktails.
Ingredients
Scale
2 cloves garlic
2 roasted Hatch or poblanos chilis, seeds and ribs removed
3 cups arugula, tightly packed
1 bunch of Italian parsley, bottom stems discarded
1 bunch cilantro, bottom stems discarded
juice of 4 limes (1/2 cup)
3 medium tomatillos, husks removed and quartered
1 avocado, scooped from the skin
1 teaspoon salt
3/4 cup olive oil plus 1/4 cup water
Instructions
With the motor running, drop the garlic in the work bowl of a food processor until minced.
Add the chilis, arugula, parsley and cilantro in batches, pulsing as you add to create enough room and to chop finely.
Add the lime juice, tomatillos, avocado and salt. Pulse all ingredients until pureed.
With the motor running, slowly add the olive oil and water. Scrape down the sides as needed.
Taste to adjust seasonings, adding salt and pepper, lime juice or olive oil to balance the flavor. Final seasoning will depend on the chilis used and the “flavorfulness” of your herbs and arugula.
Notes
If you don’t have roasted Hatch chilis in your freezer (autumn is the time to buy them fresh, possibly already roasted by your local store, and stock your freezer for the coming months) nor feel like firing up the grill to roast poblanos, substitute 1-2 fresh jalapeños, ribs and seeds removed
Serve as a dressing, marinade, salsa or sauce. If needed, you can thin with additional lime juice or water. Mix with sour cream or Greek yogurt to make a sauce or dip. Add to guacamole to kick up the guac heat. If using as a marinade, use 1 1/2 Tablespoons per chicken breast or per half-pound of meat.
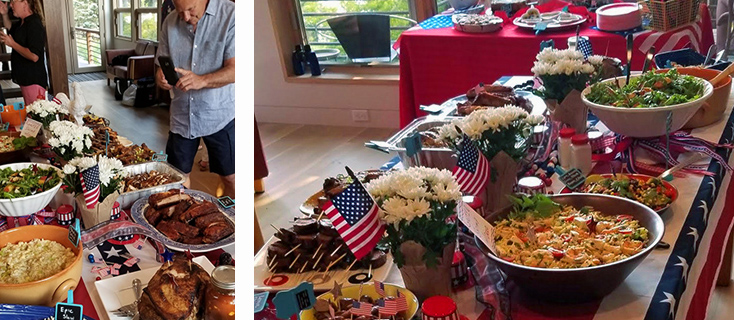
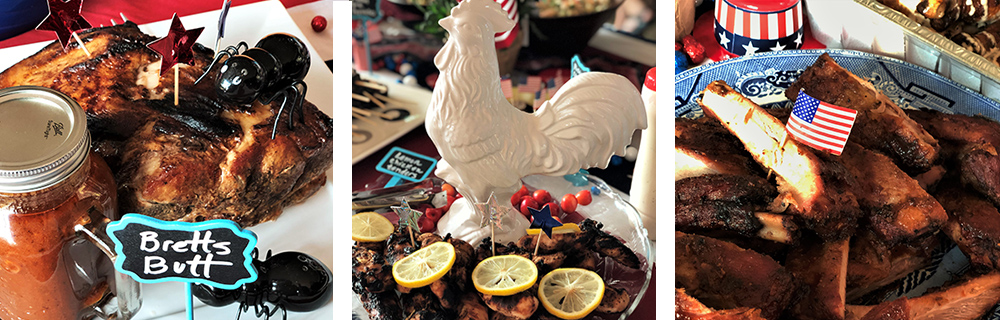
It isn’t summer without a Pot Lucky or two….or three. And just in time for Labor Day, here’s some inspo for the All American BBQ! I rounded up the troops – you must subscribe to the blog and you MUST be game to try something new – and as usual, they did not disappoint! Let’s kick it off with just three of the meats………..are you hungry yet?
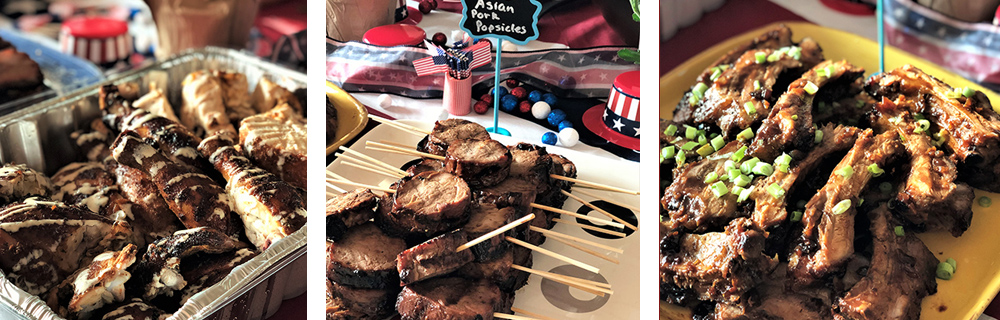
Meat, meat and more meat: Hickory smoked chicken with Alabama white BBQ sauce, Asian pork popsicles, ribs with Gilligan sauce (a lot of Ginger and a little Mary Ann).
It was a perfect storm. Beautiful house, beautiful hosts, amazing food and a fun group of Pot Lucky-ers with overactive imaginations. Culinary A game. A+!!
What’s a Pot Lucky?
If you are new to this, a Pot Lucky is my take on what I fear might be a culinary wasteland – the dreaded pot luck. Let’s put the LUCKY in Pot Luck, I say. I create a theme – All American BBQ this time – and ask guests to curate their dishes around it, avoiding the store-bought. Now, with a number of these under my belt, I’m finding more and more dishes that require an alarm set for 1 am to get the chicken out of the brine. Or one that gets started on Monday with sous vide so the ribs are smoked by Thursday. We are talking commitment here! I am not saying you can’t have a super simple Pot Lucky, but no matter your preference – simplicity or extravaganza – having your guests help with the heavy lifting can result in a stunning spread.
We’ve done about a dozen or more Pot Luckys so far with a good list of more to come. Some of my favorites include the salad palooza, fajitas, sliders, and a nautical theme. For details on how to host your own, link here. Depending on the party (8 kinds of meatloaf or 6 flavors of soup), you can plan on leftovers for your freezer. But for other themes, like the tropical-styled Swish Kabobs aka Food on a Stick, it’s more likely that the last pineapple will be licked right off the plate. The All American BBQ could have gone either way. Lots of food, lots of leftovers…..or A+ menu, A++ appetites. It was closer to the latter.
Atmosphere was easy to come by. Between the hosts’ Lake Michigan views and a smattering of red, white & blue on the tables, all was set. Add some killer BBQ, and you have yourself a party.
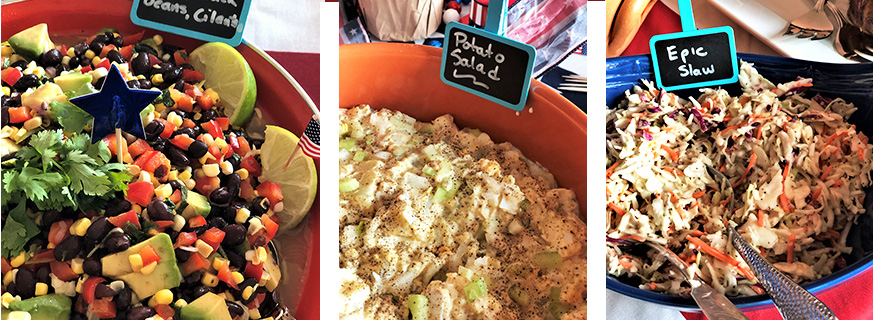
As is now my tradition, I use this app to track the menu and help guests decide on a dish not already claimed. The categories for this were Meat, Meat, & Meat; Sassy Sides, All about the Sauce, and Blue Ribbon Desserts. Since there are always last minute changes, I let guests create their own signage on arrival. This time I found some little chalkboards on a stand………..and I think they will be showing up again in the future.
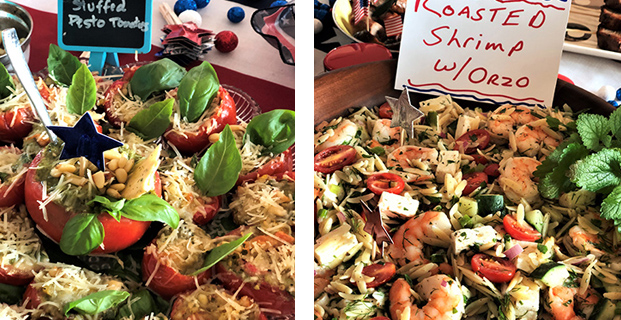
Stuffed Pesto Tomatoes and Roasted Shrimp with Orzo
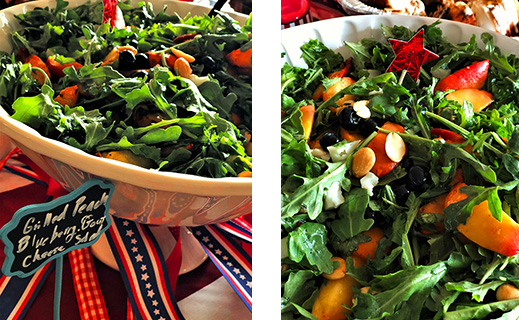
Also new to this round was a Best of Show Award. Who’d a thunk a salad could win this meat extravaganza? But that’s what happened! I let people decide what the category was they were voting for – presentation, use of theme, taste, all of the above – and aside from some sassy and irreverent votes (see the bottom of this post), the clear winner was the Grilled Peach, Blueberry, & Goat Cheese Salad. I think the red, white & blue ribbons tied around the bowl’s pedestal helped tipped the balance. While I say it was a clear winner, truth be told, there were three tied for a very close second. They were all winners in my book.
A special thank you to those that brought the meat. There is no shortage of ideas here and we are always long on laughs. Brett’s Butt! For real?? I loved the presentation on the lemon chicken tenders, and huge props to the four-day sous vide and smoking St. Louis (you are reading that as St. Louie, right?) ribs prep. That was some real commitment. At the top of this post, I shared a snap of the hickory smoked chicken (with 1am alarm to remove from the brine), the Asian pork popsicles, and the Gilligan sauce on the classic ribs – lots and lots of Ginger, with a dash of Mary Ann and the Professor.
All about the Sauce
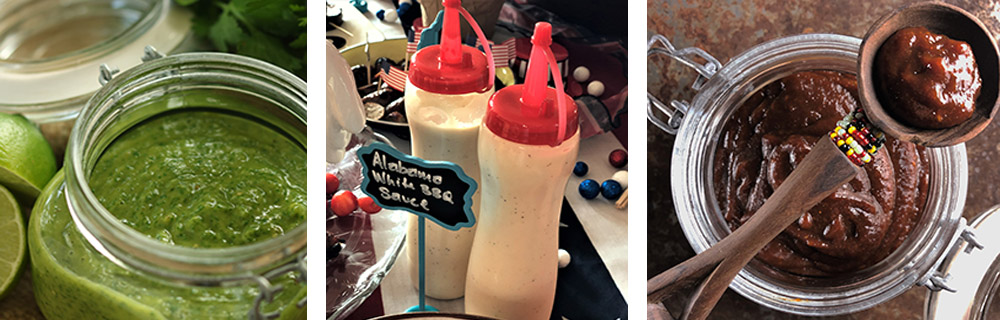
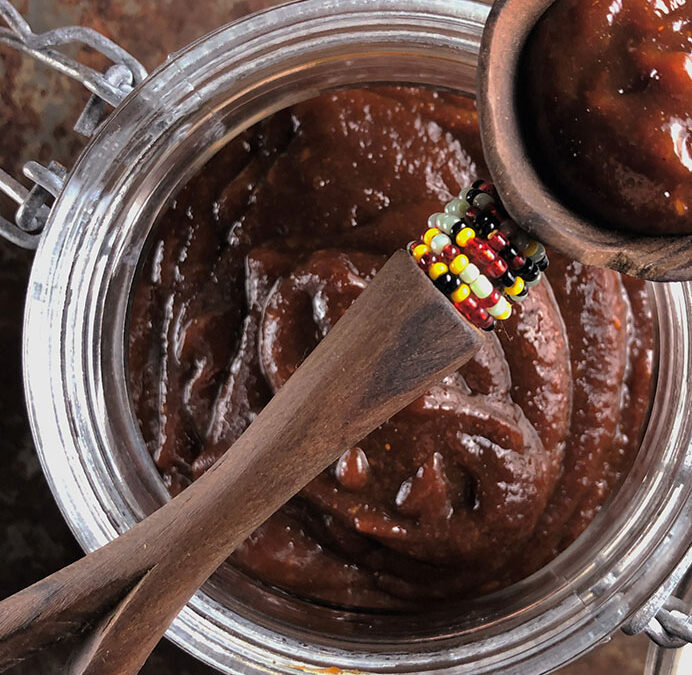
I thought this feast would be all about the sauce, but things have a way of morphing. There were some really delicious offerings, says the woman who brought two. 🙂 If you had the Mango Habanero BBQ that I brought to the party, don’t judge. I have completely redone it since then. In my haste to pull this together, I didn’t quite get what I wanted. But that is the way it is in cooking. You learn from your mistakes, or improve your near misses. Nobody will complain about the one listed below. Just the right amount of heat and sweet. Brush that on anything – toward the end of your cooking, though, so the sugar doesn’t burn. The other sauce I brought was the Green Machine Salsa Verde. It’s officially my most requested recipe and it will be in a second post later this week. Stay tuned. The Alabama White BBQ Sauce came with the smoked chicken, and there was also an Asian Orange Sesame Sauce, that was marked Agent Orange by some ne’er do well.
All about the Sauce: Green Machine, Alabama White BBQ & Mango Habanero BBQ
Bringing people together to break bread like this is one of the great joys of entertaining, perhaps life. Spirits are high and friendships are forged. How amazing when you get a chance to meet someone new. In fact at this very party, I made a new friend from SF that I had long known about through NY friends, who was also a friend of a Michigan Pot Lucky charter member. Funny how that all comes full circle. Nobody is stealing our joy!
Save Room for Dessert
Even with the bountiful meat feast and all those sides, save room for dessert. And, since it’s summer in Michigan, berries are the….”super stah”.
Blueberry Creme Brulee, Becca’s Famous Cheesecake and Peach & Blueberry Cobbler. Yum!
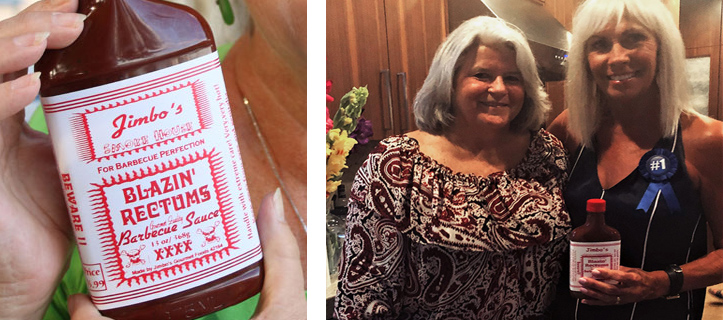
And the Grand Prize – a bottle of “saucy” BBQ Sauce, the coveted blue ribbon and bragging rights – goes to Gayle for that lovely salad. Who will win the title next time???
There’s one (or two, judging by the handwriting) in every crowd!!!!! And we are so grateful for them!
Having an All American BBQ? Give this Mango Habanero BBQ Sauce a whirl. The char of deep molasses is a perfect counter to the sweet mango and the heat of Ancho and Habanero. Slather it on your meat, chicken, fish or veg toward the end of the grilling time so as not to burn the sugars. It’s a real crowd pleaser!
Ingredients
Scale
1 cup ketchup
8-ounce pack chile spiced mangos (At Trader Joe’s, they are called Sweetened Dried Mango with Chile Seasoning)
8 ounces chopped frozen mango (fresh, if ripe)
1/2 cup apple cider vinegar
1/4 cup brown sugar
3 Tablespoons molasses
2 Tablespoons Worcestershire sauce
1 Tablespoon Mango Habanero spice
2 teaspoons Ancho chili powder
1 teaspoon smoked paprika
1 teaspoon dried minced garlic, or four cloves fresh garlic, minced
1 teaspoon salt
1/2 cup fresh lime juice
Instructions
Add all ingredients, except lime juice, to a saucepan. Bring to a boil, then reduce heat and simmer for 10 minutes, stirring.
Set aside. When cool enough, transfer to the work bowl of a food processor and puree until smooth. Add the lime juice and puree until incorporated and smooth.
Store in an airtight container, refrigerated.
Notes
I used the chili spiced mangoes from Trader Joe’s, but you can use any dried mangoes. They are similar in texture to a dried apricot, not a freeze-dried or dehydrated fruit. If you can’t find the chili mangoes, consider adding a bit more (to taste) Ancho powder to make up for plain dried mangoes.
The Spice Hunter makes a terrific Global Fusion Rub in Mango Habanero. Just be sure to take a deep breath and hold before opening the jar. It’s wonderfully potent. Avoid sniffing!!
Prep Time:15
Cook Time:10
Category:Sauce
Method:Cooktop
Cuisine:American
Keywords: BBQ sauce
BBQ Final Planning Note
Some Pot Luckys, like the one for pizzas or burgers, get cooked at the party. This time, since it wasn’t my house, I asked for the food to be ready-to-serve. Either way you need to be clear about expectations. Be sure to let your guests know that quantity is not a concern, because there are so many dishes from which to choose. I try not to focus on head count as a guideline, because I know with all that food, not all guests will try each dish, especially when you have 20+ items. I just ask that they fill their serving dish. But then again, there are those who will try every single one. Why are you looking at ME? It’s my job.
Thanks to all my Pot Lucky-ers for continuing on this journey and being intrepid voyagers. Are you game to try your hand at a Pot Lucky? Let me know how it goes. Tag me with #PotLucky & #PalatePassionPurpose. And as always, I love to get your comments below.
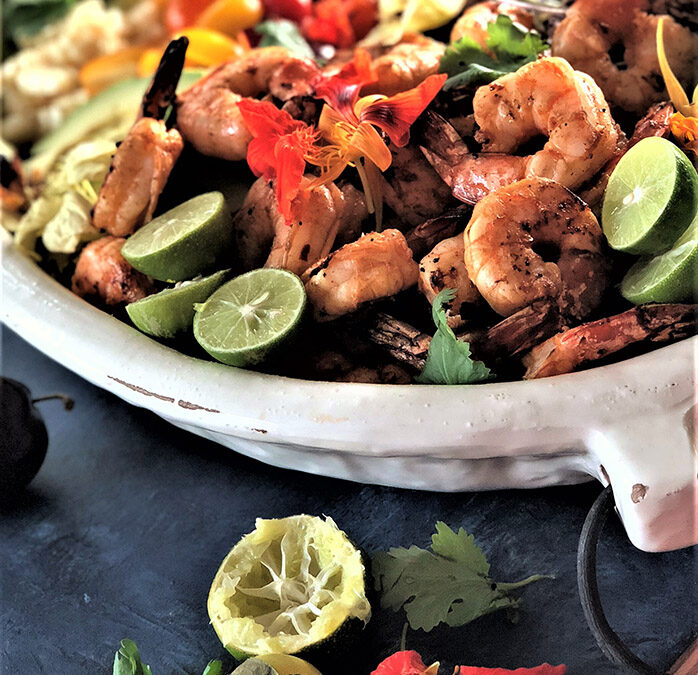
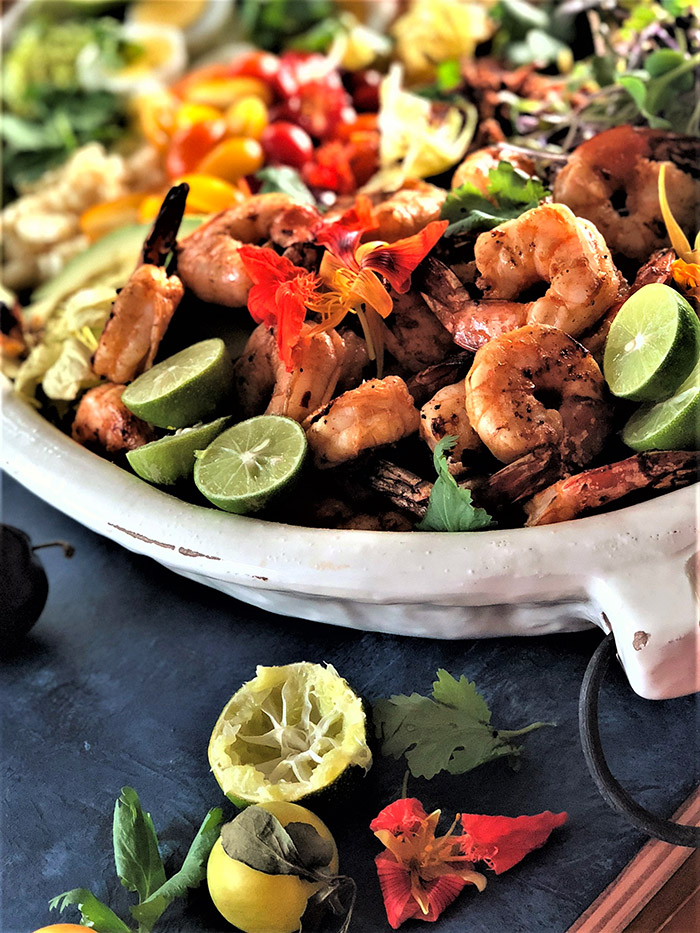
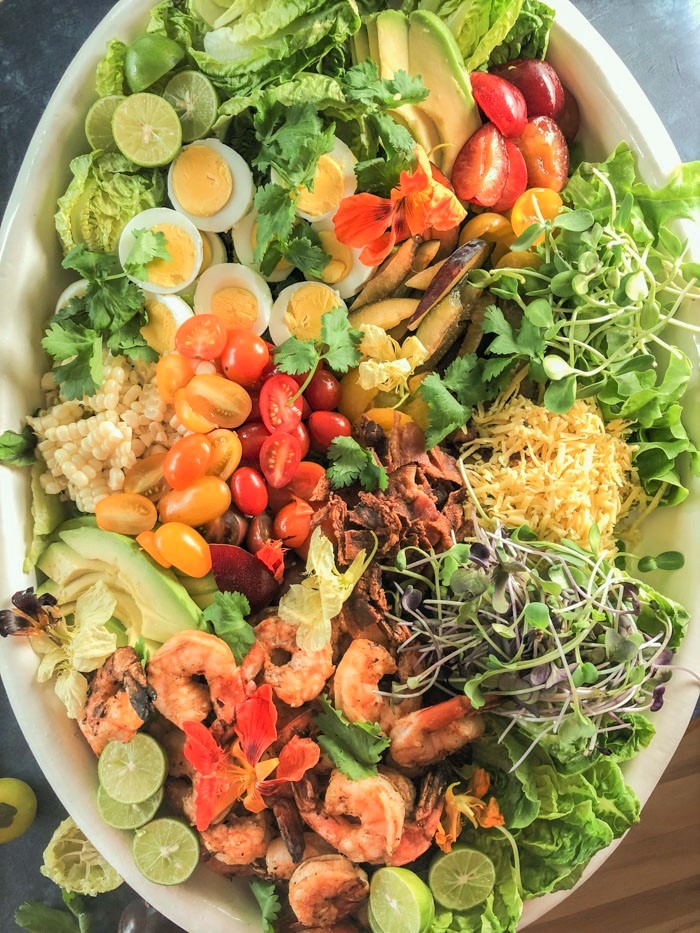
It’s no secret that Cobb Salad is a personal fave. But how to turn up the flavors, yet keep the bacon, egg, and cheese goodness? Enter Sriracha Grilled Shrimp and Buttermilk Chipotle Dressing. Say hello to your new best friend – the Southwestern Grilled Shrimp Cobb Salad. Perfection!
If you only need to know one thing about me, know this. I am mad for late summer farmers’ markets. I will probably go to five this week. Okay, I agree…..a little obsessive. But, I have a favorite farmer (plus The Cheese Lady) for every ingredient in this salad. I’m not saying you have to do the same – or that you can’t just go to the supermarket for all this – but I AM SAYING you have to make this NOW. Southwestern Grilled Shrimp Cobb Salad is all about the season at hand! Fresh sweet corn. Heirloom tomatoes. Sprouts. Flowers. Herbs. Oh my!
The Classic Cobb Salad
Instead of debating where this salad came from and why it is so called (almost certainly a 20s- or 30s-era salad from Hollywood’s Brown Derby, owned by Robert Cobb), what do you say we just dive in? The classic has greens – often iceberg or romaine, chicken, tomatoes, avocado, hard boiled egg, Roquefort and bacon. In other words, what could be bad? You may find it already tossed, as well as deconstructed with tidy little rows of ingredients. While it barely needs a dressing, the rich cheese and bacon beg for a quiet whisper of shallot vinaigrette.
The Shrimp Cobb Salad
I’m not gonna lie. I am a bit conflicted here. I have a passion for spins and tweaks and making the old new again. But the Classic Cobb is pretty much as good as it gets. I was having a party and wanted a make-ahead all-in-one salad-entree and I thought this would fit the bill….a real crowd-pleaser. But I decided as long as I keep all the favorite components, I could give it a global palate spin. Enter shrimp, corn, and chipotle. Some of the ingredients were direct swaps – chicken for shrimp, roasted for marinated and grilled, Roquefort for Hatch Gouda, and shallot vinaigrette for Buttermilk Chipotle Dressing. Others were too good to mess with – bacon, eggs, tomatoes, and avocado. Then there were a few things I decided to slide in because I could.
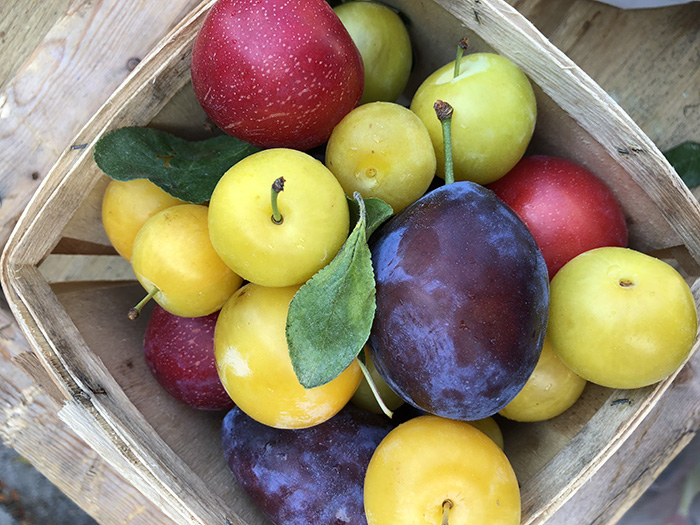
Look at these stunningly gorgeous plums. What a perfect sweet and juicy foil to all that buttermilk tang and chipotle smoke! Michigan produces a wide range of both Japanese and European varieties. Those yellow/green beauties are Shiros; the golden/orange-ish rounds are Bubblegum; the small red orbs are Methley; and the violet-blue ovals are Vibrants. I also added some corn which brought some more lovely sweetness, but bonus……….a nice crunch and texture contrast, as well.
I think deconstructed salads are among the few places where more is more. Most often in food, less is more. But if you are going to let people decide what to add to their plate, why not give them a variety to chose from?
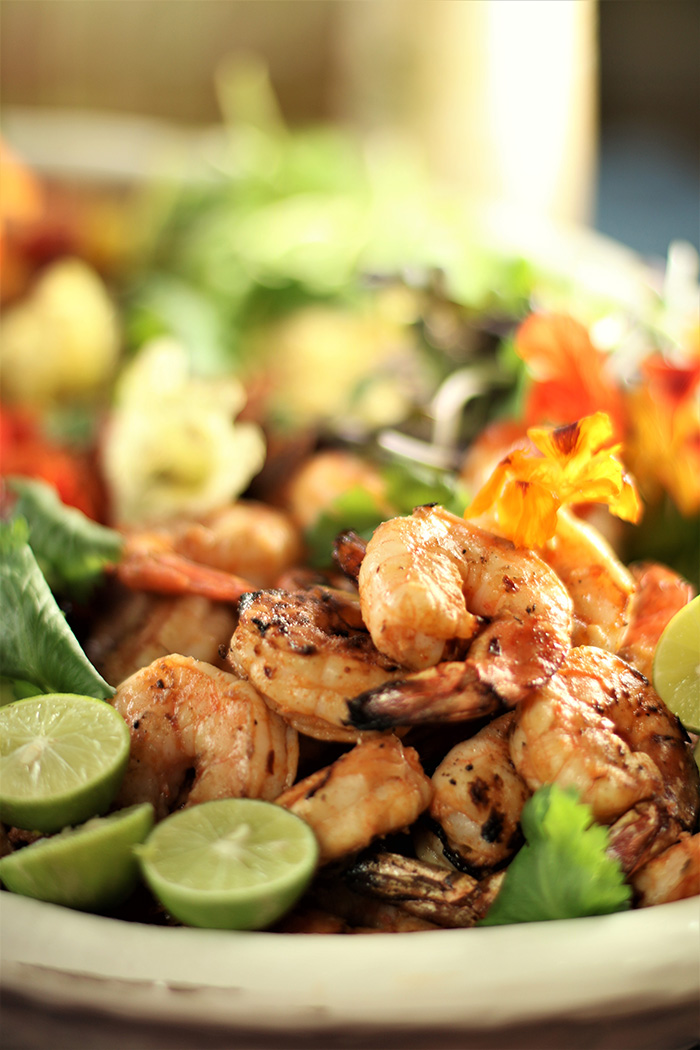
Marinating the Shrimp
Shrimp is an-oh-so simple thing to throw on the grill, and of course is good grilled and chilled, making this the perfect make-ahead entree. The marinade is dead easy – lime juice, olive oil, Sriracha, Tabasco and some spices. If you haven’t tried the Chipotle Tabasco, give it a whirl. It adds a nice smokiness to the marinade. I never like to marinate any seafood or fish for too long, because the acid will start to “cook” it. If you prep the marinade first, and add the shrimp while prepping the rest of the salad and getting the grill ready, you will time it just right. Then only a few minutes on the fire for each side, and you and your shrimp will be ready to chill.
Composing the Salad
The directions for the marinade and creamy dressing are sufficiently detailed, but I am leaving the quantities for the fixin’s – or even whether or not to add them at all – up to you. How big is your platter? How many are you serving? How much do you love/hate sprouts?
Just keep in mind colors and textures as you go to arrange your platter. It’s a bounty of beautiful ingredients so this should be the fun part once your chopping is done. If you need to prep things further ahead than when you want to compose it, just bag each ingredient separately and arrange closer to serving time. Your guests will be dazzled! Enjoy!!
This Southwestern Grilled Shrimp Cobb Salad is a kicked up spin on an old classic. A few simple ingredient swaps, along with a zesty marinade for the shrimp and a creamy Buttermilk Chipotle Dressing, and this one-platter-is-a-meal comes together quickly. What a great way to celebrate with the bounty of late summer!
Ingredients
Scale
Marinade (makes enough for two pounds of shrimp):
1/4 cup olive oil
2 Tablespoons fresh lime juice
1 Tablespoon Sriracha
1 teaspoon Chipotle Tabasco
1 teaspoon ground cumin
1/2 teaspoon salt
1/4 teaspoon red pepper flakes
Buttermilk Chipotle Dressing (makes 2 1/2 cups):
1 cup Greek non-fat plain yogurt
3/4 cup buttermilk
1/4 cup fresh lime juice
1/4 cup extra virgin olive oil
chipotles in adobo – one big and one small, more or less to taste
1 clove garlic
2 teaspoons ground cumin
1 teaspoon salt
1/2 cup tightly packed cilantro leaves
Salad fixin’s (mains):
shrimp, raw, deveined, peeled and tail on
Little Gems, baby Romaine lettuce, trimmed and halved
heirloom cherry and grape tomatoes, halved
eggs, hard-boiled, peeled, and halved
bacon, crispy and crumbled
avocado, peeled and chopped
Southwestern cheese, grated (I found Hatch Chili Gouda)
corn, shucked, boiled, and cut from the cob
plums (or other stone fruit), pitted and sliced
Salad fixin’s (garnishes):
cilantro leaves
limes, cut in wedges or halved, if small
edible flowers, like Nasturtium
fresh sprouts, like radish, watercress and sunflower
crunchy topper (see note)
Instructions
Prepare the marinade: Combine all ingredients in a mixing bowl. Add shrimp and toss to coat. Cover and refrigerate, up to one hour, while you prepare the other ingredients.
Prepare the Buttermilk Chipotle Dressing: Place all ingredients except the cilantro in the bowl of a food processor. Pulse to chop, then process until creamy. Add the cilantro and pulse several times to chop roughly. Transfer to a glass jar with a lid and refrigerate until you are ready to serve.
Grill the shrimp: Drain any excess marinade from the shrimp and grill over high heat for 2 – 3 minutes per side. Transfer to a plate and reserve until cooled.
Assemble the salad: Once the shrimp is cool enough to not wilt your salad, compose the salad using all the main ingredients, with an eye toward color and textures. Arrange the garnishes on top. If you are serving later, reserve the bacon and crispy topping until serving time. Cover and refrigerate.
To serve: Add the bacon and crispy topping and serve with the Buttermilk Chipotle Dressing.
Notes
Crunchy toppers: there are a lot of different crunchy toppers available in the crouton section these days. I used the fried jalapeno slices, but you will also find the basic fried onion rings, as well as red peppers, tortillas and more. Chef’s choice.
Marinade is enough for two pounds of shrimp and Buttermilk Chipotle Dressing makes 2 1/2 cups.
Prep Time:1 hour
Cook Time:30 minutes
Category:Salad
Method:Grill
Cuisine:American
Keywords: Cobb Salad, Shrimp, Chipotle Dressing
An Update:
I want to take a moment to send a heartfelt note of gratitude for all those that supported me spiritually, morally and physically in my Ration Challenge journey earlier this summer. Your generous financial support of this campaign put us at the very top of the fundraising leaderboard among the 40,000 challengers from around the world. Together we raised enough to feed 35 refugees for an entire year. Globally, that number is 16,829! Way to go!! With deep gratitude. xoxo, kk
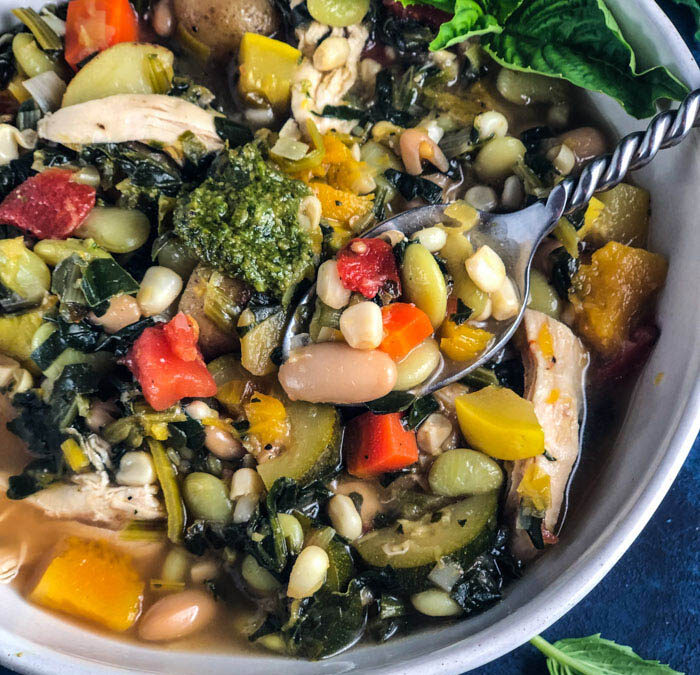
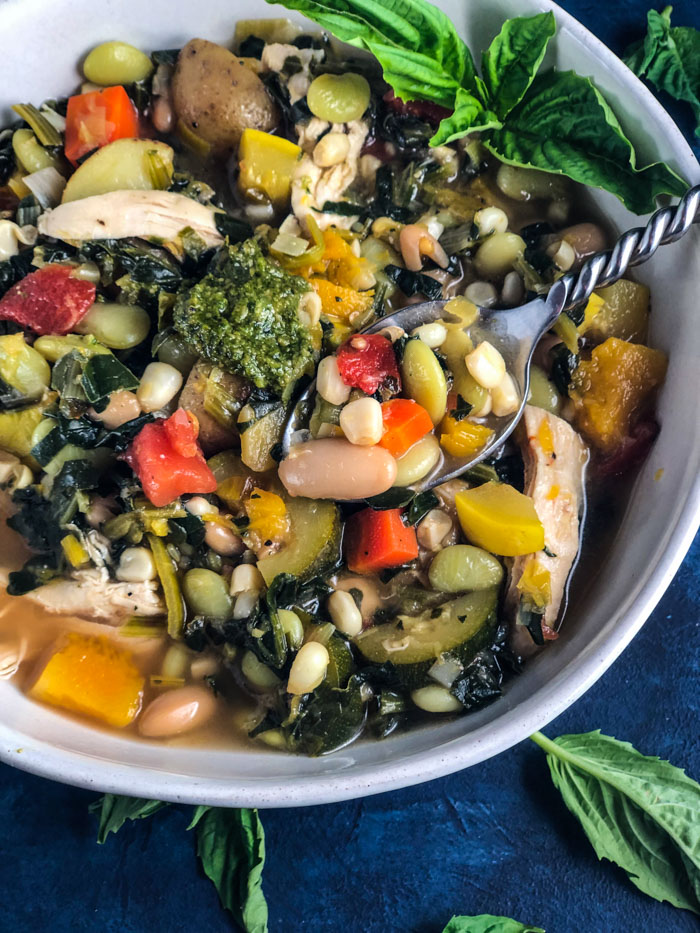
This hearty, healthy vegetable soup will get you through until the farmers’ markets are cranking out peak of the season produce again. A dollop of pesto will brighten the flavors and get you jonesin’ for sweet summer corn and tomatoes.
It probably seems like it’s way past soup season but bear with me. It’s about time that we take a second to think again about food waste and making a difference in the way we take advantage of the bounty of the season. If you have been following me for a while, you know that I am a big fan of taking any produce that you overbought and saving it in the freezer until you can use it. Ziplock it fresh, oven-dry it or sauté it and cover in broth before freezing…all to add to sauces, salads, pastas and soups through out the year. Now that we are looking down the barrel of summer, it’s time to clean the freezer and put all last season’s produce to good use. Healthy vegetable soup to the rescue!
Unfortunately we are still wasting 40% of the products that our hardworking farmers produce every year. Some are deemed too ugly to make it onto our supermarket shelves. Some are past their use by date. I love this campaign by the Ad Council. Best if used. Period. Look closely. $1500. That’s how much a family of four spends on food that goes into the trash every year. How great would that extra cash be?
And landfills filled with rotting food result in higher greenhouse gas emissions than US beef production. All that wasted food AND it is bad for the environment? No bueno!! So think about ways to re-purpose this produce and extend its life.
How to Save Vegetables
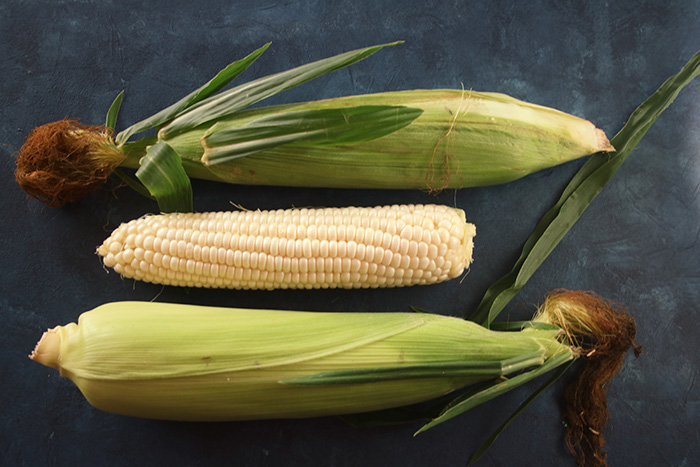
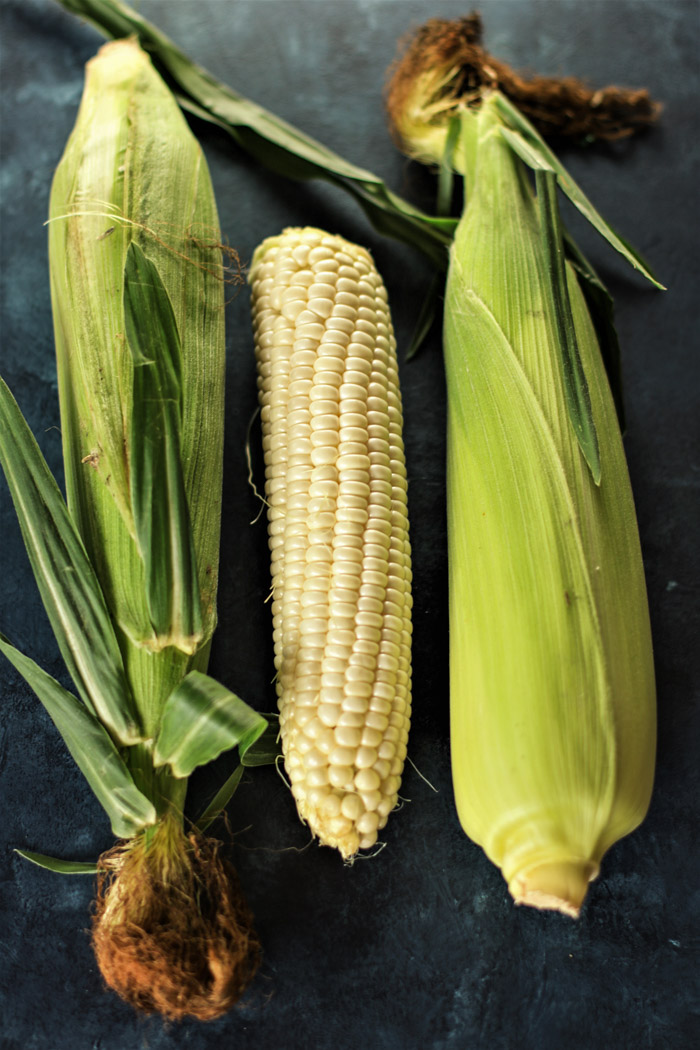
Fresh corn: cut it off the cob and ziplock it to freeze
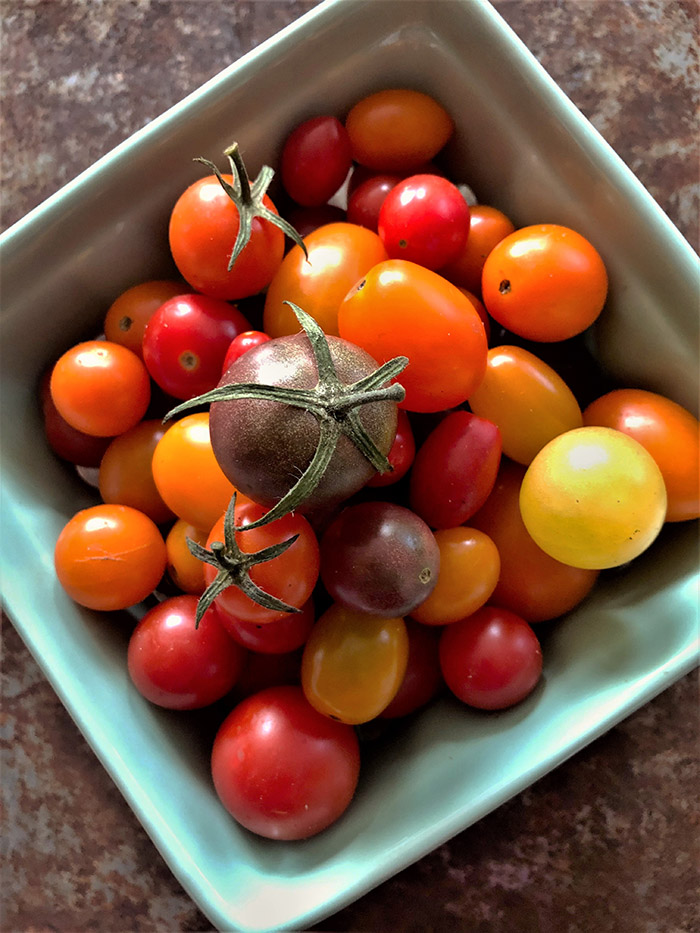
Tomatoes:oven-dry and once cooled, ziplock and freeze
Zucchini, peppers: sauté and cover with broth, then freeze to add to soups and stews
Leafy greens: steam and squeeze out the excess liquid, then ziplock and freeze
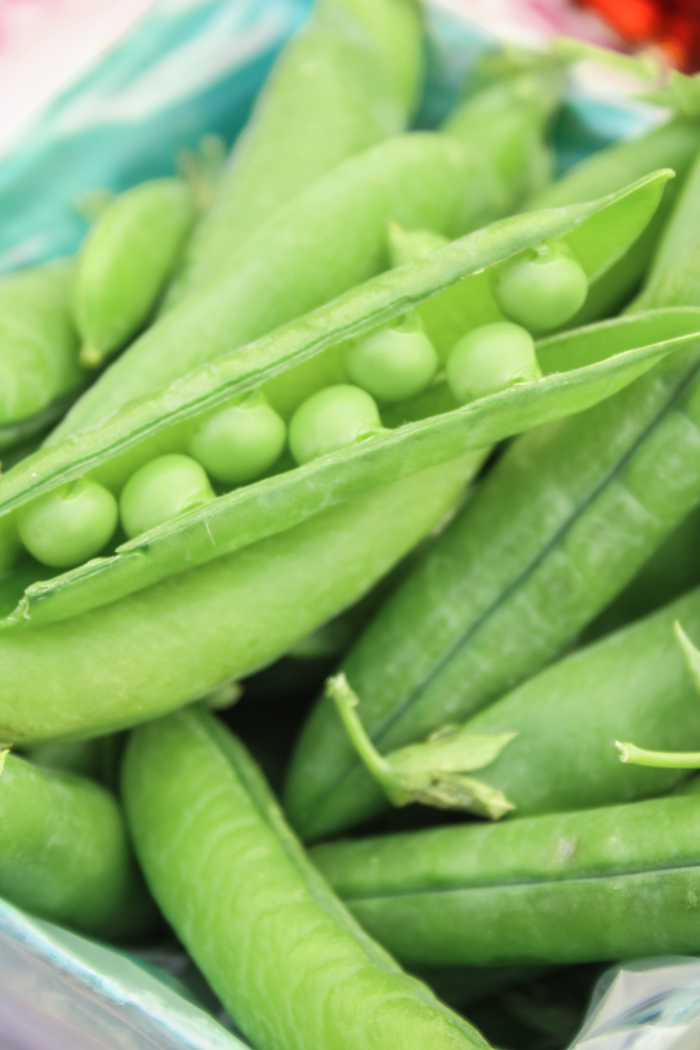
Peas: shell and ziplock raw and freeze
Winter squashes: peel, seed and cube, then ziplock and freeze
Here are some of the things coming your way soon, so start thinking about it now. Of course, try to buy the right amount, but don’t throw out your excess. Respect the food and preserve it. Or if you are like me and know the corn will never be better, do buy extra and save it for the long, cold winter.
Sweet corn and sweet peas.
Heirloom cherry tomatoes definitely worthy of oven-drying to preserve for winter.
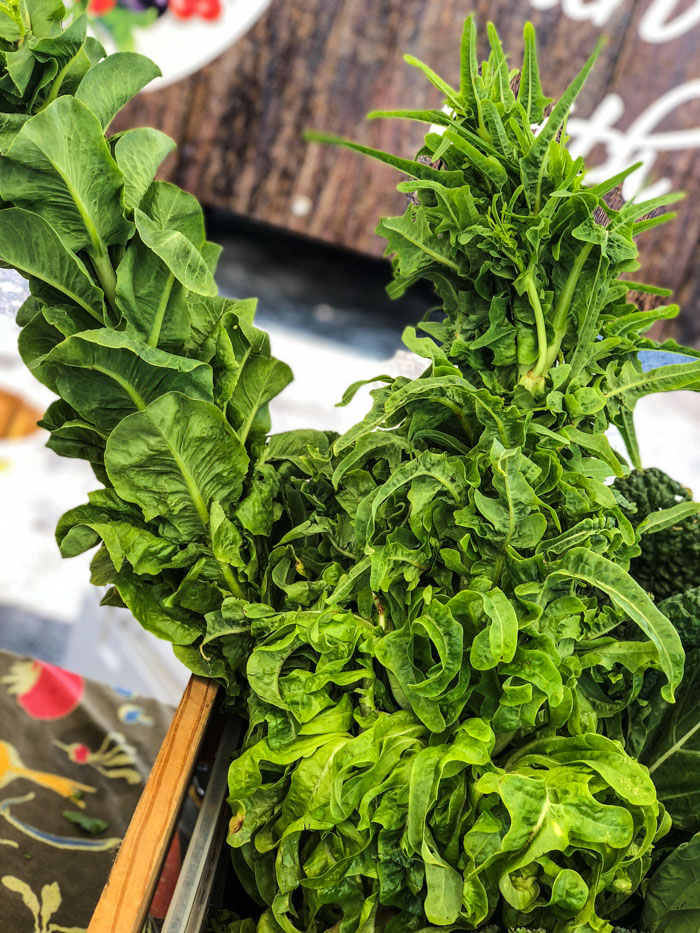
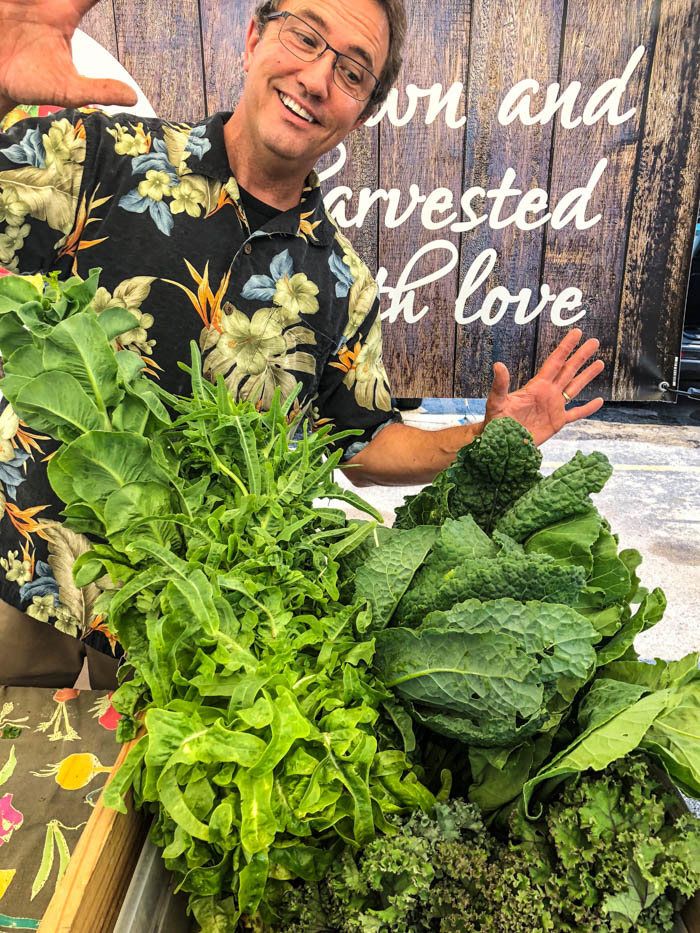
If you think this Kale is Krazy, wait until you see the farmer.
Told ya!
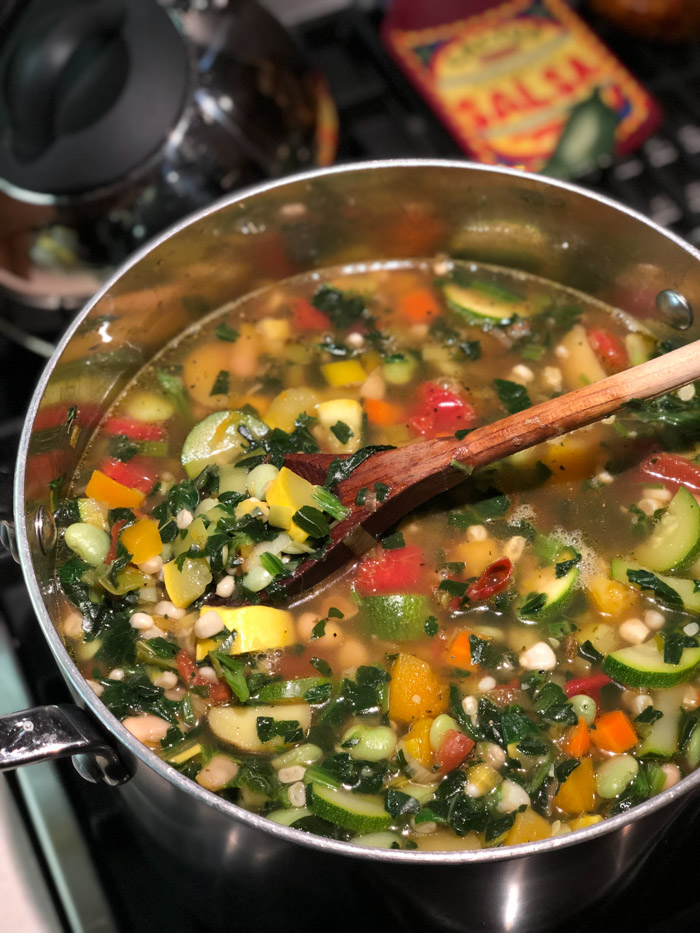
Best Ever Healthy Vegetable Soup
This soup takes advantage of many things I had in my freezer. I just made a big batch this weekend. I will put a few quarts away in the freezer for upcoming long days, but much I will eat this week. Saturday I start eating like a Syrian refugee as part of the Ration Challenge. More on that in the next post, but suffice it to say I am in a full-on panic about no fresh veggies for a week. Whole lotta rice and beans, with a sardine here and there.
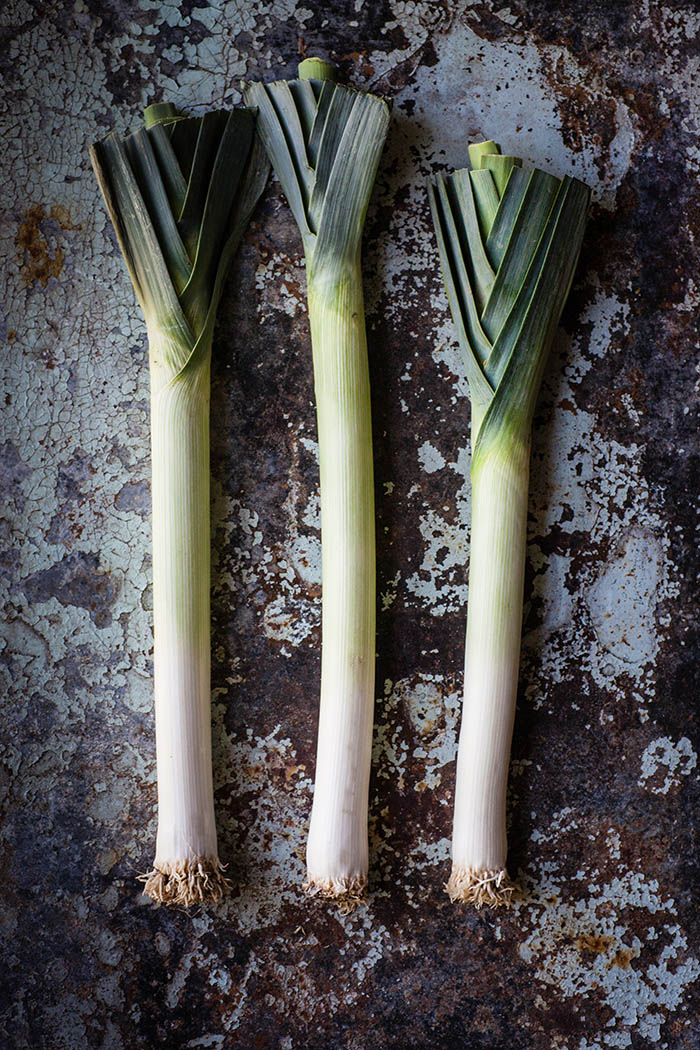
You can customize this yummy, healthy vegetable soup to your own palate, but I found corn, butternut squash, edamame, and spinach all in the freezer. The canned cannellini and diced tomatoes I had in the pantry. And the remaining ingredients consisted of only a few fresh vegetables – leeks, zucchini, summer squash, and potatoes. In fact, this soup started as a leek and potato soup and then became a runaway vegetable extravaganza! You could even go so far as to add some chicken – either leftover roasted, poached or a rotiserrie chicken – to add a little lean protein.
Photo credit: Heather Gill for Unsplash
How to Clean a Leek
Sidebar note on cooking with leeks: LOVE THEM!!! They always seem to be available because they scare people and they get left behind. They add all the depth of flavor of an onion, with none of the bite. And they are really easy to use. However, they retain a lot of dirt, so they need a thorough wash first. Trim off the woody dark green leaves at the top (and save them for a stock pot), but leave the hairy root end intact for now. Once the top is trimmed, slice lengthwise down toward the root (without cutting through), first in half, then in quarters, using two long cuts. Now holding onto the root end, run it under cold water, fanning it out to remove all the grit. It’s a bit like a brush with long bristles. Shake, shake, shake. Once thoroughly cleaned, towel off excess water and cut crosswise in desired slices. Discard the root end when you get there. Some prefer to slice and then clean and here is a quick video on that.
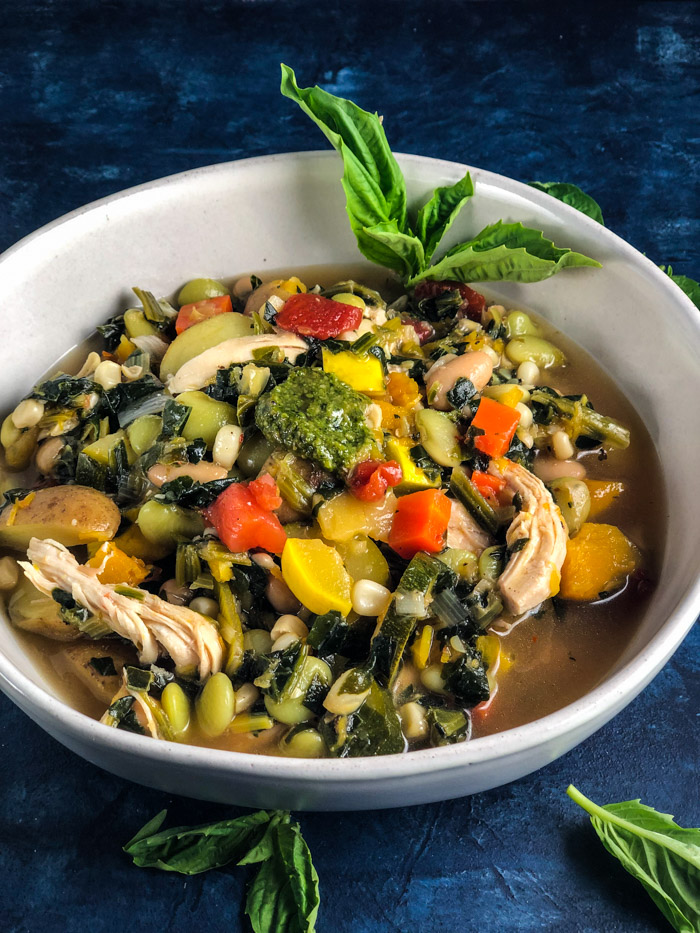
I finish it off with a dollop of pesto – homemade or store-bought. That is how I finished it off on our spring vegetable soup with pistou on the very first menu at New World Grill. The vegetables were very precisely and finely minced. That’s a far cry from the hearty chunky way I cook today. Gone are the tedious and tiny tidbits. Welcome, chunky and hearty veg.
What Vegetables are best?
While I am tempted to say you can’t go wrong, I can actually think of a couple that I might pass on. I love all vegetables that keep their shape and color. With this being a relatively quick cooking time, that would include most. Eggplant probably deserves a pass. It can get bitter and breaks down to a seedy, gummy mess. And I would avoid certain mushrooms that will absorb too much liquid and get squeaky. Know what I mean? Like a portabello. Tiny enoki might be nice in here though. In general, I prefer mushrooms in a more dry sauté dish or when pureed. Lastly, beets are going to bleed and will overly flavor the broth. But you do you, I’ll do me. Give it a whirl and see how you like it.
A Note on Prep Time Listed
In spite of 3 decades of foodstyling for television, where every ingredient is in its ramekin for a dump and stir demo, and despite 15 years as a chef/restaurateur, where all mise en place (prepped ingredients) are ready in the reach-in for cooking during service, I do not cook that way at home, nor should you. It takes a lot more time to get everything ready for dump and stir. I’m not saying you shouldn’t pull all your ingredients together in advance. However, if an onion is going to cook until golden for 12 minutes, I don’t chop the next ingredients until I get that on the burner cooking. I prep as I go. Multi-task anyone? The prep time I give in a recipe is just the minimal prep time required in order to start cooking. Once cooking commences, I start the count-up clock to track how long it takes to finish the recipe. There will be some prep during the cooking time. You may note that the ingredient list calls for the items to be already prepped (e.g., 1 cup diced zucchini). I have detailed it this way simply to space-save on a recipe printout. Don’t think you need to get it all done before you start. The more you know 🙂
This hearty, healthy vegetable soup will get you through until the farmers’ markets are cranking out peak of the season produce again. A dollop of pesto will brighten the flavors and get you jonesin’ for sweet summer corn and tomatoes.
Ingredients
Scale
3 Tablespoons olive oil, divided per below
2 leeks, cleaned and sliced
3/4 pounds mini potatoes, such as Boomer Gold, cut in half or quarters depending on size
2 medium carrots, peeled and diced
1 pounded winter squash, such as butternut or acorn, peeled and diced
2 32-ounce chicken or vegetable stock
1 medium zucchini, trimmed and diced
1 medium yellow squash, trimmed and diced
1 15.5-ounce can cannelini beans, rinsed and drained
1 14.5-ounce can diced tomatoes
1 pound shelled edamame, lima beans, or peas
1 pound frozen, chopped spinach
1 pound sweet corn
1 teaspoon pink Himalayan salt
1/2 teaspoon freshly ground black pepper
1/2 teaspoon red pepper flakes
Optional Garnish: Dollop with pesto
Instructions
In an 8-quart stock pot, heat two Tablespoons olive oil over high heat. Add the leeks and cook until wilted and starting to brown, about 5 minutes. Push to the side and add the remaining Tablespoon of olive oil. Add the potatoes and cook for 5 minutes. Stir potatoes and leeks to combine.
Add the carrots and winter squash. Stir to combine.
Add about one cup of the stock, to deglaze the pan, scraping up the brown bits. Add the zucchini and yellow squash and remaining stock. Bring to a simmer and reduce the heat. Simmer for 30 minutes. Check the doneness, especially for potatoes and squash.
Add the cannellini beans, tomatoes, edamame (or lima or peas), spinach and corn. Simmer for 10 minutes.
Season with salt, pepper and red pepper flakes. Adjust seasonings to taste.
Top with a dollop of pesto (recipes linked below).
Notes
Optional: add 1 pound cooked chopped chicken, about 2 cups. Yield will be higher, if chicken is added.
If any of the vegetables you are using are commercially frozen, check to see if they are par-cooked. If so, you may want to add them toward the end with the quick cooking ingredients like corn and spinach.
If freezing, I like to wait to add seasoning until later when I serve it. I also find I may need to add a bit more stock if it’s been frozen.
Prep time in the recipe includes only the time needed to get cooking. You can continue prepping while the first step is cooking. While total time accurately reflects the total time required, the prep time is the shortest time til you fire up the stove, not the time required to prep all ingredients to their ready-to-use state.
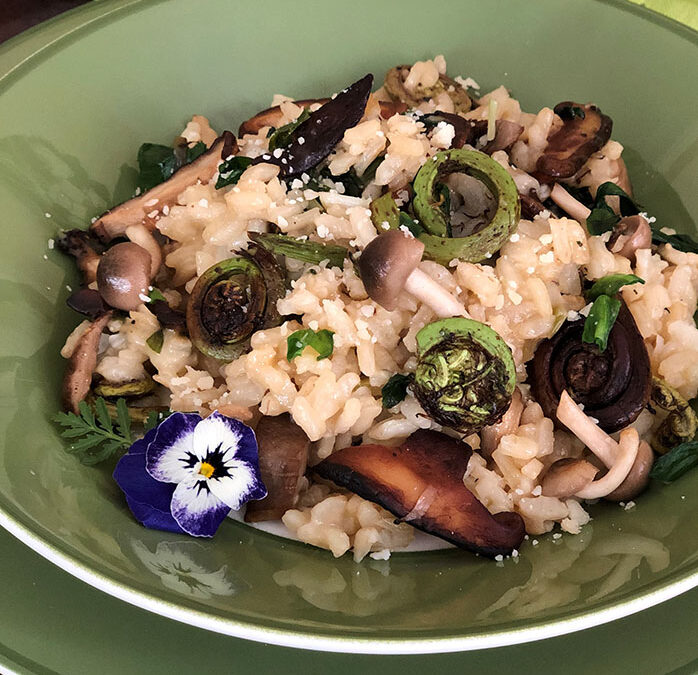
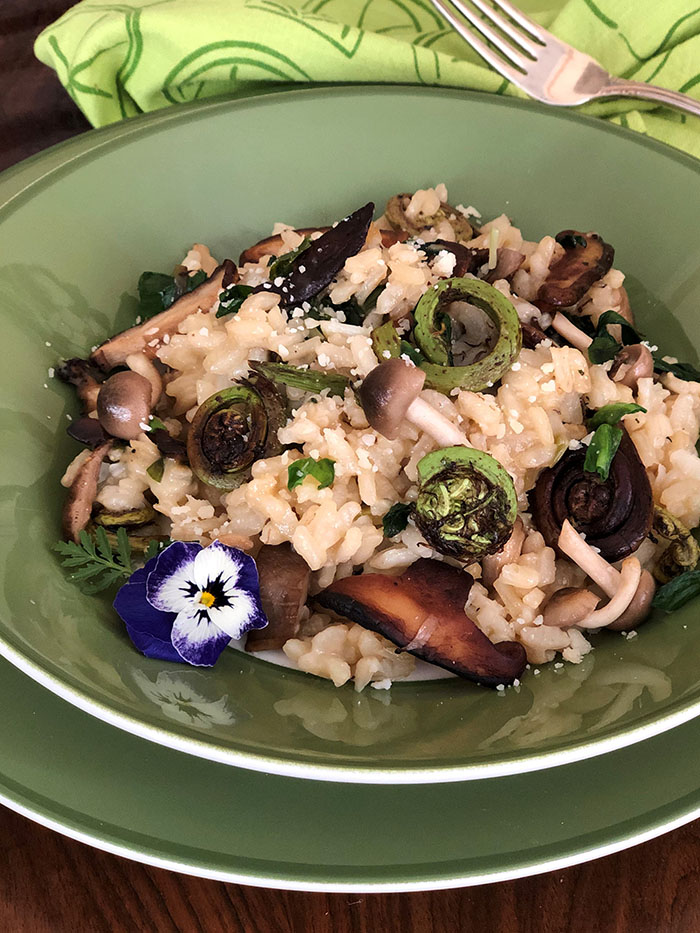
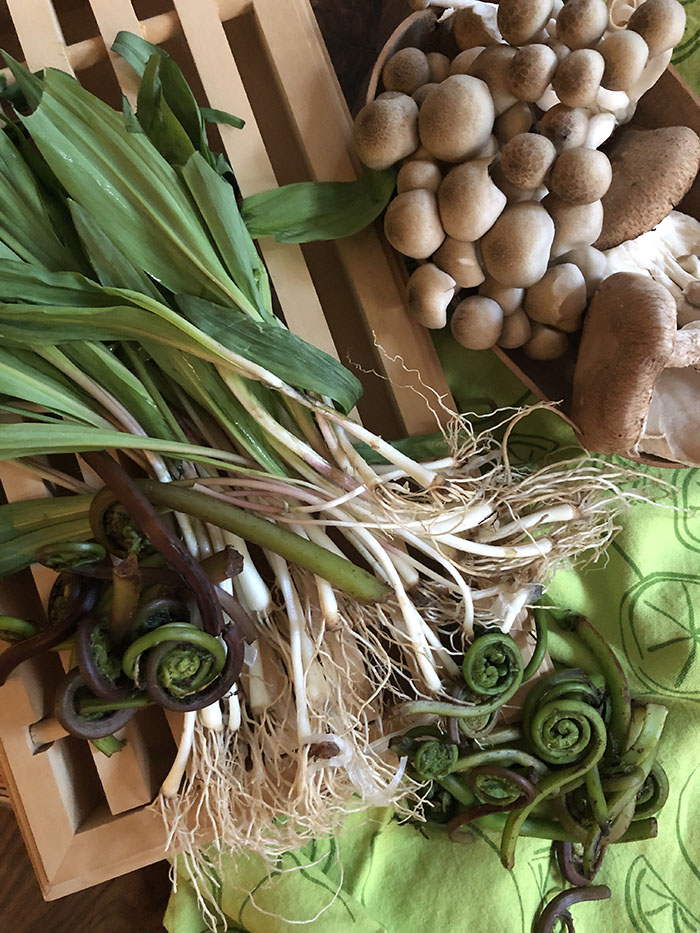
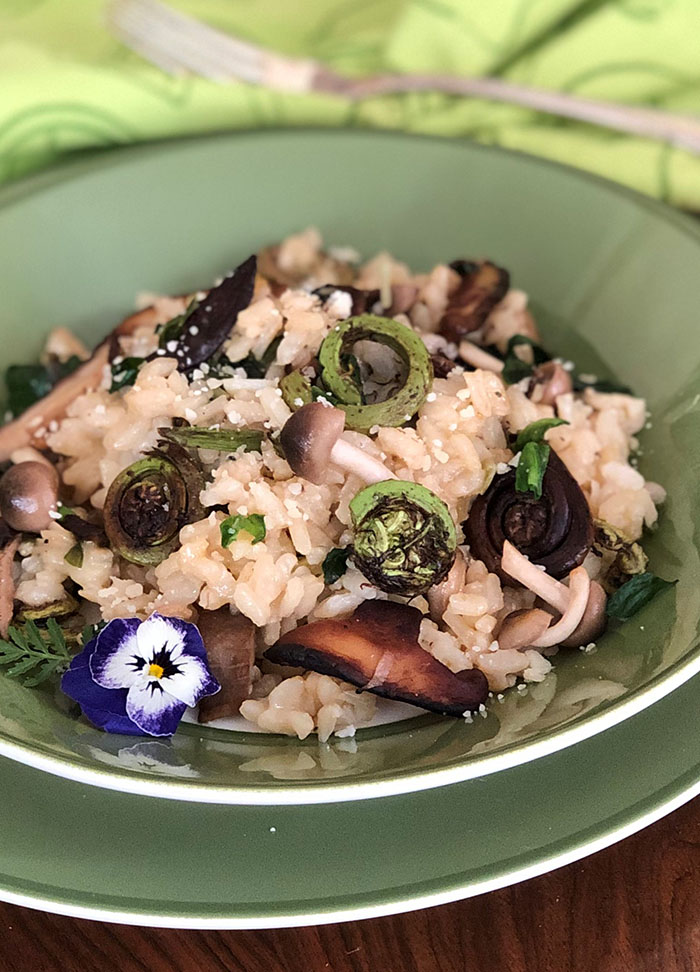
Well, hello!! Fancy meeting you here in a whole new season! I know it has been a minute, but coming in strong with some tempting taste treats to make up for lost time. Think spring woodland treasures matched up with creamy, cheesy risotto! Yup – a fiddlehead fern, ramps and wild mushroom risotto! I had a hankering for morels, the crown jewel of springtime mushrooms, but couldn’t find any while foraging at Fresh Direct grocery delivery. However, they did not disappoint with an organic Asian blend, including Shiitake, Brown Beech and Oyster mushrooms. The Shiitakes add a nice depth of flavor – umami for the win – and the Brown Beech and Oyster provide their unique textures. Use whatever you can find, but look for a range in flavor, texture and shape.
By now you should be familiar with Shiitakes, because I reach for them maybe a bit too often. My workhorse! But the Brown Beech might be a new find. They grow in clumps – often at the base of beech trees, hence the name – and have long slender stems. Just trim the clump end off and leave them whole. So pretty and their bitter taste turns nutty when cooked.
Spring pastas and risottos will beg for their seasonal rock stars – ramps and fiddlehead ferns. Ramps are commonly known as wild leeks, wild garlic or spring onion. The look a bit like a tender tiny bunch of scallions, perhaps a bit leafier at the top. They have both an onion-y and garlic-y flavor, though both flavors come through rather sweet compared to their pungent older sisters. If you can’t find them, substitute with a small amount of minced garlic, and a handful of chopped scallions or chives.
Fiddlehead ferns are the furled frond of a tender, young Ostrich fern. Left to their own devices they would unfurl and become another frond on their host. They are a great source of iron, Omega 3s and fiber. But let’s get to it – texture and taste. It’s best to boil or steam them first to eliminate tannins and possible toxins. Then add them to your sauté toward the end so they stay crunchy and show off their delightful citrus-y taste. Together these ingredients bring both a bright springtime flavor (and color) and an unctuous woody flavor from the ‘shrooms.
If you live in a wooded area – and KNOW WHAT YOU ARE DOING – look around. One friend just reported yesterday that she had ramps, fiddleheads and Shiitakes popping everywhere right out her window. How’s this for a Shiitake crop?
I’m all for a stroll in the woods to see what has “popped up”, but if you haven’t done it before, be careful. Wildman Steve Brill offers an amazing course in NYC, where he forages in Central Park, among other Tri-State locales. He just did a private tour for the New York Women’s Culinary Alliance to rave reviews. I let Fresh Direct do the foraging for me, and by next week I will be haunting some outdoor farmers’ markets as they start to pop up.
The Right Rice
Now to the most important ingredient – the rice. For years, I thought Arborio was the go-to rice and used it with good results. (I used it here, too. Old dogs/new tricks????) But my friends Elisabetta and Kris, both of whom run wonderful culinary tours in Italy, assure me Carnaroli is the queen of risotto rice for most of Italy. I suppose I have been cooking so long that it’s possible it wasn’t yet a major import in the US market. But I’m abundantly clear now that it is the preferred variety. All rice used in risotto has short, rather stout grains, and is rich in a particular starch – amylopectin – that is a tad sticky and gives risotto its creaminess. Arborio is wider and longer than Carnaroli. But both are wildly different in shape and starchiness than our Carolina long-grain rice used for fluffy pilafs, geared to be a grain that won’t clump.
But wait – do I need to take a step back? Is this iconic, and oh-so-tasty-dish familiar to you? Apparently, it is not well-known to you all. Risotto is a dish that is among the easiest and least fussy, but requires a watchful eye and some stirring. Once the rice is toasted in hot oil, warm stock is added a bit at a time and stirred until absorbed, when you can add the next batch of stock. And so it goes, until all the stock is added and the rice’s chalky, crunchy texture gives way to soft and creamy. It is then that I add in the vegetables, sautéed previously, and the grated cheese(s) to finish it off. Serve it up right away with a crisp green salad and a lovely glass of wine. Invite friends, if you must.
Spring woodland treasures matched up with creamy, cheesy risotto! Yup – a fiddlehead fern, ramps and wild mushroom risotto! I went with an organic Asian blend, including Shiitake, Brown Beech and Oyster mushrooms. The Shiitakes added a nice depth of flavor – umami for the win – and the Brown Beech and Oyster provide their unique textures. Use whatever you can find, but look for a range of flavor, texture and shape.
Ingredients
Scale
3 Tablespoons olive oil
2 shallots, finely chopped
1 1/2 cups Arborio or Carnaroli rice (just over 1/2 pound – one pound is 2 1/2 cups)
3/4 cup dry white wine
1 quart reduced-sodium chicken stock, warmed
2 Tablespoons butter + 1 Tablespoon olive oil
12 ounces mushroom blend – Shiitake, trimmed and sliced; Brown Beech, trimmed and separated; and Oyster, trimmed and sliced
4 ounces fiddlehead ferns, stems trimmed
4 ounces ramps, trimmed and chopped
1 cup grated Parmesan or Parmesan/Asiago blend
salt and pepper
Instructions
In a large saucepan, heat the olive oil over medium heat. Add the shallots and sauté until tender, about 2 – 3 minutes. Add the rice and cook until coated and starting to turn a bit translucent, about 3 minutes more. Stir in the wine and cook until it is evaporated, about 1 minute.
Meanwhile, heat the stock in a medium saucepan. Reduce heat and keep it just below a simmer.
Add about 1 cup of the stock to the rice. Stir frequently until the liquid is absorbed. Continue adding the stock, 1 cup at a time, stirring until mostly absorbed before adding the next ladle of stock. The rice will become tender – but not gummy – and creamy at about 25 to 30 minutes.
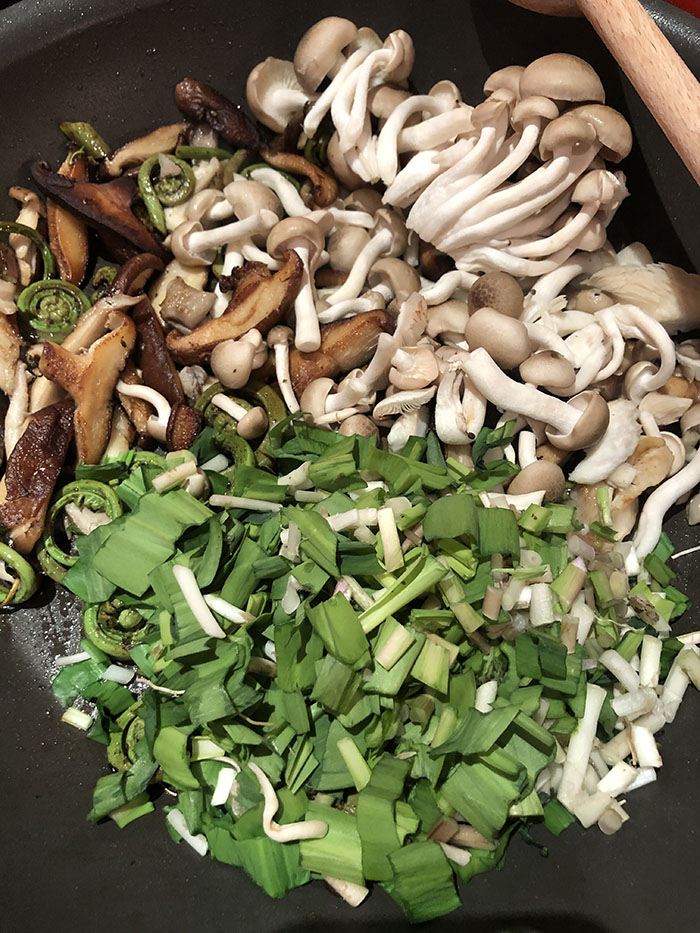
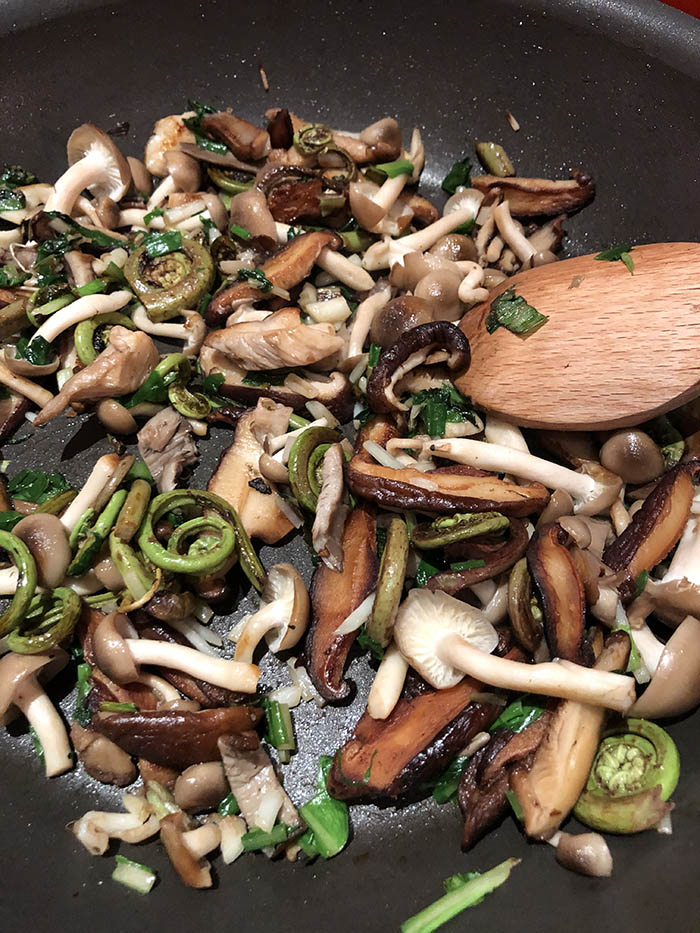
While the rice is cooking, melt the butter and remaining olive oil in a large sauté pan. Add the mushrooms, in batches if space requires, starting with the least delicate and ending with the most delicate (Brown Beech if using the mix above). Add the ferns and ramps and stir to combine. They will wilt slightly from the heat of the mushrooms.
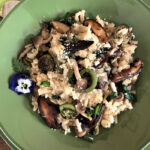
Once the rice is nearly ready, gently stir in the vegetables and grated cheese. Taste and season as needed with salt and pepper. Remove from heat.
Whistle that group to the table now! Risotto waits for no one. (and NO!!! you can’t make this ahead – well – or “freeze beautifully”! So, don’t even ask.)
Notes
Substitute 2 cloves of garlic and 2 chopped scallions in lieu of ramps. Add the garlic with the butter/oil and add the scallions last with the ferns and delicate mushrooms.
If you can’t find fiddlehead ferns, maybe try young spring asparagus, trimmed and cut into 1-inch pieces. Sauté with the mushrooms.

 Summer Harvest Bounty Menu


 Meat, meat and more meat: Hickory smoked chicken with Alabama white BBQ sauce, Asian pork popsicles, ribs with Gilligan sauce (a lot of Ginger and a little Mary Ann).